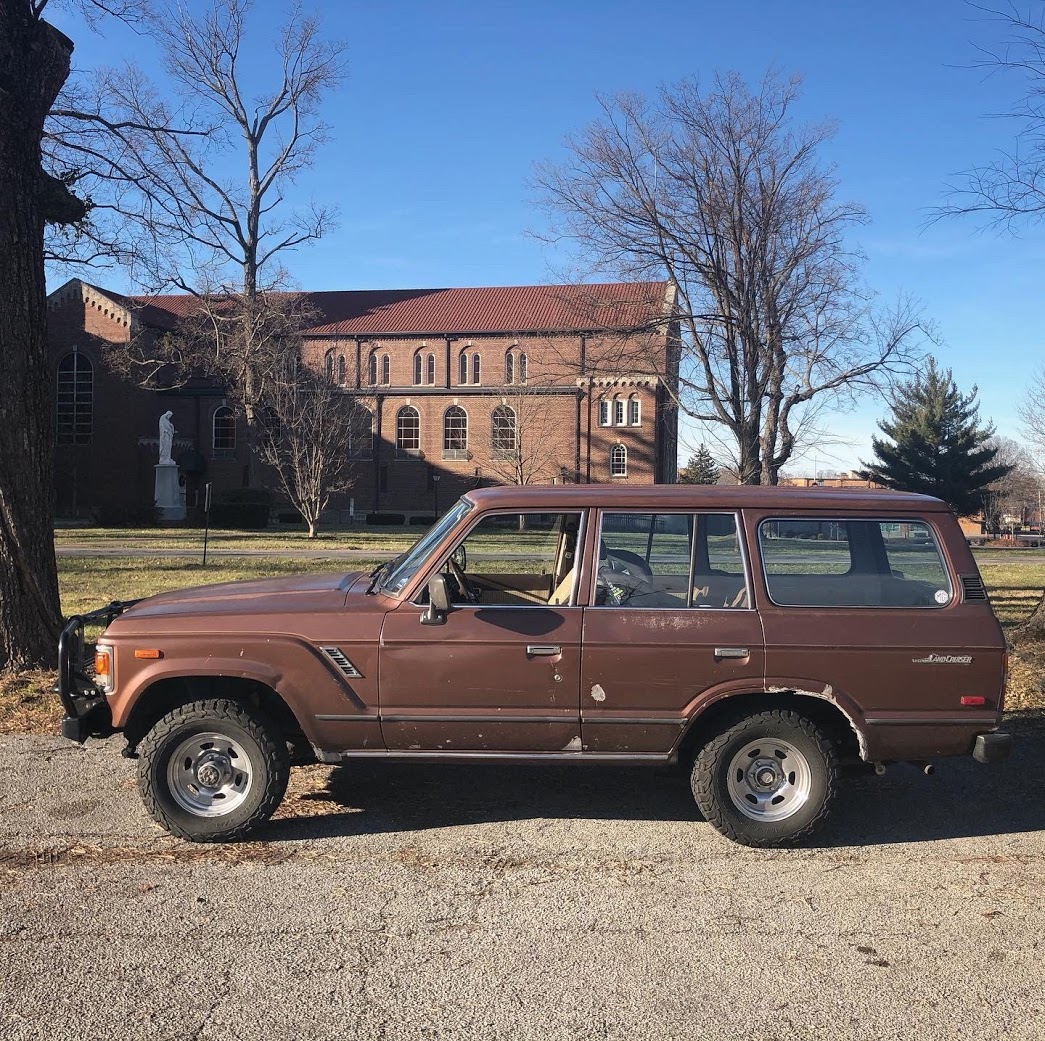
Builds 1983 Cruiser Story (1 Viewer)

This site may earn a commission from merchant affiliate
links, including eBay, Amazon, Skimlinks, and others.

On the list while we're waiting for Santa:

Knuckle rebuild!

And...

0GQQuF9.jpg


LpVSQWw.jpg


Knuckles start after my daughters bed-time tonight. The truck will be able to remain in pieces for about a week before it needs to become reliable transportation again.
 
Alright! Knuckle rebuild, new tie-rods and OME 2.5 Light Lift are COMPLETE!

Scheduled for an alignment tomorrow. I measured it out roughly with a tape measure and the old eye-ball method. It's close but toe is out and I will let the professionals get it perfect.

Overall, knuckle job is pretty messy but straight forward and easy. Don't let it scare you. The only special tools required are the 54mm socket for the hub nuts and a pull scale to make sure you're in spec for rolling resistance and turning resistance.

I'll start with the knuckle job... I purchased the Marlin Crawler Front Axles Service kit with ECO-Seals.

Front Axle Service Kit | Marlin Crawler, Inc.

Very happy with the quality, I know there is some debate over using the Nachi bearings on the knuckles in this kit versus the OEM Koyo brand. I'm cool with the Nachi brand, Nachi makes some serious machine tooling and its always high quality stuff, the visual and of the bearings show the same quality. Ask me again in ~70K miles on the next rebuild.

I started on the passenger side, only doing one side at a time so I had a visual reference if needed...

Notice the clean work area....

fGFNeFu.jpg


Disassembly started with the brake caliper/line removal, luckily the lines had all been replaced in 2017 so it all came apart easily. I also had a printed copy of the FSM instructions and a 11x17" print of the exploded diagram.

Following the FSM disassembly continued.

th2DhCH.jpg


At this point I could see someone had been in here before me, every "sealed" surface not only had a gasket but a healthy amount of black RTV. They had also used Moly grease on everything (wheel bearings).

jcGvua6.jpg


Lots of grease and grime buildup on the knuckles. Great rust prevention and sound deadening!

y6lEYHO.jpg


Here's the knuckle freshly opened. Notice the grease was all but gone..... Should have done this sooner. Luckily I haven't been in 4WD much since being a Dad....

ecLBu9o.jpg


clHq008.jpg


Fresh and clean! Everything came apart without a hiccup.

Pntt18B.jpg


I used one large roll of Bounty paper towels and probably 5 pairs of rubber gloves for each side.

DNrMWaA.jpg
 
Disassembly is the easy part. Cleaning and reassembly gets a little bit more involved but still, this is a very straight forward job. Don't let it intimidate you.

Everything cleaned up and installing the inner axles seal, the whole reason you're here...

cuivB9L.jpg


The Marlin Eco Seal is great because it is shouldered. The OEM seal has to be set at the correct depth.

xhmxgoZ.jpg


The clean knuckle went back on with the shims in the same configuration they were removed in. Everything torqued down to spec and test the bearing preload/resistance.

Yh722Fq.jpg


Axle back in and knuckle packed.

jpRPu42.jpg


Reassembly continued. All following Torque specs in FSM.

Zz50yzN.jpg


New bearings in the hub and packed with the appropriate bearing grease. Check the preload and resistance with pull gauge.

NNMyoqm.jpg


I went ahead and installed new tie-rods as well.

LhWFanJ.jpg


If you have specific questions, please just ask. I know there isn't much technical meat in there but again, its a pretty straight forward project. Make sure you've got the tools and parts you need at the ready. There's nothing worse than having to run out when you;re filthy and nasty, not to mention in a good groove of work.

The first side took me a bout 4 hours from going into the garage to turning the lights off. The passenger side took about 2.
Awesome work! And thanks for the confidence bolster. After the H55 swap in the shop this spring, I want to take this on myself. I'd love to know what's going on in there. Plus, my mini truck needs it too. ;)
 
Lift kit. Second worst job I've done on this Cruiser (worst being the C-Channels). Removal of the old stuff was the worst, particularly the hanger pins.... I would also highly recommend having a helper along for the ride. Being alone I had to do some creative Macgyver stuff with a couple ratchet straps that I'm pretty proud of. Unfortunately I wasn't in the state of mind to photograph it.... It was 1AM at this point...

Somehow I talked my wife into letting me order the OME 2.5 Light Duty lift. You know, safety reasons!

Here's a quick before and after:

w9qwe1u.jpg


Zr1dXzv.jpg


I hope the rear settles down a little. Unfortunately the tires are almost new! I'm going to live with the stock size a bit longer. It's growing on me!

Planning ahead I had been soaking the spring pins and shackles with PB Blaster periodically for a couple of months. While the retainer nuts came off easily this seemingly did NOTHING for the fused rubber and pins.

Luckily I only had 1/4 of the work finished, I previously fought the rear shackles with the C-Channel job and had new greaseable shackles installed which were easily removed. Since the old springs were garbage I cut the front shackles and focues on removing the shackle and pin from the frame portion.

I apologize for these dark photos.

EjDqQhP.jpg


The spring pins (fixed side) did not want to budge. Finally after incessant pounding with an 8 LB sledge I just went for the cut off wheel. Should have done this sooner. Cut each side of the pin (inside the frame bracket and outside the spring) which allowed the spring to drop free. Again, I wasn't worried about the old springs.

q5jmrEy.jpg


Xkdq1ak.jpg


The u-bolts came off easily as well.

rNoHlBM.jpg


BDU6mun.jpg


Getting the drivers side out was pulling the band-aid off. Now i had a plan of action for the other three corners.

Front springs went on easily.

0UxIngc.jpg


ZpMlgdx.jpg


Rears. Again, spring hangers were a bear. Cut off wheel to the rescue but at one point (with the hand guard removed) I accidentally used my right thumb to slow it down... OUCHIE. Only takes a millisecond of a millisecond to cut through leather, rubber and skin.

Cleaned it, taped it up and back at it!

The MacGyver stuff was trying to get the rear spring alignment pins into the rear axle. The passenger side just needed to come out. I hooked a ratchet strap to the wheel on my MG next to me and pulled it into place. POP! all good. The Driver's side needed to come forward and out. For this I used two ratchet straps. one up to the frame around the drum and another around the spring and draw to pull it out.

EndGrCp.jpg


I pulled the axle forward until I could see the alignment was correct then pulled the spring out and POP! Dang that's satisfying. Everything else went together easily. I almost left driver's rear shock off as well as the steering dampener. I finished at about 3AM.

I bough new OEM spring pads for the rear from Toyota and re-used the U shaped alignment piece. I'm wondering if that's a little bit of my "stink bug" look....

Long story short, this job requires a strong back, lots of beer and it took me about 8 hours start to finish.

9uwhvgC.jpg


The ride quality is amazing. Dropping it off for an alignment tomorrow and we should be good to go.

I do have aftermarket brake lines and the rear is stretched just a bit more than I'm comfortable with at full droop so I will be sourcing longer ones. Any recommendations?
 
I do have aftermarket brake lines and the rear is stretched just a bit more than I'm comfortable with at full droop so I will be sourcing longer ones. Any recommendations?
Here:

 
Overall, knuckle job is pretty messy but straight forward and easy. Don't let it scare you. The only special tools required are the 54mm socket for the hub nuts and a pull scale to make sure you're in spec for rolling resistance and turning resistance.
For others facing this job, another easier to find substitute for the 54mm socket is a 2-1/8 inch socket.
 
Disassembly is the easy part. Cleaning and reassembly gets a little bit more involved but still, this is a very straight forward job. Don't let it intimidate you.

Everything cleaned up and installing the inner axles seal, the whole reason you're here...

cuivB9L.jpg


The Marlin Eco Seal is great because it is shouldered. The OEM seal has to be set at the correct depth.

xhmxgoZ.jpg


The clean knuckle went back on with the shims in the same configuration they were removed in. Everything torqued down to spec and test the bearing preload/resistance.

Yh722Fq.jpg


Axle back in and knuckle packed.

jpRPu42.jpg


Reassembly continued. All following Torque specs in FSM.

Zz50yzN.jpg


New bearings in the hub and packed with the appropriate bearing grease. Check the preload and resistance with pull gauge.

NNMyoqm.jpg


I went ahead and installed new tie-rods as well.

LhWFanJ.jpg


If you have specific questions, please just ask. I know there isn't much technical meat in there but again, its a pretty straight forward project. Make sure you've got the tools and parts you need at the ready. There's nothing worse than having to run out when you;re filthy and nasty, not to mention in a good groove of work.

The first side took me a bout 4 hours from going into the garage to turning the lights off. The passenger side took about 2.

Nice work on this. It is not hard but just a lot of steps. Took me a lot longer than you however. Good work here and congrats.
 
I may have mentioned above but the stock brake line was a little short for comfort at ~13 inches with the new lift at full droop. I ordered the extended line from Cruiser Outfitters and finally got around to installing. It was 26 inches so I looped it. Excuse all the PB Blaster on everything...

HtOqEYH.jpg


I also went ahead and bought a new door handle as the drivers door was getting pretty loose and hard to deal with.

5GQVkXh.jpg


Turns out I was past due. I'm shocked it still worked (its been like this for awhile)! Notice the crack all the way around.

rHzSs6F.jpg


0JbQXrP.jpg


xrrv0u3.jpg


Gave it a bath, too!

TUDxlPP.jpg
 
Hey @kirvesmies, it's just a roll bar, not a full cage and the car is just a fun, modified street car. I was a British car enthusiast before I was a Cruiser enthusiast (now both).

It's a 1973 MGBGT, it was my first car my father and I restored it so it was ready when I was 16 (I drove it in high school). I've owned it for 20 years. It's lowered with performance valved shocks, roll bar, sticky tires and some small engine upgrades.

But the more fun part is I just had an engine built for it! Over-bored, higher compression pistons, decked head, hot cam, dual valve springs, Weber 45DCOE side draft carburetor, lightweight flywheel and dual point distributor. I just need to find time pull the old one and put this on in!

Maybe it will make 100HP instead of 95HP!! :rofl:

1pyTFpQ.jpg


zsEFdct.jpg


Thanks for asking!
 
Great progress. Have you bled the brakes yet? I would expect that coil to cause air entrapment issues.
 
Great progress. Have you bled the brakes yet? I would expect that coil to cause air entrapment issues.

Brakes are bled and we're stopping great! Nice firm pedal feel but interesting observation. I hadn't thought of that but it didn't seem to affect anything, maybe since its well below the master?
 
Hey @kirvesmies, it's just a roll bar, not a full cage and the car is just a fun, modified street car. I was a British car enthusiast before I was a Cruiser enthusiast (now both).

It's a 1973 MGBGT, it was my first car my father and I restored it so it was ready when I was 16 (I drove it in high school). I've owned it for 20 years. It's lowered with performance valved shocks, roll bar, sticky tires and some small engine upgrades.

But the more fun part is I just had an engine built for it! Over-bored, higher compression pistons, decked head, hot cam, dual valve springs, Weber 45DCOE side draft carburetor, lightweight flywheel and dual point distributor. I just need to find time pull the old one and put this on in!

Maybe it will make 100HP instead of 95HP!! :rofl:

1pyTFpQ.jpg


zsEFdct.jpg


Thanks for asking!
that's cool ian, buildin' a vehicle with pop's 👍 my dad didn't actually help with any of my h/s builds but did support the mechanized mayhem my brother n i got into, shop space, tools n such.
bet that's a fun little ride in the back woods twisties
 
Brakes are bled and we're stopping great! Nice firm pedal feel but interesting observation. I hadn't thought of that but it didn't seem to affect anything, maybe since its well below the master?

Loops in fluid lines are generally a poor idea due to air entrapment (particularly brakes and diesel fuel supply lines - they cause so many troubleshooting headaches that Cummins won't sign off on install approval of hydraulic injection engines if a loop is present in fuel lines). Sometimes you get away with it, others you don't. Removing the loop will save your future self lots of frustration when a wheel cylinder fails and a bubble works its way into that line during repair.
 
Loops in fluid lines are generally a poor idea due to air entrapment (particularly brakes and diesel fuel supply lines - they cause so many troubleshooting headaches that Cummins won't sign off on install approval of hydraulic injection engines if a loop is present in fuel lines). Sometimes you get away with it, others you don't. Removing the loop will save your future self lots of frustration when a wheel cylinder fails and a bubble works its way into that line during repair.

Thanks for the input! Many vintage and modern vehicles have loops in the factory hard lines for flexibility, including the 60-Series. (albeit horizontal loops). I also wouldn't argue that if there were air in the system it would tend to live in the top of the loop, but the bleeding procedure would push all the air bubbles out regardless of line orientation. As long as you have a sealed system and no additional air could be introduced I don't see a major issue but you make a solid point on the example of a wheel cylinder failing and introducing air and the trouble shooting that comes along with that.


That aftermarket line is just so long I hate to leave it loose and exposed to catch on something I'd be passing over. Open to suggestions if you have any! That goes for any other MUD member that has the same line on a 2.5" lift! I'd love to see your solution!
 
The aftermarket length really is the problem. I think my lines are listed as 2" longer than stock and they're too tight at droop for my liking, but going to longer ones gets the 20"+ products leave me having this same back and forth with myself about how to solve it.

There are some thermoset plastics out there (think heat shrink, but more durable) that may could be used to set a desired shape in these while maintaining flexibility. I've given it some thought to try and source some but the volume hasn't been there. If there were, I'd see about getting some.
 
From one of my earlier posts (rear to front swap idea thanks to @Godwin):

Did you install longer flexible brake lines front and rear between the frame and axle? You can move the rear to the front and buy a new rear from a '95-'98 Toyota T100 pickup, Part Number 96940-34705. This set-up is good for 4/85 and up FJ60s and FJ62s.
 
All smooth sailing as of lately until I went to replace the distributor stop pin bushing.... When I loosened the clamp bolt on the distributor to pull it, the distributor immediately rotated very freely. That was odd. I went top pull up on it and it had free play up and down. Very odd. Well, it turns out the disributor casting had cracked!

nETAEDO.jpg


I'm guessing this was a pre-existing condition but for the life of me can't figure out when or where it would've happened. The truck must've only been running (well) since it was locked into position with the clamp/clamp bolt.

So I went on a search for a new distributor and fast because my DD was down. Luckily, a local TLCA member had one leftover from a flood vehicle and delivered it the next day!

I disassembled it and cleaned it up, put all of my parts back in (weights, springs, breaker, etc.) and had my truck back up and running for the time being.

I of course didn't want to trust previously "flooded" bearings so I went about finding a good used unit which I found from a MUD member.

We're back up and running as good as new with a new stop pin in place and timing set.

Also went ahead and installed the OEM distributor cover and the coil cover which I had never seen before! (Scored with the distributor).

p4hRWo1.jpg


emDsXzd.jpg


Up to 109K miles!
 

Users who are viewing this thread

Back
Top Bottom