1978 LPB Teardown and Rebuild

This site may earn a commission from merchant affiliate
links, including eBay, Amazon, Skimlinks, and others.

I enjoy this thread so much its not even funny. I have a question about all your panel replacement and spot welding. Now i have never done any type of work like what your doing ... ever... so this question is for my education. You are using a sander/grinder to flatten down all your spot welds to make it all smooth. What about the backside of all your spot welds? I know most ... if not all of them won't be seen but are you suppost to grind those as well and take the same steps as you do on an outside panel... as far as making them all real smooth, then prep work, primer, sanding, painting, buffing...stuff like that. Is the backside of all your panels suppost to be the same quality as the side that is seen by all?

I won't speak for Kevin, but I work to smooth the backside of all welds if I can. I figure that the less places for dirt and water to accumulate the better. The weld bead can certainly hold dirt and water if you aren't careful, and then of course you get to repair the rust again someday...

Dan
 
I like to clean off the back side also, more for looks than anything else. In general I try to make my repairs and alterations look like original factory work. Particularly when it comes to patches. I want people to think the damage was never there not say "wow, that was a big patch, I wonder what else that damn PO wrecked" :lol:
 
Just a little update

play_button.webp
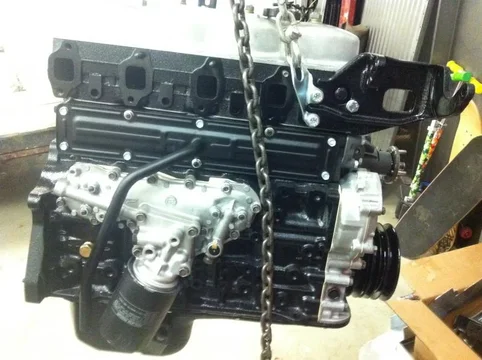
Brought home my 3B a month ago after a rebuild. New head and cam, valves, lifters, oil pump gears water pump, rebuilt IP etc, etc
IMG_1095.webp

IMG_1100.webp
play_button.webp
IMG_1095.webp
IMG_1100.webp
 
so I wrapped it up and set it aside as I worked on the bed build project....

IMG_1103.webp


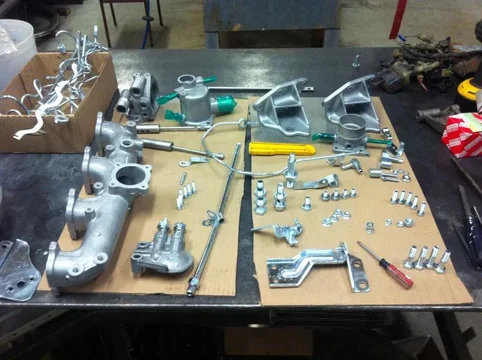
That lasted a couple weeks until I had some cruiserheads over one night and I had to unwrap it to show it off. Next day I could not resist and had to start prepping bits and pieces. I sourced a new to me set of injector lines from a BJ60 at pick n pull, then had them and all other steel bits re-plated. I bead blasted and clear coated all the aluminum parts with a good acrylic clear (dupont A-7480S).


IMG_1214.webp

Re-assembled throttle body - I was surprised how nice it turned out.


IMG_1216.webp
IMG_1103.webp
IMG_1214.webp
IMG_1216.webp
 
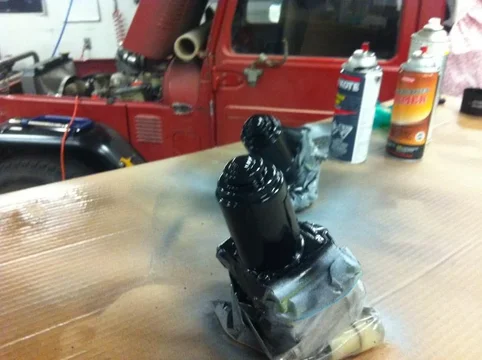
Cleaned up and painted the EDIC

IMG_1217.webp
Glow parts all accounted for
IMG_1219.webp
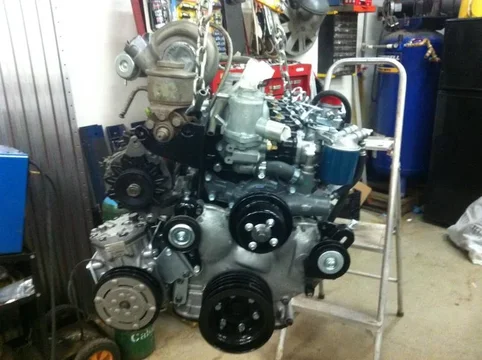
Mounted the York - I removed the top plate and tapped the suction and discharge with 3/8 and 1/4 NPT respectively - plugged for now.
IMG_1258.webp
IMG_1217.webp
IMG_1219.webp
IMG_1258.webp
 
Decided I did not want a rusty exhaust header and hot side of the turbo so I stripped the turbo.

IMG_1232.webp

IMG_1228.webp
I am looking more for corrosion protection than for heat management so rather than pay $300+ for ceramic coating I found a rattle can product that will do the trick.
IMG_1229.webp
IMG_1232.webp
IMG_1228.webp
IMG_1229.webp
 
The directions on the can are more or less as follows:
get all the paint on in 1 hour - 10 mins between coats - this stuff is thin so light coats are best
let dry fully - I went overnight

Then you have to cure it through baking.
30 mins at 250F - 30 mins cooling
30 mins at 400F - 30 mins cooling
30 mins at 600F

IMG_1238.webp

IMG_1244.webp

IMG_1247.webp

My take on this paint so far - pretty tough stuff - during re-assembly of the turbo the wrench-on-paint test was impressive.
IMG_1238.webp
IMG_1244.webp
IMG_1247.webp
 
Just the alternator and the power steering pump yet to tidy up. Lines for the turbo too.
IMG_1255.webp

IMG_1257.webp

IMG_1256.webp
IMG_1255.webp
IMG_1256.webp
IMG_1257.webp
 
damn, very detailed. nice.
i wish i could have made it down today to meet up with you but old Crusty just wouldn't make it.

your one talented individual but then you already know that.

hopefully we can hook up when i am back out here for River Shiver in Feb. I know my helper will be ... inspired when he sees your work.

cheers
 
Subscribed!!! Wow.

who or What did you replate engine parts with? I clear coated all my stuff numerous coats with rattle cans and did not last and looks like sh** so I need to do the right way this time.

R
 
Well.... when I say "new" parts in some cases that would be "new to me". The block was a good used core because mine had a small chunk missing at the bottom of sleeve #1 - likely would not have mattered but my builder had another good block to use. For the cam shaft (13511-56010) I don't think was new because I don't think you can get them. He told me once that he had the ability through the engine shop that he works with to "make" the camshafts. Now I don't know if that means he re-manufacures used ones or what but he said he has the "pattern" or "jigs". The head was also a good used core because mine was cracked.

Here is my bill minus the dollar figures:

1- supply good used cylinder head as original one cracked N/C
supply sleeves, pistons, rod pin bushings and all bearings
machining costs for long block 3B includes counter boring, surfacing block @ shipping
1- camshaft 13511-56010
4- pre cups
1- gasket set 04111-58017
8- lifters 13751-56012
2- exhaust rockers 13812-56020
4- intake valves
4- exhaust valves
2- oil pump gears 15121-56030 @ 15122-56030
1- water pump 16100-59105
1- rebuilt injection pump and 4 injectors includes shipping cost
1- injection pump o-ring 19127-15021
4- injector seals 11177-56010
2- oil line washers 90044-30026
1- oil filter 15600-41010
3- frost plugs 90331-51032
4- dense glow plugs 19850-68040
1- machined oil filter surface
drilled, tapped block for proper turbo drain and plugged
supply all proper bolts and misc supplies
labour for rebuilding of motor and installing all new parts


Roberto - you of all people can attest to the expense of rebuilding a 3B! I had a budget going in to the engine rebuild and managed to more than double that. As a certain ex-Albertan likes to say, these are obsolete engines mounted in expensive vehicles. If you want cheap buy a Jeep (no offence to the Jeep owners out there - you can follow me on the trail anytime!)

The guy who did my rebuild is Ryan at Hilltop Cruisers. He is not inexpensive to say the least but he has treated me quite well in the past and we have business dealings going both ways between each other too. In fact he took one of my 45 beds a partial payment for this rebuild. He is putting it on his own 45 that he is building with a 1HDT.
 
I spoke with Ryan a long time ago and was going to ship my engine to him in which with the luck i had with my engine I should have. He does really nice work. What is the plating stuff called, I wanna redoo mine. Yeah I have a huge binder of my total frame off and I am afraid to add it all up but I would easily say my engine was around $10K alone for once it was opened up I started buying new OEM parts like camshafts, rocker arm, pre cups, oil pump gears, rockers, on top of the already expensive rebuild kit itself. and then the turbo. and then thats just the internal right. then injectors rebuilt, new P/S pumps, yada yada.....rediculous but I love it as I am sure you do as well. Its not what you got its how you got there. My father and I still talk about we actually did it, and we dont know how for we knew not what we were doing and that being said alot of trial by error per my thread, lol. Looking back now I wished I would have took more time to be a little more maticulous with like the painting when perhaps I should have powder coated and should have put a nylon washer under any bolt or nut that touches the outside paint for whoever says SS doesnt rust is full of it. Keep up the awesome work, you are talented. I am actually going to take some time and go to the local community college and learn how to weld for I have always wanted to learn just to do my own projects.

R
 
Welding is something I'm very glad I got into after years of watching co-workers do it and begging for help to get stuff done. I'm not trained at all. I just picked up the TIG whip at work one day and told one of my welders to give me pointers. I was aware of the concept and what was involved but had never actually tried it. The MIG was easier because I had done lots of tacking assemblies together in another life. Did some stick welding in High School way back when.

Now I own a TIG and MIG - lotsa fun for sure
 
Last edited:
Mac, saw your thread a while ago, very nice cab. Mine was very nearly a quad cab build but I decide not to change my overall bulid concept and stick with my original plan.
 

Users who are viewing this thread

Back
Top Bottom