1976 FJ40 BUILDUP - Chief $*itty Pants (1 Viewer)

This site may earn a commission from merchant affiliate
links, including eBay, Amazon, Skimlinks, and others.

Here is one to show where my 40 will live shortly!! It is also one of the main reasons my FJ's progress slowed down lately.

I know its a FJ site but :meh: it shows where the FJ lives :D

106_0543.jpg

Here is a picture of a :bang: However I didnt care how but i knew my cruiser tub was going on one way or another that day to come home so out came the torch :crybaby:

The other stupidity move was recessing my D-ring hangers to far into the bumper!! I will pull something out of my %%^& however I am unsure what right now. Any ideas???
106_0543.jpg
oops.jpg
 
Just as I had suspected I wussed out on my rear cuts and the spring flip is a little too much so I think i will use the front hole in my perches and move my rearend back forward approx. an inch.


106_0538.jpg
106_0538.jpg
 
Thanks Antfj!!

Now for my newest.....

Tires :hmm:

I am planning for something around 37's

I wanted the new KM2's by BFG but I just saw the price of 350.00 each so :flipoff2: that idea since i would have to go with 17" wheels also which would have been fine. So now it is between:


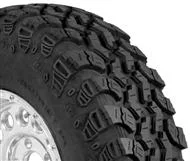
Swampers new M16 (37x13.5x15) that no one I know has so :meh: knows if they will last very long on street only
M16.jpg

Or Iroks (37x12.5x15) that my friends have. They said their bias iroks wore out quickly on the street (street only rigs) but the radials seemed to be holding up on their heavy power strokes and wearing fairly even:
irok radial.jpg

I am leaning towards the Iroks. Camcruiser13 likes his bias ply (i think they are bias) the bias ply would be sweet for offroad since they are softer and meaner however I am talking the radials and will only see street with my FJ :rolleyes: I know but I have other vehicles to beat the crap out of and I dont care about them :D

What do you guys think?
M16.jpg
irok radial.jpg
 
Last edited:
i like the iroks (the look) plus i like that its only 12.5 in wide... :) tall and kind of skinny
 
I'm no FJ owner, but my uncle had one for years when I was really little. FJ's just look 'right' with tall & skinny tires
 
Here is one to show where my 40 will live shortly!! It is also one of the main reasons my FJ's progress slowed down lately.

I know its a FJ site but :meh: it shows where the FJ lives :D

View attachment 300955

Here is a picture of a :bang: However I didnt care how but i knew my cruiser tub was going on one way or another that day to come home so out came the torch :crybaby:

The other stupidity move was recessing my D-ring hangers to far into the bumper!! I will pull something out of my %%^& however I am unsure what right now. Any ideas???

4x4 Station Wagon, Can you get a picture facing straight on the back. I'm planning on making front and rear bumpers just like that and I would like to see how the rear bumper and the tub fit.
Thanks,
Mike
 
4x4 Station Wagon, Can you get a picture facing straight on the back. I'm planning on making front and rear bumpers just like that and I would like to see how the rear bumper and the tub fit.
Thanks,
Mike

Yep I sure will tonight!!


As for tall and skinny I AGREE!!
I too like the iroks better so far votes are towards iroks
 
MDTYREE,

I pretty much choked on getting good straight on pictures tonight since I will need to push it out and it is pouring here!! However I will do the best I can with what I could do for you.

I am sure you saw these in my earlier posts but if not here goes:

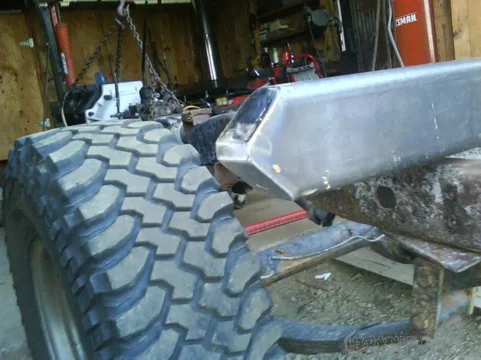
This is a pic of how I wanted it to end up and I basically mimiced the factory rear bumper end curves only I used 2x4x3/16 tubing front and rear. I simply cut the rivots and removed the factory bumper including torching the rear angle frame to bumper brackets with a simple guess.... They pivot so as long as you use a t - square or straight edge they will pivot into your bumper nicely. You will have to fold the bottom of the corner up with a hammer prior to welding - no problem though.

bumper corner rear.jpg

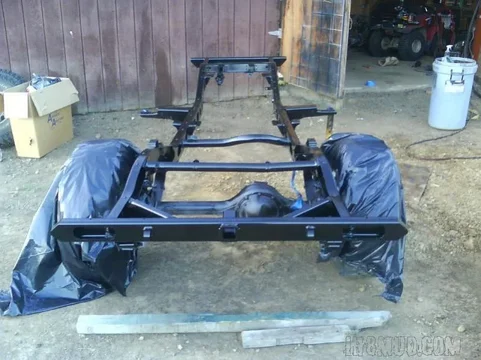
And this is what it looked like without the tub from the rear after:
Bumper rear straight.jpg

I just simply used some 1.5x1/4 inch strap to box it in with (this pic is obviously the front bumper which is 40" total long

front corner bumper.jpg

However I choked when i made my bumper slightly longer than factory to tighten up the gap. My rear bumper is 5' and a 1/2 inch and it should have been closer to 4' 10" if I wanted to keep those bends which I really liked.
bumper corner rear.jpg
Bumper rear straight.jpg
front corner bumper.jpg
 
Now I had to hack it quickly in order to get the tub to sit down. Now I plan to lift the tub back up a foot or so in the back, throw a welding blanket on it and cut about an inch or slightly more back off that ugly sucker and put back the curve, flat end, and then curve. The curves will not be the same now and it will never look as good as it would have but I plan to cap it back off with some thicker metal than before that allows me to cheat a bit and with the help of my trusty grinder put the steeper angle back in it as i wanted! My friends think i should section a piece of tube and lay it upside down to put a similar curve into the bumper as the tub but I like square angles......:meh:

106_0564.jpg

Let me know if you need further pictures and I WILL pull it together if it stops raining and EMAIL you as many as you need.

Thanks
106_0564.jpg
 
Thanks a lot, That's perfect. Mine might be a little easier, I'm not going to remove my tub. I'll have the tub to work around. I just wanted to get an idea on rough figures.
 
Great if you need any more measurements let me know I am glad to help however. As for my pictures what ever you do dont recess the D-rings as deep as I had. Also if you choose to go that route I purchased mine for like 10 a pair on ebay they were CHEAP and were plenty long to weld on the back side of the bumper also for extra support. Like an idiot I actually cut mine down and then double welded.....
 
Ok now that I even annoyed myself with my inability to make a decision on tires I finally pulled it together and ordered today:


Order Details:
*****************************************
------------------------
Quantity: 4
Make/Model: BFGoodrich Mud Terrain T/A KM2
Prodcode: 02707
Size: 37x12.50R17
Price: $290
------------------------
*****************************************

Subtotal: $1160
Shipping: $141.08
Shipping Method: Fed Ex Ground
Final Total: $1301.08

I really really really wanted the recentered hummer wheels but :meh: there were just to many things that didnt work out such as pressed centers and they were very heavy. Dang they were sweet though!!!!

Now for rims... Just kidding I dont really have any options I am going to go with Camcruisers thoughts with the cragar smoothies that you can have your backspacing set at whatever you want. The problem with my BFG's is that I had no choice but 17's or larger and most 17's have a 4.5 backspacing or greater..... I am sure since they are 17's they would probably clear with whatever backspacing but I want 2.5"-3". I do want to mix them up a bit so I might either simply weld rock rings on them and then cheaply spray them with hammerite or suck it up and lock them since it wouldnt be that much more $$ and it isnt like I am going to be going 80 mph so I think I could play with them enough that I could get them close to balanced.... I said close :D

Now for the new fun. I headed back out to the shop today to sit there and scratch my head about my fenders...... I can:

A - put a lot of time into the fenders welding up the cracks and making them nice or

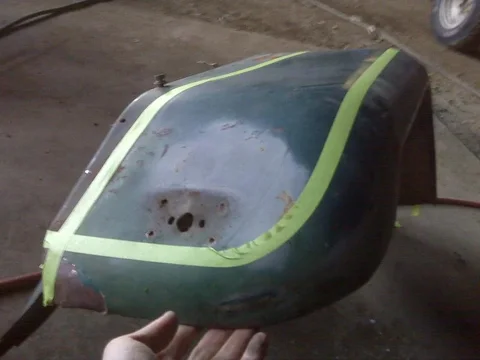
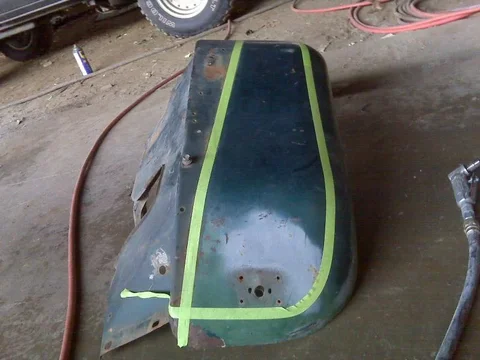
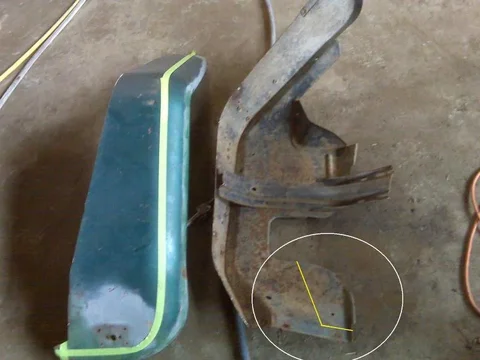
B - Cut them off just shy of sticking out past the upper fender aprons allowing me to put the entire cruiser back together.... then later cut the fenders at the outside tape line and slide them inbetween the apron and inside skirts, drill new holes to rebolt, then using them as a guide build tube fenders and tack them to the tube making for free skirts..... Of course with my trusty welding blanket protecting the paint at ALL times. And heaven for bid I did screw something up we painted it once we can paint it again right??? :D

Oh crap you got to be kidding me I erased the pics trying to get them off my cell. :bang:

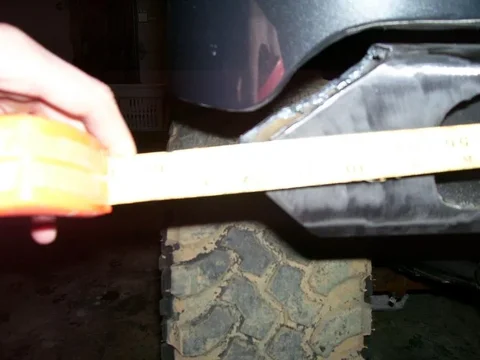
Well hopefully it makes atleast some sense... Since you cant see the tape in the pics I would cut about two inches off the outside of the front fenders and that would also help with the way they drop so far in the front. I know my stock running boards wouldnt fit any longer because I would purposely be narrowing up the fender by a total of about 2" but I could whip something up for rock sliders/steps
 
Last edited:
Ok I took pics of what I accidently deleted the other night however the other night I was looking for opinions on weither I should do it. Tonight it is too late!! :D

IMG00017.jpg

IMG00015.jpg

IMG00018.jpg

The good thing is I can blast them and paint them and get the cruiser on the road minus front fenders and then fab somthing up! I need to cut out the drivers side to clear the scout box but wow their will not be much left other than a strip for the front grill to hook to. I may need to plate it in order to reinforce it a bit. I will be cutting a W shaped piece of 1/4 inch strap to kind of box the inner brace back into the sheet metal to reinforce that at minimum.
IMG00017.jpg
IMG00015.jpg
IMG00018.jpg
 
Last edited:
LOL!! I was getting so tired of sitting in front of the computer going :hmm:. It is a dang good thing I ordered already or I would have changed my mind again!! I think it is from sleeping next to my wife..... It must have rubbed off. :D
 
Dang it Camcruiser I saw your recent steering posts and now I am second guessing if I should have gone IROKS :rolleyes: LOL

I spent half the darn night sand blasting these inners because I had the bright idea to reuse sand..... Oh and I didnt have a screen :mad: Oh well kind of what I get....

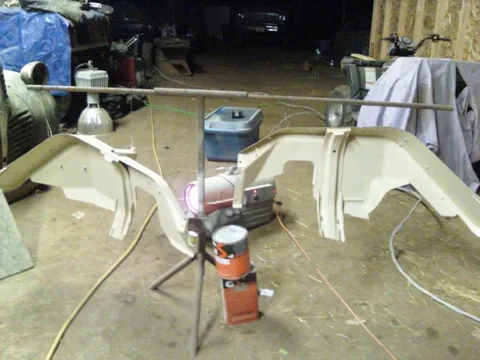
Here are a few pics of my inners and the one pic shows my attempt to reinforce the fender where I removed the brace. There is going to be so little weight on it and everything ties together so it probably didnt matter but what the heck. Also you can see the material I had to remove to clear the box. Now to weld them up and shoot them with sealer, paint, and clear. I think I will hold off on the undercoating on them until they get all chipped up and then bring it on!!

106_0577.jpg

106_0578.jpg
106_0577.jpg
106_0578.jpg
 
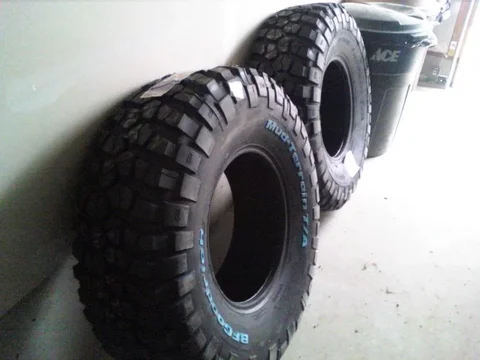
Tires showed up today and I welded my fender supports in last night so now I am off to shoot the inners tonight. I stared at my wiring harness last night for about 10 minutes scratching my head.... It is so crazy some of the little things you tell yourself no need to take notes a monkey could put it back together and you forget it will be a year or more later.....:eek: Well one thing about it I was right a monkey will put it back together :censor:

0305091629.jpg

0305091629a.jpg
0305091629.jpg
0305091629a.jpg
 
Here is tonights progress as claimed....

I sprayed them myself so if they suck blame me ;p I got kicked out of the paint booth for a Wicked Dodge Dart!! :)

This is sealed and I forgot to get after clear coat pics because it was late but they are grey and cleared also along with we reshot the gas door because of a nasty little clear coat run that I couldnt get out.

0305091932.jpg

It is late so I am going to go see if I can fit into bed with my wife my 23 month old son and 4 37x12.5 KM2's........ My wife might have to go sleep on the couch :grinpimp:
0305091932.jpg
 

Users who are viewing this thread

Back
Top Bottom