1976 FJ40 BUILDUP - Chief $*itty Pants

This site may earn a commission from merchant affiliate
links, including eBay, Amazon, Skimlinks, and others.

Well there goes another chunk of money.........


Part Number Part Description QTY Tracking Number
Carrier: Est. Arrival
ACC-170072 CONNECTOR 1 1Z1XW7200387540188
UPS: 3-4 bus. days
SUM-G5210 HEI POWER PIGTAIL 1 1Z1XW7200387540188
UPS: 3-4 bus. days
SUM-400500 DISTRIBUTOR CLAMP 1 1Z1XW7200387540188
UPS: 3-4 bus. days
SUM-901011 FORD OIL PRIMER 1/4" 1 1Z1XW7200387540188
UPS: 3-4 bus. days
ARP-430-3501 SB & BB CHEVY SS 12PT STARTER 1 1Z1XW7200387540188
UPS: 3-4 bus. days
SUM-250000-1 SBC MECHANICAL FUEL PUMP 80GPH 1 1Z1XW7200387540188
UPS: 3-4 bus. days
LOK-TC-1000U THROTTLE CABLE 1 1Z1XW7200387540188
UPS: 3-4 bus. days
TRD-2047 KIT CARB STUD 2 IN 1 1Z1XW7200387540188
UPS: 3-4 bus. days
MSD-5562 STREET FIRE WIRE 1 1Z1XW7200387540188
UPS: 3-4 bus. days


I just noticed I somehow ordered a ford oil pump primer tool to prime a chevy :bang: And I have already primed it but with a chunk of a distributor so it only oiled the driver side of the valve train :rolleyes:
 
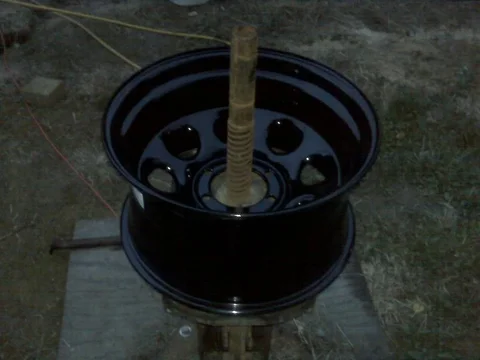
So I have been staring through the fence for a while now trying to figure out if that was a tire machine in the neighbors yard. My rims arrived yesterday and I thought what the heck why not ask. So.... I asked if I could pay him to let me use it and he said "I notice you have a lot more vehicles than I do why dont you just load it up and take it to your house and if I ever need it I will knock on your door" So my thought right now is ;p Just kidding but I am excited about the old manual machine because it worked great I had the 37's on the 17's in no more thn three minutes a piece start to finish. That included adding exactly 10 ounces of air soft pellets to each tire for balancing. I believe they will probably dissapear after a duration of time but I dont plan on driving it a lot so :meh: I used my electric reloading scales and converted to grains. 10 ounces is something like 4375 grains or ? I was able to purchase a large container that had 10,000 .12 grams pellets for 15.00 from walmart so it was cheap. I threw two on just to make myself feel better....
IMG00113 (2).webp

IMG00112 (2).webp

0617091908.webp
IMG00113 (2).webp
IMG00112 (2).webp
0617091908.webp
 
I had a problem with a head on my 383. It had a hole in the #7 intake port. I called the company Motorcrate Engine Sales and they asked if I would send the head in to have them check it out. They called back a day or two later and informed me that they had found a hole. I asked if they could help with my costs that I acquired while changing oil and intake gaskets and exhaust gaskets etc. and I had asked if possibly they could extend the warranty since the motor had never even been fired up or I had a set of good casting numbered 351w heads that maybe they could cut me a good deal on reworking. They emailed me back shortly after and said dont worry about a thing, we will reimburse your expenses, send you everything you need to put it back together, dont worry about the warranty, and to send them the windsor heads and they would build them at no cost to me!!! I dont normally give companies a plug but these guys were great!!!!

A friend of mine also picked me up a front and rear fj60 axles that are in great shape! A guy had paid 400 for them to put under a samurai and sold them to us for 120 for both!!!!

What do you guys think? I have already have disc brakes and a high steer kit for my 1976 small bolt pattern knuckles.... My highsteer arms arent even out of the wrapping should I sell or try and send them back and swap the knuckles? I dont really want the extra width that they would provide so?


Send the arms back and trade them for the large pattern components.


Swap the knuckles from the 60 axle onto your 40 axle and call it good.


Projects look good!


:beer:
 
Thanks Poser! And thanks for the help when things werent going so good on it.....

I will send them back and swap away!
 
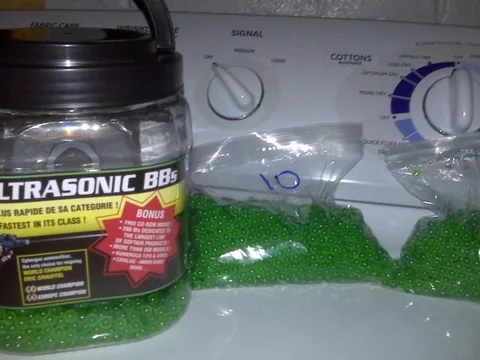
So I have been staring through the fence for a while now trying to figure out if that was a tire machine in the neighbors yard. My rims arrived yesterday and I thought what the heck why not ask. So.... I asked if I could pay him to let me use it and he said "I notice you have a lot more vehicles than I do why dont you just load it up and take it to your house and if I ever need it I will knock on your door" So my thought right now is ;p Just kidding but I am excited about the old manual machine because it worked great I had the 37's on the 17's in no more thn three minutes a piece start to finish. That included adding exactly 10 ounces of air soft pellets to each tire for balancing. I believe they will probably dissapear after a duration of time but I dont plan on driving it a lot so :meh: I used my electric reloading scales and converted to grains. 10 ounces is something like 4375 grains or ? I was able to purchase a large container that had 10,000 .12 grams pellets for 15.00 from walmart so it was cheap. I threw two on just to make myself feel better....
View attachment 333455

View attachment 333456

View attachment 333457

so you throw 10 oz's in for a 37" tire ? i was thinking of putting mine on the balancer and seeing how much it recommends and then putting in that amount . or just throwing on some weights . im pretty new to the airsoft beebee's thing , i usually use them to shoot close friends .

sorry to hijack .
 
According to the charts I needed 10oz for that size tire however I am running the chance of the airsoft pellets breaking down over time. I dont plan on driving it that much so I figured.....

I think the only real disadvantage is going to be the spot around 25mph where they dont work that well.
 
I fired the 383 and broke the cam in this weekend!!! One thing is for sure at minimum it sounds fast :D I threw the front tires on for show and am slowly working towards fabbing a bracket for my slave cylinder to AA adapter. I would have it done by now but I screwed up and bought my 2 year old a jeep power wheels instead of the FJ model and it spins out every 30 seconds....... I knew better but the damn bezel was upside down on the FJ!! Seriously :rolleyes:

As for the cruiser I hope to slap a little black on the drive line, fab the bracket for the slave, and then I can move it out of the shop on its own power and take a couple outside pics. I have a lot of (thank god) free clean up to do including building brackets for the electric honda accord seats, cut and turn/rebuild/swap fj60 knuckles, and wiring which should keep me busy for a while. The next large decision is a cage........ I have access to benders but where I live it would cost me as much for metal as I can purchase from metal tech or redline. We can actually pay to have metal shipped up from California cheaper than I can buy it locally..... I NEED the family cage so my :princess: is leaning towards the redline and I may be also even though Metal tech is fairly local to me and I could drive there in 3 hours! However I am hunting Colorado this year and may be able to swing by redline just as easily....
Any one want to chime in on what they think would look best on my fj??
 
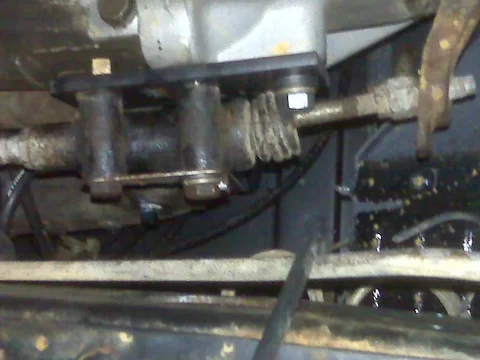
I started to fab up a fancy bracket for my slave cylinder (AA bellhousing) but when I got to looking at it I think I can keep it simple. I took a piece of 2x3/16 flat bar and drilled three holes at 1.75" apart each and mounted it up..... I wont try and say it is perfect but I think it should work just fine. The angle isnt bad and should be almost perfect at full clutch engagement, the mount is solid since one of the slave cylinder bolts actually goes through the bracket and into the bellhousing, and the bleeder is on the top. I am going to give it a try and hope it was that simple :meh:

IMG00187.webp
Need a shorter bolt so the rubber boot doesnt wear through

IMG00189.webp
Throwout bearing has free play (crappy pic)

IMG00182.webp

Don't mind the extra hole it was to reduce weight..... :cool:
IMG00189.webp
IMG00182.webp
IMG00187.webp
 
nice! don't worry its one of those things.. and as i get closer to the end of my build and can't nit pick about certain things i say...

it'll work and... no one will ever see it!
 
Thanks Guys!

It is getting closer and closer everyday....... I need to dedicate some time to it but it is tough!!!
 
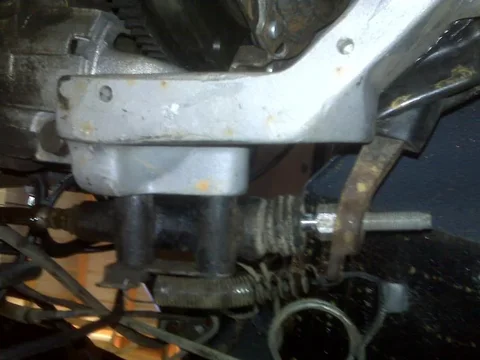
Well I think I get to join the club of guys who have defeated the impossible. I was able to get my chevy low diaphram clutch (part number shown in previous posts in this thread) with the cast fork, and throwout I recieved when I asked for one for a 1976 fj40. I removed my bracket that I built the other day when I realized I had enough room to just simply bolt my slave straight to the advanced adapters bellhousing and cut and weld my push rod to shorten it about 3/4 of an inch. Dont mind the spring it is just temp.

A few stats are that I adjusted the pushrod that hooks to the clutch pedal out to where I had only 7/8" free play as viewed in the pics. My flywheel releases at minimum an 3.25 inches from the floor with a start of 7" when you remove the 7/8 freeplay. So basically in short it releases after 3.75" of pushing the clutch in and has an additional 1 3/4" of throw to the floor to ensure full release.


Removed my bracket, mounted slave straight to factory holes in AA bellhousing and shortened rod
IMG00208.webp


When released the TO bearing spins freely
IMG00210.webp


Took the slack out to give a bit more throw yet still 7/8" free play
IMG00212.webp
IMG00208.webp
IMG00210.webp
IMG00212.webp
 
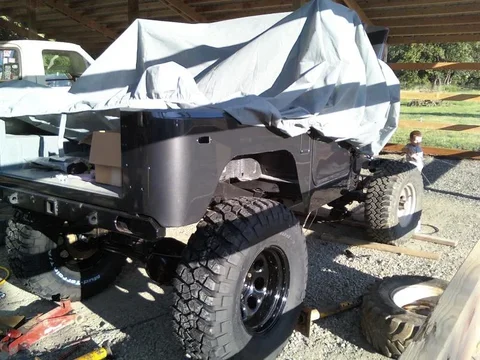
Well the poor thing finally got to move on its own power. Ofcourse I couldnt steer, was sitting on a cardboard box, and only had the E-brake for brakes!! :cool: Felt good none the less. I also ordered a 50 series flowmaster Delta that is 2.5 in and out. I was hoping to dump the exhaust behind the tire pointing out at a 45 degree but I really dont think it is possible with my clearance. (leaf vs tire vs tub)

106_0719.webp

106_0723.webp

106_0724.webp
106_0719.webp
106_0723.webp
106_0724.webp
 
Thanks FR3533!!

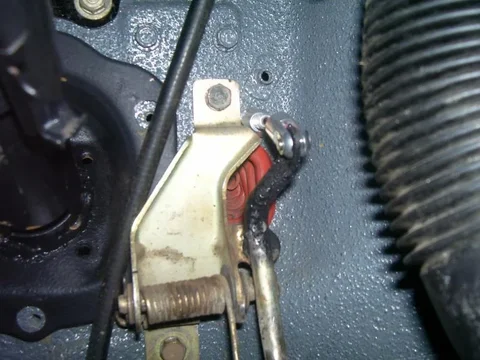
As time goes on it gets harder and harder to purchase items like an aftermarket gas pedal so I have found the need :cool: to make a few things work. I purchased a generic lokar cable and did a simple mod to the stock 1977 pedal that appears at this point to have plenty of throw to fully open the throttle on the sbc.

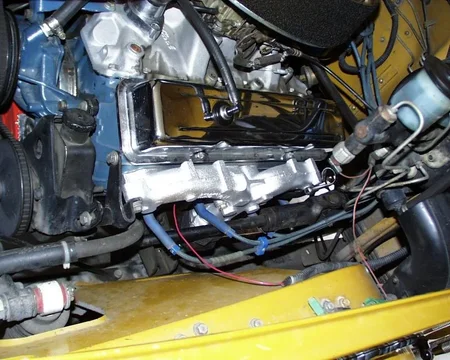
Here is a picture of before yet after I took a grinder to the back of the linkage ball and tapped it out with a punch.
0725091718.webp

Pic of after I cut the piece that actually extrudes through the firewall off just above where it sits on the rubber stopper. I then cut approx. an inch section out of my cut off piece and reattached it at a 45 degree angle pointing back towards the inside of the cab to allow for enough clearance for the linkage.
106_0730.webp

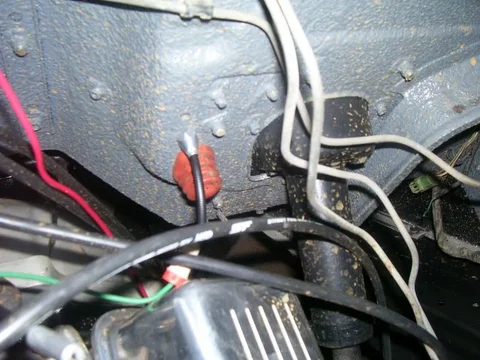
I then drilled a hole in the firewall that would line up with the mounting tab on the linkage and routed the cable through the firewall
106_0727.webp

This is a very simple no brainer but might come in handy for someone someday that is searching forums.

EDIT: no laughing at my wire nut or the fact that I opened the radiator cap with a rag while it still had just enough pressure on it to lightly coat my pretty engine bay with brown nasty water..... :rolleyes: :lol: Also I wish I would have cut a bit less out of it in order for it to have lined up perfectly rather than a 1/4" low....
0725091718.webp
106_0730.webp
106_0727.webp
 
Last edited:
Power steering mount

With my SBC shifted slightly to the driver side and my scout box only spaced out 3/8" it has been difficult to find a mount for the power steering to clear the box. I have read a few times that a upper driver side power steering mount doesnt exist (factory) but a gentleman sent me a picture a while back. As seen in first pic: (Thanks for the pic!!)
MyDside.webp

I havent been able to find that bracket so I decided to try and mod one of the other brackets I have managed to find. I actually have no clue as to what power steering bracket it is and it doesnt seem to fit anything well on my sbc. (if anyone recognizes what it is off of (maybe big block chevy??) it might help others later if this works and they wish to follow).
106_0731.webp

I cut the ear off of it, cut out the bottom near the lower bolt hole, ROUGHLY for now oblonged the upper bolt hole to make it 2" center to center rather than factory 2.25", measured 3 5/8" from center of new top bolt hole and 3 7/8"from center of bottom bolt hole, found where they lined up and drilled an additional mount hole that will really help make it solid and allow for shimming. (may need to grind the bolt head very thin to clear pump)
106_0733.webp


More pics to come
106_0731.webp
106_0733.webp
MyDside.webp
 
Here is a pic of it mounted (not tight): Again don't mind my nice radiator water mess I have a lot of clean up to do!
EDIT: I am normally pretty good at this but I have the pics out of order and cant seem to fix it no matter what I do.....
View attachment 343857

Here is a side view and when I mount the saginaw pump the center of pulley sticks out 1" on one pulley and 1 5/8" on the other pulley. So you can see the bracket should only need shimmed out about a 1/4" to have good alignment.... I am crossing my fingers!
106_0738.webp

The rest of the pump and brackets have a slide assembly mounted to the pump. I will take the long arm off and find a way to mount it from the water pump to the bracket on the pump.
106_0739.webp
106_0737.webp
106_0738.webp
106_0739.webp
 
Last edited:
just came across this thread today and read through it all. great job man. that thing looks awsome.
impressed with the body work. im with u on the doing good prep work so u dont have to wory bout the rust sneakin up on u later. now i have to just do it to mine.

i noticed in the pic of the ford where u got your pain color idea from that your pretty close to me. then the pics of the body and paint work, pretty sure i reconize that shop to from going to ride dirt bikes. hopfully ill see u driving it soon and can flag u down. love to check it out in person and BS a little.

my blazer has a stock high D side power steering pump bracket on a sbc 400. maybe not stock, butt factory.

keep up the work

jim
 
THANKS!!!

You nailed it on the head! I work at that shop where I took that pic. I drive the white cherokee that you probably saw in the previous pics or the maroon tacoma. So the high mounts do exist I just am not a lucky person!! Thanks for the props on the body work it makes alll the late nights feel worth it. I am always willing to BS and hope to be able to park it in the parking lot someday!!
 

Users who are viewing this thread

Back
Top Bottom