1976 FJ40 BUILDUP - Chief $*itty Pants

This site may earn a commission from merchant affiliate
links, including eBay, Amazon, Skimlinks, and others.

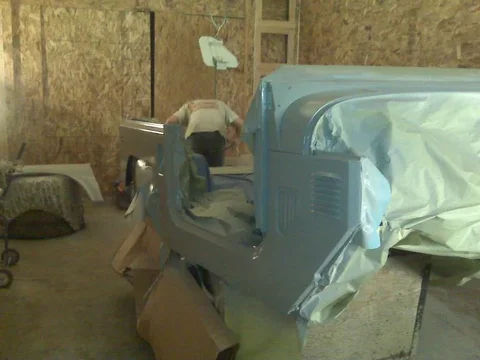
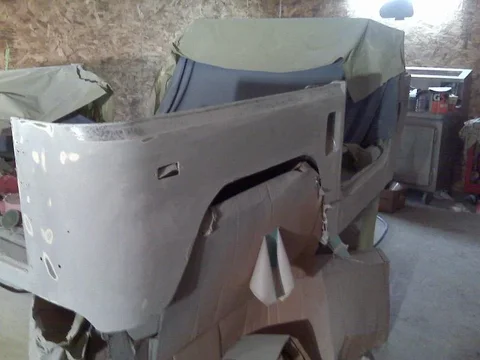
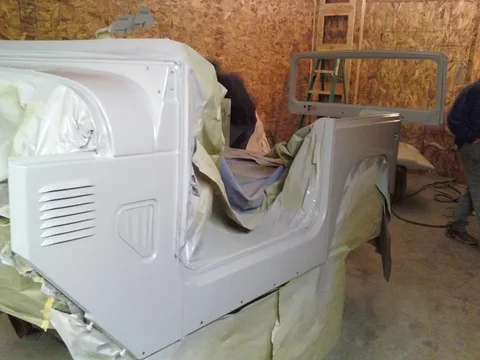
The pics do no justice. I never planned on the cruiser ever being so straight. Non of the bondo is thick it is just a skim coat to iron it out. It is actually gonna look kinda fake because you know they didnt come off the show room straight... But what the heck i actually had to slow him down and say that is good enough!!! He is awesome.

Here are a few more with primer:
IMG00106.webp
IMG00107.webp

I welded up and smoothed out all of the extra holes for the spare tire carrier. I dont want it mounted to the tub any longer and i will fab something up and hook it to the bumper. ?

IMG00108.webp
IMG00106.webp
IMG00107.webp
IMG00108.webp
 
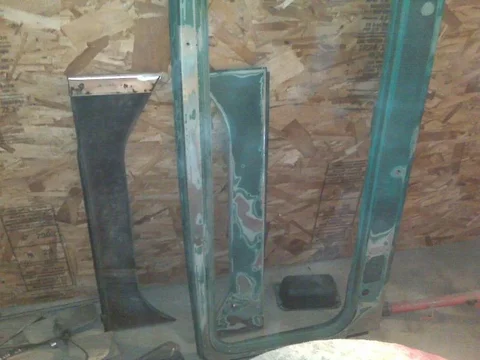
Finished the first blocking today along with prepped the windshield frame (broke the ^%^^ windshield), and the front aprons

First block came out pretty good except one high spot where the rear quarter panel had been sectioned as seen in prior pics.

The worst thing on my cruiser is my front fenders which i planned on running metal techs tube fenders however now i am uncertain because i didnt want to cut my side aprons. I know they make the fenders for non cut but i havent seen enough pics to determine if i like them. Does anyone have a pic they could post of the non cut apron style tube fenders?
Thanks
IMG00123.webp

IMG00124.webp

IMG00125.webp
IMG00123.webp
IMG00124.webp
IMG00125.webp
 
i hate bodywork so big props to you bud! :cool:

once i get the arms i'll ream out the proper one right away and will ship it back up to you asap. the 1" drop arm looks like it'll work out perfect.

keep up the work and progress! :cheers:
 
Thanks Orangefj45! They were shipped friday and should be there in no time. Also thanks again for the help!!! As for body work I like it but hate it! It would be so easy and gratifiying if you cheated and cut corners but it is so much work and depressing and EXPENSIVE to try and do it right. The tub we worked as though it will last forever the rest I am stripping the main stuff or anything in question what so ever but nothing like we did on the tub so they are taking only 3/4 the time.

What a weekend..... It doesnt take long to get FJ'ed out!! Saturday I started at 9am and we shut the lights off and left the cruiser at 1:15am after getting the bare spots on the tub sealed and the windshield, vents, gas door, front aprons, hood, and bezel stripped, mudded, blocked, sealed, and then we primed it all for hopefully the tubs last time and the rests first blocking!! We believe we are ready to wet sand the tub but it has been covered and put away because he wont paint it untill the front doors are ready also so that he can paint it all at once to ensure consistecy. (dang it!! I was looking forward to getting the tub back on but i am sure he is right.

Few tips or learning for me...
The masking tape trick worked sweet for the seam sealer!!
Next you would be amazed what is under your paint if your FJ has ever been repainted. There were so many spots as i stripped it down that must have had a rock chip in the prior paint job but the body man simply primed them out and it would be rusty. Last but not least the FJ was so nice to weld up extra holes that former PO's had installed due to the thick metal.

Few pics:

I told my painter friend that the hood didnt need much work..... I tried to just strip back where the previous repair had been done.
0103091559.webp


Wishful thinking
0103092054.webp


Better now
0103092309.webp
0103091559.webp
0103092054.webp
0103092309.webp
 
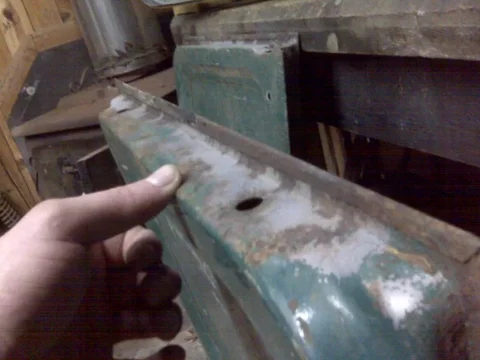
This front piece was not very happy. The backside does have some more serious rust issues however not bad enough that they wont blast out and por. I will take this in this week to be lightly blasted along with the rear ambulance doors along the bottom of them each. I then plan to por the lower inside of the ambulance doors along with take a brush and extend the handle where i can dip the brush in por and dab it down inside the lower section of the doors.

Do the new replacement seals do the same as the factory seals (trapping water and rusting the doors)?
IMG00126.webp


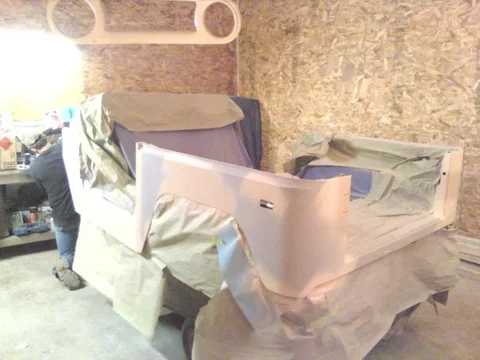
Here is one before we shut the lights out that night. Since then it has been guidecoated, the paper remove, rolled out of the paint booth and covered with cotton sheets until I can get the rest of the parts caught up to the tub.
0104090021.webp

Sorry for the long posts but it is hard not to be excited at this point. :)

:beer:
IMG00126.webp
0104090021.webp
 
Very very impressive buildup!!

I'm diggin the PS conversion....definately an awesome way to do it!

I too, had to fill in the tire carrier holes....can't mount a sizeable tire off the rear quarter!!

Must say I'm gonna steal your bumper designs :) Very nicely done!!

Can't wait to see it on the frame!!
 
Thanks!!

Must say I'm gonna steal your bumper designs

Copy that but your gonna have to thank Rockcod because thats where i stole them :D

As for the large tire on the tire carrier I agree!! I am sure it has and can be done but not by me.. ;)


Edit: One thing i wish i would have done with the bumpers is take a die grinder tool and get inside the tubing of the bumper and narrow up the material around the lights. The more i think about it i forsee the rubbers being all tweeked up because they werent designed for that thick of metal.........
 
All hail the Chief!

Looking really good and it must feel great to see all the shiny paint and smooth surfaces but I know that is a lot of work. Great build to follow.

Yes I am still here but I am working on a bunch of little problems so not really posting much--getting the alternator set up, water pump, fuel delivery, brake lines, emer brake etc sorted---cause when my carb and dizzy comes back from Jim C I want to be cranking it up!

but I am still keeping an eye on s***ty Pants:D
 
Thanks!

Thanks Bsmith123!! I saw where you had gotten betty fired up!! That had to have felt nice also. :clap: It does feel good to get closer...... I cant wait to actually start bolting! That is when it will really start feeling good. The whole body work thing has been a huge learning experience and without my painter friend it would have been too easy to cut corners!! One thing that has me excited is that he has a bead blasting cabinet and I threw all my hinges, and some of the smaller pieces in such as door latches etc....... the stuff that you never really get that clean and they look new again!! I think the blasting cabinet is really going to help bring things together. I swore after my 78 Ford restore I would never make another vehicle super straight but what the heck I can fix this one now if anything goes wrong!
 
Oh how I can feel your pain. I just completed the paint on mine in August. Like you I had a painter buddy that I had to reel in a couple of times. He also had to reel me in. Your thread brings back so many memory's. I still struggle with the amount of money you spend on supply's. Only to sweep them off the floor. :cheers: Will continue to watch the progress and remember the pain.
 
What do you think?

Well my ambulance doors werent as bad as i thought nor was the front grille. The paint was swelled up pretty bad making me think i was going to find a mess but..... I wouldnt want to have my entire doors blasted because they appear to be constructed of thinner metal then lets say the tub so with that said my question is do you guys think they are clean enough to POR and paint or do you feel as though I am taking the easy way out and should take them in and have the areas blasted better??

IMG00151.webp

IMG00149.webp

IMG00150.webp
IMG00151.webp
IMG00149.webp
IMG00150.webp
 
part

4 by,

you have any need for an extended length stainless brake line?

price is right-it's free

thought i'd ask before I flog it to the first taker

I am starting to sift through my mistakes and over-orders:)

oops also

I have a 2 pulley water pump pulley suitable for 2F water pump---brand new

I have a good used 1f pump will fit a 2f w/o the oil cooler and a california with oil cooler water pump for a 2F--mount holes are slightly different on the calif pump so you need a cali engine I suppose or a different year than my 79?

I'll give em up cheap or for a renewed MUD subscription--I'm due

if not interested let me know and I'll post em up somebody'll make use of them
 
Last edited:
Bsmith123 I would really like the rear brakeline but please PM me your address and I will send you money for shipping. (is paypal fine?) Do you have any need for a free spare coil and whatever else mounts to the coil for your 2f??
 
coil

no I got 2 of those brand new

Ill PM you after I update my subscription

you dont have to send money for the tiny amount of postage it will cost but if you just have to you could just send a self addressed mailing envelope and I'll return it with the line


really not fussed about the postage for that though

Pm tomorrow as I am off to bed :cheers:
 
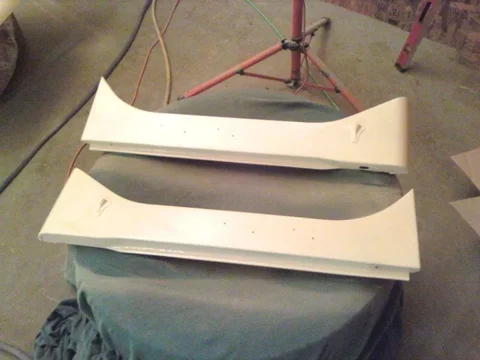
This part sucked worse then all of them to work on! Well it wasnt that bad but there are so many corners, edges, etc. and I dont know if this is one of the normal spots but this qualifies as my second rustiest spot (wasnt that bad though) Luckily i had taken my little cheepo blaster to the back which i will por and undercoat with the grey durabak along with the rest of the engine compartment. After I took this pic we degreased, sealed, and primed it. Now I plan to whip my front doors up to this level sunday and then I will be ready to start blocking. (the rear doors and top are going to be phase two!)

I just realized I stayed up until 1:am working on the dang thing because we had a couple other wrecked projects going also yet I still posted before i went to bed :rolleyes:

IMG00157.webp

Bsmith123 thanks for the rear brake line that was nice of you!!
IMG00157.webp
 
Shoot me!!!

12 hours today and I only got two doors stripped, mudded, and worked out. :crybaby: I didnt take breaks I didnt take lunch I didnt BS I straight worked with what felt like little results!! (minus two :beer:'s :D)

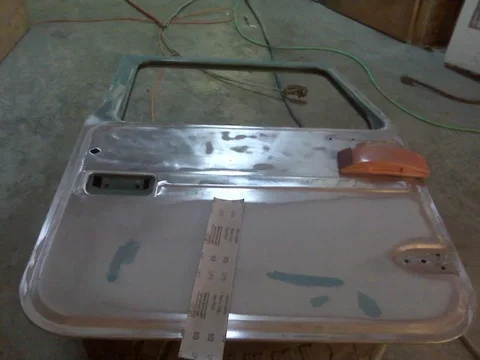
Well i got the front core support/grill, the bezel, and the front aprons blocked and ready for wet sanding then sealer and paint but that only took a few minutes between mud drying.

On the driver door it had black sealer on the bare metal where all the other parts including the passenger door had white and then anywhere they had repaired had a brown sealer but again this side only had a black sealer, primer, then paint but it would flake off in sheets!!! I am so glad i took it down to bare even if it did take all &&^ day!

Oh and i didnt want my doors to be a pile of mud yet due to factory stamping the dish/dent in the doors was very gradual yet fairly large so we worked the factory looking dish back into them but skim coated the lowers to straighten them up some.

IMG00160.webp

IMG00161.webp
IMG00161.webp
IMG00160.webp
 
Report

For those who have been helping me and are keeping track I thought i would post an update so you didnt think i am off picking flowers.

I have about 24 hours of actual non stop hours in on the body work since my last post but as most of you know it wouldn't do any good to post pics because the parts look the exact same as they did two weeks ago from a distance but up close they are starting to look really nice.

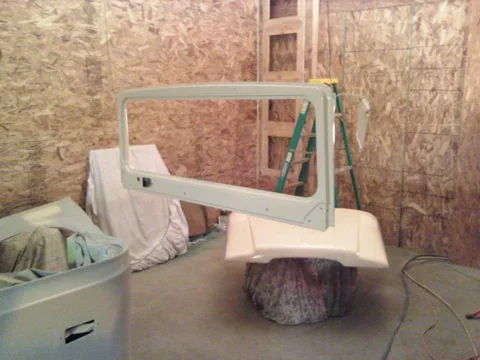
My front aprons are wet sanded and ready, my front core support is wet sanded and ready, my windshield frame is wet sanded and ready, my bezel is wet sanded and ready, and the doors are 1/2 through their first blocking but i had to grind a couple spots back down to bare and mud a couple dings... :rolleyes:

I need a break from the body work though so tomorrow I am planning to put the oil pan, timing cover, brackets, altenator, manifolds, etc. etc. etc. together and hopefully set my drivetrain back on the frame!

For the record I have rust coming through in several spots around the core supports, etc. on the frame which was completely sprayed with POR15 and topcoated. :mad: I am going to have to por them again but i am going to wait untill right before i put the tub back on so i dont have to topcoat it due to UV's :meh:
 
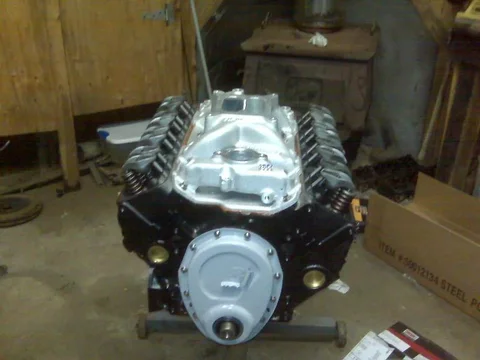
Well it never goes like you plan!! But I did get the 383 unwrapped and the edelbrock rpm air gap intake and front cover on. Apparently my ramhorns take different sized botls than i had previously (I am guessing) because there is only about a 1/2" of thread that would be in the block. Also i have some dumb questions but i will post them on a new thread in hopes to get answers plus I havent searched enough yet.

IMG00164.webp
IMG00164.webp
 
Here are a few more pics. Now all the hard part is over...... Well the hard part to me. After the first block I had to take a few spots back down to bare and fill a few lows but after that go around and sealing the bare spots/filler and primer the doors and hood all look like they will block out with mild blocking and then on to wet sanding! At that point all my parts for the first batch are going to be ready to shoot minus the tub which still needs wet sanding. :cheers:
IMG00174.webp

IMG00177.webp

IMG00180.webp
IMG00174.webp
IMG00177.webp
IMG00180.webp
 

Users who are viewing this thread

Back
Top Bottom