Nice! Will definitely try that! ThanksIt was a mess when I got it. I just wipe it down with Kerosene. Also, I use a product from NAPA named RuGlyde to clean in areas with rubber.
Navigation
Install the app
How to install the app on iOS
Follow along with the video below to see how to install our site as a web app on your home screen.
Note: This feature may not be available in some browsers.
More options
Style variation
You are using an out of date browser. It may not display this or other websites correctly.
You should upgrade or use an alternative browser.
You should upgrade or use an alternative browser.
What have you done to your 100 Series this week? (71 Viewers)
- Thread starter SHUSH
- Start date
This site may earn a commission from merchant affiliate
links, including eBay, Amazon, Skimlinks, and others.
More options
Who Replied?Beach time
Installed new rubber 295 75 r16, better floatation definitely helped on the sand. Waiting on my awning and roof rack.

Installed new rubber 295 75 r16, better floatation definitely helped on the sand. Waiting on my awning and roof rack.
dogdaysindurham
SILVER Star
Finished the Timbren bump stop install in the front. I replaced both sets in the front. Thanks to @just differentials! The front bump stops now come with a cup to limit the compression.
I had to run out to Harbor Freight to pick up the super jumbo wrench set as my pipe wrench was too big to fit and my channel locks weren’t quite long enough. Thankfully had a 20% off coupon and left over gift cards. The OEM ones are ~55 mm.

I used the 2 1/4” and 2 1/8” to get them all off. Kind of wished for a ratcheting version by the time I finished all 4.

I did have to take off my front sway bar to get to the rear pair of bumpstops. But didn’t need to remove the torsion bars. I installed my TJM uprated bar, which had all Whiteline bushings and even came with replacement bushing mounts.

The TJM/Whiteline bar is definitely beefier than OEM. I liked that the bushings have a notch to stay in space, I forgot to take a picture of my stock bushings but they were pretty much toast.

I had to run out to Harbor Freight to pick up the super jumbo wrench set as my pipe wrench was too big to fit and my channel locks weren’t quite long enough. Thankfully had a 20% off coupon and left over gift cards. The OEM ones are ~55 mm.
I used the 2 1/4” and 2 1/8” to get them all off. Kind of wished for a ratcheting version by the time I finished all 4.
I did have to take off my front sway bar to get to the rear pair of bumpstops. But didn’t need to remove the torsion bars. I installed my TJM uprated bar, which had all Whiteline bushings and even came with replacement bushing mounts.
The TJM/Whiteline bar is definitely beefier than OEM. I liked that the bushings have a notch to stay in space, I forgot to take a picture of my stock bushings but they were pretty much toast.
Bittersweet weekend under my LX. Gutted the AHC suspension for Tough Dog.
AHC is awesome for going slow on tech trail, and towing my squaredrop. The ability self level when loaded up, or tighten up the suspension on curvy roads is pretty sweet. Also putting it in high and parking next to jeeps in the parking lot is fun too. It's pretty damn reliable and never left me on bumpstops. It took some searching and reading @PADDO posts to understand and learn how to work on the system, and was a unique challenge. I'll miss it for now, but will BOL for a LX with bad AHC for cheap since I have tons of good parts.
I swapped out to TD because I find myself wanting to go faster through the rough sections. Seemed like AHC would fade and become pretty harsh after a mile or so of rough road, and blow through travel on bigger hits. I beefed up the tb's and rear springs, but it didnt help. I can already feel a difference with TD at speed over beat down ag roads. It's pretty damn sweet! Still have to break things in, but so far so good.
Also washed, clay bared, and applied some CarPro Reload. Busy weekend. Tired. Done for now.
dogdaysindurham
SILVER Star
Yesterday, I drilled out the broken sway bar bolt on the passenger side rear. It took about 45 minutes stepping up using cobalt drill bits. I wasn’t able to extract with my left handed drill bits or special bolt extractor. On the positive side, none of them broke inside  .
.

I ended up drilling out further and retapping the threads with a coarse M8 tap. Lang Tools offers an affordable made in USA tape and die set.

I used a ratcheting combination wrench with the M8 tap with some Tap Magic.

My truck feels a more button down with the uprated SuperPro rear bar and TJM/Whiteline front bar sway bars and poly bushings. It was very satisfying replacing all the rusted hardware with fresh OEM pieces. I sprayed everything with Amsoil Heavy Duty Metal Protector, applied Never Seez Marine antiseize, and use Magnalube GX (a ptfe / moly grease) to lube up the bushings.

For folks considering the Timbren bump stops in the rear, they now come modified so the mounts don’t need to be ground on the sides to clear the springs. I got mine from the fine folks at Just Differentials.

.I ended up drilling out further and retapping the threads with a coarse M8 tap. Lang Tools offers an affordable made in USA tape and die set.
I used a ratcheting combination wrench with the M8 tap with some Tap Magic.
My truck feels a more button down with the uprated SuperPro rear bar and TJM/Whiteline front bar sway bars and poly bushings. It was very satisfying replacing all the rusted hardware with fresh OEM pieces. I sprayed everything with Amsoil Heavy Duty Metal Protector, applied Never Seez Marine antiseize, and use Magnalube GX (a ptfe / moly grease) to lube up the bushings.
For folks considering the Timbren bump stops in the rear, they now come modified so the mounts don’t need to be ground on the sides to clear the springs. I got mine from the fine folks at Just Differentials.
Bittersweet weekend under my LX. Gutted the AHC suspension for Tough Dog.
AHC is awesome for going slow on tech trail, and towing my squaredrop. The ability self level when loaded up, or tighten up the suspension on curvy roads is pretty sweet. Also putting it in high and parking next to jeeps in the parking lot is fun too. It's pretty damn reliable and never left me on bumpstops. It took some searching and reading @PADDO posts to understand and learn how to work on the system, and was a unique challenge. I'll miss it for now, but will BOL for a LX with bad AHC for cheap since I have tons of good parts.
I swapped out to TD because I find myself wanting to go faster through the rough sections. Seemed like AHC would fade and become pretty harsh after a mile or so of rough road, and blow through travel on bigger hits. I beefed up the tb's and rear springs, but it didnt help. I can already feel a difference with TD at speed over beat down ag roads. It's pretty damn sweet! Still have to break things in, but so far so good.
Also washed, clay bared, and applied some CarPro Reload. Busy weekend. Tired. Done for now.View attachment 2355533
View attachment 2355511
View attachment 2355527
How do you like the tough dog setup? How does it feel.
Camping trip


Too early to give it a review, but initial test run was impressive. Hit some pretty rough roads at 50mph and was much smoother than my old AHC doing 25mph. Still has to get some miles through it to break it in. I'm sure it just get betterHow do you like the tough dog setup? How does it feel.
My projects this week:
 Boy, flash makes that surface rust look bad - luckily it's not really
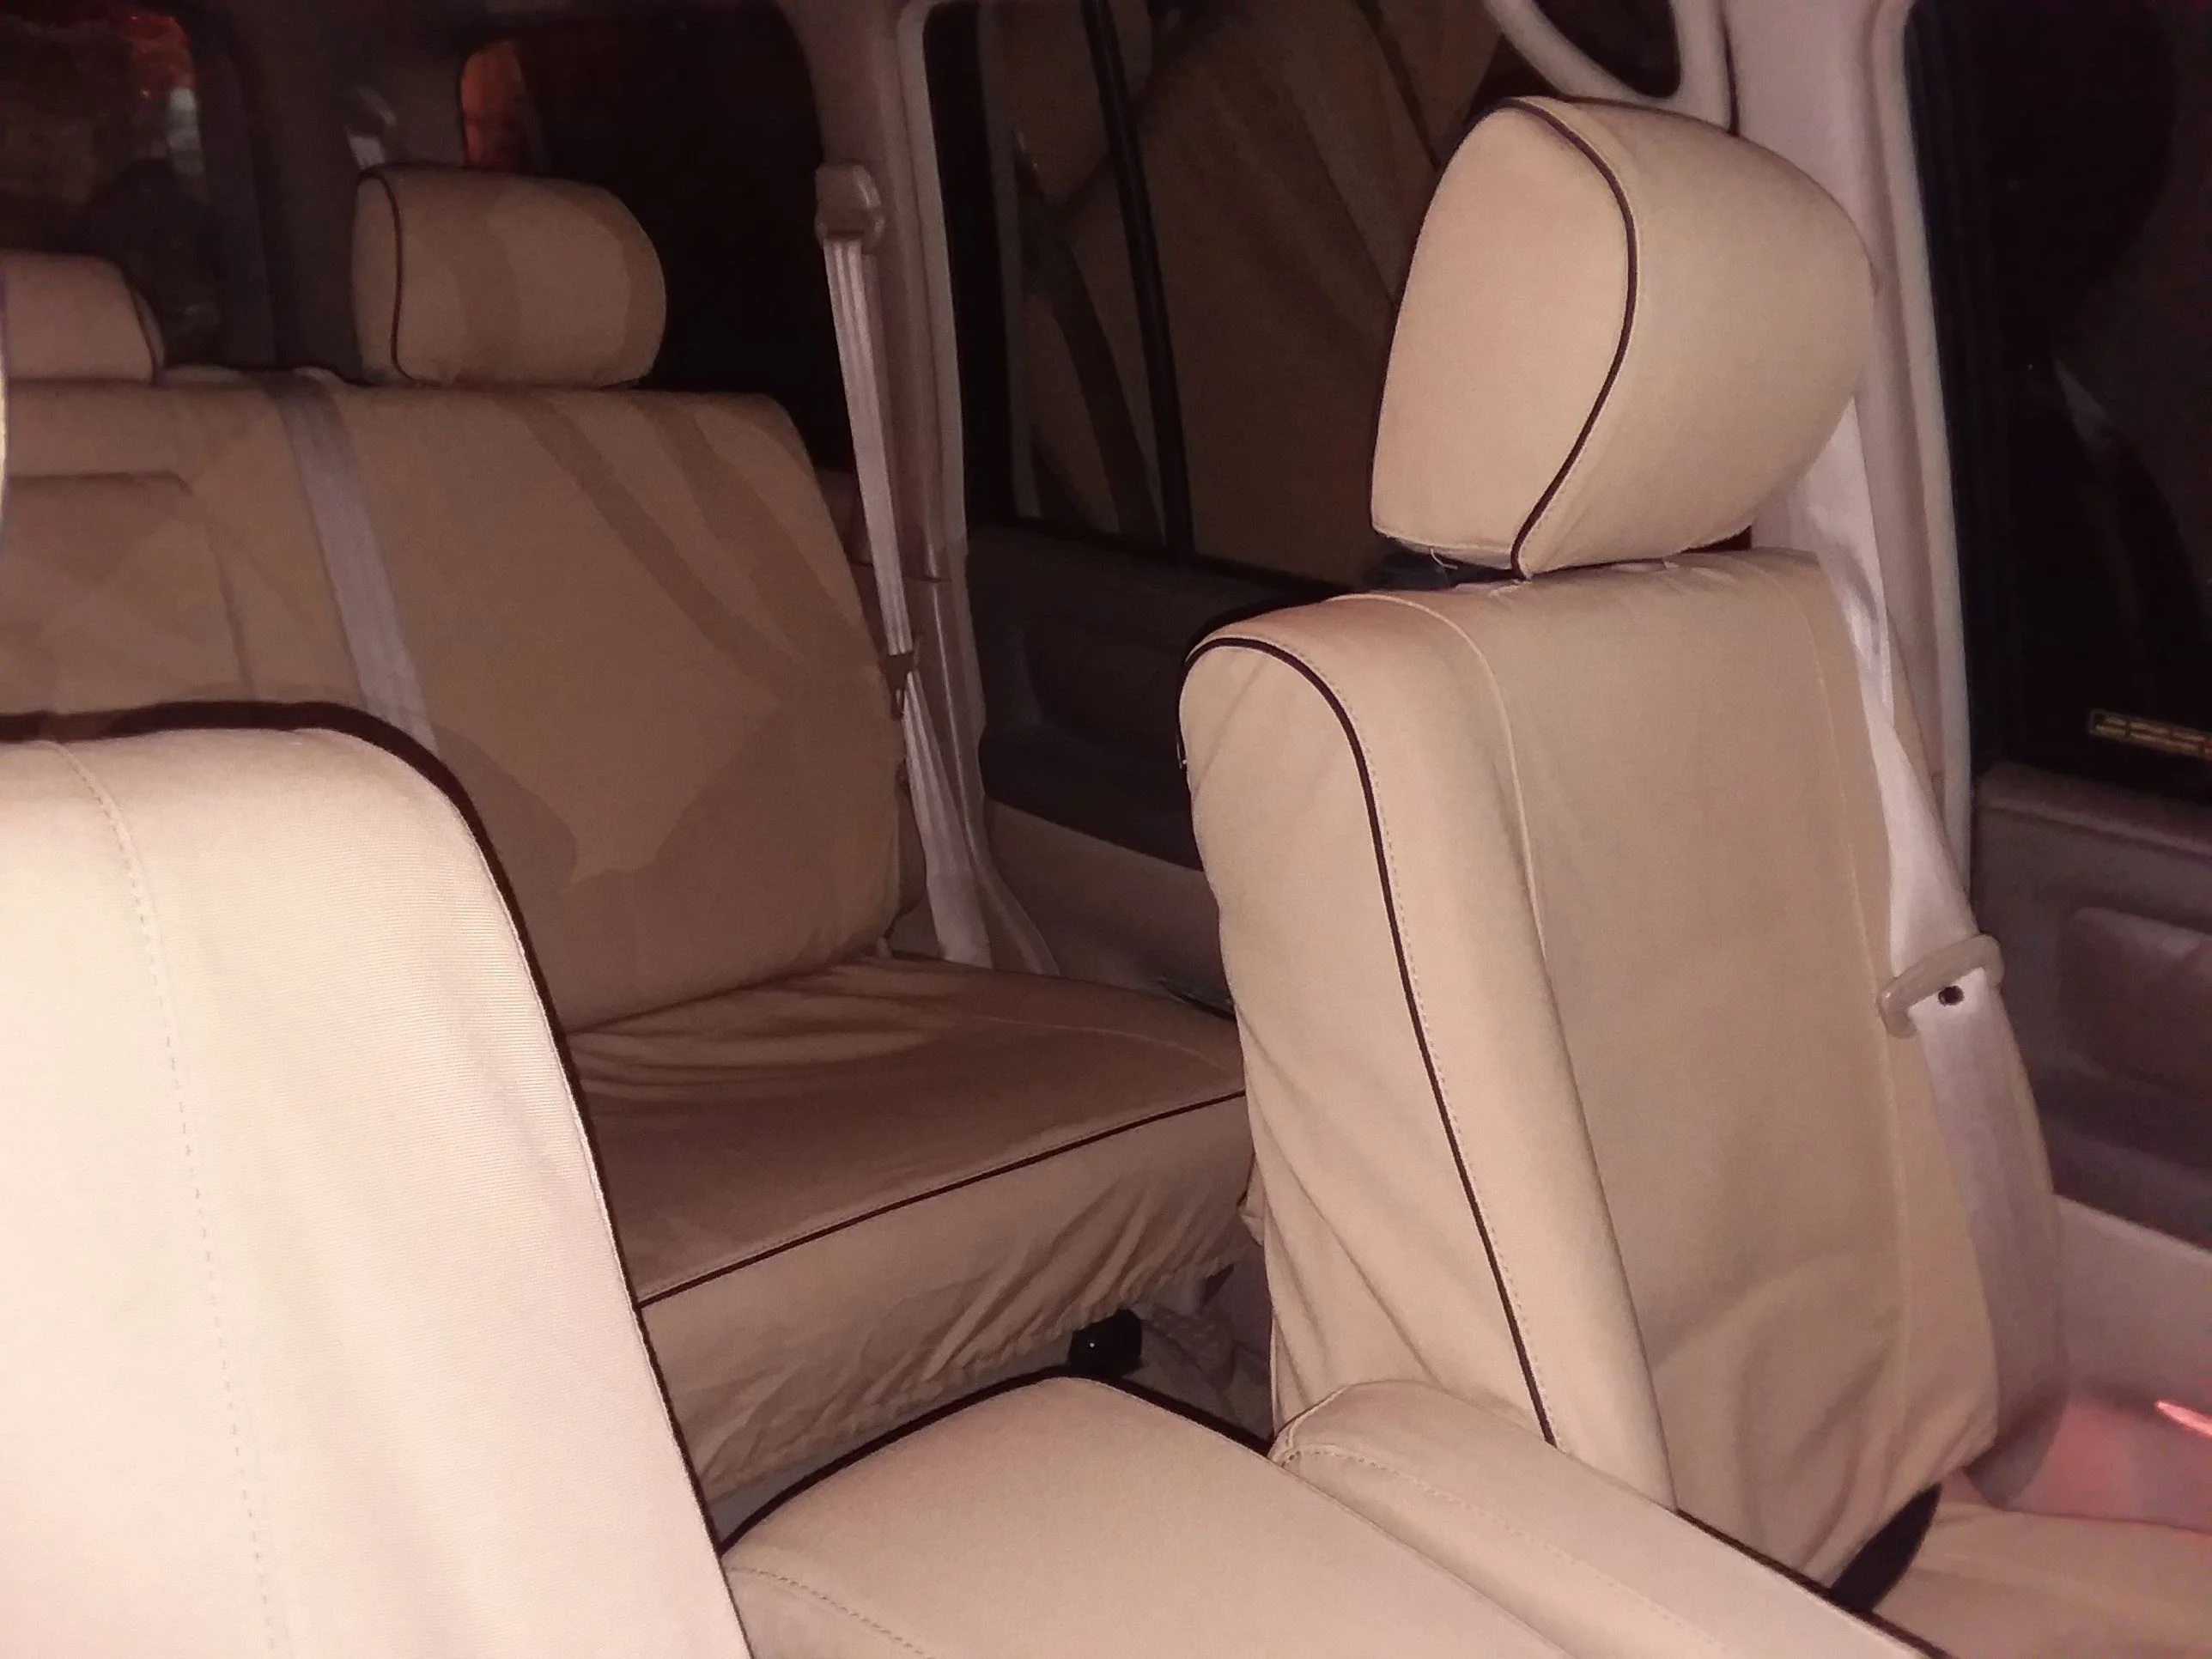
- Installed Escape Gear seat covers - love them. Made from scratch and arrived from South Africa faster than I could get sliders from the west coast.
- Dealt with the recent bad wheel lug - unlike previous lugs this one was reluctant to be pulled into place.
- Exchanged the transmission fluid, even flushed the cooler. With the wife manning the ignition key this was a half-banana job.
- While taking off the grill I saw there were two broken headlight brackets on each side so reconstructed and/or buttressed the three worst using some Kydex and 5 minute epoxy.
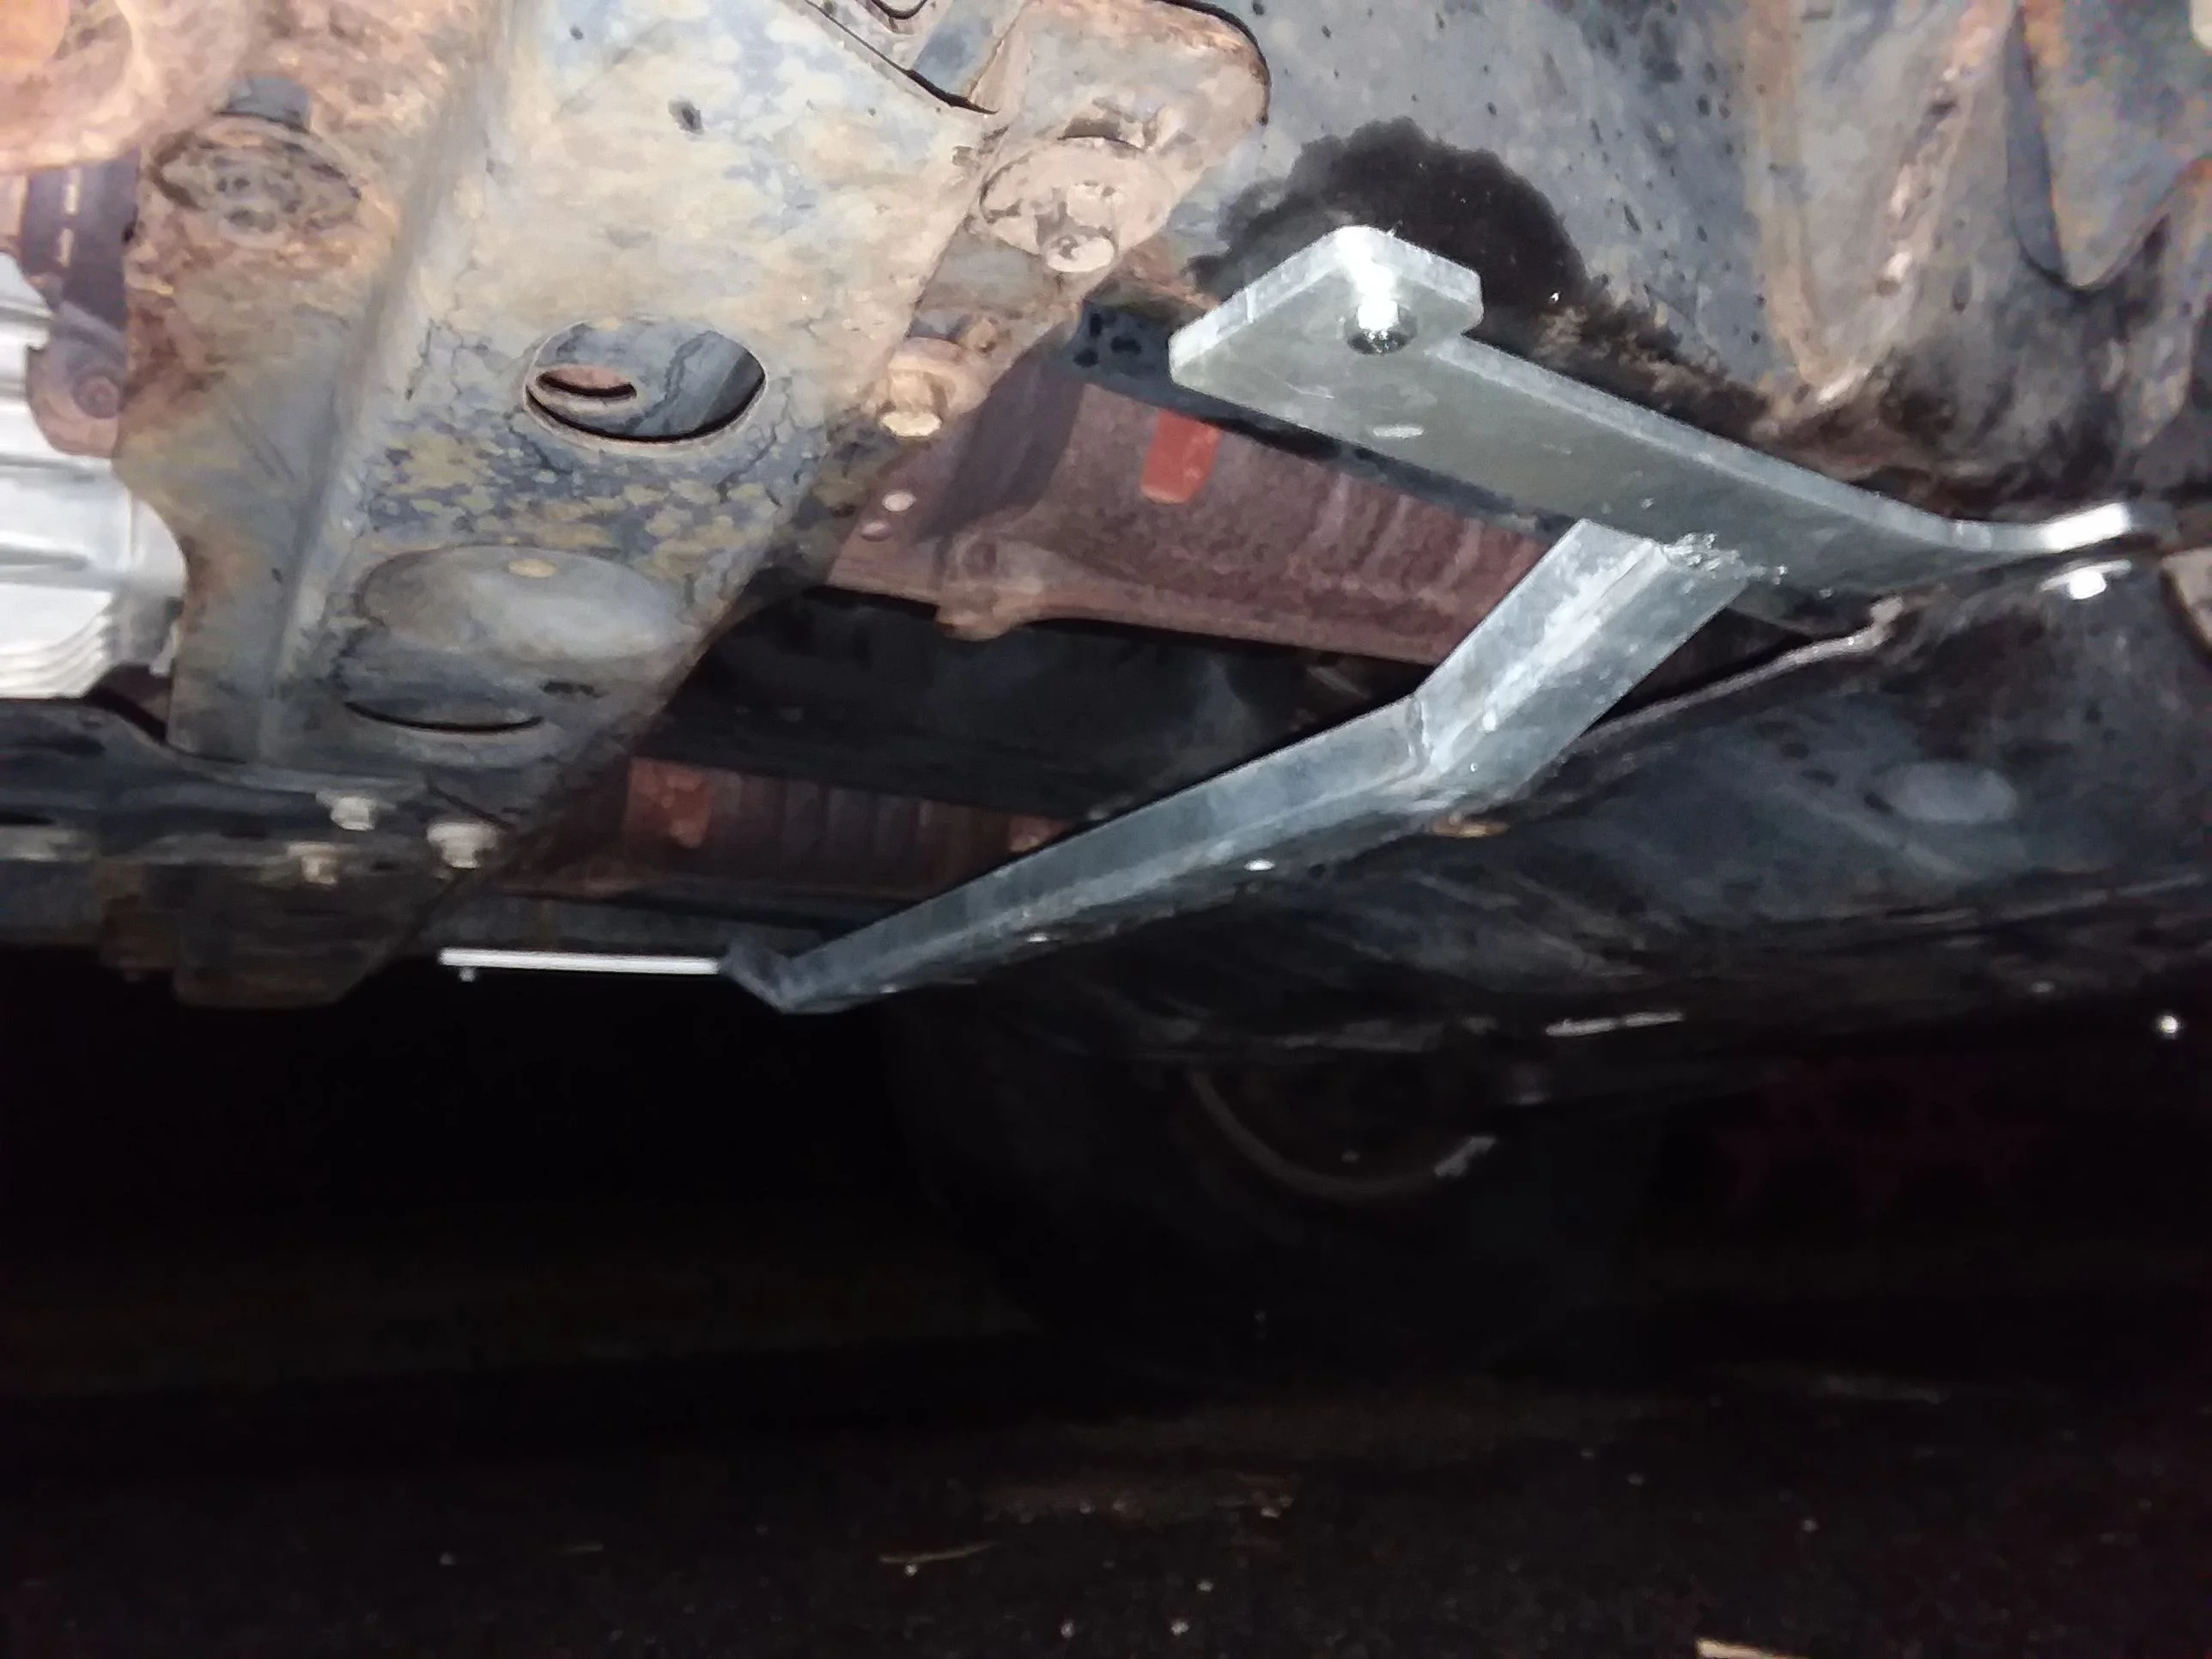
- Installed the bracket for my ASFIR middle skid - cut back my factory skid a bit more and embedded *fiberglass into various spots on both hands. Went on much more easily than expected ~ that is to say it pretty much fit. Will massage one or two of the holes so they more exactly align.
04 LX470 keys were cracked and on the verge of dying, went with the YotaMD key shell, nice fit although the screw above the actual key won’t go flush. Still a good upgrade.


Did some maintenance & prep work for upcoming for the long ride West and trail running around the Silverton high country.
Slee stainless brake lines front & rear- (I should have done this long ago)
BG EPR & MOA treatment
LOF and grease driveshafts & Ujoints
Replace secondary fuel filter
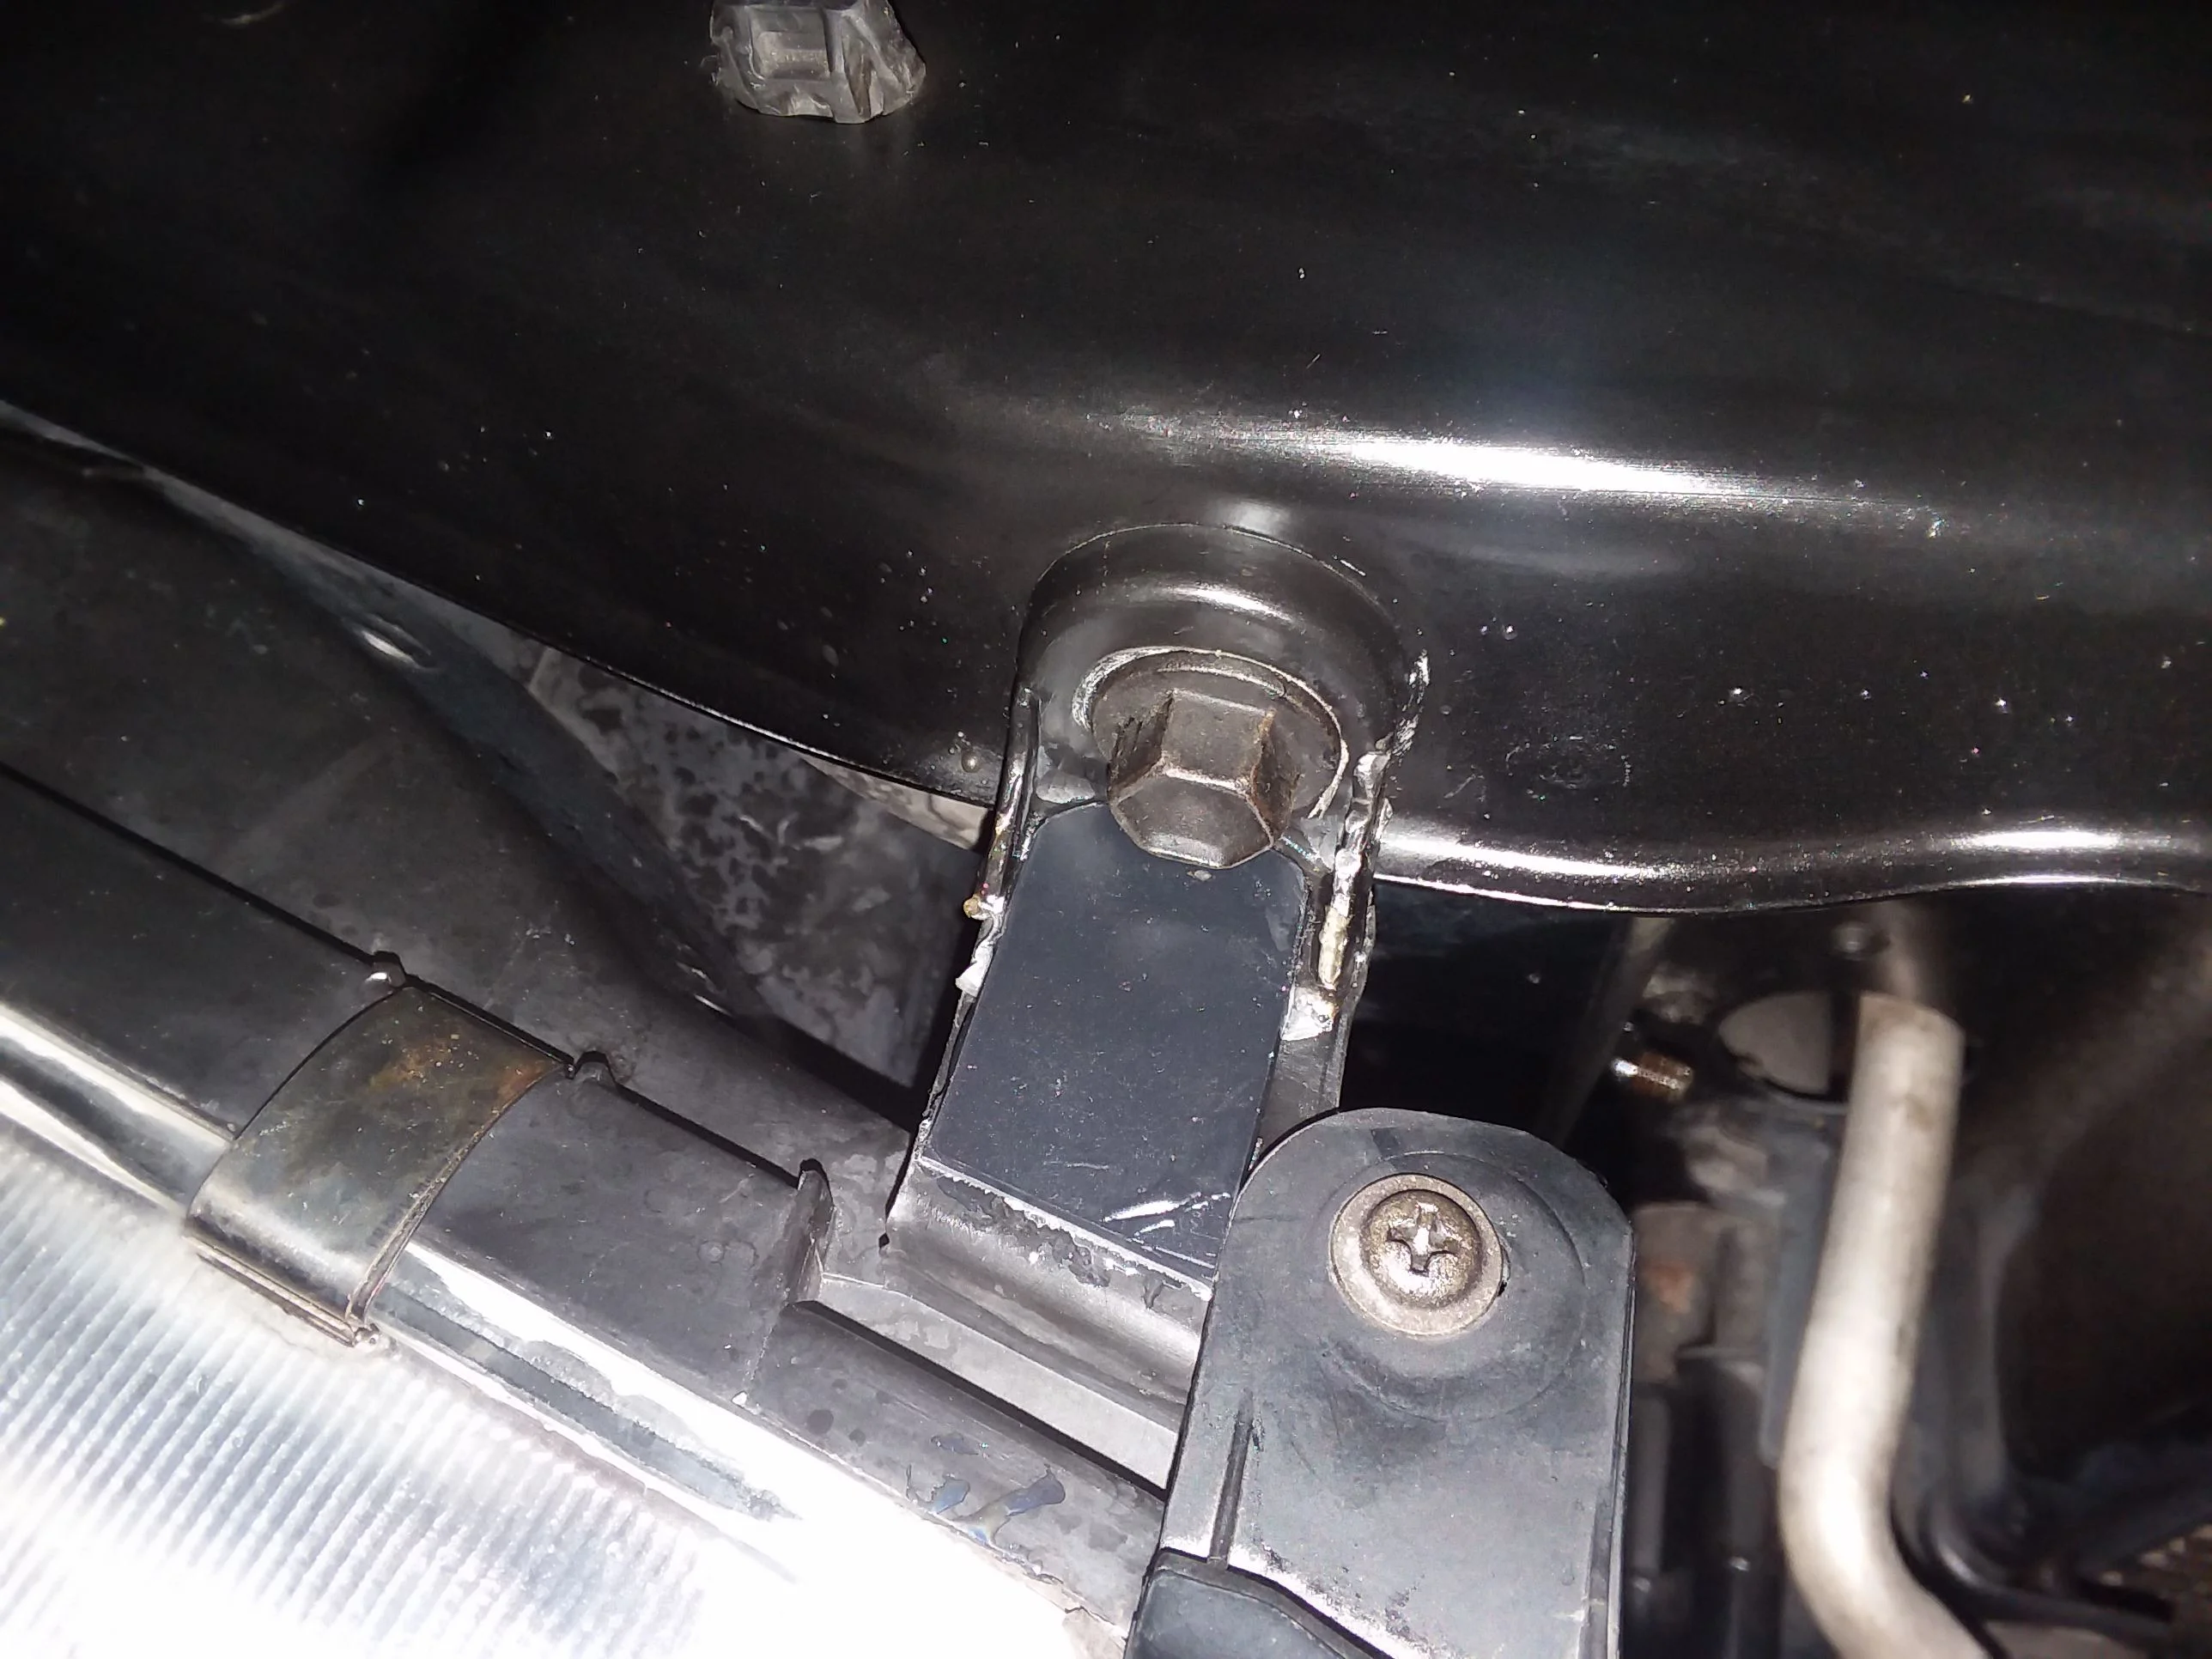
Replaced FPR
Replaced some EVAP vacuum hoses
Recheck wheel bearing preload
PSA- Its a good idea replace your cv axle end snap rings each time you remove them; when removing / replacing rotors, wheel bearing service, etc. I think this step gets ignored more times than not- and then we read about the result a couple of times a year here on the forum. With install and then removal, they start to stretch out and do not recover, (open up) and loosen fit to the axle stub. Basically there's less surface area holding the snap ring in place putting even more stress on smaller surface area of the axle and as the edges start to round off on the snap ring increasing the potential of these slipping/popping off the end of the axle. Even with careful removal the snap ring with the right tool, these start to expand and will not recover.
Left is new, right has been removed once before and reinstalled last fall when I repacked wheel bearings. I knew then I should have replaced but I let it go. Knowing that I would be hammering the truck in Colorado I decided to go back in and replace the snap rings. After inspection there was already a considerable stretch 3mm gap difference between old & new. This was at approx 20,000 miles of use. I don't know how much is too much gap before it fails to hold onto the end of the axle, but I didn't want to find out. You see the thin black line on the inside edge where it was resting against the end of the axle stub- not much surface area holding it on. Also checking the gap between the snap ring and the end of the flange is important step. Gap should be less than < 0.2mm. These are only about $2 ea; good idea to keep some handy. I think consensus is sizes 2.4~2.8 will cover most of us that have original spindle bearing & bushing.


Slee stainless brake lines front & rear- (I should have done this long ago)
BG EPR & MOA treatment
LOF and grease driveshafts & Ujoints
Replace secondary fuel filter
Replaced FPR
Replaced some EVAP vacuum hoses
Recheck wheel bearing preload
PSA- Its a good idea replace your cv axle end snap rings each time you remove them; when removing / replacing rotors, wheel bearing service, etc. I think this step gets ignored more times than not- and then we read about the result a couple of times a year here on the forum. With install and then removal, they start to stretch out and do not recover, (open up) and loosen fit to the axle stub. Basically there's less surface area holding the snap ring in place putting even more stress on smaller surface area of the axle and as the edges start to round off on the snap ring increasing the potential of these slipping/popping off the end of the axle. Even with careful removal the snap ring with the right tool, these start to expand and will not recover.
Left is new, right has been removed once before and reinstalled last fall when I repacked wheel bearings. I knew then I should have replaced but I let it go. Knowing that I would be hammering the truck in Colorado I decided to go back in and replace the snap rings. After inspection there was already a considerable stretch 3mm gap difference between old & new. This was at approx 20,000 miles of use. I don't know how much is too much gap before it fails to hold onto the end of the axle, but I didn't want to find out. You see the thin black line on the inside edge where it was resting against the end of the axle stub- not much surface area holding it on. Also checking the gap between the snap ring and the end of the flange is important step. Gap should be less than < 0.2mm. These are only about $2 ea; good idea to keep some handy. I think consensus is sizes 2.4~2.8 will cover most of us that have original spindle bearing & bushing.
Last edited:
Eyedaho
SILVER Star
What prompted you to change out your fuel pressure regulator? Is there a rubber diaphragm in it that fails or something? I was wondering about that when I had mine off recently, but for ~$80 I decided not to replace it without knowing a reason to.Did some maintenance & prep work for upcoming for the long ride West and trail running around the Silverton high country.
Slee stainless brake lines front & rear- (I should have done this long ago)
BG EPR & MOA treatment
LOF and grease driveshafts & Ujoints
Replace secondary fuel filter
Replaced FPR
Replaced some EVAP vacuum hoses
Recheck wheel bearing preload
PSA- Its a good idea replace your cv axle end snap rings each time you remove them; when removing / replacing rotors, wheel bearing service, etc. I think this step gets ignored more times than not- and then we read about the result a couple of times a year here on the forum. With install and then removal, they start to stretch out and do not recover, (open up) and loosen fit to the axle stub. Basically there's less surface area holding the snap ring in place putting even more stress on smaller surface area of the axle and as the edges start to round off on the snap ring increasing the potential of these slipping/popping off the end of the axle. Even with careful removal the snap ring with the right tool, these start to expand and will not recover.
Left is new, right has been removed once before and reinstalled last fall when I repacked wheel bearings. I knew then I should have replaced but I let it go. Knowing that I would be hammering the truck in Colorado I decided to go back in and replace the snap rings. After inspection there was already a considerable stretch 3mm gap difference between old & new. This was at approx 20,000 miles of use. I don't know how much is too much gap before it fails to hold onto the end of the axle, but I didn't want to find out. You see the thin black line on the inside edge where it was resting against the end of the axle stub- not much surface area holding it on. Also checking the gap between the snap ring and the end of the flange is important step. Gap should be less than < 0.2mm. These are only about $2 ea; good idea to keep some handy.
View attachment 2355782
What prompted you to change out your fuel pressure regulator? Is there a rubber diaphragm in it that fails or something? I was wondering about that when I had mine off recently, but for ~$80 I decided not to replace it without knowing a reason to.
Apparently, something in it can rust over time, and MPG can vary in the summer months as a result. It's only $40 on Partsouq, so probably worth it if you're already in there, or are trying to potentially eek out some more MPGs.
Long winded conversations with other LC guru's conclude that these start to show signs of aging by 150k. Yes its an expensive part for what it is (less expensive buying at PS $48). Being that it is vacuum operated, the internal spring and valve wear out- and said to restrict the flow rate of return fuel, and over supplying injectors which hurts fuel econ., makes the fuel pump work harder (heating fuel in the process and wearing the pump out faster) IDK- at 202k I thought I'd change it and see what if anything happens to fuel econ, return fuel temps etc. I changed fuel pump a year ago, and secondary fuel filter this time around so I wanted to see if that made any improvement to fuel tank heating & pressurization issues at altitude.What prompted you to change out your fuel pressure regulator? Is there a rubber diaphragm in it that fails or something? I was wondering about that when I had mine off recently, but for ~$80 I decided not to replace it without knowing a reason to.
Fixed that front end clunk. Stock parts at 208k


We finally got to it this morning... My boy putting the final twists on the Pioneer Platform installation.
View attachment 2353605
Fit and finish are really good but all the installation credit goes to PC, measurements for the legs and centering on the rig were all him. We had to move two crossmembers forward as they were set for the Excursion installation, and the install went easier than expected.
Thanks again to the MUD crewmembers I've gone back and forth with, and those that have captured their installs in the past to help us make fewer mistakes in the DIY mode.
Small note; Instead of blankets on the roof to protect the finish from accidental drops/skips/skids, we used several of those styrofoam noodles/floatees the kids use in the lake. The two of us military pressed the PP and walked the platform over/onto the noodles, lowered it and stepped up on our portable benches and slid the entire package into place. The noodles worked perfectly, holding the PP level at ~2" above their final resting positions.
We removed the noodles, one side at a time, made some final adjustments to the legs upon observing a good test fit, added final torque applications to the Allen head bolts, and the rack dropped right into their respective mounting pads. I was a little surprised to see 10mm bolts for the six fasteners of the PP to the mounting pads as everything else was Allen heads...???
View attachment 2353623
I think having a ratcheting box wrench set is in my future too as having a 10mm in hand would have saved us a ton of time on the installation.The low legs would not allow a socket wrench in the tight confines so the open end wrench was the only way forward.
View attachment 2353679
Even the Upper Half was impressed with the final outcome. She was so afraid it was going to look "too tactical..."
I'm in hopes that, upon sending the RR folks some pics of the install, they'll send us some new labels for our PP as their OEM stickers are lifting...
Cheers mates,
G


Wanted to add some Aircraft Seat Track (AST) pieces to the Pioneer Platform this morning. We used a lot of this stuff in tactical response mobility platforms in my previous life. We were expected to follow USAF load preparation and tie down TTPs in order to fly our stuff anywhere. The USAF air transportability requirements for grey tail flights were tightly controlled. We had some pretty cool kit to move and once our credibility was tested, we were ready to roll on.

I purchased four pieces of AST finished in Black Powder Coat at 4' lengths. I never got them onto the Pioneer Platform after originally installing it on my Excursion.
 I guess I just ran out of time and my ladder was too short, at the time, to make the effort.
This stuff is really versatile and if you haven't used it, you really should give it a look... There are all sorts of hardware pieces you can snap in with significant working strengths for tie-down straps. These below are spring loaded and can be moved anywhere on the track for any sized load you want to secure.
I was really surprised this morning to find that FASTENAL didn't have any hardware in the form of machined screws/bolts/nyloc nuts etc. I wanted to use some to reinforce these on the platform. I guess I should have gone to the True Value Hardware in the first place... I don't know about you guys, but I can spend an afternoon wondering through a TVH...

So we've got a West Virginia Cabin trip planned for the 4th so I thought I better get at least two pieces installed for T&E.
They blend in beautifully and I got to reuse/repurpose the original T-slot hardware from my Excursion mounting legs to do it.
I went every other hole in the track as I only had so many T-slots but the new hardware from TVH can fill the voids after some drilling is accomplished. The 4' sections fit beautifully between the roof rail mounting points. I have two more pieces in the event we need to have something across the front or aft.
Please feel free to reach out if you have further questions on AST and the spring-loaded tie-down rings...
Cheers mates,
G
Last edited:
Bittersweet weekend under my LX. Gutted the AHC suspension for Tough Dog.
AHC is awesome for going slow on tech trail, and towing my squaredrop. The ability self level when loaded up, or tighten up the suspension on curvy roads is pretty sweet. Also putting it in high and parking next to jeeps in the parking lot is fun too. It's pretty damn reliable and never left me on bumpstops. It took some searching and reading @PADDO posts to understand and learn how to work on the system, and was a unique challenge. I'll miss it for now, but will BOL for a LX with bad AHC for cheap since I have tons of good parts.
I swapped out to TD because I find myself wanting to go faster through the rough sections. Seemed like AHC would fade and become pretty harsh after a mile or so of rough road, and blow through travel on bigger hits. I beefed up the tb's and rear springs, but it didnt help. I can already feel a difference with TD at speed over beat down ag roads. It's pretty damn sweet! Still have to break things in, but so far so good.
Also washed, clay bared, and applied some CarPro Reload. Busy weekend. Tired. Done for now.View attachment 2355533
View attachment 2355511
View attachment 2355527
Quick bit of advice. I've owned my ToughDog setup for over 2 years (53mm front, 45mm adjustable rear). They RUST like crazy on the bottom tube. Best thing to do right now is wrap the lower tube with LaminX clear film to protect them. The paint is crazy thin, wears down quick and gravel starts to "pit" the tubes. The rears get beat to hell. Trust me, do that and you'll be thanking me. My rear shocks looked like they were sandblasted and were rusting like mad within 6 months. It was absurdly bad. I had to remove the rear shocks (NOT a fun job as everyone knows), sand them a little to remove the rust, respray them with Rustoleum and then wrap the lower tube with LaminX film.
Quick bit of advice. I've owned my ToughDog setup for over 2 years (53mm front, 45mm adjustable rear). They RUST like crazy on the bottom tube. Best thing to do right now is wrap the lower tube with LaminX clear film to protect them. The paint is crazy thin, wears down quick and gravel starts to "pit" the tubes. The rears get beat to hell. Trust me, do that and you'll be thanking me. My rear shocks looked like they were sandblasted and were rusting like mad within 6 months. It was absurdly bad. I had to remove the rear shocks (NOT a fun job as everyone knows), sand them a little to remove the rust, respray them with Rustoleum and then wrap the lower tube with LaminX film.
ADVICE TAKEN THANKS FOR THAT
Thanks! Good point! I remember seeing a post you or someone else mentioning the lowers get beat to hell. I had some clear plastidip and built it up pretty thick last night. Should keep them safe till I order some LaminX.Quick bit of advice. I've owned my ToughDog setup for over 2 years (53mm front, 45mm adjustable rear). They RUST like crazy on the bottom tube. Best thing to do right now is wrap the lower tube with LaminX clear film to protect them. The paint is crazy thin, wears down quick and gravel starts to "pit" the tubes. The rears get beat to hell. Trust me, do that and you'll be thanking me. My rear shocks looked like they were sandblasted and were rusting like mad within 6 months. It was absurdly bad. I had to remove the rear shocks (NOT a fun job as everyone knows), sand them a little to remove the rust, respray them with Rustoleum and then wrap the lower tube with LaminX film.