The 1974 Surf Wagon...

This site may earn a commission from merchant affiliate
links, including eBay, Amazon, Skimlinks, and others.

Little update...

~Removed Fuel Tank (rust free if anyone wants it) Draining fuel sucks BTW.
~Removed 1FZ exhaust

I got about 5-6" inches removed from the wheel wells that will allow me to get the body almost on the frame where it should be. In it's current position it has about a 1" body lift. Which means I have already came to a cross roads. I can do 3 things with this.

A) Trim the floor to make room for the suspension buckets on the frame.
B) Move the suspension buckets on the frame down somewhere around 2"
C) Just live with a 1" body lift.

I will either choose B or C. I really don't want to cut into the floor when its pretty good shape. I know I am doing a lot of modifications but I would like it to look as original as possible inside and out. Cutting and moving the suspension buckets down about two inches will be a decent amount of work and will also lift the rear about two inches. Which might be fine as I was planing on a small lift and once there is a drivetrain in the truck I am sure it will settle a little more than it is now.

Or I could go for C and just have a 1" body lift. Which is kinda funny because I bought it with a 1" body lift and didn't notice it until I was removing the body from the frame. I have a 4 day weekend coming up and since the town/beach gets crazy busy on the holidays I am sure I will spend most of the time working on the truck. Hopefully I will get to shortening the frame, removing body mounts and possibly lowering suspension buckets if I go that route.

If anyone ever measured the wheel well openings are 35" which will be perfect for the 255/85 R 16s that I plan on running under the rig.

I do have a request from my fellow cruiser heads... About how far is the body from the frame in the rear under the tailgate and also about how far down does the frame hang from the rockers?

Thanks in advance... :beer:


Fender Trim 2.webp
Fender Trim 3.webp
Fender Trim 4.webp
Fender Trim 5.webp
 
Last edited:
Man this is a cool build!
It seems like so many Cruisers/Tacos/4Runners sag in the ass end, so I would not be afraid of getting a little lift by moving the rear spring buckets down 2 inches...
You need pics of how the frame and the rear of the body line up?
 
If you have some close up shots of how the body lines up already taken post em' up, if not no worries. I can only work so much magic with what I have anyway ;)

I think I have decided to move the suspension buckets down the 2" to make the body sit on the frame as close as possible. Printed out the FJ55 frame dimensions last night so I can start making the mounts to work on the 80 series frame.
 
80 series body mounts removed.webp
Fj55 on the frame.webp
Frame Buckets Lowered.webp
Hovering Fj55 Body.webp


Time for an update...

I got about 22 hours of work done on the truck, long hot terrible work. I removed all of the body mounts and lowered the suspension buckets 1.5". Cutting out the suspension buckets were hands down the worse thing I have ever had to remove. The buckets edges were rolled in on the sides and welded from below which made it very difficult to remove. It's one thing to cut stuff out but its another to cut it out while trying to save the section your removing. They are now lowered 1.5" and tacked back in. I had to remove some of the suspension links and sway bars to get the springs back in.

I went thru about 30 4.5" 1/16th grinding discs, 4 1/4 discs and a variety of flapper wheels. The frame is now smooth and ready for new body mounts :bounce:. Not all that interesting but it's a big step forward. Next weekend hopefully I'll get to shortening the frame, and maybe some body mounts for the 55. With this amount of work getting done on the frame I looking into getting it galvanized. It looks like there is a place in Jaxs that has a large enough tank for the frame. But I am getting a little ahead of myself as I won't do that till all the body work is done.
It was sure a long weekend, wearing a respirator, grinding gear/ safety gear in 90 degree all day. It was hard staying hydrated... Worth it though I hope.
~ Al:beer:
 
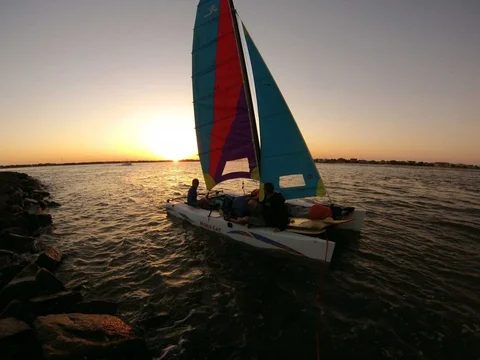
Here are some fun shots from the week... The sunset storm the other night turned the sky the super apocalyptic bright orange, raccoons hanging in the yard, and a little sailing trip out to a surf spot. I'll keep all the non cruiser related crap at thumbnail size.

Racoon Buddies .webp Sailing.webp Yard at Sunset.webp
 
Lowtideride,

Very good job! It's always nice to get a funky job past you. The body sets perfect on the frame.
 
To keep the weekly updates rolling....
Lights & Emblems.webp

I came home to some goodies. I am not sure I am going to use the earlier 40 series turn signals but I thought I would grab them for now. Ill prob pick up the rectangular ones as well and decide later. I am really nowhere near painting but it's good to gather parts when you can. I put off buying parts before and had them go out of stock.

Aside from that, tomorrow will be "shortening the frame day" I'll report back tomorrow night. I should have some more time to work on the cruiser for awhile, the airplanes I build are a head of schedule so I am back to 3 day weekends :)
 
Land Cruiser Fridays have been spilling into Land Cruiser Saturdays... I originally planned on working on the rig every Friday till it was done. But I just keep jamming out :)

I got some more reproduction parts from SOR. The taillights are so so as far as quality goes, way over priced by my standards $150 for a L&R lens. If they were NOS I would not have cared but these are "meh". The repo stickers are pretty nice though!

I got the frame measured and cut, I removed 5.5" from the frame. I added .5" to the wheel base of the Fj55 to push the front axle a little further away from the front fender to make room for the 255/85 R16. This is the 3rd Land Cruiser I have built and over the years you tend to pick up tricks... I like using thick painters tape for cutting straight lines after you measure. The tape is easy to see while you cut which makes clean cuts at the end. I built the internal frame sleeve for the shortened frame out of .25" steel, it will be butt and rosette welded top/bottom and sides.
Box 2.webp
Frame Box.webp
Frame Cut.webp
Repo Tail Light Lens.webp
Sleeved Metal Box.webp
 
~The plan is to shorten the frame to the correct Fj55 wheel base. IIRCC 7" has to be removed from the center section of the frame

Why the center?

Would it not work taking out of the straight section where the lower link mounts?

I have to pull the gas tank because of the lack of room from the frame/suspension parts.

Was the 80 tank or location an issue due to frame shortening?

I can do 3 things with this.

A) Trim the floor to make room for the suspension buckets on the frame.

Assume the cargo floorpan was already out, do you think it'd be feasible to raise the entire floor 2", floor supports and all?

Not sure how it'd look terminating at the rear sill and betting thered be tweaking at the wheel wells, but anything is possible with metal, right?

Any plans on the rear frame rails, where they arch?
 
D-man! (Delancy)...You could have removed meat from a few spots on the frame. The center seemed the easiest to me, along with keeping it square to remove the material I needed to. Moving the floor up 2" would be a massive amount of work and you would lose a lot of room. Plus I wanted to touch the body as little as possible. The suspension buckets and rear 5 link takes up too much space for either stock tank. So a custom one will have to be made after the drivetrain is figured out.

This weekend update: It was more fun than the past ones! I spent most of "Land Cruiser Friday" cleaning up the shop from the last 2 weekends of work which wasn't all that bad with old bond movies playing in the background. After cleaning up I spent a few hours with multiple measuring devices and plumb bobs figuring out where the heck the body mounts are going to land.

After centering everything up I happened to have the exact tire size and rim size sitting around. It is not the rim style I plan on running, but it gave me an idea of how it's going to tuck the tires back under the wheel wells. Which is awesome because they stick out just shy of an inch, enough to protect the body and not look goofy wide as they do now with the wagon wheels.

I bolted the cowl, fenders, hood back on to see how everything ended up. I trimmed up the cowl where the power steering box & shock towers interfered and rolled it out into the drive to take a few shots.

Body Test 2.webp
Body Test.webp
Centered Front Wheel.webp
Frame Dim.webp
 
Test fit of the KM2 and body mounts getting ready to go on...
FZJ Body Mounts.webp
KM2 Test 2.webp
KM2 Test Fit.webp
 
That IS looking good. What's your idea on fuel tanks. My parts wagon has two tanks, thinking going that way, for extended driving or not needed?
 
Thanks guys... :beer:

Bob I still need to put another order in! (edit Money Sent!)

Ron I plan on running it in the rear but have not measured anything for it yet. If I measure everything out and only end up with a 12 gallon tank I will build a 20 to 30 gal tank where the 80 series and Tacoma's have them. I really have to figure out what modern drivetrain I am running first to see what emissions, fuel pump, to build in along with the 55 series sender. But I am focusing my lasers on body work next!
 
Last edited:
The suspension buckets and rear 5 link takes up too much space for either stock tank. So a custom one will have to be made after the drivetrain is figured out.

Is the interference between the 80 tank and rear links a result of where you chopped? Or does the Pig body sit that close to the frame rail?

Going to apologize in advance for the current and future question, because I'm sure there'll be more....
 

Users who are viewing this thread

Back
Top Bottom