Steering gear box rebuild (1 Viewer)

This site may earn a commission from merchant affiliate
links, including eBay, Amazon, Skimlinks, and others.

Geezzzz....
Not another seal...
I did not disassemble the worm drive valve body. Before seeing this thread. I was looking at Teflon seas from Hydraulic supply sites. There are many sizes and shapes. My issue was I did not know the proper size to choose.
 
REASSEMBLY

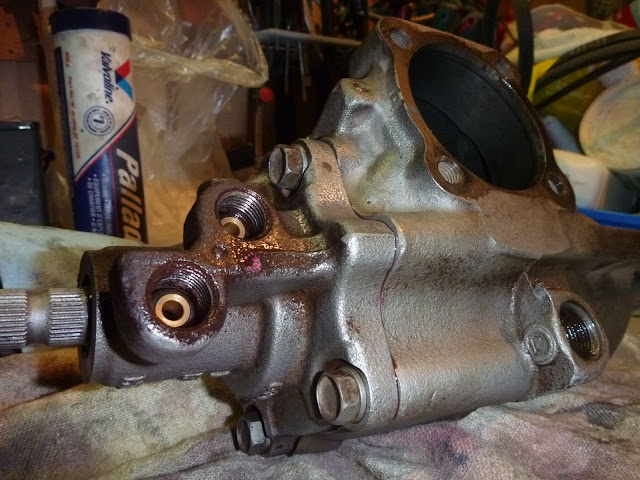
Step 7: Reassembling the worm gear valve body assembly

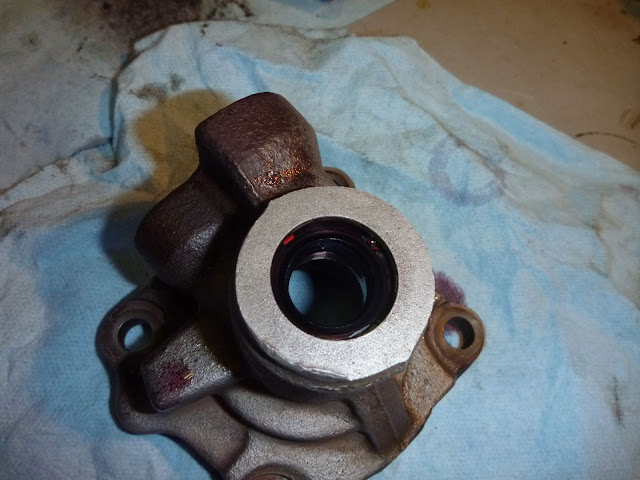
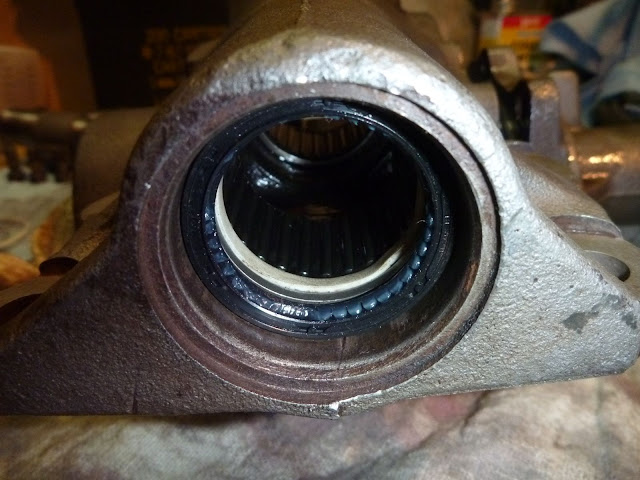
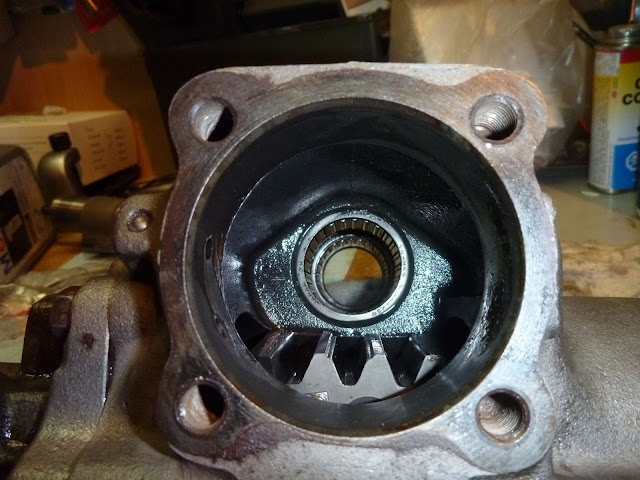
Press the input shaft oil seal and bearing back in. Make sure they seat properly at the bottom of the valve body housing. A large socket (~24mm), wooden dowel, or brass drift are all equally useful for this.
P1010316.JPG


P1010317.JPG


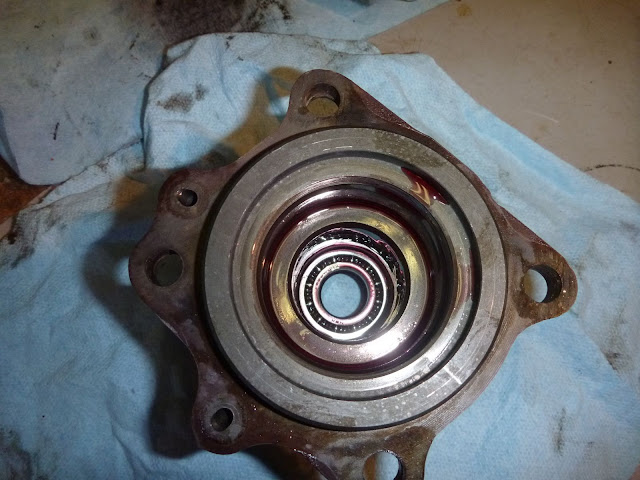
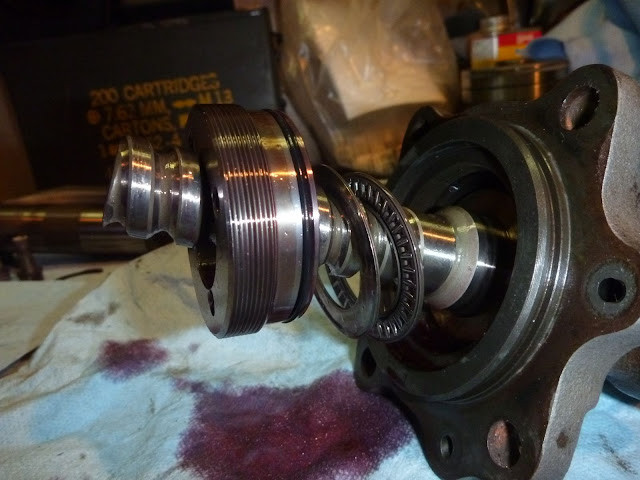
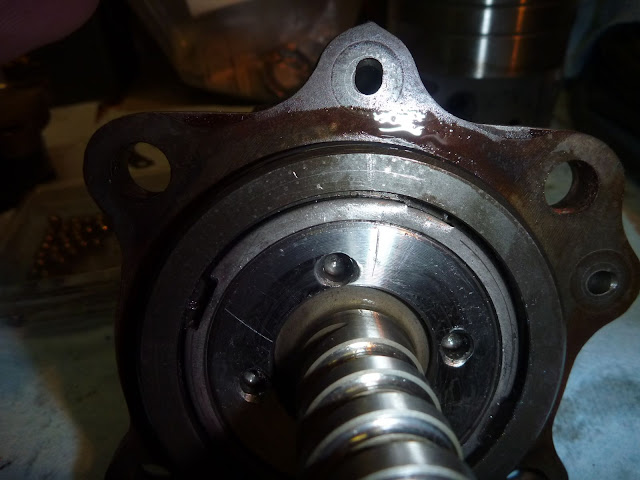
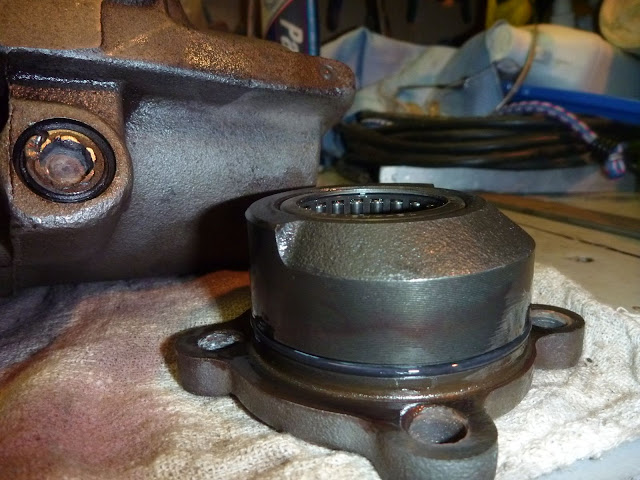
Put the input shaft back in the valve body housing. Use plenty of ATF to ensure everything slides in properly, and be careful of the Teflon ring if you replaced it. Then put the needle bearing and preload nut back in place.
P1010321.JPG


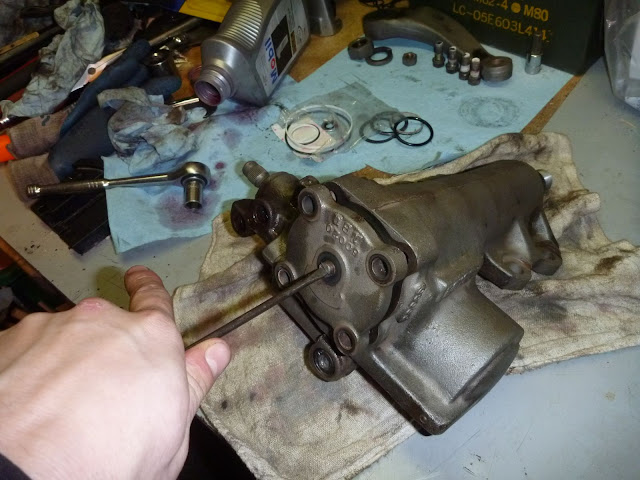
Tighten the preload nut until the match marks line up. I tried increasing the preload but the really isn’t much room to play here and I ended up going back to “stock”
P1010324.JPG


Install the lock nut and align it with the other match marks.
P1010328.JPG


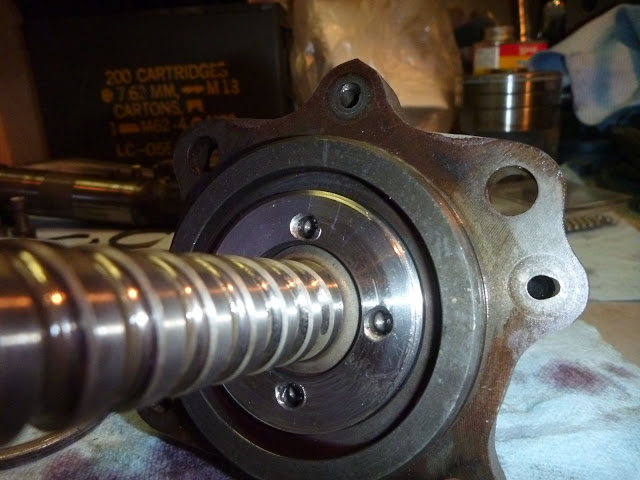
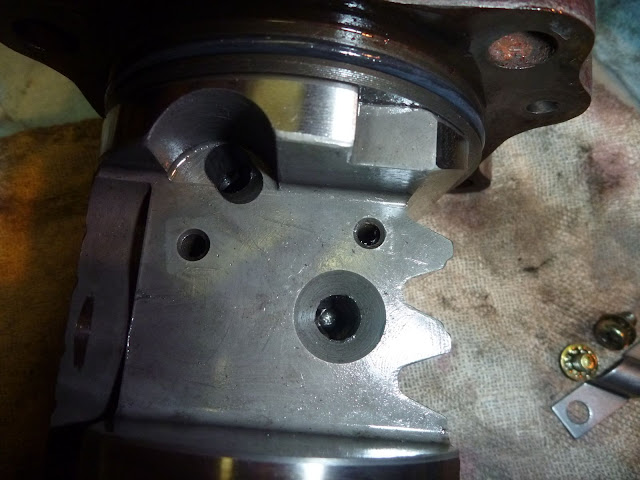
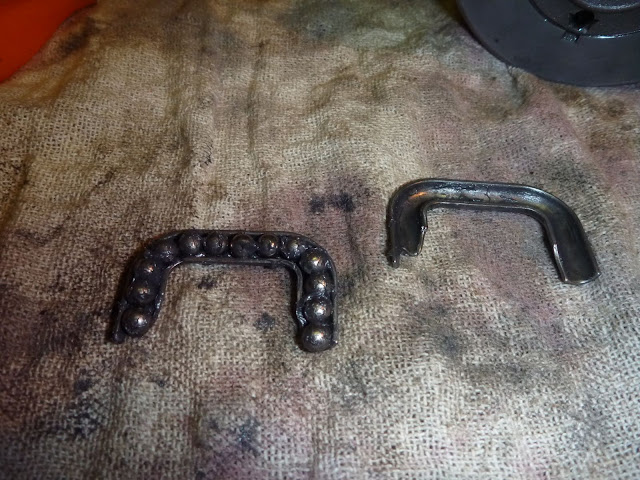
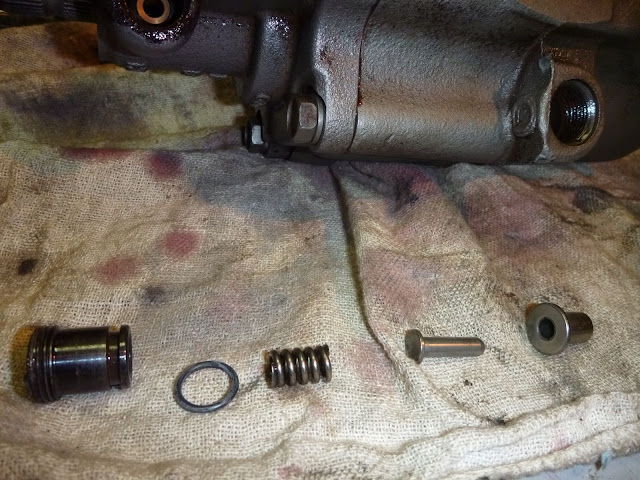
Now comes the tricky part, getting all the ball bearing back in the power piston. Put the worm gear shaft back inside the power piston. You should be able to get most of the ball bearings back inside the two holes by turning the input shaft back and forth. Make sure you keep the piston close to the valve head so the balls don’t fall off either end of the worm gear.
P1010332.JPG


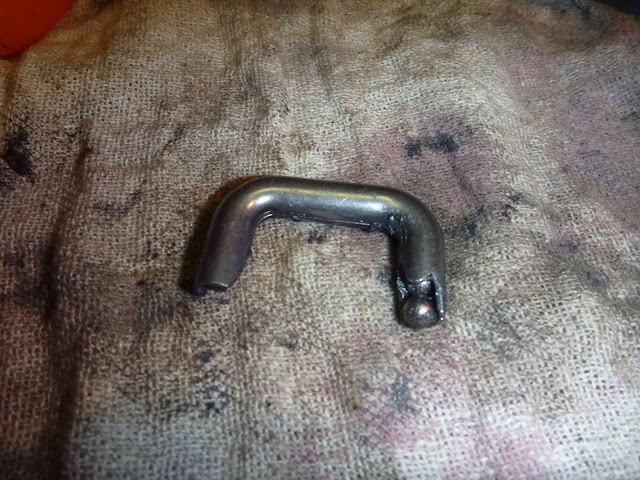
Once most of the balls are in the housing, grab the two halves of the metal tube and some sticky moly grease. Line the inside of the tube halves with grease and stick the balls inside the tube.
P1010329.JPG


Put the other half of the tube on top of the first
P1010330.JPG


Push the assembled tube back into the piston until you can get the metal clamp back in place. Install the two screws.


Step 8: Reinstalling the worm gear valve body assembly

Now that the worm gear valve body is back together, reinstall it into the gearbox housing. Use plenty of ATF to ensure nothing binds, and be especially careful of the Teflon ring. Make sure it isn’t caught on the edge inside the gearbox.
P1010337.JPG


Install the four 14mm bolts and tighten them down to pull the valve body into the gearbox
P1010338.JPG


Now reinstall the power piston plunger and guide. More ATF to lube the O-ring here too.
P1010339.JPG


Step 9: Installing the sector shaft

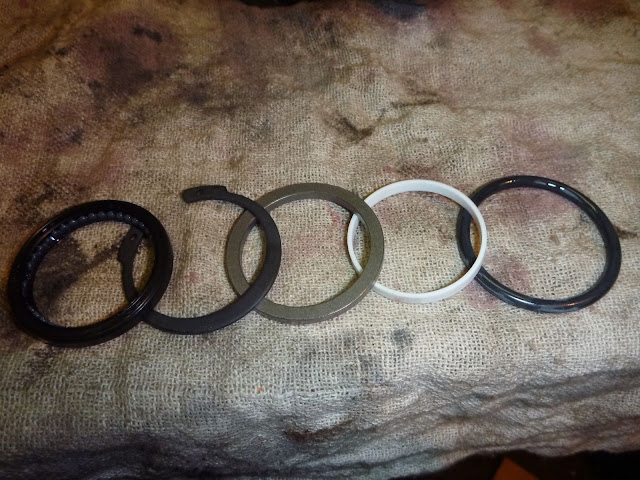
Install the new O-ring, Teflon ring, metal ring, snap ring, and oil seal. Pay careful attention to the orientation of the oil seal.
P1010334.JPG


P1010335.JPG


Centre the power piston in the gearbox housing
P1010340.JPG


The FSM recommends putting some moly grease on the teeth prior to installation. Install the sector shaft, making sure the teeth are centered on the power piston.
P1010342.JPG


Put a new O-ring on the side cover and line it up on the adjusting screw.
P1010341.JPG


Use the adjusting screw to pull the side cover down. Note the direction of the threads (lefty loosey in this case)
P1010344.JPG


Install the four side cover bolts and tighten them.

Now the box is 99% back together, and you need to set the preload. It is possible to use a special SST socket on the input shaft to attach a dial torque wrench, but most of us don’t have access to either of those. I found that the difference between good and too tight was easy to differentiate while turning the input shaft back and forth from lock to lock. Adjust the screw 1/8th of a turn at a time until you get to too tight, then back it off a bit. Install the new seal washer and the adjusting screw lock nut. Be sure that the adjusting screw doesn’t move as you tighten the nut.

That’s it! :cheers:


A few power steering related links:

Pump
Power Steering R&D - https://forum.ih8mud.com/80-series-tech/409610-power-steering-r-d.html
Toyota OEM PS Pump PIS and GPM Ratings & Hydraulic Winch - https://forum.ih8mud.com/80-series-tech/367350-toyota-oem-ps-pump-pis-gpm-ratings-hydraulic-winch.html
Power Steering Pump and Hose Replacement - FAQ - https://forum.ih8mud.com/80-series-tech/201920-power-steering-pump-hose-replacement-faq.html

Gearbox
Power Steering Gear Box 105 Series Sector Shaft/Pitman Arm Upgrade - https://forum.ih8mud.com/80-series-tech/336799-next-list-rebuild-ps-gear-box-new-sector-shaft-pitman-arm.html
FJ80 Power Steering Pump & Gearbox Rebuild - https://forum.ih8mud.com/80-series-tech/98211-fj80-power-steering-pump-gearbox-rebuild.html
Cracked Frame - https://forum.ih8mud.com/80-series-tech/273182-cracked-frame.html
Tightened steering nut - big benefit!! - https://forum.ih8mud.com/80-series-tech/330999-tightened-steering-nut-big-benefit.html

Fluid cooler
Power steering cooler upgrade - https://forum.ih8mud.com/80-series-tech/20738-power-steering-cooler-upgrade.html
Power steering cooler Install - https://forum.ih8mud.com/80-series-tech/343463-power-steering-cooler-install.html
Heat Sink power steering cooler install - https://forum.ih8mud.com/80-series-tech/280386-heat-sink-power-steering-cooler-install.html
Absolute great work!

Now, I have just barely made it home with what seems to be a failing steering gear box. Doing a parts search did not distinguish between HDJ 81 and all the other models of 80 series were listed as compatible. So is RHD LHD using the same gear box? Forgive my ignorance as I have just started searching. If anyone can suggest a USA source for what I need to fix HDJ81, highly appreciated!
 
This is an incredible write up, mine's weeping (not leaking as the PS fluid has remained mostly steady for months) and I had toyed with the idea of rebuilding the steering box myself... but after reading this you've well and truly scared me off even trying! Looks way above my head. Good stuff in any case
 
Had to reread the first few pages here. Tore into mine a few nights ago because I knew my spline were tweaked, but holy sh*t. I had no idea how bad it was.
1650076763113.jpeg

Needle scaled it in the catch pan of trans fluid and broke a puller trying to remove the pitman arm. 😳 somefreakinhow the sector shaft splines were twisted and the whole shaft BENT ! ? Prolly why I had to liquify the pitman arm to get it off.
1650076898358.jpeg

I knew it needed some attention. The most abuse I’ve given it was at an ORV park in MN climbing some log ‘stairs’ and I supposed it could have happened there. 🤔 but at 310k, god only knows.

Anyway, appreciate the write up. The main housing is still in need of the lower main seal and a good blasting. The rest is all clean and painted. Hoping to have it back in this weekend.
 
Holy schmoly Batman, liquify? Please explain!!!
 
Had to reread the first few pages here. Tore into mine a few nights ago because I knew my spline were tweaked, but holy sh*t. I had no idea how bad it was.
View attachment 2982887
Needle scaled it in the catch pan of trans fluid and broke a puller trying to remove the pitman arm. 😳 somefreakinhow the sector shaft splines were twisted and the whole shaft BENT ! ? Prolly why I had to liquify the pitman arm to get it off.
View attachment 2982892
I knew it needed some attention. The most abuse I’ve given it was at an ORV park in MN climbing some log ‘stairs’ and I supposed it could have happened there. 🤔 but at 310k, god only knows.

Anyway, appreciate the write up. The main housing is still in need of the lower main seal and a good blasting. The rest is all clean and painted. Hoping to have it back in this weekend.
Ended up breaking a pitman arm puller as well :D

But did not have to resort to torching the arm off 😅
 
So, I’m trying NOT to be that guy . . .but I didn’t see a count for the balls in this ball screw assembly. FSM doesn’t cover pulling the piston off and putting the balls back in, only checking play/replacement. I may be wrong 😑

Anyhow, I’m counting 42 bearings. Anyone else have a solid # ?
 
So, I’m trying NOT to be that guy . . .but I didn’t see a count for the balls in this ball screw assembly. FSM doesn’t cover pulling the piston off and putting the balls back in, only checking play/replacement. I may be wrong 😑

Anyhow, I’m counting 42 bearings. Anyone else have a solid # ?
Send your steering gear to Redhead, they install new balls that are custom sized to your specific project making the steering gear as tight and smooth as possible.
 
Send your steering gear to Redhead, they install new balls that are custom sized to your specific project making the steering gear as tight and smooth as possible.
So you’re saying I should have the professional ball-checkers check them out cuz I might need bigger ones ? ?

1652569338175.jpeg

1652569384578.jpeg

1652569450965.jpeg

Had to upload a few more pics from the rebuild. Be sure to break out the FSM if you’re tearing your box all the way down. And take some emery cloth to that edge before the power piston goes back in or you’ll slice that Teflon seal up. It takes quite a while to get the system bled after it’s completely empty too . . .
 
So you’re saying I should have the professional ball-checkers check them out cuz I might need bigger ones ? ?

View attachment 3008956
View attachment 3008957
View attachment 3008958
Had to upload a few more pics from the rebuild. Be sure to break out the FSM if you’re tearing your box all the way down. And take some emery cloth to that edge before the power piston goes back in or you’ll slice that Teflon seal up. It takes quite a while to get the system bled after it’s completely empty too . . .
You might need smaller onze….. cuz custom is custom. My balls circulate so smoothly it’s like they ain’t balls at all. I see you got the big shaft too. Is the box ported?
 
Do they all say Toyoda? :P
 
 
That's awesome...mine has an L though. :P
 
I wouldn't expect a RHD and LHD steering box to have the same parts. I've got a rebuilt standard one in my 80 but a few years ago priced up the 105 series box with bigger shaft on Amayama. About A$3000 and at the time there were 3 in stock. No way I can justify that sort of money on a steering box when I already spent $1500 this year to get the cracked chassis properly plated where the box mounts.

I wouldn't be game to attempt a rebuild on one.
 
For the record, there are 44 ball bearings in the 80 series Land Cruiser steering gearbox. Don’t asking how much time I spent searching that. Finally got the idea to count the picture. (Hopefully the wording above turns up in people’s google searches).

Awesome write up , Thank you
 
There are 44 ball bearings in the 60's as well, an 80 series gear box also fit -85 or later 60 series. Thats what I am running now, had my 60 rebuild by Raven Power steering specialist in Denver, sitting on the Bench. I'll find out how it does, out in Moab this week.
 
There are 44 ball bearings in the 60's as well, an 80 series gear box also fit -85 or later 60 series. Thats what I am running now, had my 60 rebuild by Raven Power steering specialist in Denver, sitting on the Bench. I'll find out how it does, out in Moab this week.
It did not take a long time until it started to leak, pretty bad. The set nut became loose and spewed the ATF with any little turn of Wheel, easy fix. Held set screw in place and Kurt, W tightened the nut, never leaked again.

So, I will keep the 80 box in place for a bit longer no difference in output.
 
Can anyone verify Toyota OEM part numbers for the bearing that is pressed into the input shaft housing? I see 9036319007 and 9036319002 mentioned and they both come up as bearing for power steering support, upper. Anyone have experience? Also, trying to track down a US supplier for nsk 19bsw05 which is what is stamped on the race.
 

Users who are viewing this thread

Back
Top Bottom