My First Galley Plug Fix (1 Viewer)

This site may earn a commission from merchant affiliate
links, including eBay, Amazon, Skimlinks, and others.

did the plug on my 87 fj60. photos identical to those already posted. went slow with tap and all ended well. am listing all tools needed for this repair in classifieds. hopefully save someone a few bucks....and i'm not expecting to need again.

really grateful for this thread!!
 
Is there any statistics on the fail rate compared to non failing. Like 60 or 62's? Anyone fail more then the other? Im all about preventive maintenance. I know for s*** sure if I do this it will fail and me saying why did I touch this. Cant fix something thats not broken right? 90 FJ62 123k stock
 
Is there any statistics on the fail rate compared to non failing. Like 60 or 62's? Anyone fail more then the other? Im all about preventive maintenance. I know for s*** sure if I do this it will fail and me saying why did I touch this. Cant fix something thats not broken right? 90 FJ62 123k stock

I guess you have to ask your self “are you feeling lucky?”
It’s really easy if you use the right tap and plug, just go slow with the tap and use Loctite. The repair is threaded vs a press fit, so failure for the repair would be just a leak, vs dumping all your oil out while under way.
 
it's pretty easy especially being able to follow the guide set forth in the thread. really....the tap "tells" you when to stop turning and remove to clean. when you insert clean tap, the cutting goes very smooth, then gets a little more resistance. then even more. stop, clean and repeat. i put it off for 3yrs, had the tools on the workbench. got tired of staring at the oil pressure gauge and wanted to be more comfortable on longer trips.

problem cured.
 
So I dove in yesterday, after reading, and re-reading tons of posts on here. I will share my successful method, and add it to the pile:

It was time to adjust my valves, so I figured since I was in up to my elbows, why not fix the galley plug, too?

Total time was about 2.5 hours. That included removing a steel heater pipe against the firewall for drill clearance (and draining the radiator so as to not make a mess).

Everything went well, and I'm glad I did this! I feel way more confident about driving around in my truck after I pulled out the tiny, weeping, oil galley plug.

I had previously sourced everything I needed for this job.

-Vermont American "Dual Speed Angle Drive Kit" p/n 17172
-Irwin/Hanson 5/16"-18NC Tap, with "G" drill bit kit p/n 80235
-Irwin/Hanson T-handle tap wrench for sizes 1/4"-1/2"
-Stainless Steel Set Screw Socket 5/16"x3/8"(Bag of 2) Barcode p/n 3069973858

I bought the angle drive kit at a local hardware store. The tap&drill set, tap handle, and set screws came from Home Depot. Buying the tap & drill as a kit was helpful. The tap is a USA-made, high carbon steel plug tap. I searched for a true tapered tap, but couldn't easily find any. A couple specialty tool supply places had them, but they were spendy. (I know Home Depot isn't the best place to look)

View attachment 1586803

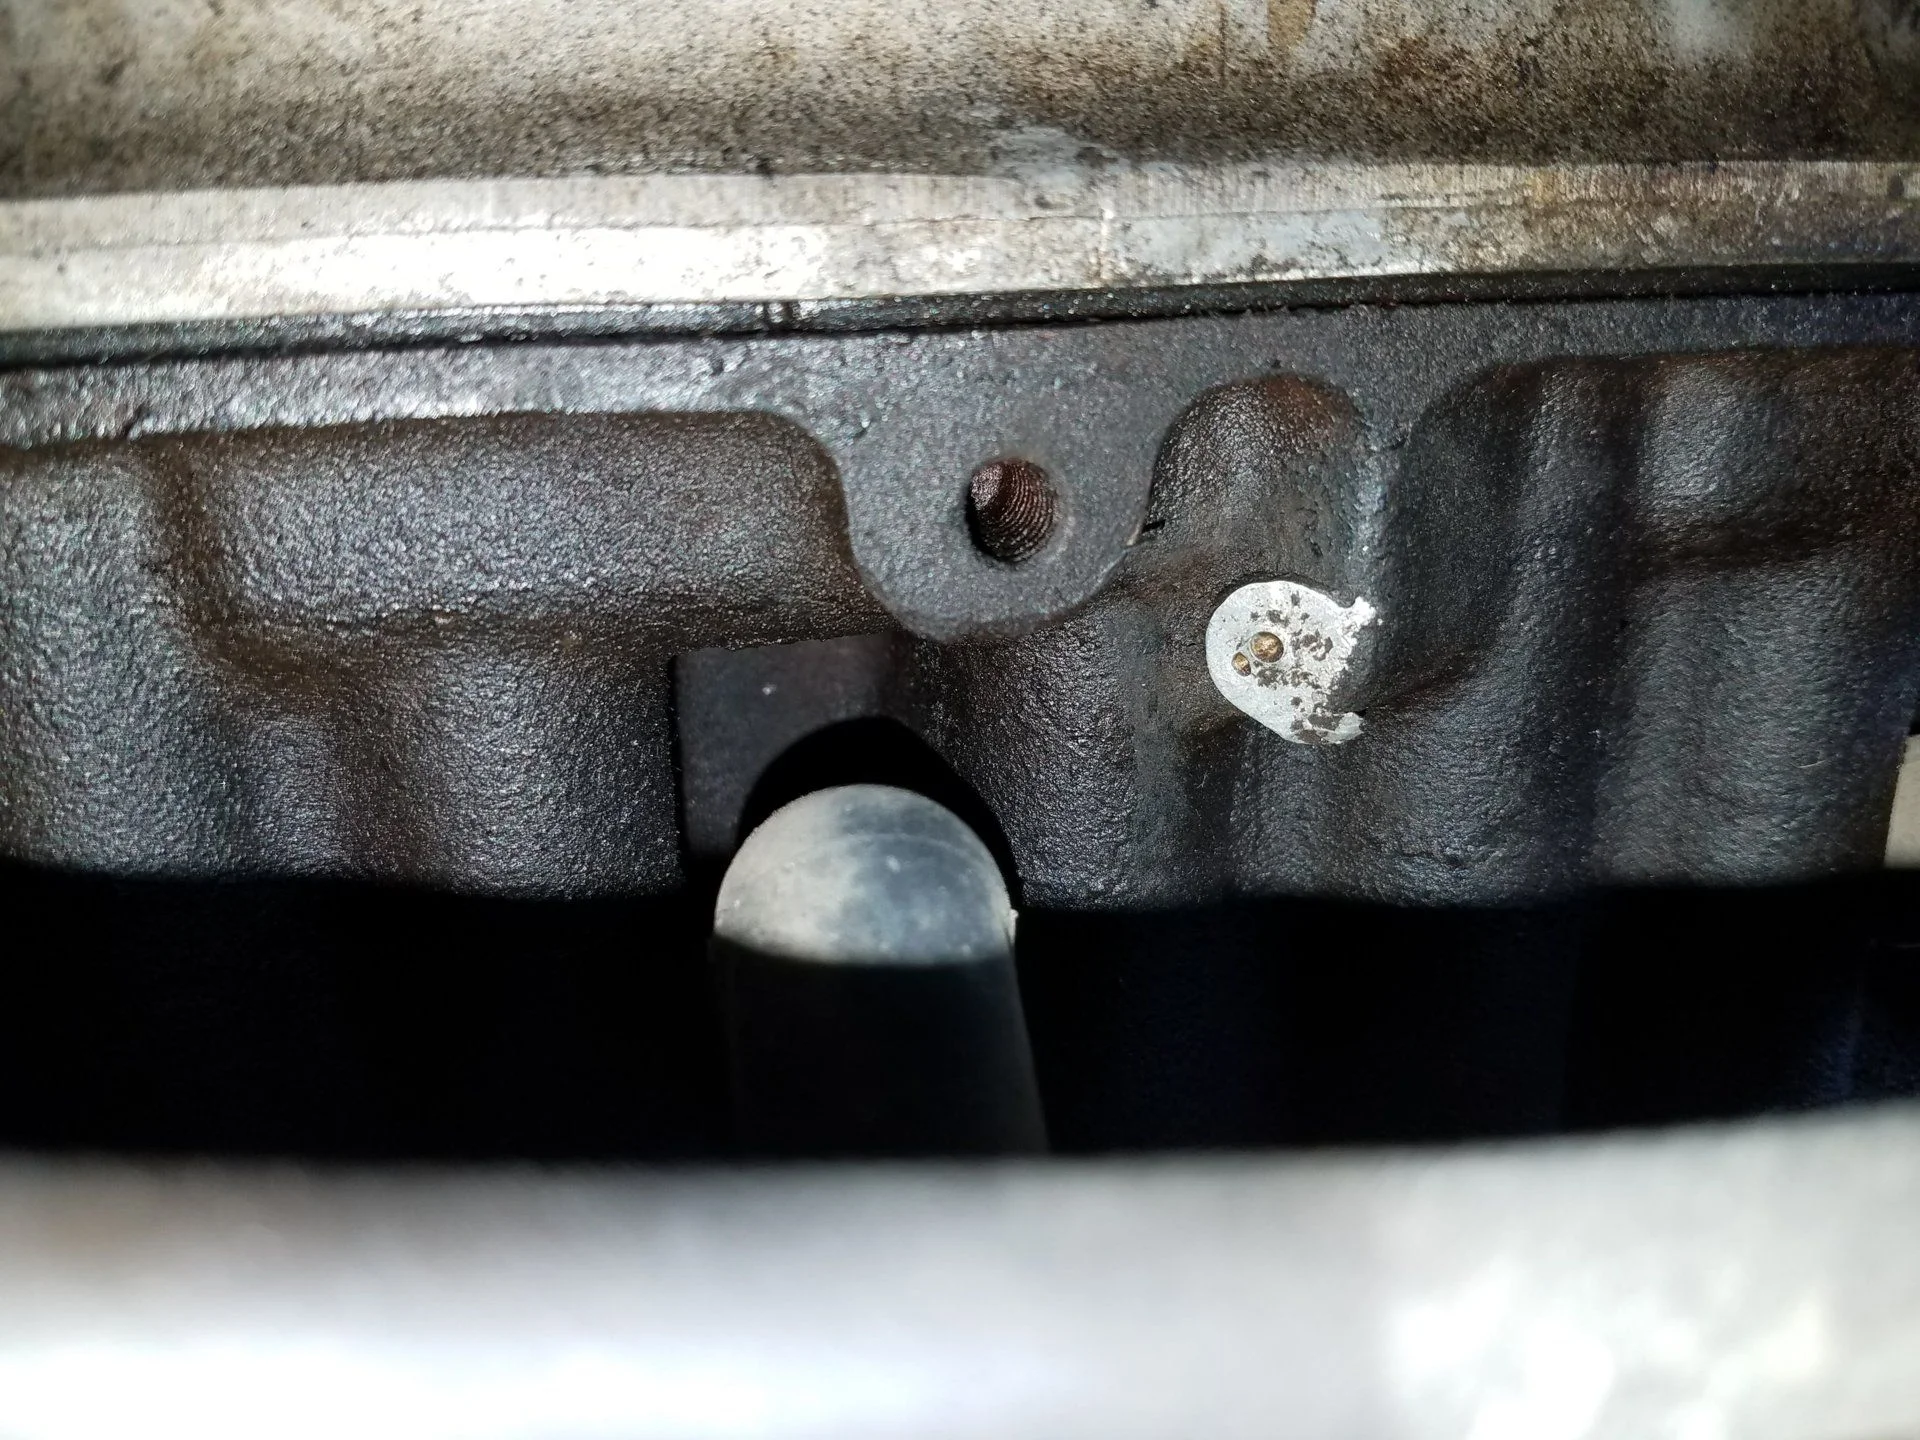
So, note the weeping oil galley plug:
View attachment 1586804

I removed the head bolt, and stuffed my custom-made crap-catcher in. It's a 2-3" square of cloth & a zip tie.
View attachment 1586805

Note the installed position. I pushed the cloth into the hole until just below the oil galley hole. This will allow any crud that goes through to be pulled up and out when I'm all done.
View attachment 1586806

I then center-punched the plug with a cheap Harbor Freight center punch tool.
00621.gif


Then drilled with a 1/8" bit, moving up to 13/64". The plug is very soft & easy to drill. It's only about 1/4" long, while the galley passage is about 1" to the head bolt bore.

I found a random coarse-thread eye bolt in a jar of misc. bolts. I threaded it in until the galley plug started rotating and popped out:
View attachment 1586807

My engine was rebuilt a few years back, so I'm not sure if this was the factory plug. Too bad they didn't fix it for me! Note how short it is, compared to the 5/16"x3/8" set screws:
full


On to the drilling & tapping. First, I cracked a can of Moxie. It seemed appropriate. My housemate's friend shipped a case of the stuff to us. It's a New England thing...

I used the "G" sized bit supplied with the tap. Oiled the bit, drilled, & removed shavings.

I then used the tap. This is the part where everything can go wrong. I've never tapped something so carefully! I filled the flutes of the tap with grease to catch the metal chips & sprayed some light cutting oil into the galley hole. I would do about 1/8th of a turn cutting, then back off 1/2 a turn.

Repeat several times until you feel added binding on the cutting turn. This binding means the flutes of the tap are full of metal chips. DANGER! DANGER! Back the tap out of the hole before you break it! Clean both the tap and the hole. A pipecleaner & q-tip came in handy for this.

**Tighten the tap wrench just enough on the tap. This makes backing out easier, as you can loosen the tap a bit, then pull the wrench off and un-thread, clean, grease, & re-thread the tap by hand. The PCV metal plumbing on the block just barely got in the way of my tap wrench's handle.***

This part of the process took awhile, and I really wanted to rush it. I think that's why there are the varied "I broke this, please help!" threads. Yes, taps can snap for no reason. However, I didn't want to give my tap ANY reason to break!

S..l...o...w......a...n...d.......s...t...e...a...d...y...........

I tapped in a little further than I needed to for the two set screws. I didn't tap clean through to the head bolt hole, as I wanted the set screw to bind in the galley hole, and not be able to continue into the head bolt hole. I then cleaned out the hole, and blew out any grease with a little brake cleaner, using a straw through the head bolt hole. This will leave a nice surface for the loctite to bind into.

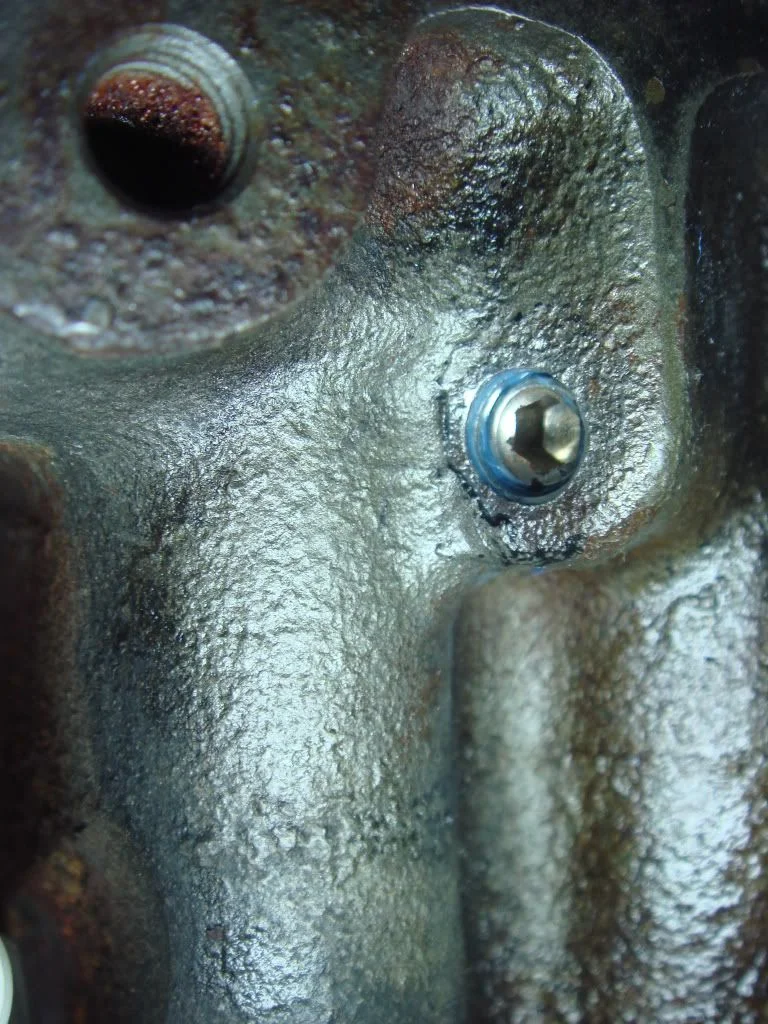
Look at that beautiful, threaded hole!
full


What's better? Why how 'bout the same hole with not one, but TWO set screws in it? WITH Loctite! (I didn't have any red, but blue is good, & the screws are bound into the hole & each other):
full


And, here's all the crap I took out of the head bolt hole:

full


***Don't forget to put the head bolt back in***

SO, hope that helps anyone concerned about trying this. It really isn't that bad.
Thanks for this! Mentor found it after my driveway turned into a oil slick and we were trying to figure out where it came from. Problem is, we just did the valve adjustment the day before :bang:. Just to confirm I put a few quarts back in and turned it on to make visual confirmation, wow it comes out fast! Here goes nothing. :worms:

Screenshot_20180123-232139.png
 
Been working on getting my new to me 60 back on the road slowly for over a year now. Decided to just look at the galley plug. It was sticking out an eighth from the surface of the block. Galley plug fix will be next after I get the floors back in.
 
I guess you have to ask your self “are you feeling lucky?”
It’s really easy if you use the right tap and plug, just go slow with the tap and use Loctite. The repair is threaded vs a press fit, so failure for the repair would be just a leak, vs dumping all your oil out while under way.
After a couple years my repair plug started weeping a little , just a simple matter of pulling the plug and cleaning/ resealing the threads. Anyone who hasn’t done this simple fix , needs to
 
I see some people using two 5/16" X 3/8" set screws. Is there an advantage using those over one 5/16" X 3x4" or is it that the 3/8ers are more commonly found at the hardware stores?
 
I see some people using two 5/16" X 3/8" set screws. Is there an advantage using those over one 5/16" X 3x4" or is it that the 3/8ers are more commonly found at the hardware stores?

No reason I can think of, except shorter ones are more common I would imagine.
I used 2 shorter ones.
 
For anyone on the fence wondering if the plug actually blows out or if this is one those ‘urban cruiser legends’ that we all freak out about and perform unnecessary procedures on our vehicles....I am hear to tell you it is a reality....happened to my 3FE quite a few years ago. Got lucky, had just pulled off the highway and was in a parking lot when mine blew. Saw the puke pouring out from under it when I stepped out.

It makes quite the oily sh*t show!

I had a local shop order a Toyota plug and punch it back in place with sealant....I didn’t have any spare time to handle it myself then. Been worrying about it ever since.

Every time this thread gets refreshed, it makes my stomach ache a little, haha. I gotta get this done.
 
I see some people using two 5/16" X 3/8" set screws. Is there an advantage using those over one 5/16" X 3x4" or is it that the 3/8ers are more commonly found at the hardware stores?

by using 2 plugs the second plug locks against the first plug. if you don't tap the new thread too far, the first plug bottoms out against the head.
 
Thanks for writing up such an informative series of directions. In anticipation of taking a big road trip later this week, I replaced my galley plug this last weekend:

vvC7C2F.jpg


rKxiY34.jpg


I drove around 30 miles on the highway today and was startled to see some oil weeping around second (outer) set screw:

68ZXG5x.jpg


I tried my hardest to loosen the exposed set screw but it's sealed in there good with red loctite.

So what are the odds that I'll have a catastrophic failure in the next two thousand miles? Can I just add some high temp JB Weld and keep an eye on out? Any advice here would be greatly appreciated.
 
This is just my experience, and I am far from any expert.
I did the fix and have noticed some very light weeping over the last 1000+ miles. I keep an eye on it but I’m confident with the two threaded inserts it would be highly unlikely that a plug failure would happen. Interested in hearing other oppinions on it though.
 
Thanks for writing up such an informative series of directions. In anticipation of taking a big road trip later this week, I replaced my galley plug this last weekend:

vvC7C2F.jpg


rKxiY34.jpg


I drove around 30 miles on the highway today and was startled to see some oil weeping around second (outer) set screw:

68ZXG5x.jpg


I tried my hardest to loosen the exposed set screw but it's sealed in there good with red loctite.

So what are the odds that I'll have a catastrophic failure in the next two thousand miles? Can I just add some high temp JB Weld and keep an eye on out? Any advice here would be greatly appreciated.

If you can’t loosen it with a Allen wrench, it won’t work itself out. You should be good to go. You can probably JB weld or high temp silicone it if you want the weeping to stop.
 
I see some people using two 5/16" X 3/8" set screws. Is there an advantage using those over one 5/16" X 3x4" or is it that the 3/8ers are more commonly found at the hardware stores?
More common, fits hole better.
 
Thanks for writing up such an informative series of directions. In anticipation of taking a big road trip later this week, I replaced my galley plug this last weekend:

vvC7C2F.jpg


rKxiY34.jpg


I drove around 30 miles on the highway today and was startled to see some oil weeping around second (outer) set screw:

68ZXG5x.jpg


I tried my hardest to loosen the exposed set screw but it's sealed in there good with red loctite.

So what are the odds that I'll have a catastrophic failure in the next two thousand miles? Can I just add some high temp JB Weld and keep an eye on out? Any advice here would be greatly appreciated.
Has it been weeping more in the past week? I'm thinking its just an initial weep, maybe a little residual oil was in the hole if it has not continued to weep. I doubt it will fail. Glad the info helped!
 
Hi All, I have a question for the group relating to the Oil Galley Plug. My dad bought our land cruiser in the spring of 1987. At 17, I was driving it less than a year later and just over 20k miles when the oil galley plug fell out stranding us in Tahoe for a week while the local dealership took care of the issues under warranty. See the following original invoice for this work. Reading about all the issues with the oil galley plug failures and after experiencing it first hand, I finally took a look at the replacement. See picture. It looks like all the dealership did was stick an aluminum plug back in. The OEM part number they used is 9033407009. Any thoughts on whether I need to consider replacing this plug?

 
after happening first hand i would think it would be a "no brainer" considering how easy it is and the potential downside.......but then others have gone 300k without the fix........i got tired of being fixated on the oil pressure gauge.
 
Has it been weeping more in the past week? I'm thinking its just an initial weep, maybe a little residual oil was in the hole if it has not continued to weep. I doubt it will fail. Glad the info helped!

I went medieval with some high temp silicon sealant and JB weld just to be on the safe side. After 1500+ hard roadtrip miles the last 7 days, no new
 

Users who are viewing this thread

Back
Top Bottom