
Navigation
Install the app
How to install the app on iOS
Follow along with the video below to see how to install our site as a web app on your home screen.
Note: This feature may not be available in some browsers.
More options
Style variation
You are using an out of date browser. It may not display this or other websites correctly.
You should upgrade or use an alternative browser.
You should upgrade or use an alternative browser.
Mike's Overhead Console Build
- Thread starter 78fj40mg
- Start date
This site may earn a commission from merchant affiliate
links, including eBay, Amazon, Skimlinks, and others.
- Thread starter
- #62
I also purchased a few electrical parts from @Coolerman to safely complete the spaghetti bowl of wiring

- Thread starter
- #64
Very slick! Nice job!
Thanks!
- Thread starter
- #65
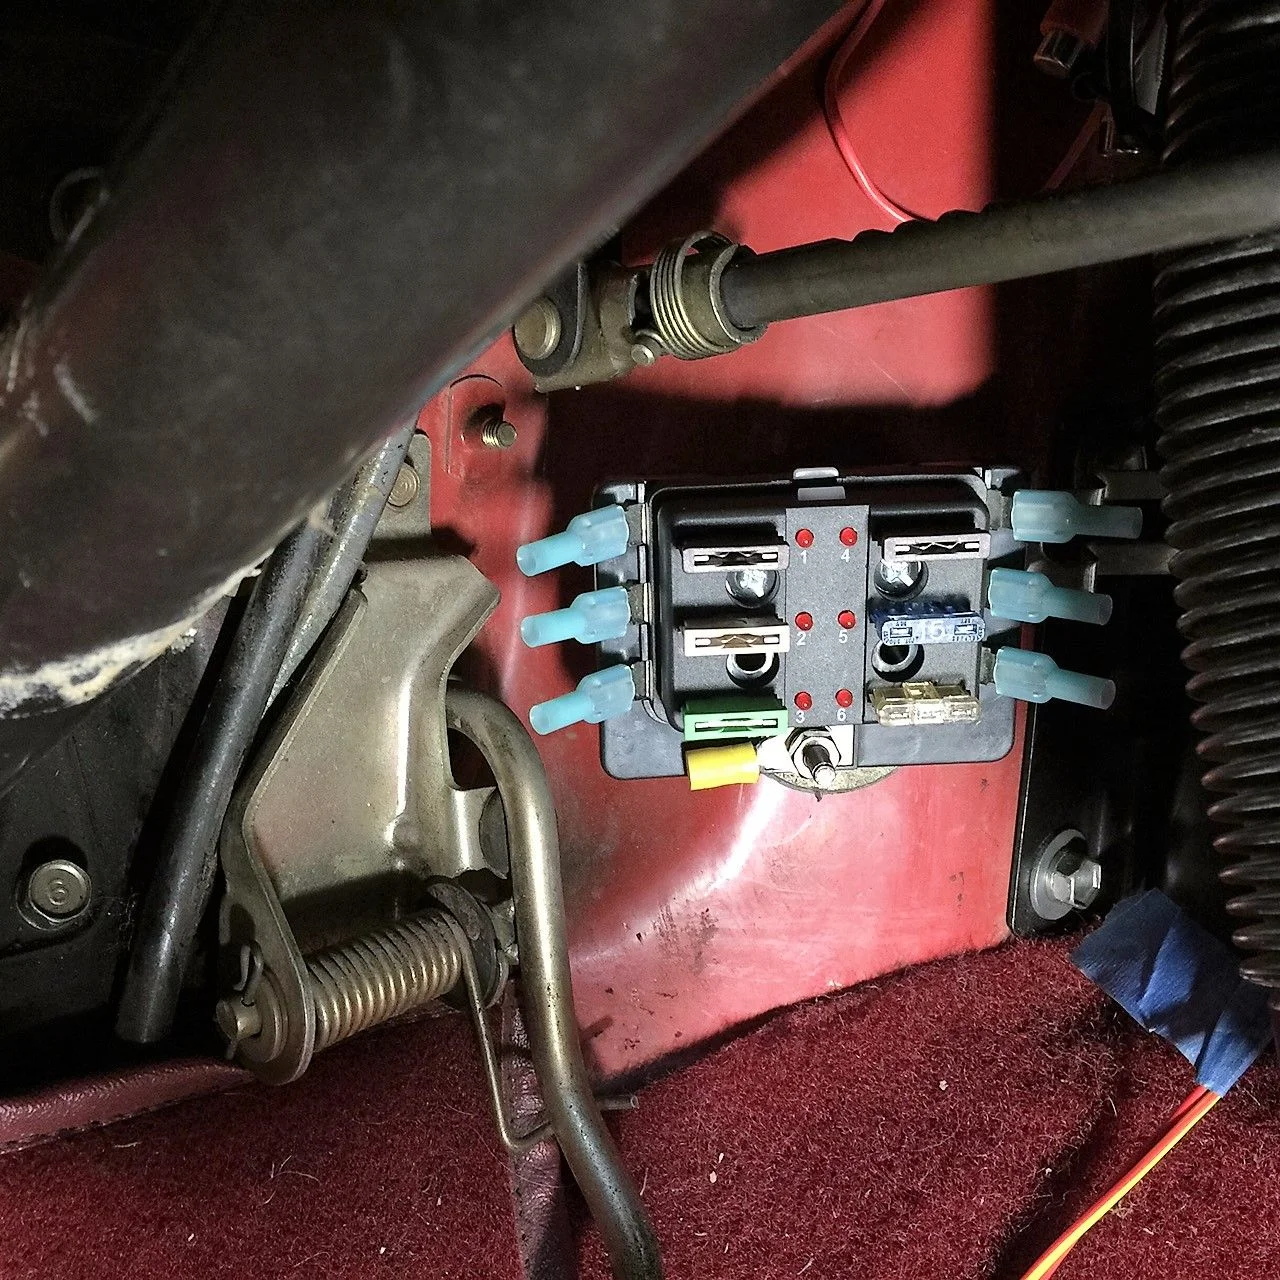
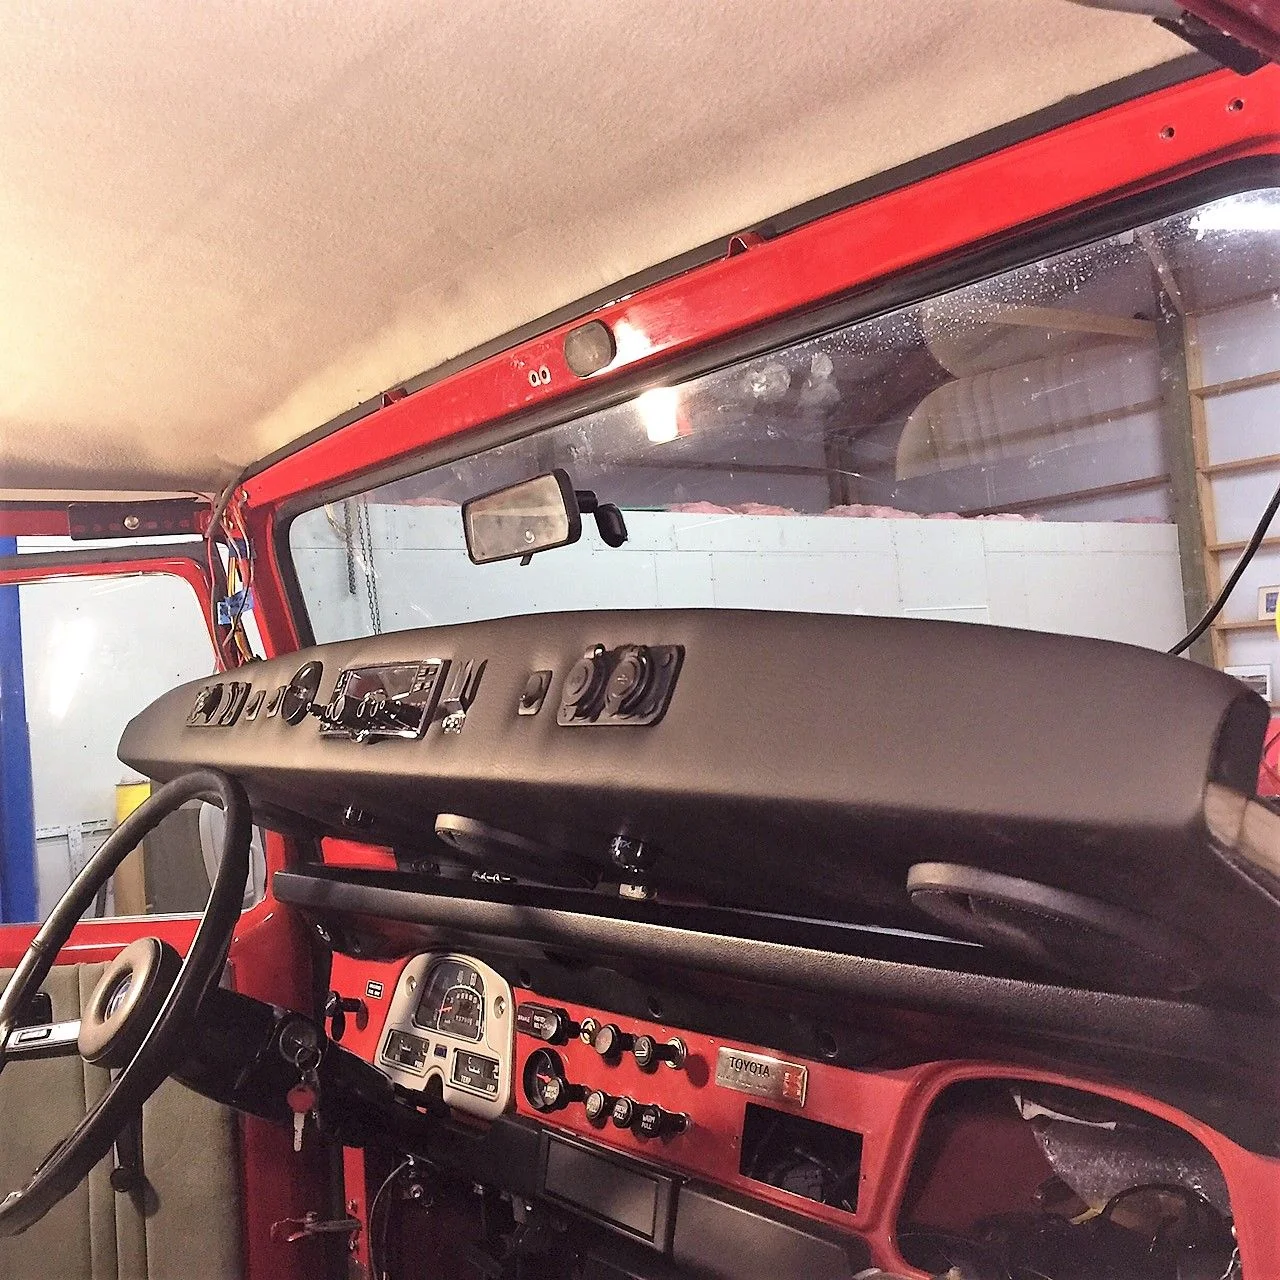
Currently testing and finalizing installation of the new sub fuse box, and also a pic of the topside of the console thru windshield

As soon as the electrical connections check OK the console will be installed
As soon as the electrical connections check OK the console will be installed
I selected a different fuse sub block for the console, it will be located adjacent to the front heater.
May I ask where you got the sub block?
Sent from my iPhone
I added a few extra outlets on the console
I also like this outlet panel. Where'd you get this one?
Sent from my iPhone
Last edited:
- Thread starter
- #68
May I ask where you got the sub block?
Sent from my iPhone
The sub fuse box I got from Amazon here's the link Amazon.com: OLS PSZACCEPS051H 6-Way LED Illuminated Blade Fuse Box with Cover: Automotive
I also like like this outlet panel. Where'd you get this one?
Sent from my iPhone
The outlets panel I also got from Amazon here's the link Amazon.com: Astra Depot Triple Function Dual USB Charger + Voltmeter + 12V Outlet Socket Panel Jack Marine For Digital Devices Mobile Phone Tablet: Cell Phones & Accessories
Let me know if you have any questions as I'll be glad to help.
")
@78fjmg I also purchased that OLS fuse box for switched power on my 4runner. Seems to work quite well so far. I like that the led's light up when a fuse is blown and that it was cheaper than the BlueSea box. One thing that I wish I would have done with my install, and I still might, is add a ground distribution block.
As always, you do great work. Bookmarked your 40 build for when I get around to playing with my 40.
As always, you do great work. Bookmarked your 40 build for when I get around to playing with my 40.
- Thread starter
- #70
Hey thanks Kris!
How did you supply power to the new fuse box? Switched power from the main fuse box or direct power from the battery?
I'd like switched power on mine but haven't finalized the power connection as yet.
How did you supply power to the new fuse box? Switched power from the main fuse box or direct power from the battery?
I'd like switched power on mine but haven't finalized the power connection as yet.
That fuse block is a nice alternative to more expensive ones like the Blue Sea lineup.
- Thread starter
- #72
That fuse block is a nice alternative to more expensive ones like the Blue Sea lineup.
I agree Kevin. It is also very compact and easily fits in a remote locations in our 40s, the Blue Sea box that I had originally selected to buy was a much larger unit and might have been more of a challenge to fit in the very few available locations in our 40s. The glove box is an alternative location but personally don't like exposed wires in there as the chance of a short is present in a small space that's usually filled with stuff.
Yes, agreed. I have one of the Blue Sea big ones for an overhead console build I am doing. I went with the big one because I plan quite a few devices/ gauges/ switches etc and wanted more terminals... plus I didn't see the Amazon one earlier. But I am mounting the block in the console with an access panel on the bottom of the console next to the rear view mirror. That way all electrical is above the waterline for river crossings LOL. My rig is 24V diesel too so I've got a lot going on.
Full disclosure - my console build is also a prototype for a basic kit I plan to sell. I hope I'm not stepping on your toes posting that here and I plan to run a thread about it at some point.
Kevin
Full disclosure - my console build is also a prototype for a basic kit I plan to sell. I hope I'm not stepping on your toes posting that here and I plan to run a thread about it at some point.
Kevin
- Thread starter
- #74
No not at all Kevin, I don't mind. In fact I'd love see a pic of what you've done. Did you utilize a step down transformer for all your gauges? Or are you running 24 volts through out?
Neither, I mounted a second 100A alternator on the 3B in the same spot the a/c pump would go. I use it to charge a house battery and supply all 12V in the rig. The 24V system is entirely untouched and stock save for the 24V 8274 winch and a 24V dual ARB compressor for the lockers.
The 12V system/battery powers the fridge/ LED fog lights/ 12V headlights/ aux gauges/ CB/ Ham radio/ double DIN head unit (DVD/NAV)/ inverter/ LED camp lights as well as 8 carling switches to control all that stuff. Speakers for the stereo/CB and Ham are on the bottom with LED interior lights (red and white - red for use while driving) and switches for the interior lights too. And a glove box, and USB charger, and, and, and - it's a busy console
The console is aluminum and mounts similar to yours above each door in stock holes and also uses the mirror bolts to secure the center. It is notched to go around the sun visor and still allows the rear view mirror to mount. The face or front surface of it is tilted down toward the driver I think 15° for better viewing and the leading edge is chamfered to protect your head.
I am still collecting hardware before I do the full install. I haven't got the Ham unit or the Stereo yet. Both are $800 units so I'm saving pennies. I have the mock up installed in the truck for several months now and it is entirely not in the way. This one will be tossed and replaced with one reflecting the revisions I have made.
This is a custom one off unit that is useless to anyone but me. I had imagined there might be a market on MUD for a blanked out unit that a customer could cut holes in to suit their needs. This thickness of aluminum cuts easy with a hacksaw/drill/coping saw. It could be spray painted any color or covered with a desired material.
- Thread starter
- #76
Kevin that's an amazing console!
We share some of the same characteristics although the aluminum console allows more flexibility than my wooden frame does. I very much like all the access points you have designed into the console. Is the front fascia one piece with the bottom panel, bent, or fastened together?
My console LED lights are also red for use during driving conditions, I converted the original OEM dome light to LED and it illuminates the cab very well, used during non-driving conditions.
All your console openings appear to be as they were CNC laser cut, how did you manage those cuts?
Excellent work! I'd buy one from you without hesitation!
Mike
This mock up is one piece including the side mounting flanges. For better material utilization in production I would make the side flanges as separate brackets. It was cut out on the laser we have at work so all holes are smooth and clean. Here is a Solidworks screenshot of the CAD model. The Ham radio will go left of the double DIN hole which is dead center (though this view doesn't look it).


@78fj40mg I am using a relay with the trigger being switched power with power coming directly from the battery. Conveniently the PO left me some "extra" wiring after installing an aftermarket stereo, so I tapped into that.
- Thread starter
- #79
@78fj40mg I am using a relay with the trigger being switched power with power coming directly from the battery. Conveniently the PO left me some "extra" wiring after installing an aftermarket stereo, so I tapped into that.
Kris, that's pretty clever, what size relay did you use?
I may do the same relay trick.