Subscribed
Navigation
Install the app
How to install the app on iOS
Follow along with the video below to see how to install our site as a web app on your home screen.
Note: This feature may not be available in some browsers.
More options
Style variation
You are using an out of date browser. It may not display this or other websites correctly.
You should upgrade or use an alternative browser.
You should upgrade or use an alternative browser.
How NOT to restore the FJ40
- Thread starter FJ40Jim
- Start date
This site may earn a commission from merchant affiliate
links, including eBay, Amazon, Skimlinks, and others.
More options
Who Replied?Sooooo... Being the owner of the Cruiser discussed and displayed in this thread (and the companion thread "an ethical dilemma?"), I have a strong desire to talk with an attorney in the Benton, Washington area familiar with Lemon laws, civil fraud, etc. Jim Chenoweth has done a fabulous job of restoring the engine that the seller assured me had already been done--and there is much more to be done, all involving things on the vehicle I was assured, in writing, had been done at the time of my purchase. My purchase was to have been of a fully restored Cruiser--clearly it was not.
Being in Ohio, I am not acquainted with attorneys in Washington state qualified to pursue a civil case involving such blatant misrepresentation--as I'd like money back so Jim C can continue restoring this rig the right way. Contrary to the seller's suggestion that Jim C should just work for free, I believe a decent, honest, hard-working janitor like Jim deserves to get paid for his work, as he says, "cleaning up other people's sh*t". Any and all suggestions/ recommendations welcome.
Being in Ohio, I am not acquainted with attorneys in Washington state qualified to pursue a civil case involving such blatant misrepresentation--as I'd like money back so Jim C can continue restoring this rig the right way. Contrary to the seller's suggestion that Jim C should just work for free, I believe a decent, honest, hard-working janitor like Jim deserves to get paid for his work, as he says, "cleaning up other people's sh*t". Any and all suggestions/ recommendations welcome.
1973Guppie
Supporting Vendor
Sooooo... Being the owner of the Cruiser discussed and displayed in this thread (and the companion thread "an ethical dilemma?"), I have a strong desire to talk with an attorney in the Benton, Washington area familiar with Lemon laws, civil fraud, etc. Jim Chenoweth has done a fabulous job of restoring the engine that the seller assured me had already been done--and there is much more to be done, all involving things on the vehicle I was assured, in writing, had been done at the time of my purchase. My purchase was to have been of a fully restored Cruiser--clearly it was not.
Being in Ohio, I am not acquainted with attorneys in Washington state qualified to pursue a civil case involving such blatant misrepresentation--as I'd like money back so Jim C can continue restoring this rig the right way. Contrary to the seller's suggestion that Jim C should just work for free, I believe a decent, honest, hard-working janitor like Jim deserves to get paid for his work, as he says, "cleaning up other people's sh*t". Any and all suggestions/ recommendations welcome.
IMO, you are going to have a hard time with this. I am sorry for your loss, but in the end, it is a used car and you purchased it. It was your burden to really check it out thoroughly before the purchase. Again, just my opinion but unless you can show in writing specifics, it may be better to just move on. Best of luck.
FishTacos
Full Globetard
To keep this a tech thread I am going to offer my $.02 in the ethical dilemma thread.
Hope you get this awesome truck back soon.
Hope you get this awesome truck back soon.
Where is the ethical dilemma thread?
in Chat
- Joined
- Sep 26, 2003
- Threads
- 117
- Messages
- 11,199
- Location
- Lancaster, Ohio, USA
- Website
- www.tlcperformance.com
- Thread starter
- #227
In chat here:
Ethical Dilemma
Ethical Dilemma
FishTacos
Full Globetard
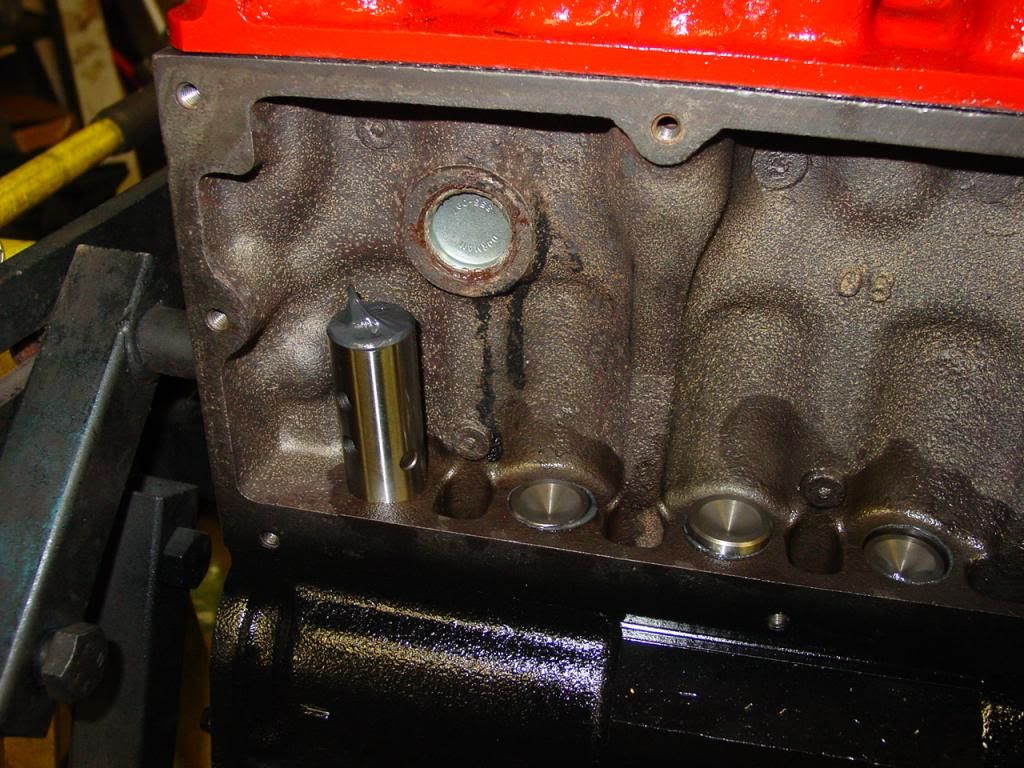
New lifters replace the worn originals. Here's a pic before dropping the last one in the hole, showing moly grease on the business end.
http://i1086.photobucket.com/albums/j459/FJ40Jim/Tan FJ40 overhaul/DSC07744.jpg
with the extreme likelihood that this is a stupid question.....
Why the grease on top of the lifters? Maybe I missed it in my FSM.
What does that do?
Also, any progress on this, Jim?
What a sad story both here and in "an ethical dilemma" in chat.
great work as always.
Thanks
LAMBCRUSHER
SILVER Star
notice how none of the other lifters have any grease on their tops? He also stated this was the last one...I'm guessin- just a wild shot in the dark, that he's got it inverted to show us the schmeg of moly "on the business end" that will be against the cam lobe when he's done- after the camera was put down;p
notice how none of the other lifters have any grease on their tops? He also stated this was the last one...I'm guessin- just a wild shot in the dark, that he's got it inverted to show us the schmeg of moly "on the business end" that will be against the cam lobe when he's done- after the camera was put down;p
Most Likely. Notice how the lifter in question is not dimpled to accept/center the pushrod.
This has been a great read so far. I know I'm shallow but the RedHead paint job just looks so fricken cool!
I (supposedly) had SBC valves installed in my rebuild close to ten years ago but there's no way of easily knowing as I had the machine shop assemble the long block. My unheated shop was holding around 20º at the time and I wasn't really motivated. There were enough errors in the rebuild that it's likely they forgot or simply didn't bother.

Not that there aren't decent used car salesmen in the world but many "reputable" dealers and restorers are cheats and swindlers - period. I know of another in this Cruiser arena I wouldn't trust to turn my back on in a dark alley so the COs experience is likely not an isolated event. If you don't have it in writing stating the date and/or mileage as to when the work was performed it is simply a matter of he said/she said and you'll get nowhere. Good luck and try to resist passing the buck if you can.
Last edited:
- Joined
- Sep 26, 2003
- Threads
- 117
- Messages
- 11,199
- Location
- Lancaster, Ohio, USA
- Website
- www.tlcperformance.com
- Thread starter
- #232
AC bracket reinstall
Thread dredge!
It has been pointed out that this thread needs finished out.
So the engine had this terrible AC install. Wrong (small) belt, very ill fitting mount bracket, wrong fasteners everywhere, rubber hoses bound up and rubbing things, getting sawed thru by the belt....
Just a textbook example of how not to install AC.
This pic shows:
Belt riding too deep in the groove,
all the 3/8" bolts in the 10mm mounting holes,
belt that rubs on AC hose,
and the deformed bracket that points the compressor down about 4deg in front.
(and the tiny hyundai battery & missing aircleaner bolts and....)

One of the mounting bolts is riding on a weld seam, which will eventually pop the head off the bolt.

The DIN bolt gets replaced with a Toyota bolt w/ JIS head. Now it can be run in & out w/ a socket.

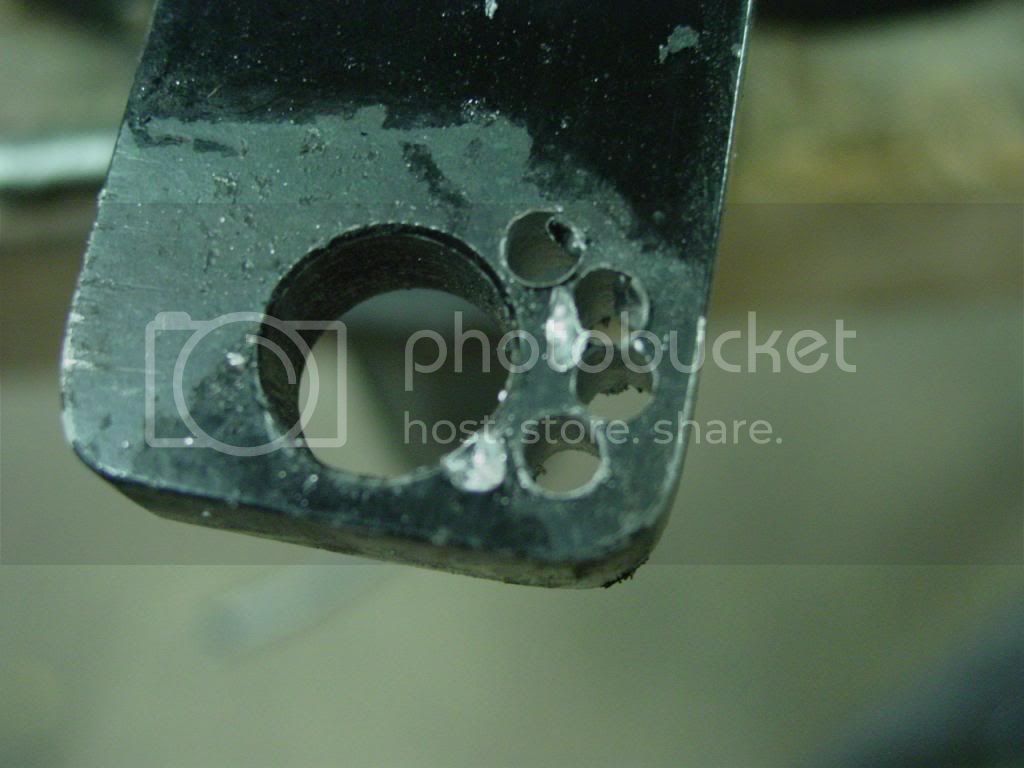
This is shows more of the bracket in question. Note the two AC mounting bolts hanging in the bracket. One is the correct M10 size, the other that is dangling more steeply is the too small 3/8UNC size. Using the wrong size bolts to mount the compressor allowed it to cock in the bracket causing the belt misalignment to be even worse.

The Toyota bolt is used as a pivot point to rock the whole bracket up in front. That leaves two 10mm and one 12mm bolt holes that need stretched.
The 12mm hole at the botom that is also the topmost engine mounting bolt, needs moved about 8mm. Let the chain drilling begin.

Thread dredge!
It has been pointed out that this thread needs finished out.
So the engine had this terrible AC install. Wrong (small) belt, very ill fitting mount bracket, wrong fasteners everywhere, rubber hoses bound up and rubbing things, getting sawed thru by the belt....
Just a textbook example of how not to install AC.
This pic shows:
Belt riding too deep in the groove,
all the 3/8" bolts in the 10mm mounting holes,
belt that rubs on AC hose,
and the deformed bracket that points the compressor down about 4deg in front.
(and the tiny hyundai battery & missing aircleaner bolts and....)

One of the mounting bolts is riding on a weld seam, which will eventually pop the head off the bolt.

The DIN bolt gets replaced with a Toyota bolt w/ JIS head. Now it can be run in & out w/ a socket.

This is shows more of the bracket in question. Note the two AC mounting bolts hanging in the bracket. One is the correct M10 size, the other that is dangling more steeply is the too small 3/8UNC size. Using the wrong size bolts to mount the compressor allowed it to cock in the bracket causing the belt misalignment to be even worse.

The Toyota bolt is used as a pivot point to rock the whole bracket up in front. That leaves two 10mm and one 12mm bolt holes that need stretched.
The 12mm hole at the botom that is also the topmost engine mounting bolt, needs moved about 8mm. Let the chain drilling begin.


Last edited:
- Joined
- Sep 26, 2003
- Threads
- 117
- Messages
- 11,199
- Location
- Lancaster, Ohio, USA
- Website
- www.tlcperformance.com
- Thread starter
- #233
After getting the mounting holes all slotted & stretched, the modified bracket is installed w/ better hardware.

The new 65A alternator (the one that is spec-ed for AC trucks) is hung with the correct long M10 bolt instead of two 3/8 bolts. The ears of the alt require significant grinding to allow it to pivot without interfering with the compressor ears.


The AC compressor is installed with all correct M10 hardware and a correct 11/16 belt is installed.

BX57 seems to be the correct number for this type of AC kit.

Last edited:
- Joined
- Sep 26, 2003
- Threads
- 117
- Messages
- 11,199
- Location
- Lancaster, Ohio, USA
- Website
- www.tlcperformance.com
- Thread starter
- #234
Carb oddities
The carb & dissy need gone through. They appear to be fairly stock & unmolested on the outside.
Carb is filthy, but has correct date code and part #.

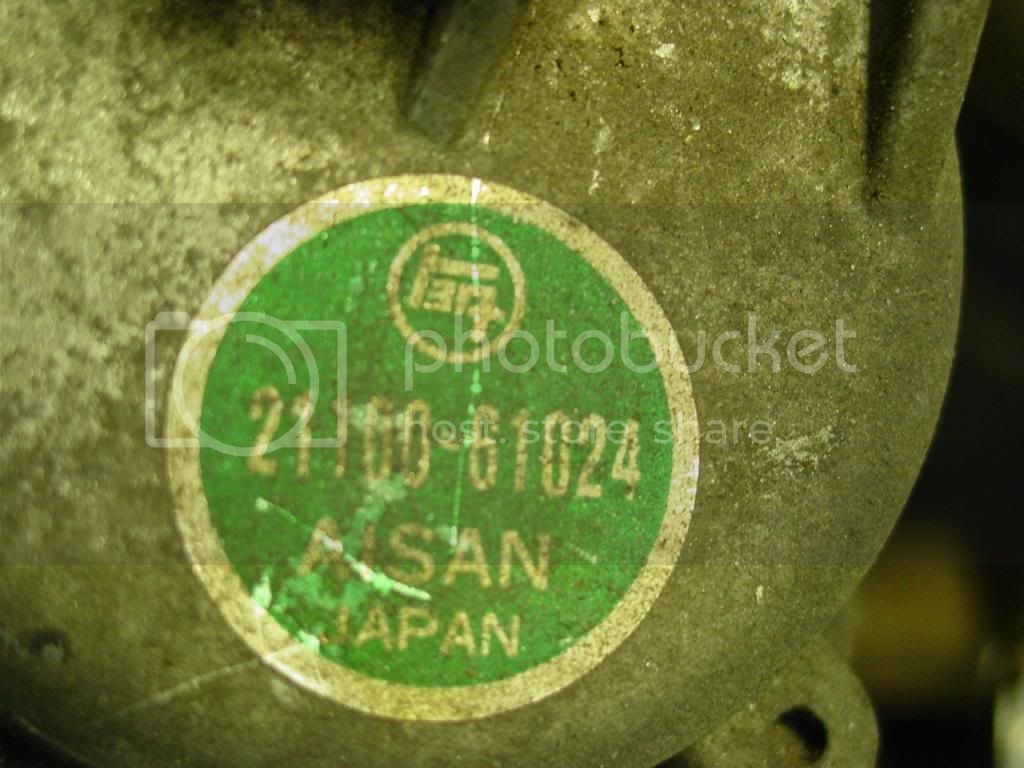
There are stalagmites growing on the carb due to the wrong air cleaner fasteners (no rubber grommets) allowing rainwater & condensate to trickle down the stud and into the carb. PO sez that's not important.


The carb has some unusual "mods" inside. The power valve is broken off and the power jet is actually soldered shut.

The main jets were also mangled & soldered & redrilled (no good pics of them).
The secondary diaphragm was completely shot, cracked through everywhere, rendering the second barrel inoperative.

The carb would have flowed enough fuel to make 70? HP. This contradicts the PO optimistic claims of 200HP.
OTOH, it turns out the dissy is stock.
The advance mechanism is sticky because the ventilation system was not working right at some point in the past. A quick cleanup, replacement of dustshield and governor pin bushing has it good as new.

Last edited:
- Joined
- Sep 26, 2003
- Threads
- 117
- Messages
- 11,199
- Location
- Lancaster, Ohio, USA
- Website
- www.tlcperformance.com
- Thread starter
- #235
T-stat housing
On to the modified(?) t-stat housing. It has a bunch of booger welding inside, the face is hand filed to be not flat, and the BVSVs are leaking & broken.


The top is bead blasted to remove layers of paint for a better inspection.
A used bottom is pulled off the shelf.
One of the original 1/31/1978 BVSV that is not broken is cleaned up for reuse.
Bolts are cleaned & antiseezed.
T-stat has 10/1990 date, looks good and is correct 82* rating, so it is re-used.


Pic of installed good t-stat assy and good belt tracking.

This completes the engine, yes? Next is the t-case.
On to the modified(?) t-stat housing. It has a bunch of booger welding inside, the face is hand filed to be not flat, and the BVSVs are leaking & broken.
The top is bead blasted to remove layers of paint for a better inspection.
A used bottom is pulled off the shelf.
One of the original 1/31/1978 BVSV that is not broken is cleaned up for reuse.
Bolts are cleaned & antiseezed.
T-stat has 10/1990 date, looks good and is correct 82* rating, so it is re-used.
Pic of installed good t-stat assy and good belt tracking.
This completes the engine, yes? Next is the t-case.
Last edited:
crushers
post ho
damn Jim
the deeper you go, the more interesting the build.
the deeper you go, the more interesting the build.
Jim-your pictures and ability are absolutely awesome to read through. I'm new here but just went through a "similar" type situation...I've read MUD constantly (literally 4+ hrs/day) for the past 2 months and learn more about builds than you can imagine (not that I can do any of it myself ") )from the unfortunate circumstances such as this owner is going through.
)from the unfortunate circumstances such as this owner is going through.
Similar to me, it is comforting for the owner just to have the confidence that everything being done is being done the right way...gunna check out the "ethical" thread now as I may be able to help the owner if needed...thanks again!
Mike (gotta get rid of my avatar, I know until I replace it hopefully very soon)
)from the unfortunate circumstances such as this owner is going through. Similar to me, it is comforting for the owner just to have the confidence that everything being done is being done the right way...gunna check out the "ethical" thread now as I may be able to help the owner if needed...thanks again!
Mike (gotta get rid of my avatar, I know until I replace it hopefully very soon)
Wow, the condition of the Tstat housing pretty much says it all about this "restoration" doesn't it.
- Joined
- Sep 26, 2003
- Threads
- 117
- Messages
- 11,199
- Location
- Lancaster, Ohio, USA
- Website
- www.tlcperformance.com
- Thread starter
- #239
Yes, the t-stat was a remarkable bit of work. In fact, it deserves another picture:

And now the fairly complete engine (placeholder carb, no insulator, no AC):

And now the fairly complete engine (placeholder carb, no insulator, no AC):
It is almost like an effort was made to get everything into such bad shape. Impressively bad!
Similar threads
Users who are viewing this thread
Total: 1 (members: 0, guests: 1)