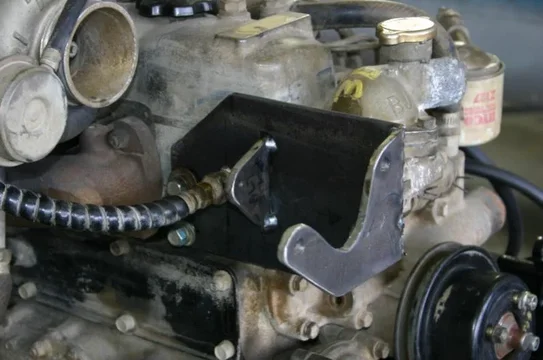
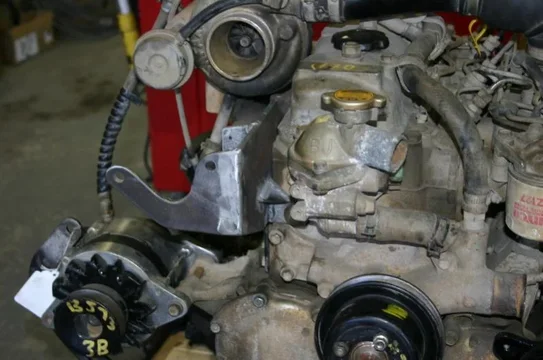
Builds Here we go (FJ-40 getting a 3B/Turbo/H55f)... (1 Viewer)

This site may earn a commission from merchant affiliate
links, including eBay, Amazon, Skimlinks, and others.

This is a slight crosspost from the 40 section, but I got to welding the rocker panel in today...
rocker 2.jpg

And here's some pics of the PS bracketry that I powder coated yesterday. It looks so good!
ps bracket 1.jpg

The idler pulley at goes into this bracket:
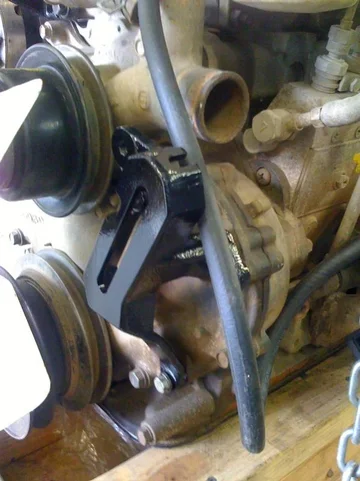
ps bracket 2.jpg

The FJ-80 (with the 3FE, not the 1FZJ) has the same profile pulley. That is good. Unfortunately, the stock bearing ID is too large to fit with the 3B PS idler assembly, and the pulley ID/bearing OD is different from the one off the original 3B idler. So, I'm going to see if a bearing shop can come up with anything. I figure NSK has got to make a bearing that would work somehow.

More in a bit, I again forgot my camera cable, so these were just pics off of my camera phone.

Dan
rocker 2.jpg
ps bracket 1.jpg
ps bracket 2.jpg
 
Real quick update...

The rocker is pretty much done until it's time for body filler and whatnot.
progress.jpg

Also been getting ready to swap the parking brake. I need to order some new shoes for it. So, in the meantime I powdercoated the backing plate.
parking brake backing plate.jpg

Unfortunately I have to head to work tomorrow and will be gone all week long, so it'll all have to wait...

Dan
progress.jpg
parking brake backing plate.jpg
 
Well, life is a bit nuts around here at the moment. But....

Here's a bit on the PS pump deal....

I got a PS setup, minus a pump from Radd Cruisers. It came from an October 82 to November 84 truck, from what I have gathered. That means that it has a 44443-60040 bracket that bolts to the engine.

These year trucks used the 44320-60080 pump. This pump is now manufacturer discontinued, which means that it is very much not available. However, the later BJ series trucks used the 44320-60090 pump. The 60090 pump is still available from Toyota (roughly $330 IIRC), and it is also used on the FJ-62 (which is why it is available).

So, taking a gamble (as it were) we bought a 44320-60090 pump. Long story short: the newer (November 84-November 85) pump requires the newer bracket (44443-60060), and will certainly not work with the 44443-60040 bracket.

Here's some pictures to show why... They speak for themselves...

This means that I'll either be looking for the later model bracket, or just fabricate one myself. Easy enough to do, and the hard part is the pump (because it needs to have the hose connections on the right side)
new pump old bracket 1.jpg
new pump old bracket 2.jpg
new pump old bracket.jpg
 
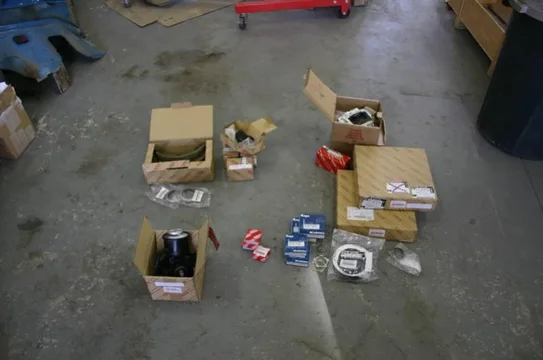
What does a $1500 pile of parts look like?

If you've ever been curious...
expensive pile.jpg

What's in it?

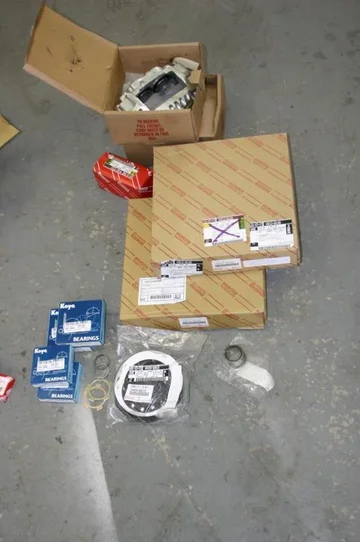
Well, here's the stuff for the rear axle...
expensive pile 1.jpg
That's basically just 4 new wheel cylinders, new shoes, and seals. Nothing too big going on here, just replacing just about everything.

And for the front axle...
expensive pile 2.jpg
Reman IFS calipers, vented rotors, and obviously a full gasket kit to do the birfs, bearings and seals. I've also got Marlin Heavy Duty inner axle seals to use with this stuff.
expensive pile.jpg
expensive pile 1.jpg
expensive pile 2.jpg
 
What else is in that pile?

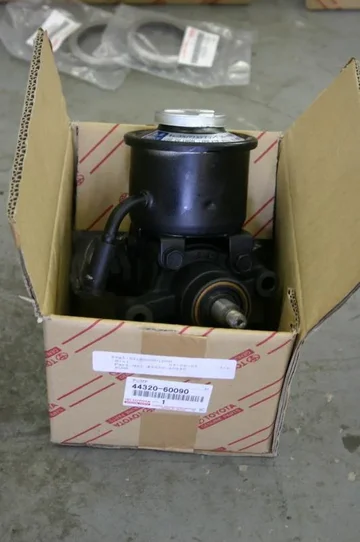
A brand new PS pump! There's discussion about it a few posts above...
new ps pump.jpg

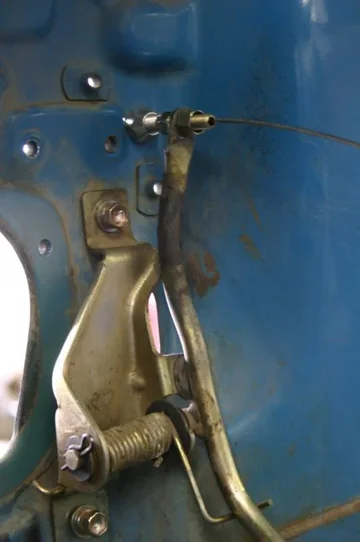
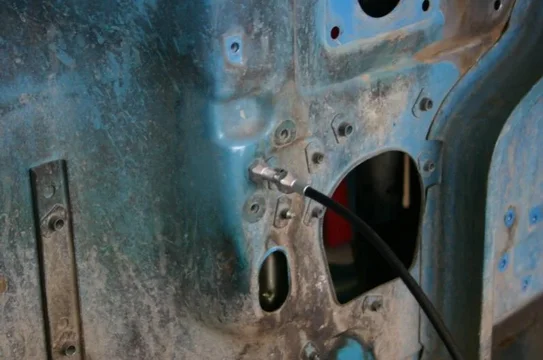
Also, I ordered some stuff from Summit Racing. One of the things I got was a Lokar TC-1000U universal throttle cable. I didn't get the blingy stainless one, sorry. Here it is attached to the throttle pedal,
throttle cable 1.jpg
throttle cable 2.jpg

This truck originally had a weber carb when Dad bought it, but to pass emissions here it had to go back to the Aisin, and so this throttle pedal was left over. Glad it was, as the throttle cable was a lot less expensive than the pedal assembly from Downey (commonly used with V8 conversions, apparently).
new ps pump.jpg
throttle cable 1.jpg
throttle cable 2.jpg
 
But wait! There's more!

Another little package arrived in the mail. OK, not really in the mail. Arrived at the shipping terminal. ;)

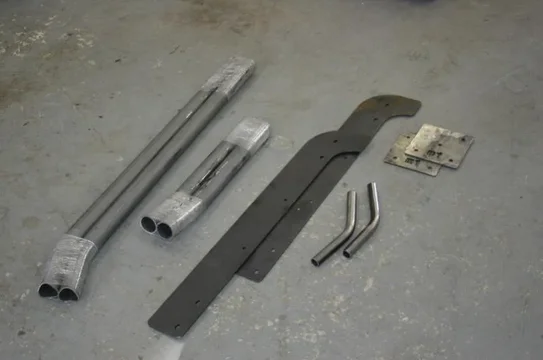
If you haven't figured it out yet: it's a cage. A Metal Tech Jackson Cage
no less.
mt cage 1.jpg
mt cage 2.jpg

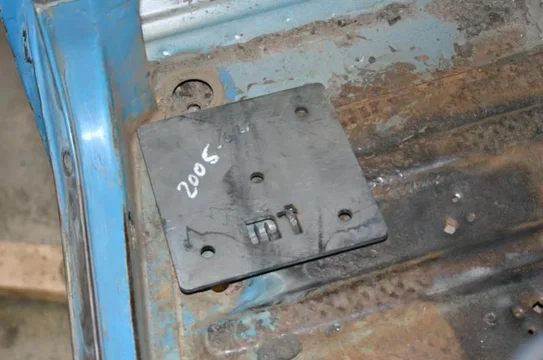
Here's the front hoop plates. The MT logo is cool. I think I'll be doing some bodywork so that they can sit flush on the floor though (even though there's a frame tie in as well). Besides: I've got rust repair still to attend to in this area...
mt cage 3.jpg
mt cage 1.jpg
mt cage 2.jpg
mt cage 3.jpg
 
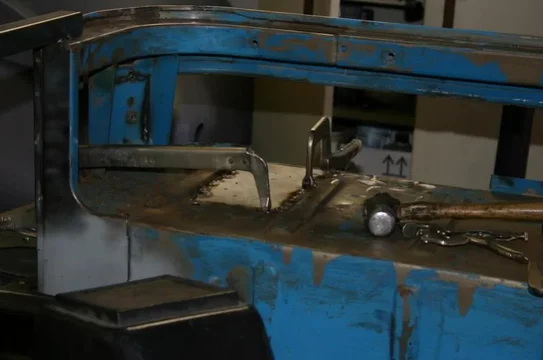
I also did more rust repair today.

This is all that I have to do before the left quarter panel can go on!
more rust 1.jpg
more rust 2.jpg

And some more repair on the right side...Bummer you won't be able to see this underneath the Metal Tech cage plate, but I'll know it's there. I even put the captive nut plate back on, even though it'll never be used (it's covered by the cage plate).
more rust 3.jpg

That's about the time I realized that I actually have to go to work tomorrow. I was under the impression that I didn't have to leave until Monday, but nope. Kind of frustrating, as I'm really getting to the end of the body work. I am excited to get to putting the actual engine into the frame and making it run again!

EDIT--I forgot to snap pictures, but I got the PS idler figured out. Between the parts I had, the parts Alia176 had, and the parts at Pappy's--I got a complete idler that will work nicely. If the stuff hadn't all come from the junkyard, I'd have more information on where it all came from.

I should be home on Wednesday night, and then maybe have a few days to HOPEFULLY wrap up the bodywork.

Dan
more rust 1.jpg
more rust 2.jpg
more rust 3.jpg
 
Thanks guys. It is coming along, slowly....

If I'm on a roll, I honestly think there's only another couple of days of rust repair in it.

After that: I get to do only fun stuff. Like swapping the motor, building a skidplate, rebuilding the axles.... You know: the stuff that isn't measured in "gauges."

Dan
 
Good question....

Research time! I don't see a spot to put the alternator bracket on that, but I'll see if I can't find more pictures somewhere to clarify...

It sure looks "close" to something that might work.

Dan
 
Yeah, I see that, but I don't think it will work.

I think the easiest thing for me to do will be to get out the plasma cutter, the welder and start fabricating one that will work. Should be easy enough.

I unfortunately won't be home for a week or so, so we'll see how it goes when I can finally get back to dealing with it...

Dan
 
Hey. I have a 12volt edic/wrelay & harness from a 79 hj45, I also have a tranny mount that looks like it may fit, it has 2 studs sticking out bottom & 4 holes, 2 per side where it bolts to tranny, if your interested i could get some pics. Rollie
 
Hey. I have a 12volt edic/wrelay & harness from a 79 hj45, I also have a tranny mount that looks like it may fit, it has 2 studs sticking out bottom & 4 holes, 2 per side where it bolts to tranny, if your interested i could get some pics. Rollie


For this project: not needed. Got all that stuff.

I'll send you a PM tomorrow hopefully. I might be interested for a different project...

Dan
 
Man, between work, and going to visit my brother in MT (there's a story in the 60 section) I've not been able to do as much as I'd have liked.

But....

I got busy fabricating a bracket to bolt the PS pump onto the engine.

Basically I just copied the factory bracket (the one that doesn't fit the pump we've got) and went from there. I'm using 1/4" steel for all this. The pictures speak for themselves...
ps bracket 1.jpg
ps bracket 2.jpg
ps bracket 3.jpg
 
I actually had to cut this tab off. Turns out that the late model pump and the PS alternator bracket don't like one another.
ps bracket 6.jpg

But here's tacking it together...
ps bracket 4.jpg

Here's the best way to prove to myself that it's nice and straight. This would have been much easier if I would have had help.
ps bracket 5.jpg
ps bracket 4.jpg
ps bracket 5.jpg
ps bracket 6.jpg
 
Last three...

The original was gusetted a bit, so I did the same. I'll do a little more before it's all done (I think I'll weld some 1/8"x1/2" strap along the top of the bracket to stiffen it a bit side to side)

I need to buy a 10x1.25mm tap tomorrow, that's why the holes are only pilot sized. They are lined up correctly though, so it should be real quick work once I get a tap in there.

ps bracket 7.jpg
ps bracket 8.jpg
ps bracket 9.jpg

I also have to weld on the tab for the alternator bracket. I went back to the non-PS alternator adjusting bracket, and it clears the PS pump. I don't know why the early model PS alternator adjusting bracket is so tall, but it is.

I might also cut out a hole in the plate next to the PS pump. The original bracket had a window in it there, and not that the weight savings would be that big of a deal, but every little bit helps. Any reason I shouldn't cut a window into the large plate?

As soon as I finish this bracket (it's 99% done now) then I'm back to rust repair...

Dan
ps bracket 7.jpg
ps bracket 8.jpg
ps bracket 9.jpg
 

Users who are viewing this thread

Back
Top Bottom