Head Gasket job (total noob) (2 Viewers)

This site may earn a commission from merchant affiliate
links, including eBay, Amazon, Skimlinks, and others.

I will use the "angle degree torque gauge" as suggested by Eric the Car guy. I think that it is pretty neat tool to have.

you may want to check the rear two headbolts to see if there is room against the firewall to use an angle torque guage. Otherwise looks like a great tool.
 
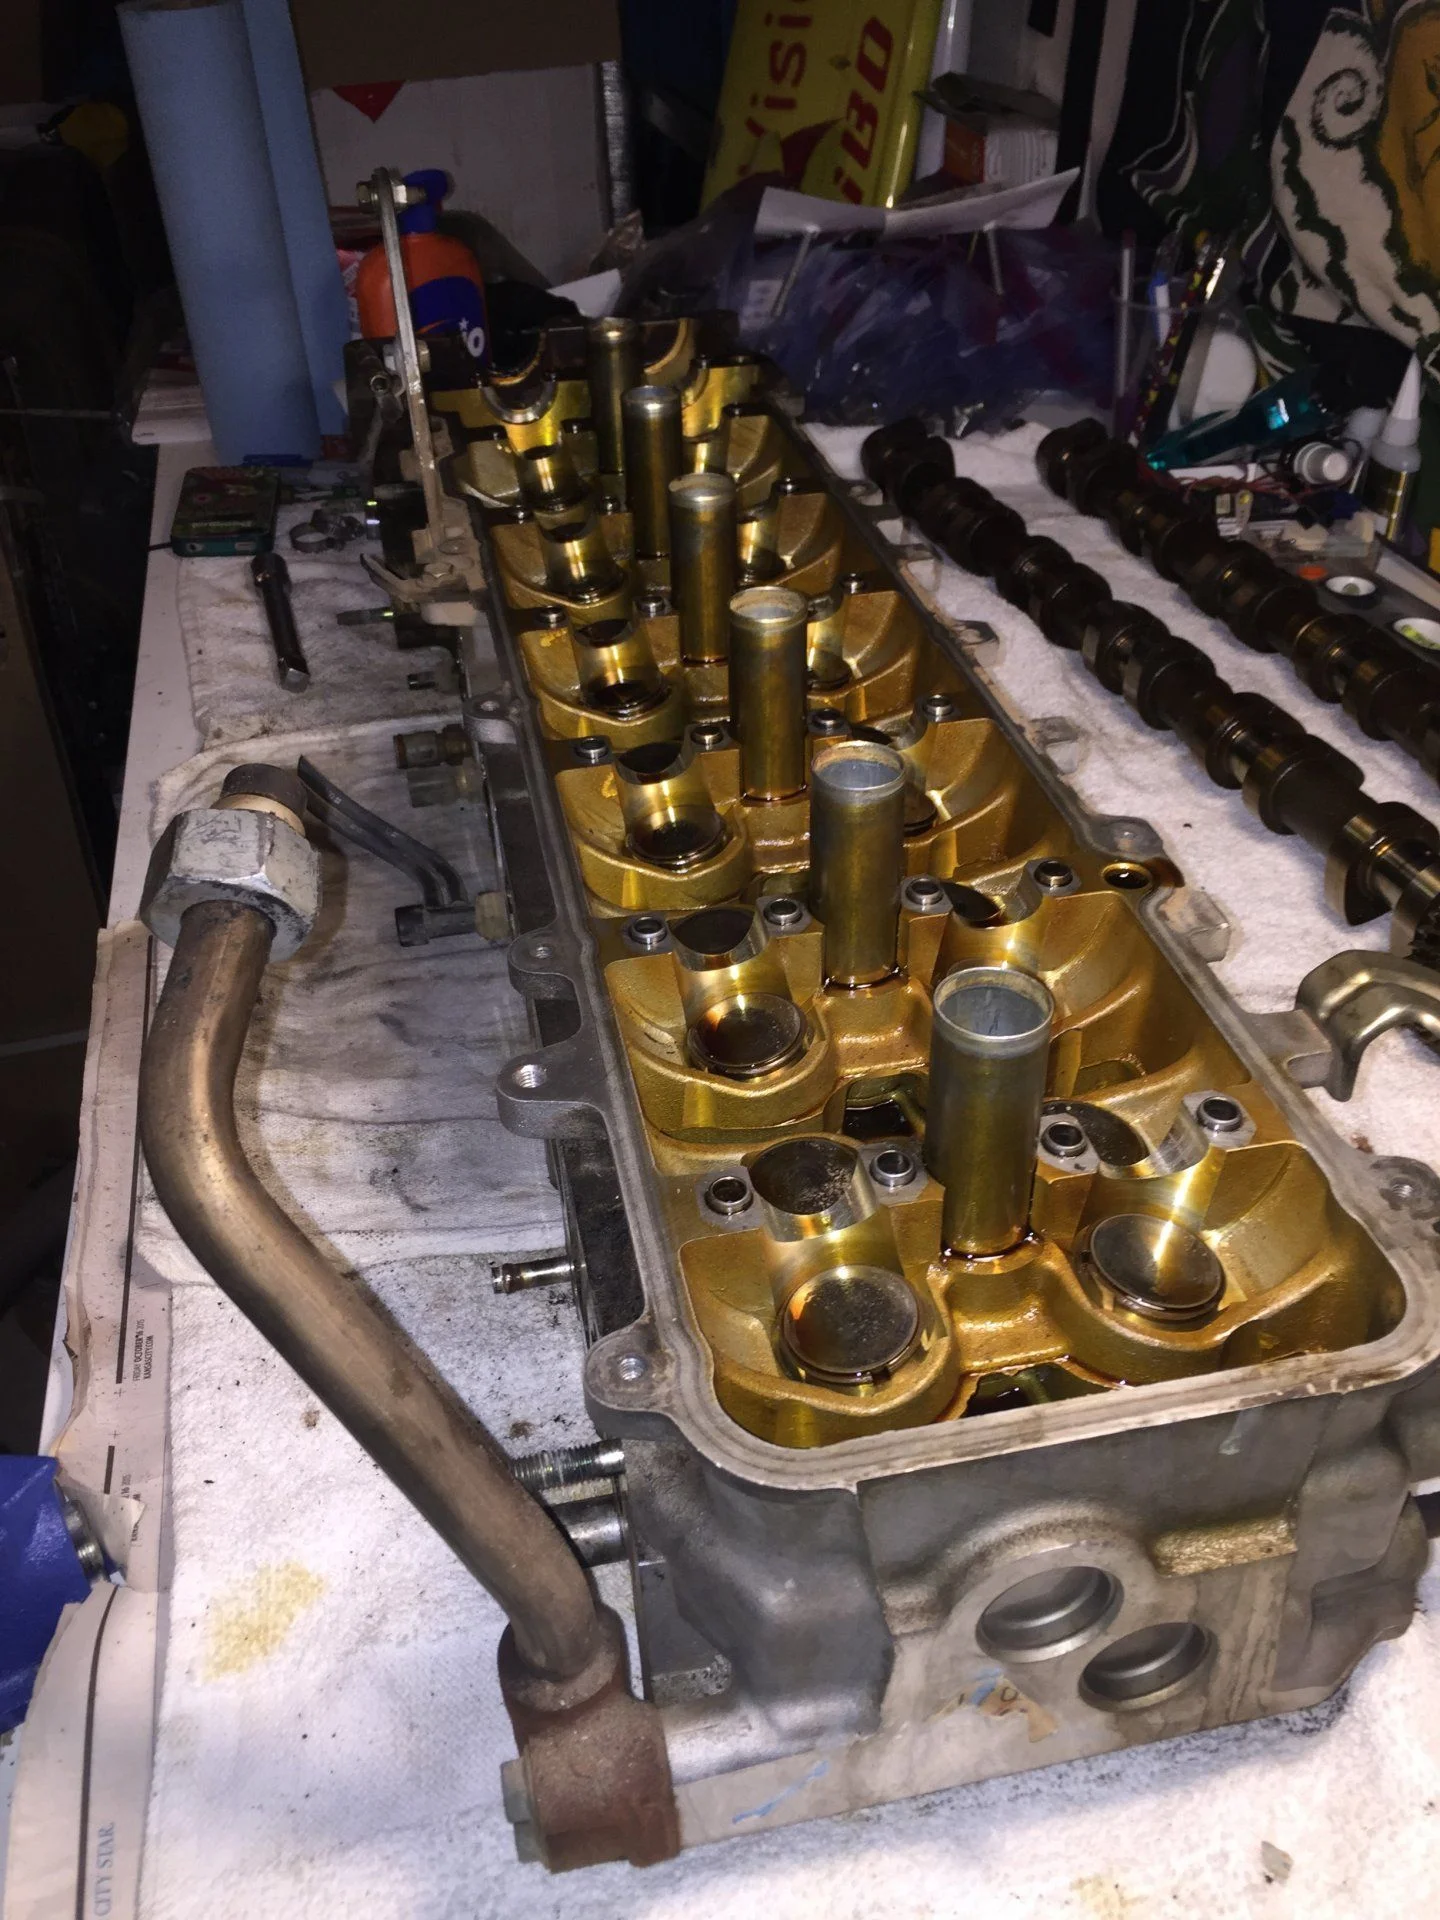
Head is off. I don't know if I should be happy or not :)

All went well, needed a little help lifting the head from the bay as it was little heavy. I just followed the FSM and it is pretty straightforward. Just couple of questions:

  1. before sending the head to machine shop I suppose that I should take the sensors out.
  2. shall I just rip the old gasket from the block or is there some specific technique how to do that ?
  3. what is the best way to clean the block. I have seen Robbie commenting that he uses scotch pad. Do you have any recommendation what exactly should I buy ?
  4. Can I just rotate the crankshaft to clean every cylinder even when the timing chain is locked with zip ties ?

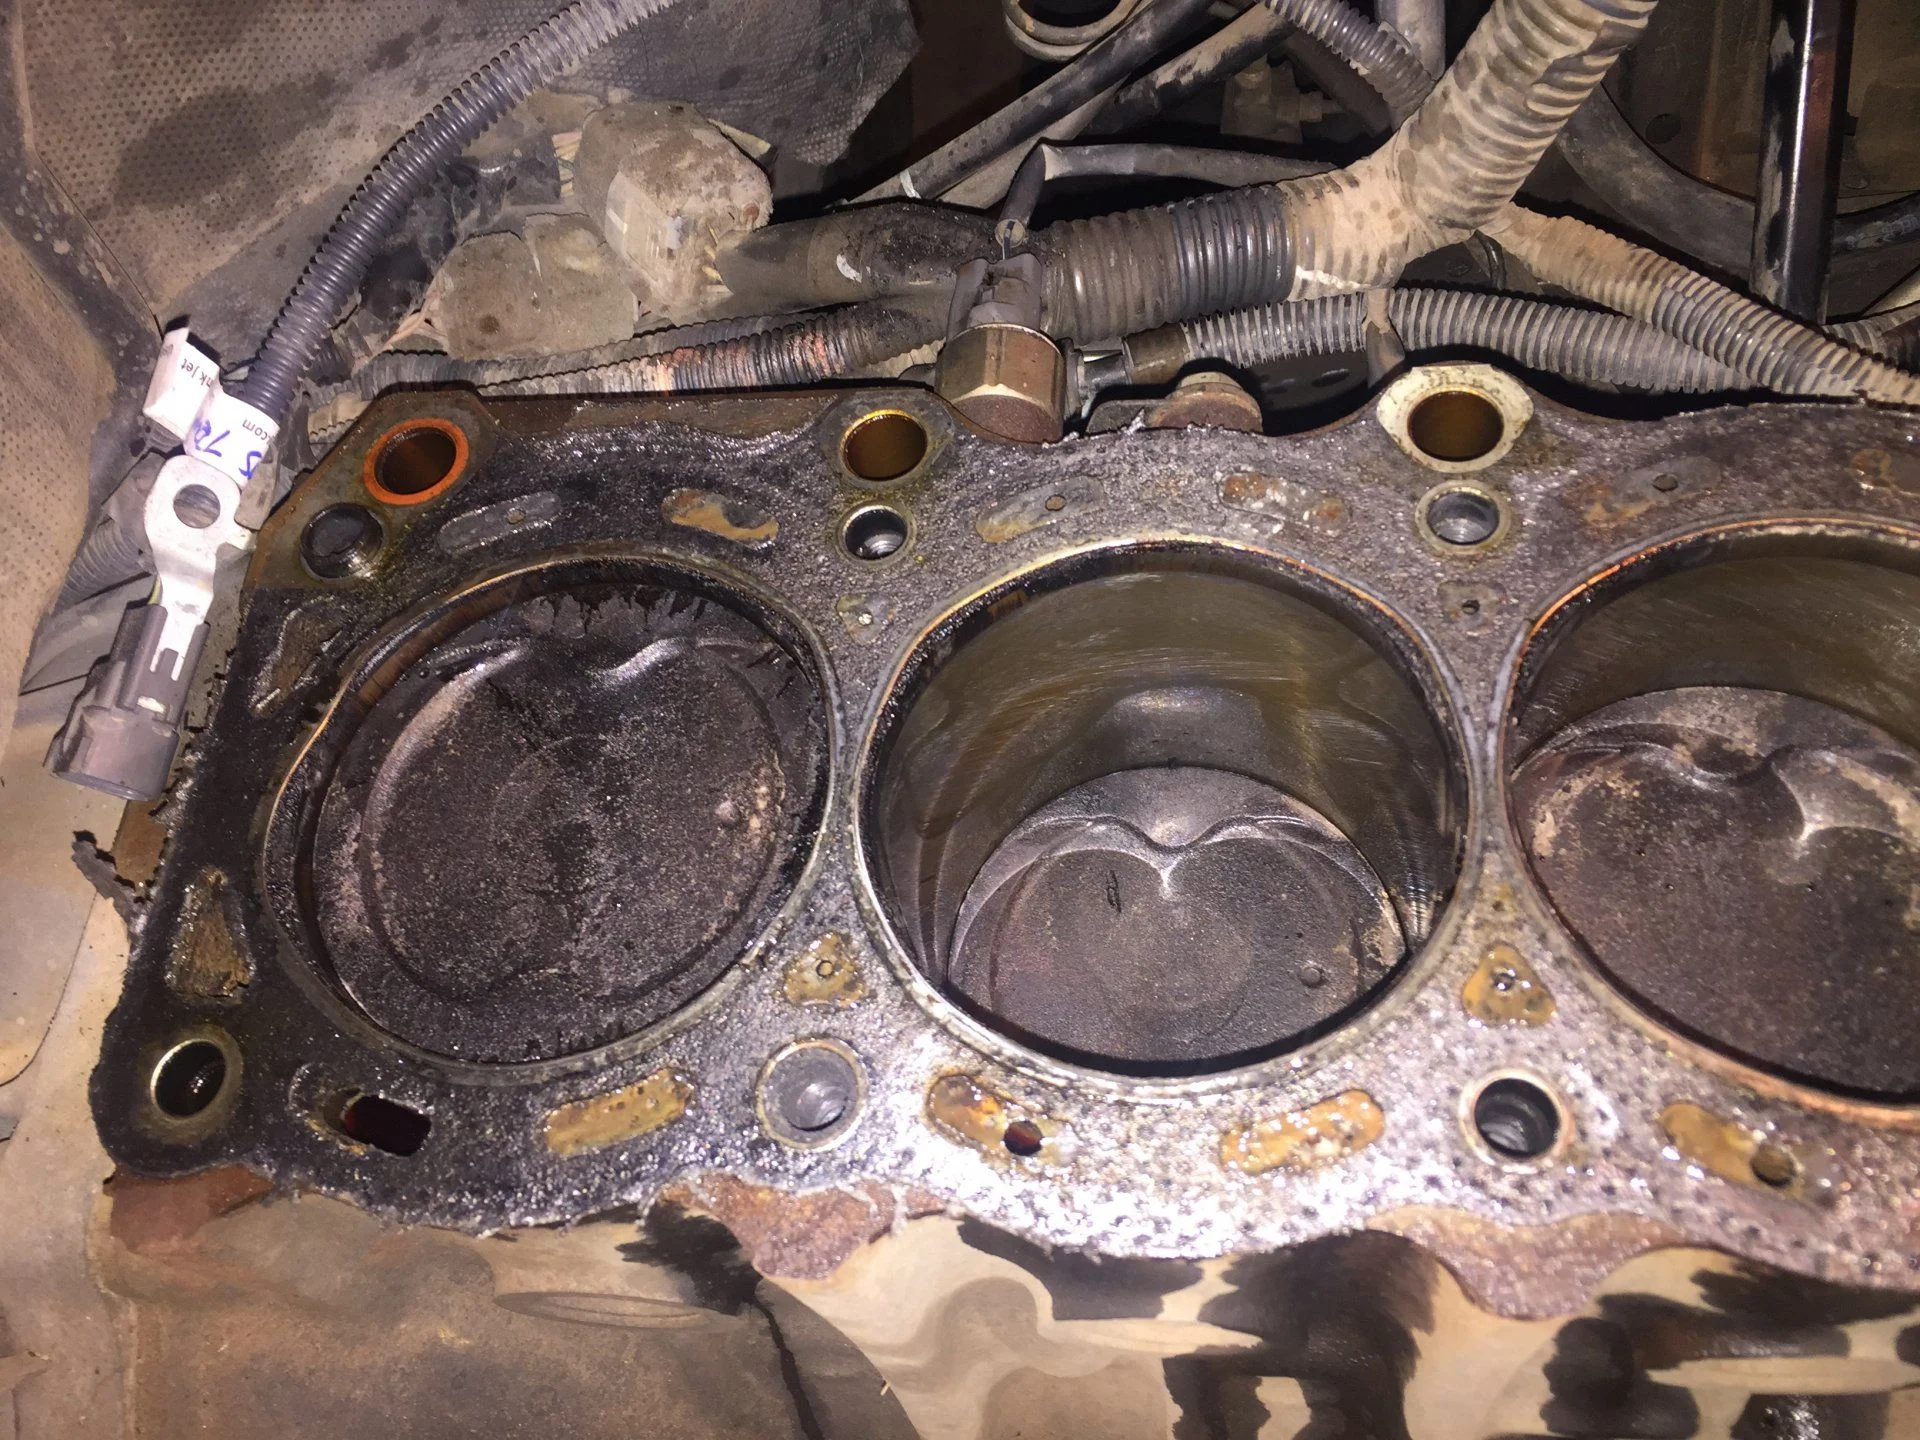
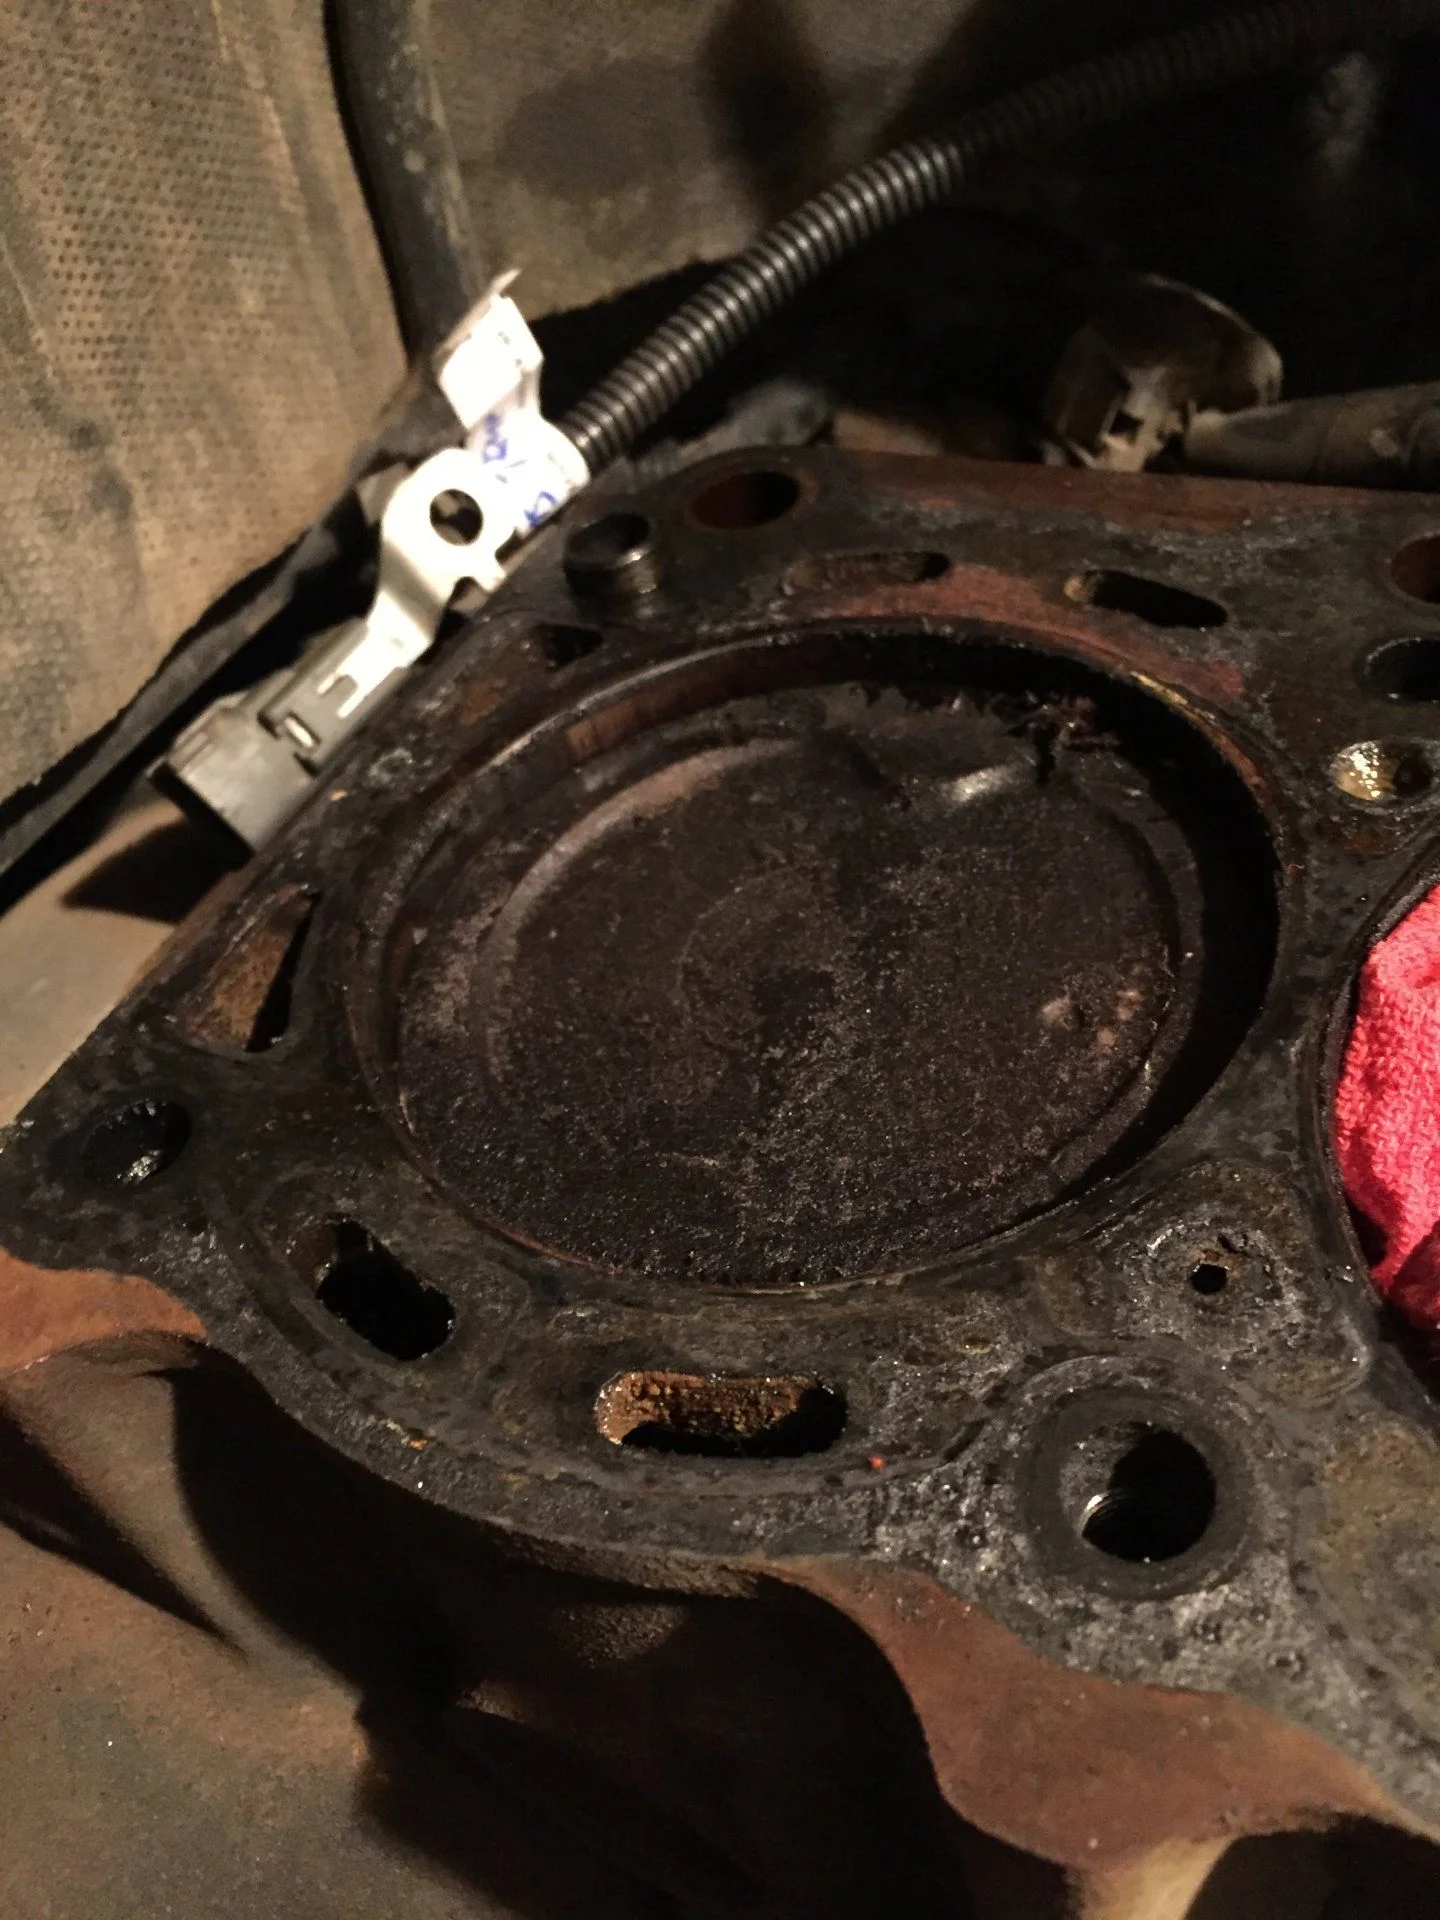
Some photos:
 
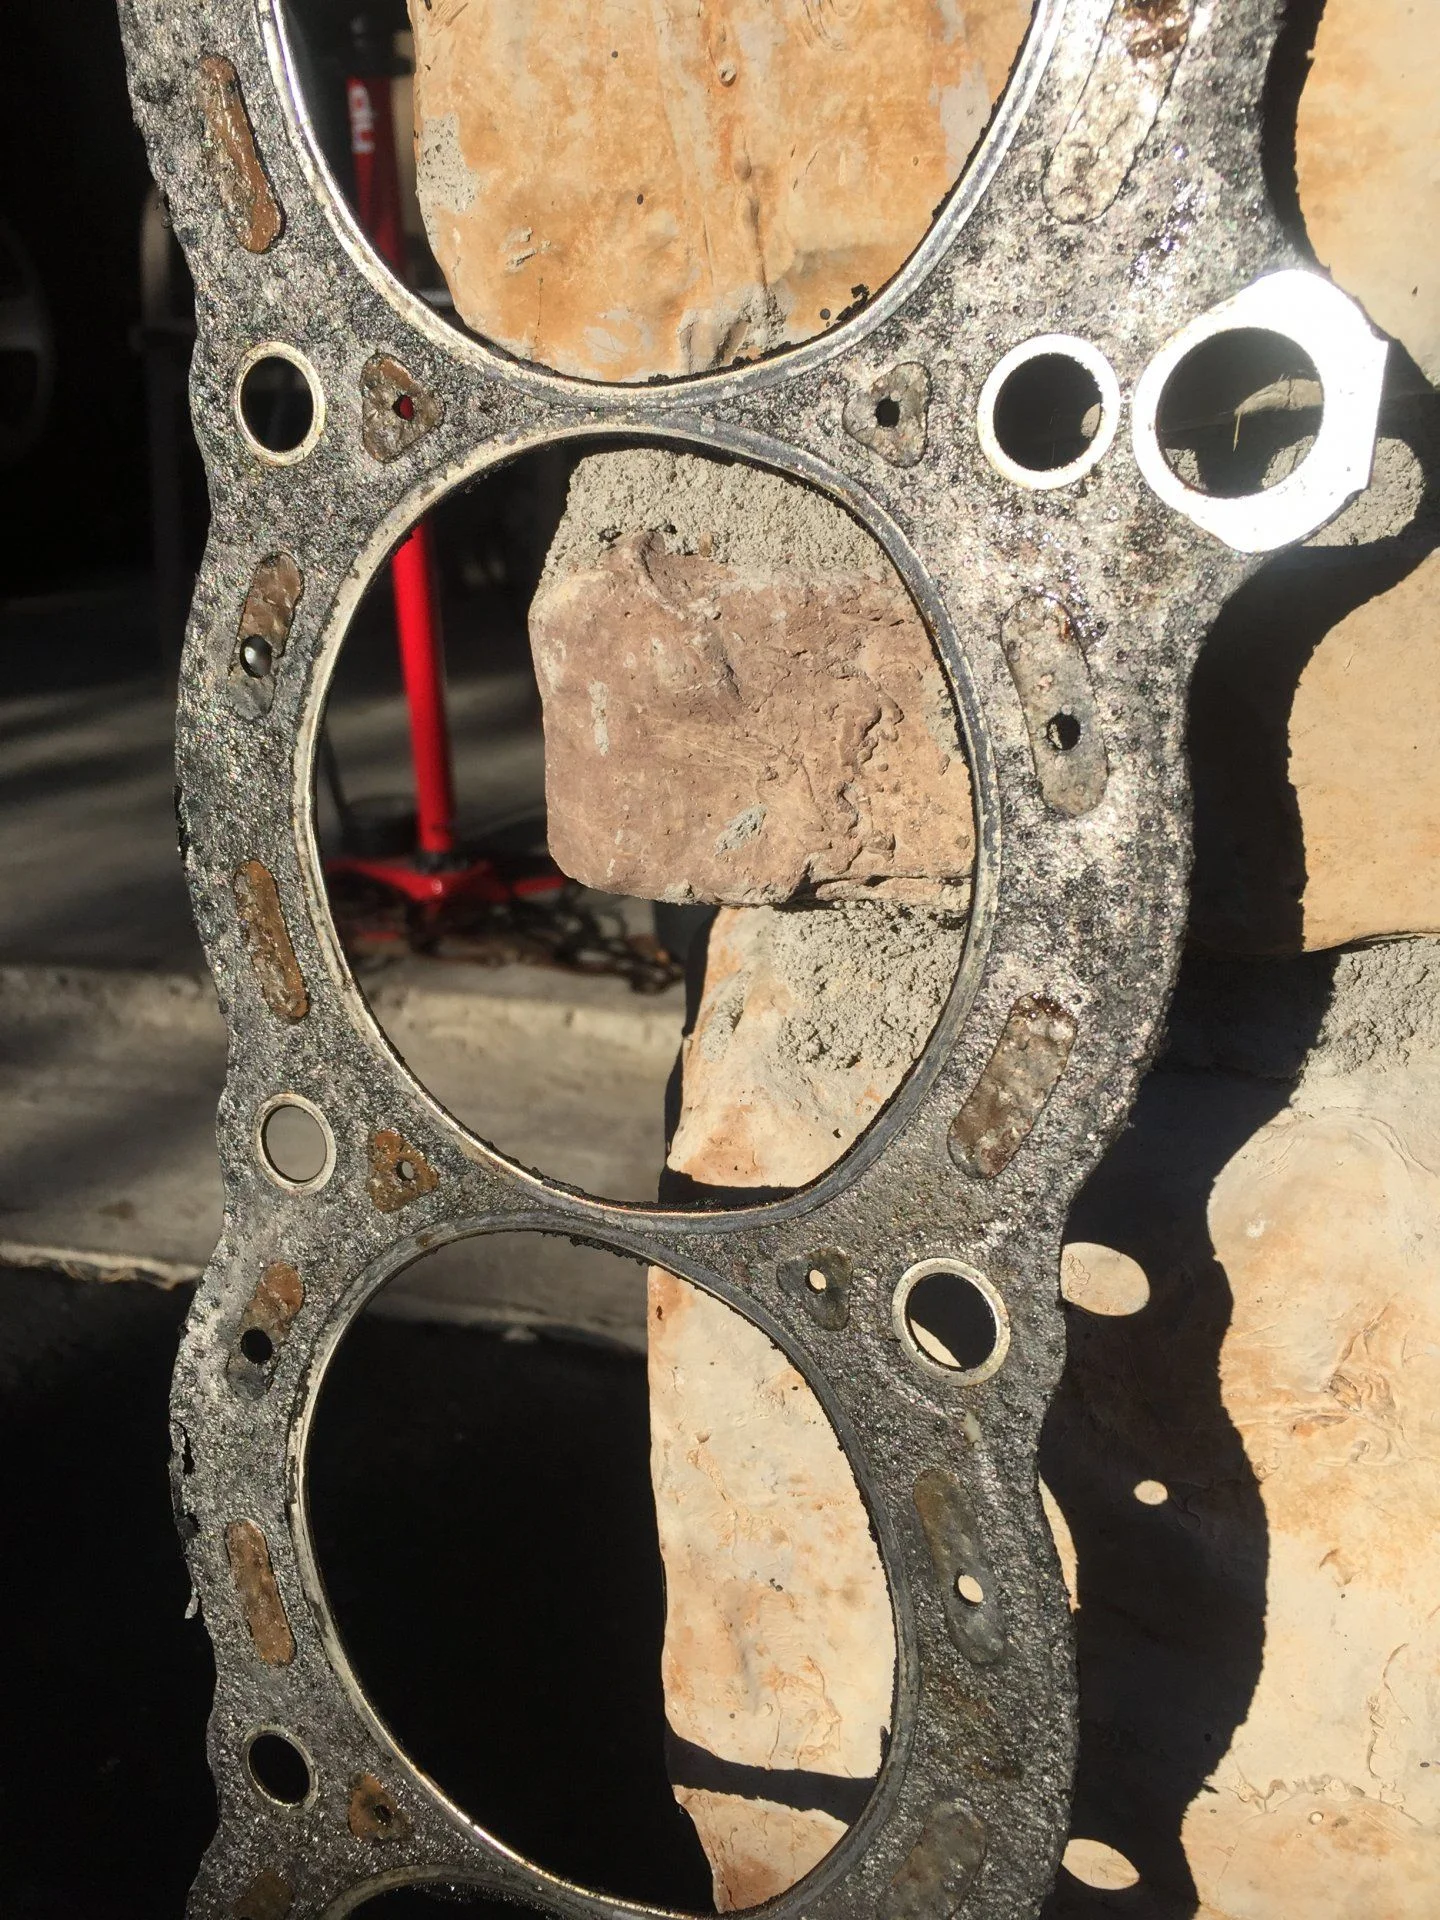
How do I recognize if this gasket is the original or if it was already changed ?
 
This is what I found how to clean the surface:

Head gasket pics
"Is the engine back together yet Jklubens? Hopefully you are using the beer funnel for what it ment for.
As for cleaning the tops of the pistons and the cylinder wall of the carbon and the top of the block. i use the 3m scotch brite pads on a air die grinder. NOTE: BE VERY CARE FULL WITH THE VERY COURSE ONE, IT CAN WEAR DOWN THE BLOCK VERY FAST. On the top of the pistons i use a wire brush(soft one) to break up the carbon. On the cylinder walls I use scotch brite pads and scrape it with a a small screw driver to brake up the carbon. I use cylinder plugs made of thick paper board(like a ups folder mailer). I peen out a plug to catch the partical for the other cylinders(6 plugs ) I usually work on the two cylinder that are at the top of the stoke at one time. I use a vaccuum to suck what I can and air to blow the rest way. The stuff that is stuck down the cylinder wall and piston can be pulled out with oil on the cylinder walls, the rotate the pistons up and down (mind the timing chain while moving the pistons up and down). When cleaning the top of the block, mind getting stuff down the open timing chain area and the oil galley.
these are techniques I have used for well over 28 years to clean out cylinders.
If done properly it return the combustion chamber to near new conditions and gives the engine a great boost. It is a must for supercharging and or turbo charging(IMHO). As it gets rid of the carbon that can create hot spots that can lead to predetanation and piston melting.
Any how it can be a time consuming process, the resluts are nice.

Happy Holidays every one. Just waiting for the kids to get out of bed. Robbie"

"I use 3 different types of scotch brite pad. From course to fine to clean the surface. by the time I am done the surface is fairly smooth except for the pitting from corrosion. With some of the Scotch brite pads, you can polish a surface to very very smooth surface.
Rick, if you can not use some type of abrasive, what does this information reccomend a person to use to clean the surface of the block?
In the not so distance past, I used sand paper in various grades to do the same job. Even using a DA sander(this method I have used for a very long time) But you have to be very carefull in the cleaning process to make sure no sand particals are left in between the piston and the cylinder wall. Sand paper was all I was trained to use in the early 80' to late 80's. Then Scotch brite came out in force. The big benifit of it was to allow a person not to have to be as miticulus in the cleaning process, as the material would not harm the internals of a engine quite like sand paper particles. Not to say, I am not going to clean just as much, but I do not worry as much about something left behind.
Any how enjoy the holiday(what a way to engoy them, tearing a engine apart). later robbie"
 
  1. before sending the head to machine shop I suppose that I should take the sensors out. YES.
  2. shall I just rip the old gasket from the block or is there some specific technique how to do that ? RIP - should come complete.
  3. what is the best way to clean the block. I have seen Robbie commenting that he uses scotch pad. Do you have any recommendation what exactly should I buy ? Scotch brite pads. I use them and a block of wood to keep even pressure.
  4. Can I just rotate the crankshaft to clean every cylinder even when the timing chain is locked with zip ties ? No real opinion. I have heard some say to not clean the pistons. Not sure it really helps, but it does give you possibility of leaving dirt in cylinders.

machine shop will need head with cams, bearing caps, and all the new valve parts.

I pulled mine last night and posted a pic on TAC forum. I got a scrap of lumber and screwed scraps of wood on it to keep it from moving.
 
I was impressed by the job that my 3 x 8 inch DMT diamond sharpening plate did in cleaning up the surface. It cuts fast and it doesn't appear to lose any grit particles. It is dead flat, so you can see any surface imperfections and pitting. You can also use it to sharpen anything.
 
Yes, remove everything you can from the head before taking it to the shop. Will you have the shop assemble the head and set cam lobe clearances? Probably a good idea.
I cleaned my block with a sealant scraper and scotch brite pads and lots of elbow grease, no power tools. Be sure to use a shop-vac while you are cleaning. Ask the machine shop if you can borrow their straight edge in order to check your deck surface for flatness per the FSM after cleaning is done.
You won't be able to rotate the crank very much but it will be enough to clean carbon at the top of the cylinder wall.
 
For the head sending to machine shop: Do I need to take out the studs also ?
 
you may want to delete/ bypass the rear heater. i personally NEVER used it and given that the tubes are located directly over the exhaust...........its an area very prone to rust- leaks and eventual low coolant levels/overheating. im much happier having removed my rear heater and frees up some underseat storage space.
 
you may want to delete/ bypass the rear heater. i personally NEVER used it and given that the tubes are located directly over the exhaust...........its an area very prone to rust- leaks and eventual low coolant levels/overheating. im much happier having removed my rear heater and frees up some underseat storage space.
I will definitely do that. Already looking into this one : 1FZ-FE Work Around Kit/Rear Heater Bypass – Kit 3 | Toyota 80 Series Land Cruiser and Overland Gear.
 
I took the studs out except one at the rear that I had one end of a cord tied to (and the rear hanger) for carrying - I also took out all the sensors .. again be careful that the socket or wrench you use for the sensors fits properly and you dont damage the sensors. It is also handy to remember how they are oriented before you remove them (photos are great)

Some things to be aware of: there are washers that sit on the head between the headbolt and aluminum head; retrieve these as others have had them go missing when the head went to the machine shop. Also if your valve clearance was ok before and you do not want to have the shop reset your valve clearance ... make sure you remove all the "buckets" with the shims that sit on the valves and label each one so that they go back on the same valves (I used individual numbered baggy's) ... also remind the shop that the valve seals are specific to intake or exhaust ( I put mine in two separate bags and labeled them)

ALSO take multiple photos of your head before you disassemble the studs and sensors etc ... My shop returned my head with the rear PS engine hanger reversed from the direction that it was when I sent it to them .. I dont know why but assume it was to make handling easier... the head will not go on if this is not corrected before you try to install it ... which is also very annoying as you are trying to maneuver it properly onto the block and gasket without disturbing things too much. I caught this because of my photo's

I did not turn the engine over once I had the timing chain and gear zip tied ...

I used a gasket scraper that had a razor blade (and several spares) I also used a shop vac to keep stuff out of the water jacket and pistons. I did not use any abrasives on the block ... it took a while! Some areas will appear clean ... then a little bit of solvent on a rag rubbed on the area and the blade again finds more gasket material - takes a while like I said.
Thanks,

you have been very helpful with your comments. Thanks a lot.

Jorge
 
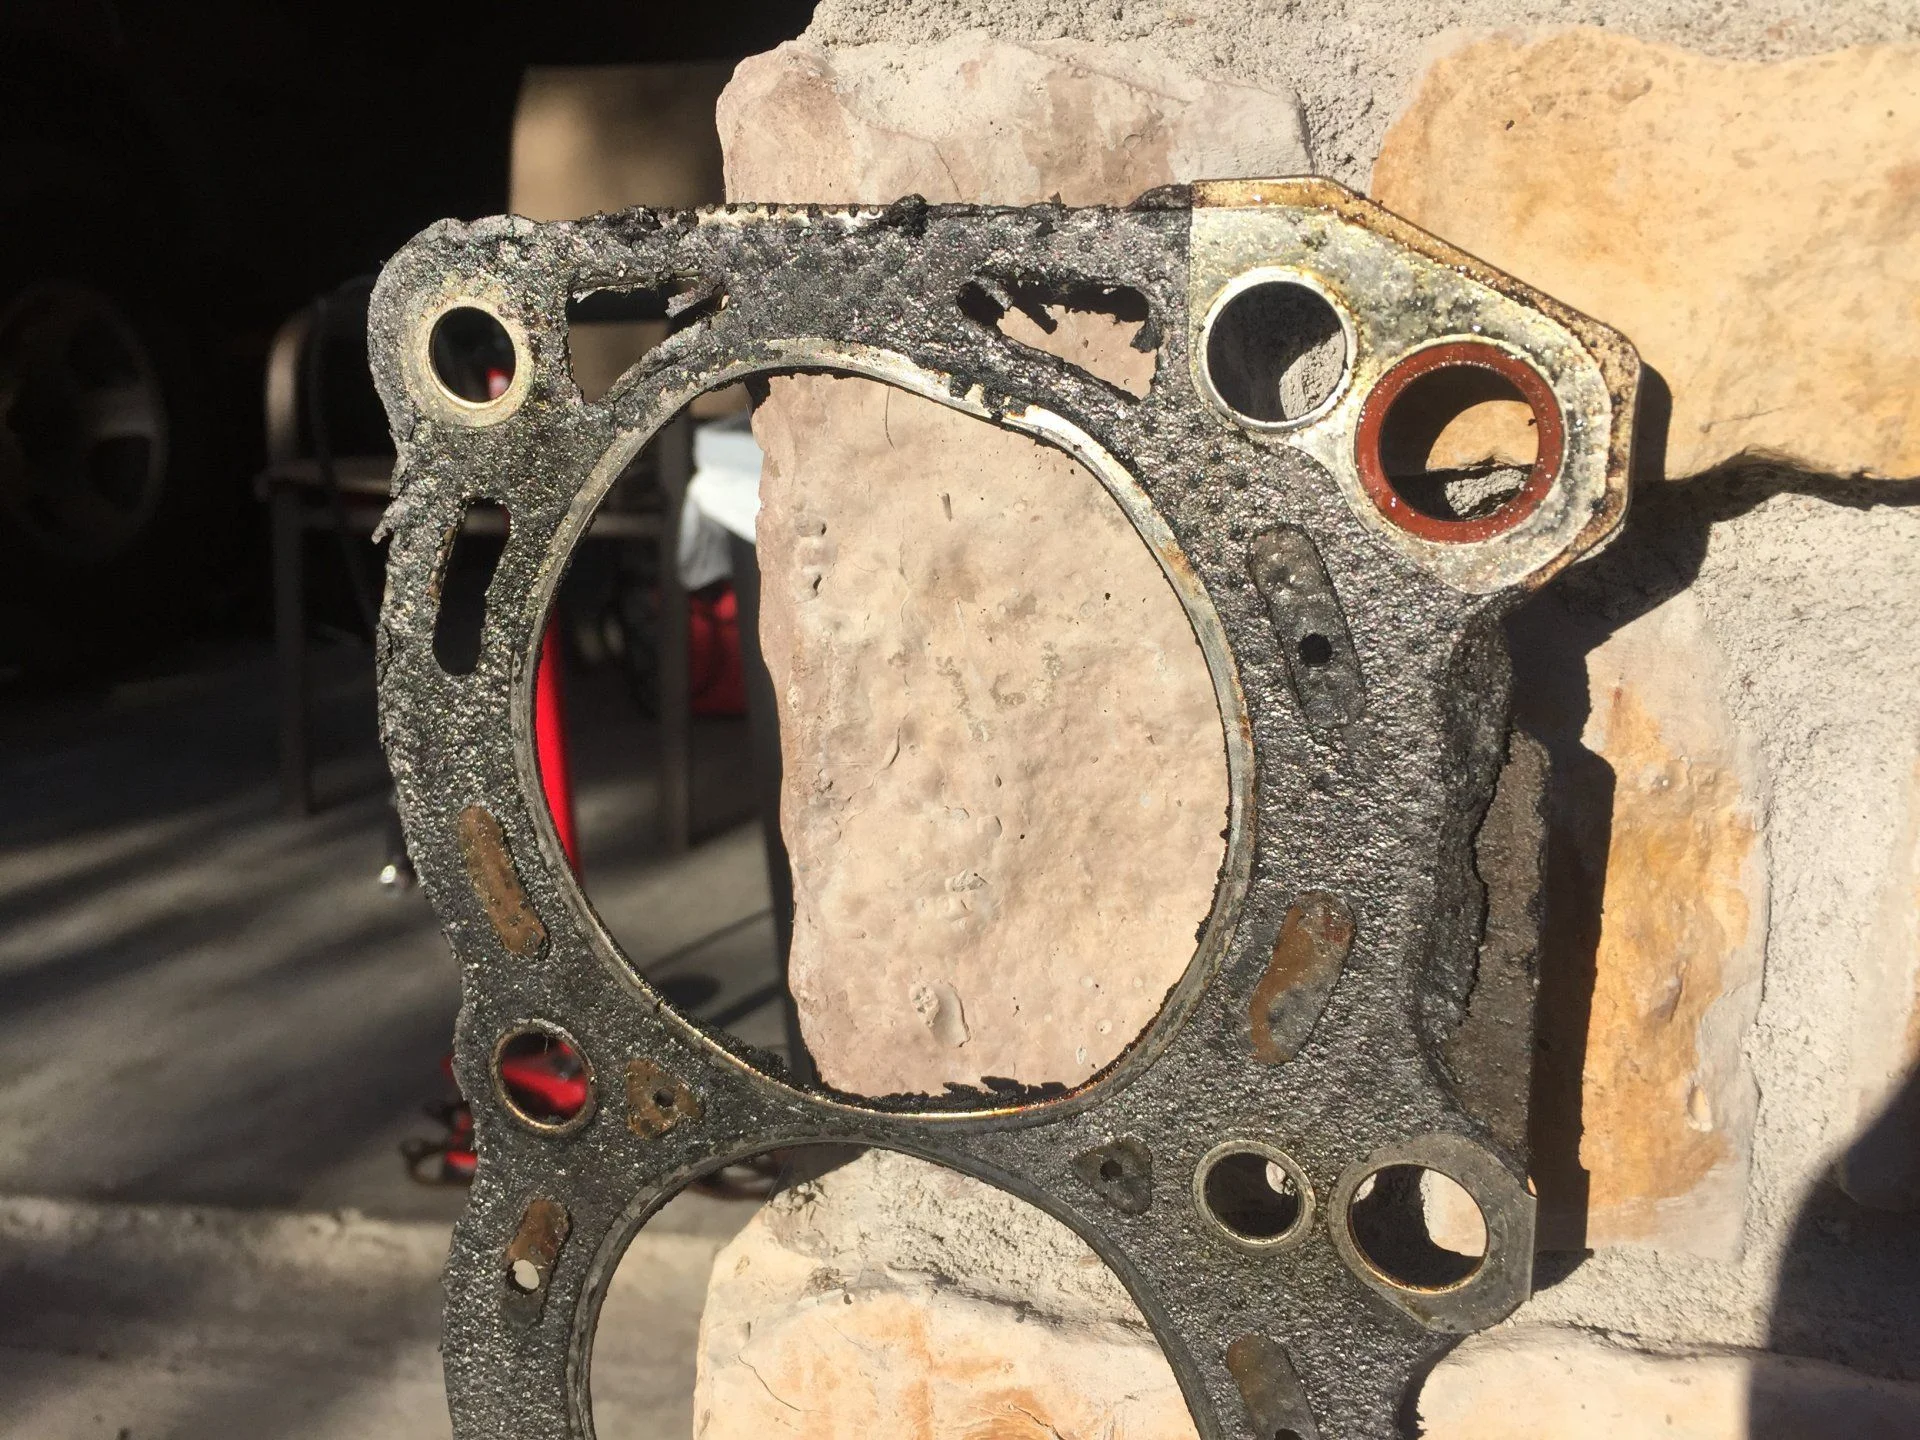
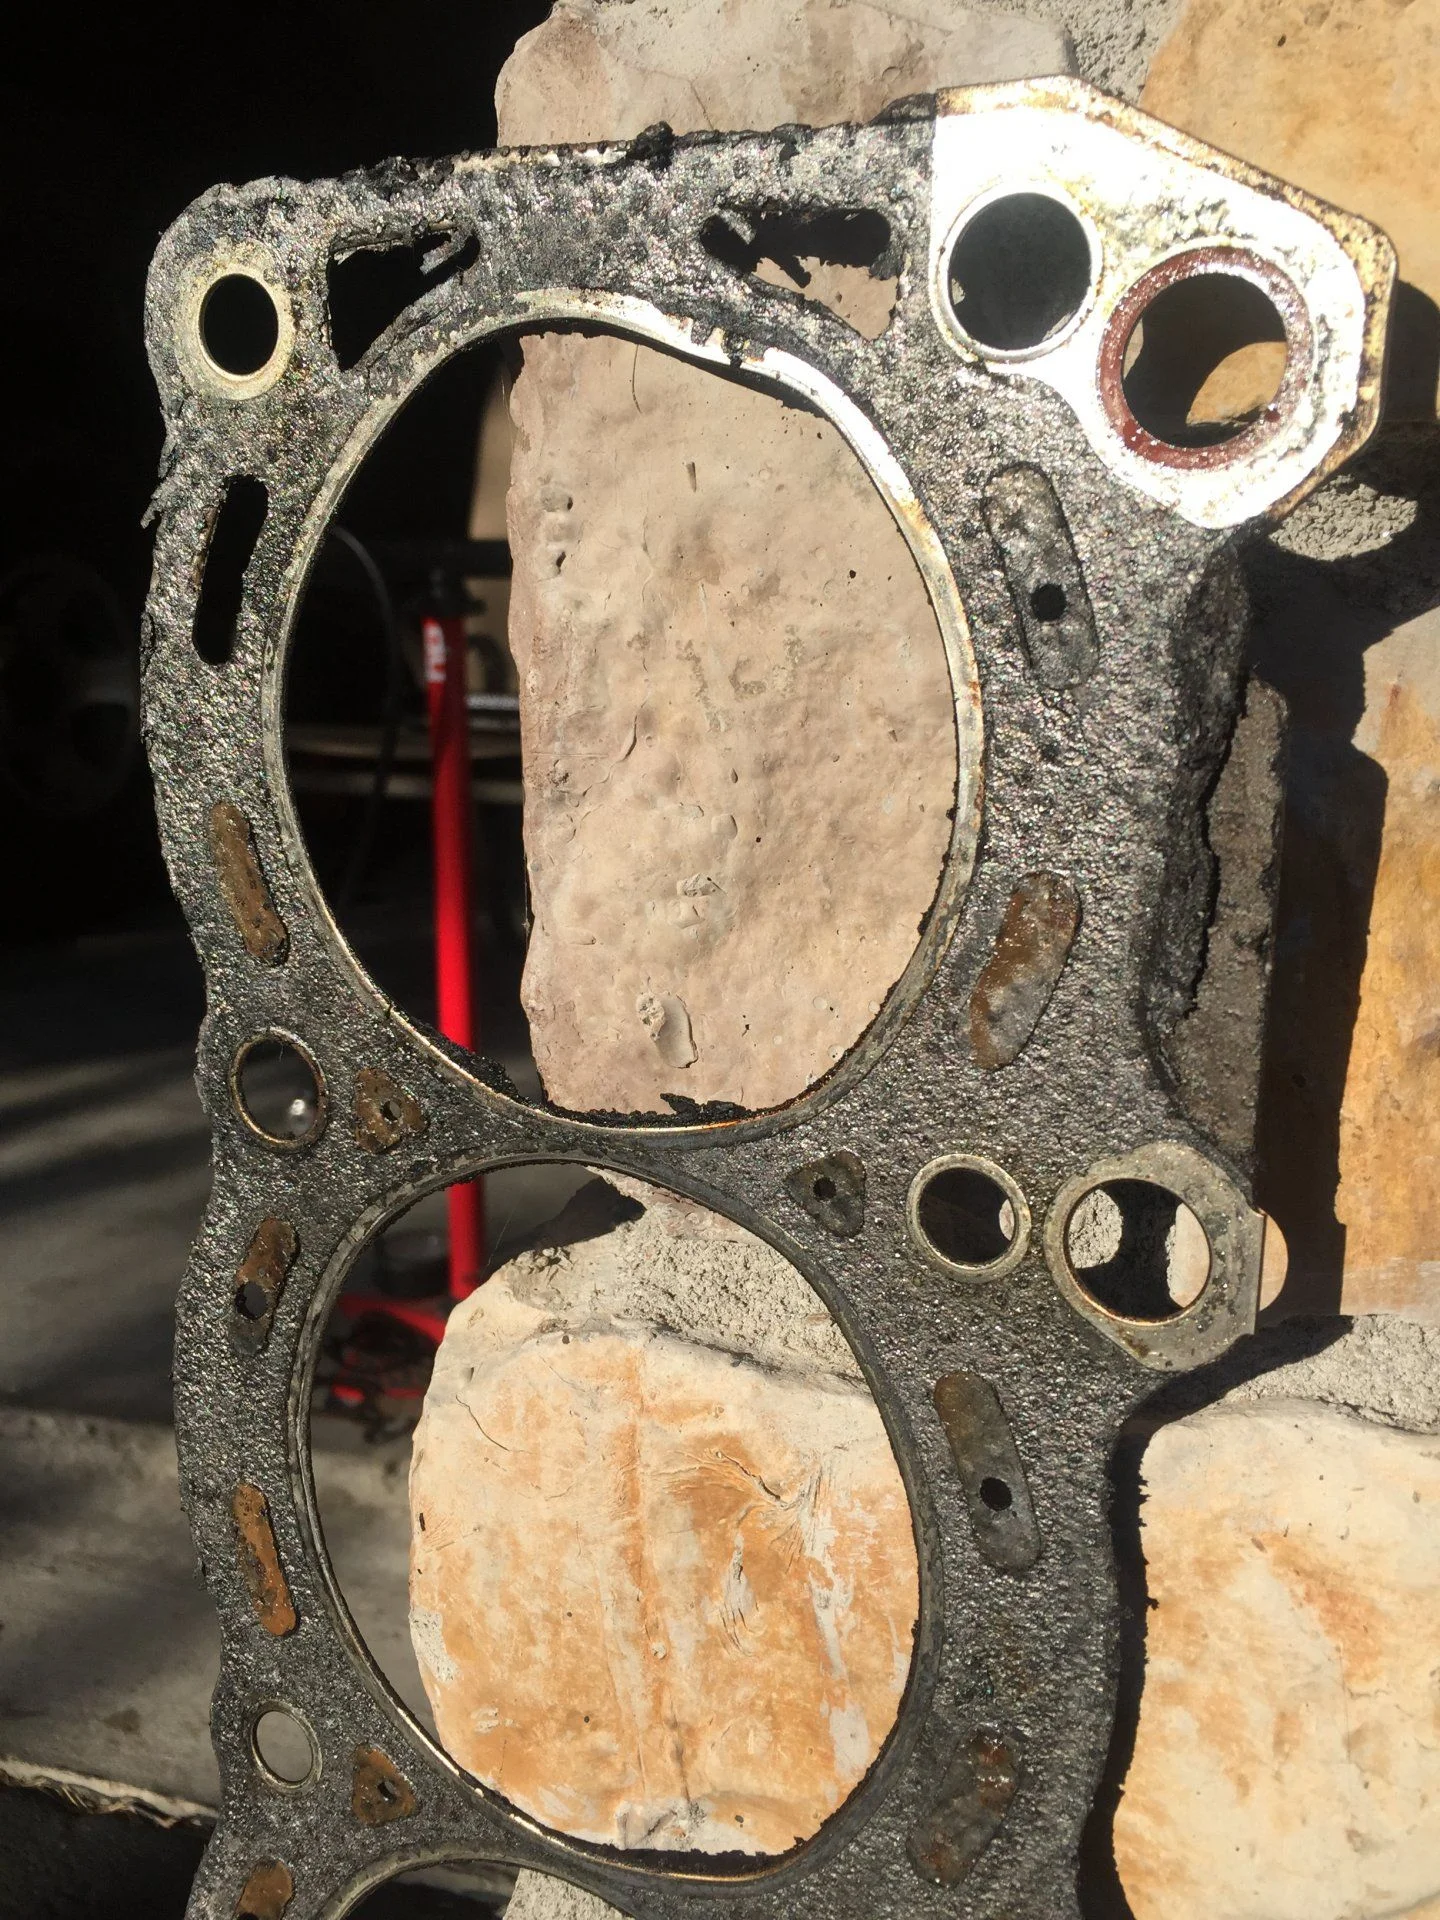
I see that your head gasket has failed at the back of No. 6 ... that is where mine also failed although I had a little distortion in other cylinders as well. There is clearly something that is causing head gaskets to fail on number 6 .... but so far as I know Toyota has not identified why. Personally I did not put a straight edge on the block as frankly I did not want to know as I have no intention of pulling the block out. I also believe that the head will "adapt" a little bit if necessary when torqued down.
 
I see that your head gasket has failed at the back of No. 6 ... that is where mine also failed although I had a little distortion in other cylinders as well. There is clearly something that is causing head gaskets to fail on number 6 .... but so far as I know Toyota has not identified why. Personally I did not put a straight edge on the block as frankly I did not want to know as I have no intention of pulling the block out. I also believe that the head will "adapt" a little bit if necessary when torqued down.
Before buying the rig I had Toyota do the leak down and compression test together with the chemical test for combustion gas in the coolant. All was fine. I will make some more pictures of the gasket.
 
What do you guys think about this picture ?

Seems like lot of residue , I am in process of cleaning the block but I am not sure what scotch pad to use.

Jorge
 
I hope that I did not screw the timing chain up. While cleaning I did rotate the crankshaft counter clock way and was surprised that the timing chain was not moving , I was able to move it the other way also without problem. After while the crankshaft is not able to be moved clock wise any idea ? Don't tell me that I will have to open the timing chain cover.
 
Pull up on the timing chain, and rock the crankshaft a bit either direction while keeping tension on the chain. I hope you didn't jump a tooth or bind up the chain. @concretejungle took a piece out of his timing chain cover doing this. He has a build thread on here somewhere. A great read.
 
if you marked BOTH the camshaft gear and chain together (as recommended in the FSM) so that they can be engaged exactly at the correct tooth and link AND you did this when the crank shaft was at TDC ... you should be able to get everything back ok ... AS LONG as you didnt do what blkptj80 identified ....

(I guess you didnt zip tie the gear and chain together as suggested)
 
I did bind up the chain not sure what should I do right now. Was going well till now, now I feel down and I will leave it for couple of weeks probably.
 

Users who are viewing this thread

Back
Top Bottom