Navigation
Install the app
How to install the app on iOS
Follow along with the video below to see how to install our site as a web app on your home screen.
Note: This feature may not be available in some browsers.
More options
Style variation
You are using an out of date browser. It may not display this or other websites correctly.
You should upgrade or use an alternative browser.
You should upgrade or use an alternative browser.
Builds fj40_73 Build Thread
- Thread starter fj40_73
- Start date
This site may earn a commission from merchant affiliate
links, including eBay, Amazon, Skimlinks, and others.
More options
Who Replied?Shane-
I may be able to get that 4+ Carrier down from Simi if you like. Let me know. I've heard it's a TON of $ to ship one.
I may be able to get that 4+ Carrier down from Simi if you like. Let me know. I've heard it's a TON of $ to ship one.
Great thread, the rig looks awesome. I'm maybe a little too late on seeing it since it looks like you are getting close to being done. I have a 73 (Oct 72) also and am down in Leucadia. Let me know if you ever need a hand.
nicely done. Where are ya gonna stab your sending units on your gages or are they -all- electric?
- Thread starter
- #85
Great thread, the rig looks awesome. I'm maybe a little too late on seeing it since it looks like you are getting close to being done. I have a 73 (Oct 72) also and am down in Leucadia. Let me know if you ever need a hand.
Thanks for the offer. It has been really great to get the support and offers for help on my project from members of his board. I have it well under control so I will not requre the help. I think I will take up DomSmith's offer to help save me some shipping fees.
as far as guages go, uh, ya the group came with electrical sending units for all, no stabing required.


- Thread starter
- #86
Some time ago I stripped out a volvo headed to the scrap yard. In my pack-ratting, I saved all the connectors I could cut out. I finally get to put them to use.
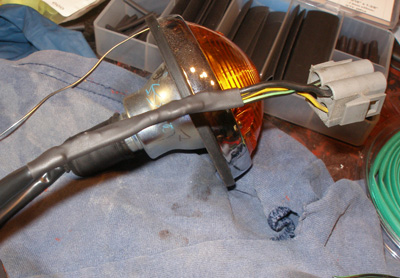
The front bib lights I altered to use both as running lights, and turn singles, I added back in a ground wire, and added this volvo connector.
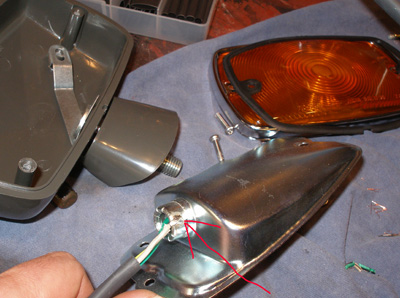
my Fenders have a fair bit of bondo and paint on them, so I decided to add a ground wire to the fender lights.
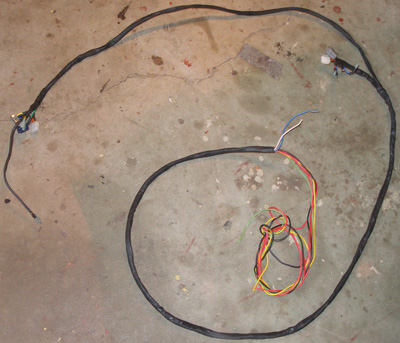
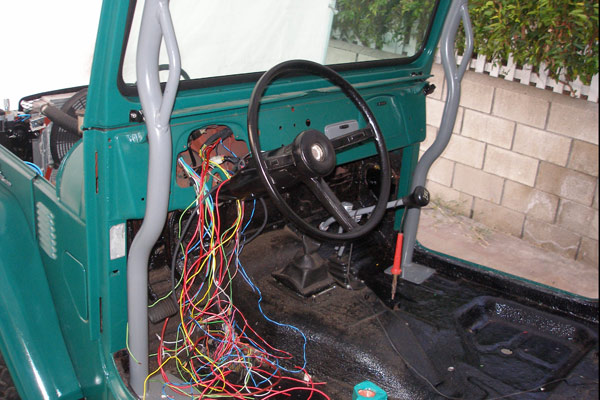
Took me a full day to make this front wireing harness that is for all my running/turning/special-running_N_turn side lights/headlights. And just before I fell asleep, I realized I am going to have to pop the pins out of the left side connectors, so I can feed it through the top of the front bib.
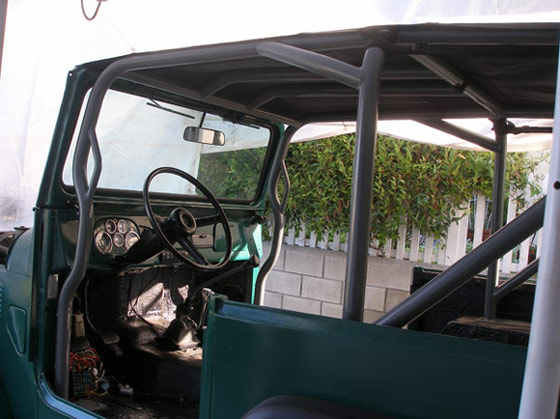
Roll cage is working well to help me sting out my wires.
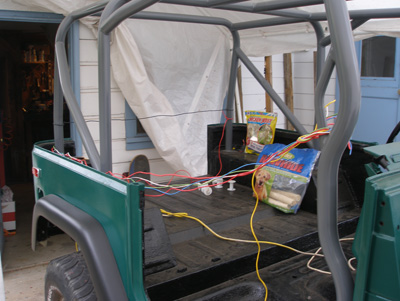
My engine / trans/ speedo sensor / water temp/ oil pressure wires will have their own seperate harness coming in at the driversided of the fire wall.

Front Light harness color code: 14GA Green(Running), 14GA Yellow(Left Turn), 14GA White(Special Left), 14GA Red(Right Turn), 14GA Blue(Special Right), 12GA Red(High Beam), 12GA Black(Low Beam)
The front bib lights I altered to use both as running lights, and turn singles, I added back in a ground wire, and added this volvo connector.
my Fenders have a fair bit of bondo and paint on them, so I decided to add a ground wire to the fender lights.
Took me a full day to make this front wireing harness that is for all my running/turning/special-running_N_turn side lights/headlights. And just before I fell asleep, I realized I am going to have to pop the pins out of the left side connectors, so I can feed it through the top of the front bib.
Roll cage is working well to help me sting out my wires.
My engine / trans/ speedo sensor / water temp/ oil pressure wires will have their own seperate harness coming in at the driversided of the fire wall.
Front Light harness color code: 14GA Green(Running), 14GA Yellow(Left Turn), 14GA White(Special Left), 14GA Red(Right Turn), 14GA Blue(Special Right), 12GA Red(High Beam), 12GA Black(Low Beam)
Last edited:
- Thread starter
- #87
More wires......
Not exciting, but an almost sadistic pleasure comes over me as I proceed through these wires.
Wires wires wires, here's the route:
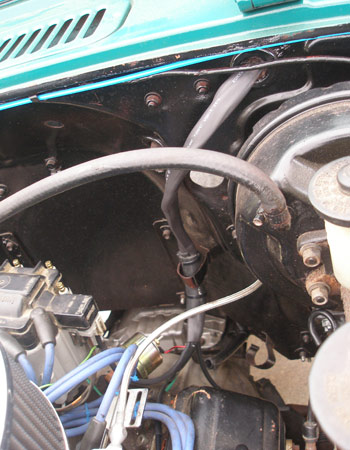
Drivers side fender with ARB & light connectors,

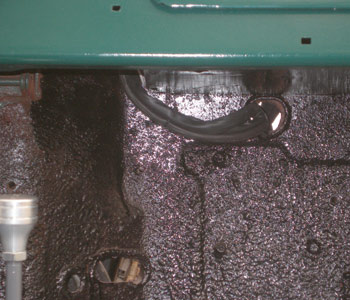
Here are my relays for: KC lights, Fog Lights, Engine Fan, and Horn, all with inline fues. The two washer looking thing in the photo, that are connected to the side Negitive batter post, are
two extra long bots threaded up threw the fender. All my front items run ground to these posts, and I have a ground running to my dash. My battery is grounded to the frame, my frame is ground to the driveline, off of one of the main bellhousing bolts.
Later on , I might build a box for this area.
Yeah, I went overkill with my grounding. All my lights are very bright.
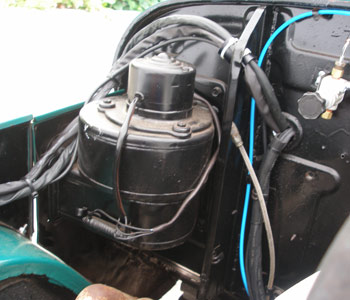
Back corner, the plugs on the top right are for:
License plate light, fuel sending unit, kc type light.
The lights mount to the 4+ bumper on the way, so
all I have to do is wire from the lights to the connector
plugs once I have the bumper on.

Rear light wires & Front light wires merge in the
left hand area.
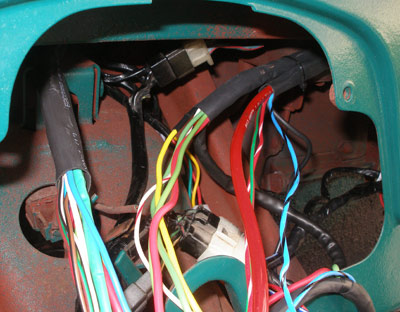
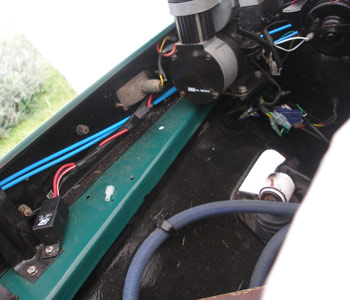
From left to right of the main wire wraps.
1. Engine and Sensors
2. All Legal Lights
3. Main Power In & Hood relay controls.
Pretty happy to be inside the cab now with my wires, I had the Hazard switch already wired up(which gives the power to the turnsingles) so those are done and now to the rest.

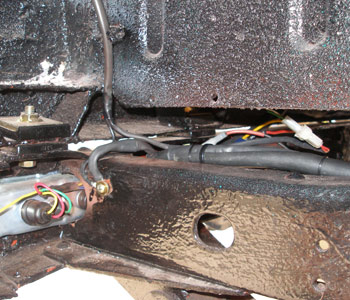
One last blurry photo, this is under the dash, on top of where the ebrake/dash support bar. Here again, I have two grounding "posts" for all my dash grounds.
Not exciting, but an almost sadistic pleasure comes over me as I proceed through these wires.
Wires wires wires, here's the route:
Drivers side fender with ARB & light connectors,
Here are my relays for: KC lights, Fog Lights, Engine Fan, and Horn, all with inline fues. The two washer looking thing in the photo, that are connected to the side Negitive batter post, are
two extra long bots threaded up threw the fender. All my front items run ground to these posts, and I have a ground running to my dash. My battery is grounded to the frame, my frame is ground to the driveline, off of one of the main bellhousing bolts.
Later on , I might build a box for this area.
Yeah, I went overkill with my grounding. All my lights are very bright.
Back corner, the plugs on the top right are for:
License plate light, fuel sending unit, kc type light.
The lights mount to the 4+ bumper on the way, so
all I have to do is wire from the lights to the connector
plugs once I have the bumper on.
Rear light wires & Front light wires merge in the
left hand area.
From left to right of the main wire wraps.
1. Engine and Sensors
2. All Legal Lights
3. Main Power In & Hood relay controls.
Pretty happy to be inside the cab now with my wires, I had the Hazard switch already wired up(which gives the power to the turnsingles) so those are done and now to the rest.
One last blurry photo, this is under the dash, on top of where the ebrake/dash support bar. Here again, I have two grounding "posts" for all my dash grounds.
Last edited:
- Thread starter
- #88
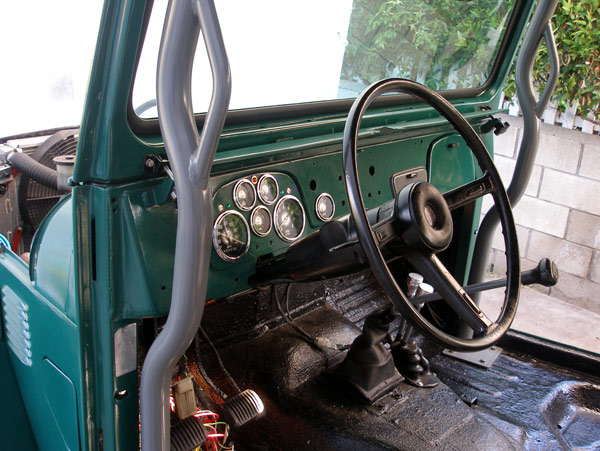
Dash/lights/hazards stitched up. Just have the fuse box to wire up, then I will have life support(legal lights & sensors).
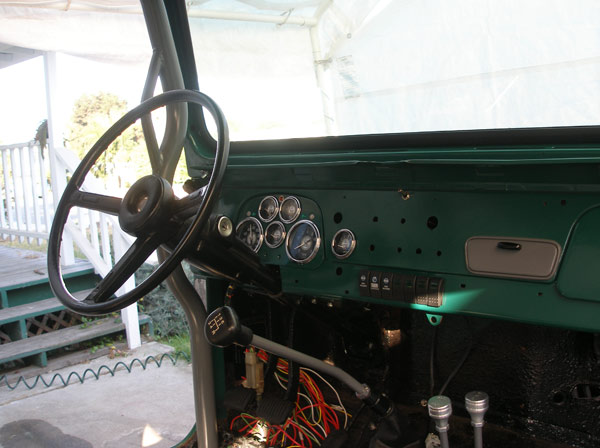
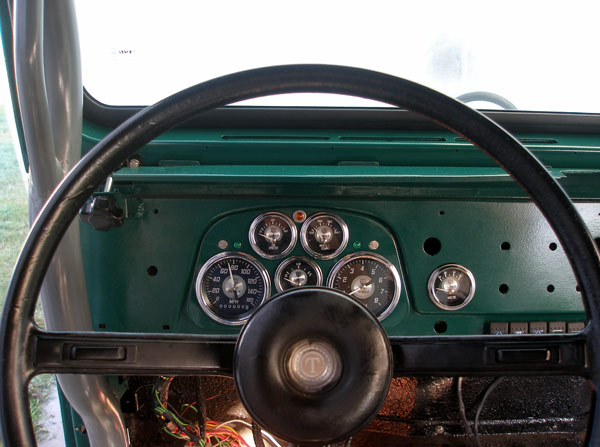
One of the hardest things I have had to do on this project is cut the hole for the volts gauge on the dash. The cutting was easy enough, the getting up the gut to cut was not, but I do not what any junky looking gauges and wires hanging from the bottom of the dash.
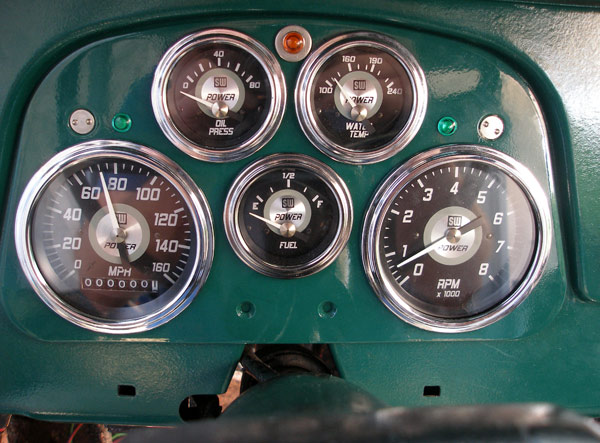
Two green LEDs are for turn indicators, and the center orange is for hi beam.
- Thread starter
- #89
one more shot.
- Thread starter
- #90
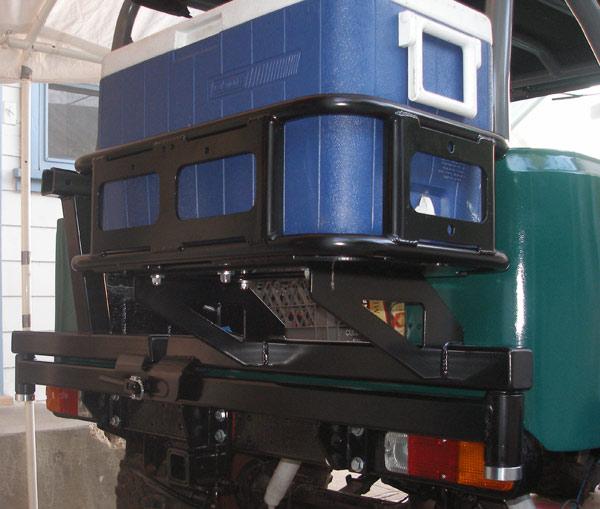
Picked up my 4+ bumper from Dom's house this AM. He offered to help my out with it on Monday, .... but looks like I was a bit excited to get it on there.

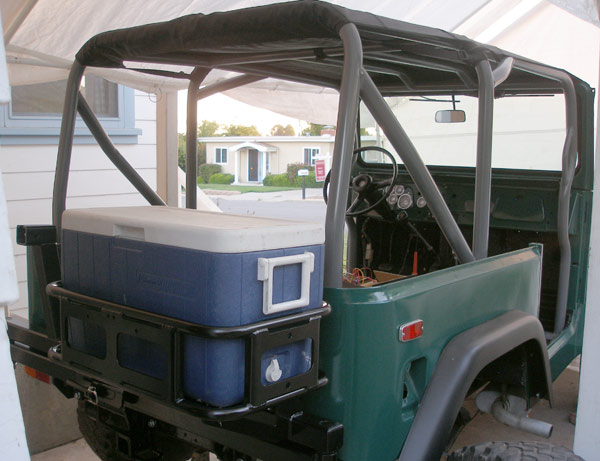
Now to attach my rear fender flars, put gas tank & seats back in, reattach drive axles, then wait for more paint to arrive to pain the hood.
 Brakes are back on line too.
Nice Shane! That was quick. Did it come out pretty level? Rear hinge fitment? How's the wiring coming along?
Now I have my Monday free to replace the catalytic converter someone swiped off my 4Runner...

Now I have my Monday free to replace the catalytic converter someone swiped off my 4Runner...
nice job
looking great--who makes the cooler carrier? Or did u do it, looks good
looking great--who makes the cooler carrier? Or did u do it, looks good
- Thread starter
- #93
Nice Shane! That was quick. Did it come out pretty level? Rear hinge fitment? How's the wiring coming along?
Now I have my Monday free to replace the catalytic converter someone swiped off my 4Runner...
Yeah, it was a really nice little project to get that sucker on there. To lift it up on there on my own, I ran the center four bolts backwards threw the rear cross member, and set the bumper up onto those, and put a few nuts on to secure it. From there, I used a level to get it even. Then I marked the eight spots on the rear cross member where I needed to drill. Took off the bumper, drilled my holes, painted the holes & the spot where the original tow bracket was. Then this was the part that made it a good project, while the paint was drying I went up to my bros house and drank beer. Came back and assembled it up.
Not sure about the back door hinges yet, I'll put my rear doors on tomorrow, but if its too close, I should be able to adjust the back stop to where I need it.
I still have to wire in the fuse box, but all is ready, just not as an exciting project as that bumper. And with a new bumper sitting around, it won my attention that day.
I think we need to start to string people up who swipe stuff off of toyotas, slimy bottom feeders. Going to check the surf tomorrow AM with my surf bud, I'll give you a call while we check it to see if your interested.
- Thread starter
- #94
looking great--who makes the cooler carrier? Or did u do it, looks good
It's the 4+ bumper from man-a-fre, I followed DomSmith's wright up for installation.
https://forum.ih8mud.com/40-55-series-tech/172850-4-plus-tire-cooler-carrier-install-fj40.html
- Thread starter
- #95
Test Run
Took a test run to the hard ware store for some more bolts N nuts. Seems I forgot to tighten one of my Radiator hoses all the way. Those new gauges already payed for themselves, no harm no foul. Other then that all seems well. Now for the hard part... going to the gas station to fill up the 22 gallon gas tank.
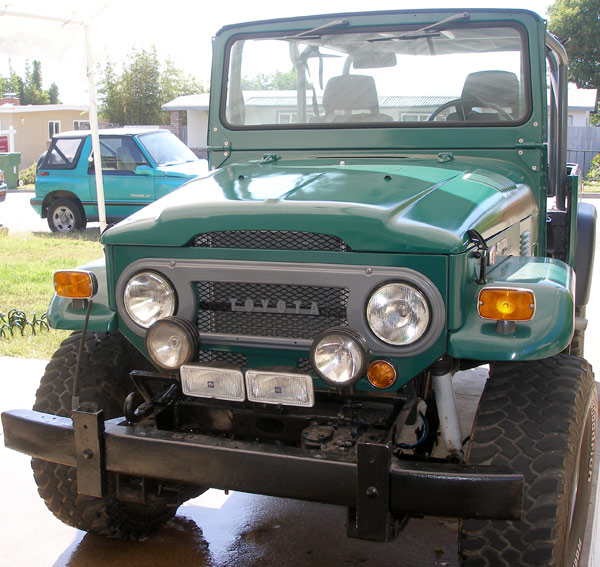
The front end it not completely square. Both those fenders have been bashed at some point, so no matter how hard I tried, the right font hood nose hanges over a bit. Oh well, one day, once these are trashed, I'll get new ones. I also am not super happy with the TJ fender flares. 1. they get in the way of my rear gas tank filler cover & they do not follow the lines of the cruiser body to my likings. I will go back to my old bushwackers, once I get some time to fix them up. Looking forward to driving it back and forth to the beach of a while before I do anything to it.

Took a test run to the hard ware store for some more bolts N nuts. Seems I forgot to tighten one of my Radiator hoses all the way. Those new gauges already payed for themselves, no harm no foul. Other then that all seems well. Now for the hard part... going to the gas station to fill up the 22 gallon gas tank.
The front end it not completely square. Both those fenders have been bashed at some point, so no matter how hard I tried, the right font hood nose hanges over a bit. Oh well, one day, once these are trashed, I'll get new ones. I also am not super happy with the TJ fender flares. 1. they get in the way of my rear gas tank filler cover & they do not follow the lines of the cruiser body to my likings. I will go back to my old bushwackers, once I get some time to fix them up. Looking forward to driving it back and forth to the beach of a while before I do anything to it.
Not sure about having to drive all the way down but the Ace hardware in downtown Encinitas has a pretty good selection of harder to find hardware. They have a decent amount of stainless metric....I've been there a million times now. I think maybe a little better than HD. Your truck looks great, can't wait to check it out in a couple weeks.
- Thread starter
- #97
Not sure about having to drive all the way down but the Ace hardware in downtown Encinitas has a pretty good selection of harder to find hardware. They have a decent amount of stainless metric....I've been there a million times now. I think maybe a little better than HD. Your truck looks great, can't wait to check it out in a couple weeks.
Thanks, I am kinda over it, atleast for a few weeks.

There's also a denalts True vaule in Oside I go to and there is also one in carlsbad by Dom. I am relevived that I will actually be making the SD getogether in Solona, date is coming up fast.
https://forum.ih8mud.com/trails-eve...get-together-sometime-soon-2.html#post3443084
Shane-
Looks good dude. Just got back from a day trip to Big Bear with Noah (Big Bear Pics) and found a few bugs in the rig. Lots of fun and a good test for all the improvements to the ride. I have to spend some time sorting out the transfer linkage issues uncovered but I'm a bit over it too.
What's next? You need to drive that thing by the house.
1973Guppie
Supporting Vendor
Shane, truck looks great! looking forward to seeing it. Dom, the linkage problem should be a minor thing I think, it just seemed like the linkage was not fully engaging 4lo.
That truck is looking awesome - well done
Similar threads
Users who are viewing this thread
Total: 1 (members: 0, guests: 1)