
Navigation
Install the app
How to install the app on iOS
Follow along with the video below to see how to install our site as a web app on your home screen.
Note: This feature may not be available in some browsers.
More options
Style variation
You are using an out of date browser. It may not display this or other websites correctly.
You should upgrade or use an alternative browser.
You should upgrade or use an alternative browser.
Build fj40_73 Build Thread
- Thread starter fj40_73
- Start date
Member Build Threads
This site may earn a commission from merchant affiliate
links, including eBay, Amazon, Skimlinks, and others.
- Thread starter
- #42
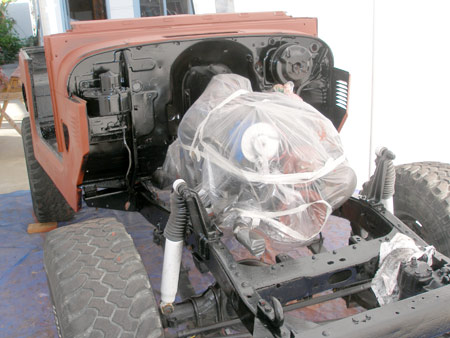
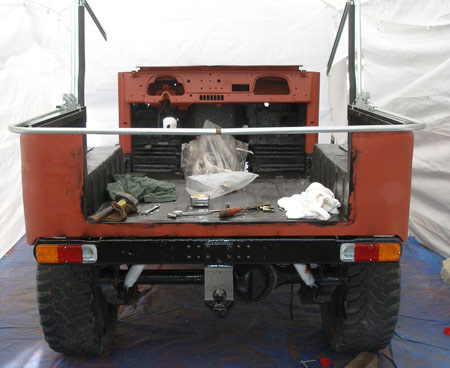
I have taken more pictures then have worked on it. Got the body back on the frame yesterday. I still have some body smoothing to do, but wanted it back on the frame, before I got my hammer and filler on it.

I rolled it on the grass to make it easier to bring the body on from the back.

The dog is getting pissed, because now that summer is over, and the life guards are gone, it's beach season for her.

The list is way too long, to make it to SnT. If I did rush to make it, the paint would just be curing, and I would most likely end up with a sand/salt engraved paint job.
(this next part fits under the, "it's your cruiser, do what you want.")
For the inside of the cruiser, after going over my patches with herkliner, which was already on the rest of the inside, I sanded it down to take down the rough/sharpness, and painted over it. It still has grip, but not the scaring quality it has out of the tin.

I need to take some photos of the underside. the back channel, and all the body seams, i herklined. I also painted the whole underside black too.
Next I will plastic cover, and tape up the bottom, and inside. Start in on the roll cage, and final body work.
I rolled it on the grass to make it easier to bring the body on from the back.
The dog is getting pissed, because now that summer is over, and the life guards are gone, it's beach season for her.
The list is way too long, to make it to SnT.
If I did rush to make it, the paint would just be curing, and I would most likely end up with a sand/salt engraved paint job.(this next part fits under the, "it's your cruiser, do what you want.")
For the inside of the cruiser, after going over my patches with herkliner, which was already on the rest of the inside, I sanded it down to take down the rough/sharpness, and painted over it. It still has grip, but not the scaring quality it has out of the tin.
I need to take some photos of the underside. the back channel, and all the body seams, i herklined. I also painted the whole underside black too.
Next I will plastic cover, and tape up the bottom, and inside. Start in on the roll cage, and final body work.
- Thread starter
- #43
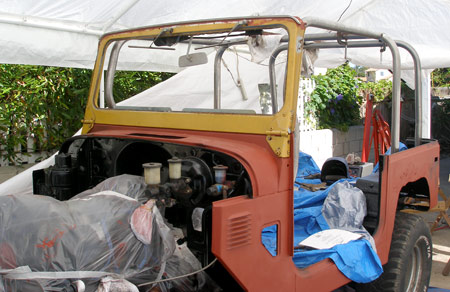
I have plans to use a 4+ tire/cooler rack on the rear, and feel the round lights from my oct 72 were not going to cut it around here. So to change to 74 lights, I made end caps made out of old front bumper. Went rounded to match body curve.
tail lights.

not bolted tight, but will be flush.
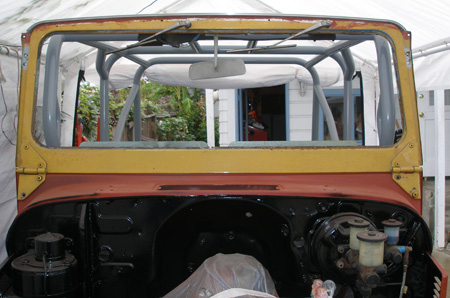
Got on the cage some too!!!")

I got a full bikini family top, and made a templete as to where the straps go, and Tacked according. Check door clearences and so on. Getting a good fit.

Cutting a V out then using a Grinder to do the tube notching, as other threads have concluded, works great. I also have a HF hole cutter, and dont like the cut it gives, another POS to be returned to them.
tail lights.
not bolted tight, but will be flush.
Got on the cage some too!!!
I got a full bikini family top, and made a templete as to where the straps go, and Tacked according. Check door clearences and so on. Getting a good fit.
Cutting a V out then using a Grinder to do the tube notching, as other threads have concluded, works great. I also have a HF hole cutter, and dont like the cut it gives, another POS to be returned to them.
Last edited:
- Thread starter
- #44
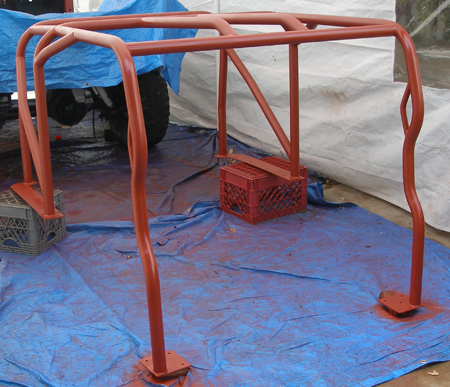
Welded most of the cage while it was in the tub. Here it is after I sanded it and put some primer on it. I'll get my top coat on tomorrow.

- Thread starter
- #45
Cage Painted and set in tub.
The cage build threw out my time schedule, but I am very happy with how it turned out.

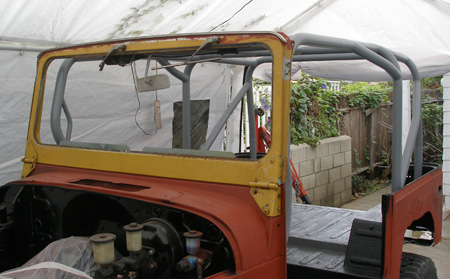


The cage build threw out my time schedule, but I am very happy with how it turned out.
Shane-
Looks sweet. I'll have to swing by soon. Sorry you didn't get it done in time for SnT. What 4" springs are you running? My springs are pretty beat after many years and I have a BAD rear sag now after SnT.
Looks sweet. I'll have to swing by soon. Sorry you didn't get it done in time for SnT. What 4" springs are you running? My springs are pretty beat after many years and I have a BAD rear sag now after SnT.
- Thread starter
- #47
Shane-
Looks sweet. I'll have to swing by soon. Sorry you didn't get it done in time for SnT. What 4" springs are you running? My springs are pretty beat after many years and I have a BAD rear sag now after SnT.
pm sent. - and I am running tpi4x4's Smoky Mountain set. I got these about 4-5 years ago when I was very green about land cruiser suppliers. I now think they are over priced. Ih8 their website, dose not work for crap on macs. I always have to start up Paralles just to view it, I definitely would not submit a credit card over their system, but that is a chat subject.

great work, are you going to tie the cage to the frame? I really like the looks of their cages. And it looks like it works well with the top mounted wipers.
- Thread starter
- #49
great work, are you going to tie the cage to the frame? I really like the looks of their cages. And it looks like it works well with the top mounted wipers.
eventually I probably will do that when I go to build some rock sliders. For now, I need to get this thing running.
yeah, it's pretty cool how the top motor clears it. Over all really cool fit and well thought out bends.
- Thread starter
- #51
What kind of shackle angle do you have with those smokey mountain springs? I have a new set on my frame off and right now it is not so good. I know they will break in some.
My pinion angle in the rear is about 5 Degrees. After I get finished loading this thing up all its gear and weight, making it sit some, i will measure it again, and the flange off my TC, and add shims accordingly.
The front have shims to correct the caster for good steering.
My shackle angle is vertical right now.
Last edited:


- Thread starter
- #53
hello,
Verry good worlk, and nice truck
like the garage
bye
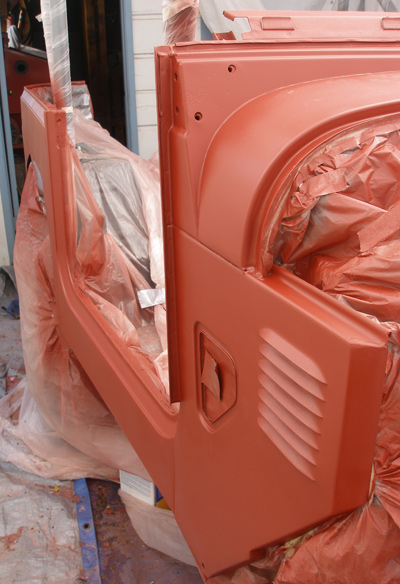
Thanks, I finally am able to get back at it today. After my Christmas trip, and then cold. Finally feel good enough to sand and prep for painting the main body.
Great build thread! I really like seeing these things restored right. You've got some real talent.
- Thread starter
- #55
Primer
Well, finally have to put down the sander and call it good.
Tuesday/Wed looks to be a couple of dry days for us, so plan is to do a wet sand on tuesday, and paint on Wed. Between the new year, work, and weather, this part has drug on way too long. Also had to half my space because the neighborhood got a city enforcer nazie threw it, and most of us got warning letters about this or that.
They said my tent stuck too far out.
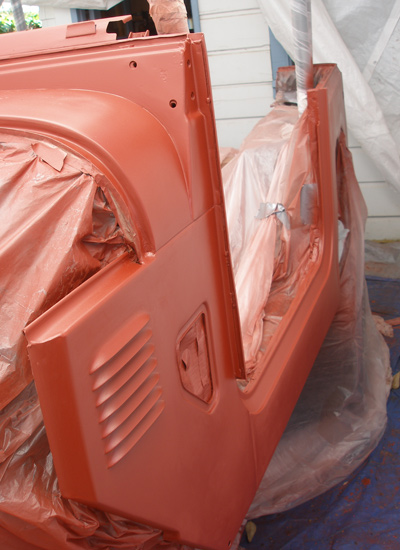
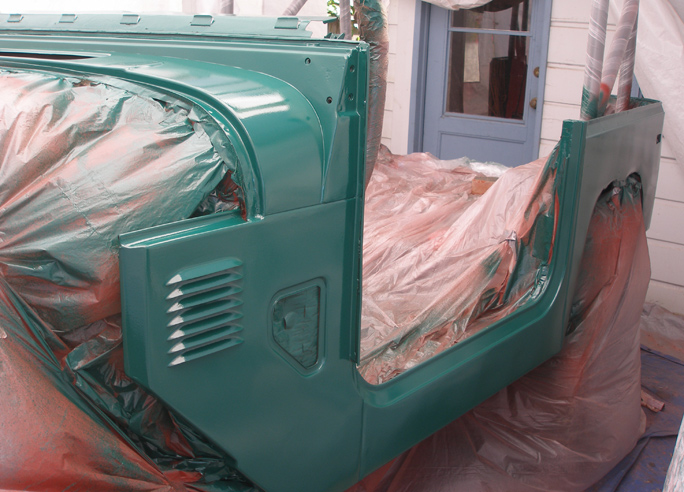
Next week we should see green, back to the original color, back before it got a couple crappy paint jobs to hid the rust.


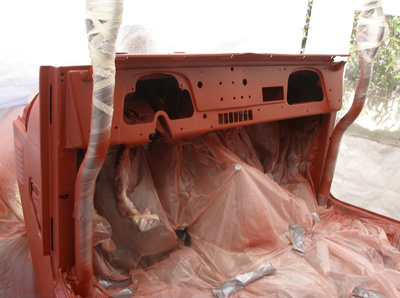
 But I still have rear doors, fenders, front doors, Hood, skits, bib, to paint, but only the fenders and rear doors need preped. The others are primed and ready for a wet sand.
Well, finally have to put down the sander and call it good.
Tuesday/Wed looks to be a couple of dry days for us, so plan is to do a wet sand on tuesday, and paint on Wed. Between the new year, work, and weather, this part has drug on way too long. Also had to half my space because the neighborhood got a city enforcer nazie threw it, and most of us got warning letters about this or that.
They said my tent stuck too far out.
Next week we should see green, back to the original color, back before it got a couple crappy paint jobs to hid the rust.
But I still have rear doors, fenders, front doors, Hood, skits, bib, to paint, but only the fenders and rear doors need preped. The others are primed and ready for a wet sand.- Thread starter
- #56

VERY nice work....love the color!
Shane-
Nice work bro. I just got home from Tavarua Friday and have to install some cabinets then back at it on the cruiser I hope. I'd like to check it out first hand soon.
Dom
Nice work bro. I just got home from Tavarua Friday and have to install some cabinets then back at it on the cruiser I hope. I'd like to check it out first hand soon.
Dom
- Thread starter
- #59
VERY nice work....love the color!
Back to the original Rustic Green, it started out as.
This is the first time I have viewed this thread. I am very impressed.
The green looks good.
VERY COOL
The green looks good.
VERY COOL