Builds FJ40 Build - Hell's Kitchen (1 Viewer)

This site may earn a commission from merchant affiliate
links, including eBay, Amazon, Skimlinks, and others.

Joined
Jul 18, 2011
Threads
1
Messages
45
Location
Cool, CA
Website
www.stoffregenmotorsports.com
Do any of you guys watch cooking shows? Well there's one guy that I really admire in the food world, Gordon Ramsay. His NO-BS attitude automatically let's you know where you stand. He will tell you like it is, or tell you to get out. In a past life I worked as a chef so I have experience with guys like him. If I still were a chef, I would love to work for him. The reason I chose Hell's Kitchen for this build is twofold; One - I was brought a mystery basket of parts and told to use them. Two - it's a budget build so asking for permission to spend more than I need to would get me the Gordon Ramsay response.

Here goes.

We started with a trailer load of parts:

- FJ40 tub and frame of unknown vintage
- LS V8 of unknown variety
- Dana axles, previously modified

The criteria behind this build was:

- 4 seat trail-only rig
- Link suspension
- 40" tires or thereabouts
- It had to appear to be a FJ40 when completed
- Budget of "under 50K"

The customer and I decided on a TH400 for the trans, a 3.8 Atlas t-case, a 4 link rear kit and 3 link front kit from RuffStuff (to keep costs down). I procured some parts and the building began. We have no visions of KOH victory, no aspirations to climb Mt Everest, but it should be a capable rig. So if you see something here in the pages that follow that raises a question, there's probably a reason behind it.

Here's the body and frame we started with.


After mounting the motor, trans and t-case, and plating the frame, I quickly got to work designing the rear suspension. I set it up with a bit less roll steer than a KOH car and there is a bit of adjustability built in. The wheelbase was stretched to 115" wheelbase.


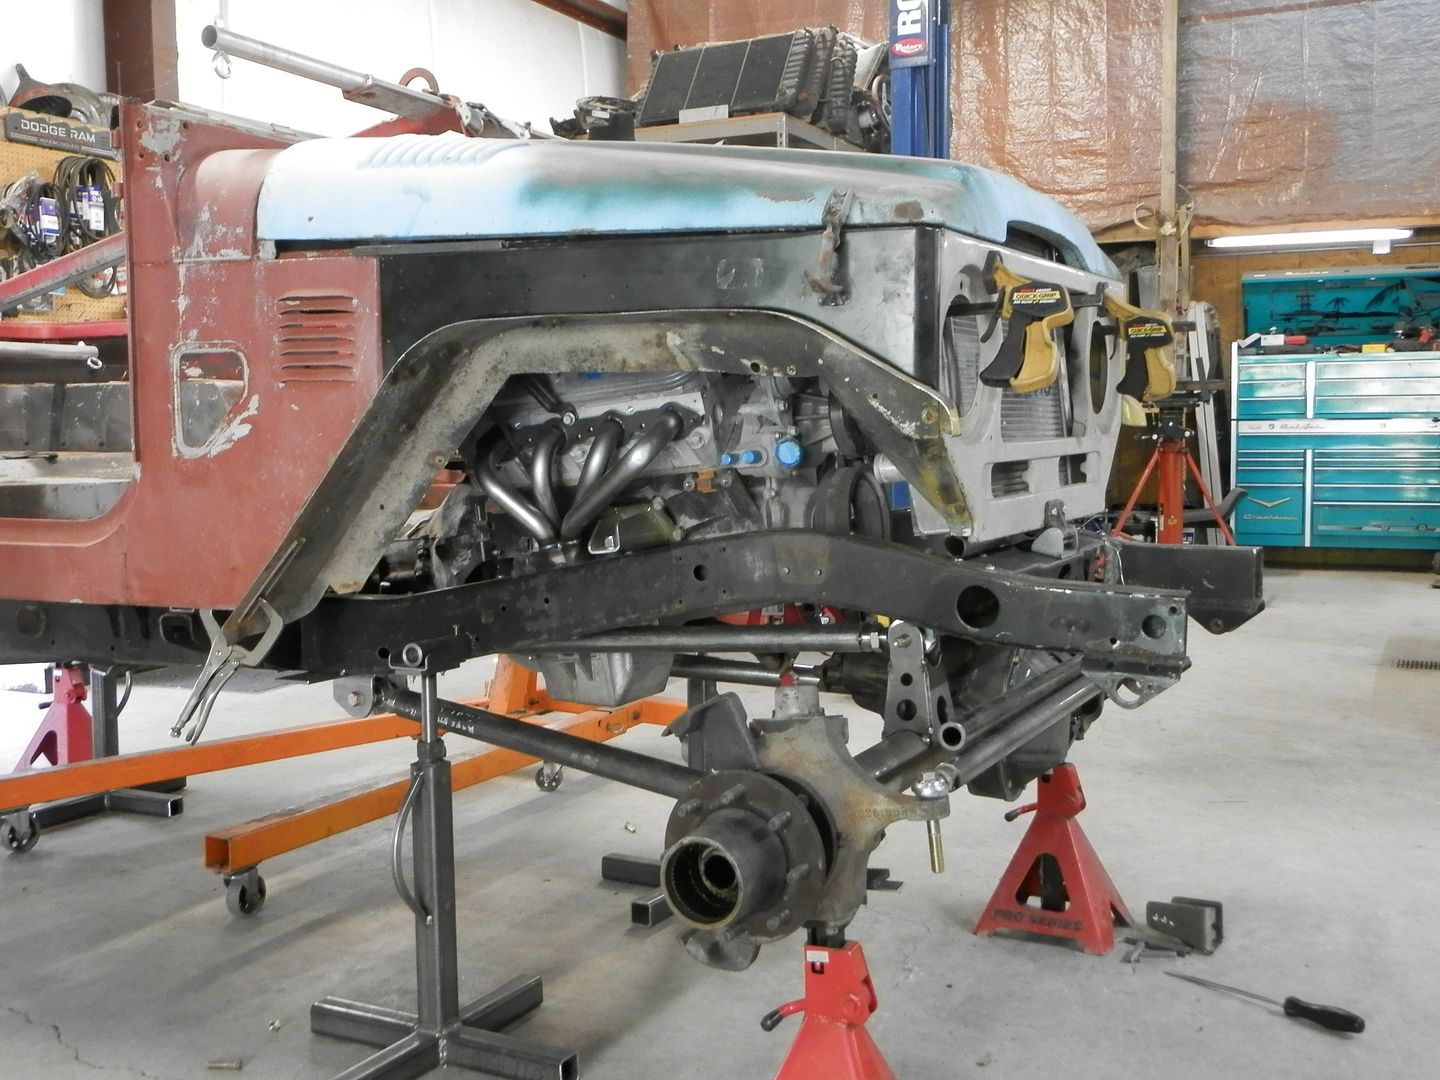
 
Next up, hang the front axle.

A 3 link with a panhard was the only way to go while working inside the confines of a stock-ish frame and also trying to maintain a low ride height. So far, the bottom of the frame is 23.5" above ground so the truck is pretty low. We may raise it an inch or two if we need to.

There was simply no room to use a fully triangulated 4 link. Even using a traditional steering box was out of the question. We ordered a single ended ram system from PSC and I was able to fit it behind the tie rod and low enought to clear the panhard bar and frame.

The initial mock up was with really long lower control arms and a single piece front driveshaft. After proving that scenario to be sub-par, we ordered up a short intermediate shaft from Jesse at High Angle Driveline and shortened up the lower control arms. The upper control arm is almost the same length as the lowers to try to control the pinion angle throughout the suspension travel, the same approach as we took with the rear. One benefit to using a 2 piece front driveshaft was that I could design it so that one-length-driveshaft is used front and rear, so one trail spare will fit either end.

Mock up.


Building the front suspension at full bump is always a good idea, but here things were very tight so that's where I started. The stock frame horns would cause a lot of fitment issues, so the frame was clipped out front to make room.


It was clear from the start that the rear frame section and the rear portion of the body would not be able to be used. The options were: Lengthen the body, Clip the body in a "half cab" style, Clip the body and leave it open. We decided that the cheapest option was to clip the body and built it into the roll cage. This decision leaves a lot of room for variations and we will strive to keep it looking like an FJ throughout the rest of the build.

Cut the rear frame off.


Build lower clip section. Has to clear the links.


Mock it up and start the welding.


This is how she sits right now.
 
Chassis almost a roller, just need shock mounting, bumpstops and limiting straps.


Had to shift gears a bit to get ready for the rollcage. The body is going to be removable from the chassis, and the cage is going to be integral with the body, so strong mounting points are key. The rear of the cage section will support the weight of the truck via upper shock mounts tied into the cage, so the rear section has to be triangulated and stiff.

Finding a nice out of the way place to stick some tubing.


Getting crafty with a hole saw.


There was simply no room to use a fully triangulated 4 link. Even using a traditional steering box was out of the question. We ordered a single ended ram system from PSC and I was able to fit it behind the tie rod and low enought to clear the panhard bar and frame.

So you are using a single ended ram and an orbital valve? Will this Cruiser be street driven? What prevented the use of a steering box?
 
Interesting build so far... Its good to have a well thought out plan... But... We all know how plans change :) like removing the whole back part of the frame LOL

Look foward to seeing your progress...

Please tell me you had not just thrown away the back part of the frame however ... There are many guys that would live to have a clean rear section for repairs to their own cruiser...

IMHO... if you do still have it that would help out a fellow mudder immensely


Carry on with a great build :)
 
So you are using a single ended ram and an orbital valve? Will this Cruiser be street driven? What prevented the use of a steering box?

Yep, single ended ram from PSC. We bought the entire kit from them including a beefcake PS pump and the Eaton orbital valve.

This will not be a street truck so I had complete liberty to build it as I saw fit. I don't like using heims on a street driven truck anyway so if it were a pavement pounder, I would have engineered it to use a Toyota mini truck box and one tone TRE's from Parts Mike with an intersect style drag link.

Ride height and packaging is one of those inverse relationships that make life miserable for someone like me when trying to build a front suspension. I really wanted to keep the ride height down to a minimum. The narrow frame rails of the FJ combined with the mass of the D60 diff did not leave me much room to play with anyway. Even without a steering box and drag link, getting everything to fit at full bump took a lot of time. One thing to point out is that since there is not going to be a drag link, I was pretty much able to have the panhard bar set at any static angle I liked without the worry of bumpsteer. Would I have liked it flatter, sure, but I'll take what I got.

We chose the single ended ram over the double ended ram for cost reasons. The cost difference between the two kits is substantial.
 
Interesting build so far... Its good to have a well thought out plan... But... We all know how plans change :) like removing the whole back part of the frame LOL

Look foward to seeing your progress...

Please tell me you had not just thrown away the back part of the frame however ... There are many guys that would live to have a clean rear section for repairs to their own cruiser...

IMHO... if you do still have it that would help out a fellow mudder immensely


Carry on with a great build :)
Nope I didn't throw it away I gave it to John Pardi.

Thanks.
 
It was clear from the start that the rear frame section and the rear portion of the body would not be able to be used. The options were: Lengthen the body, Clip the body in a "half cab" style, Clip the body and leave it open. We decided that the cheapest option was to clip the body and built it into the roll cage. This decision leaves a lot of room for variations and we will strive to keep it looking like an FJ throughout the rest of the build.

After cutting the rear frame section and the front frame horns, how much more effort do you estimate it would be to build an entirely new frame? You mentioned the packaging issues regarding the frame interference with the steering and I was wondering if a new frame is a possible solution. Have you seen the Jeep buggy that Savvy and Currie built for King of the Hammers with a frame that is narrow in the front and rear but splays out all the way to the edge of the tub in the middle where the drivetrain is mounted?
 
Building an entire frame has it's benefits and drawbacks. If for some reason, the owner of this rig ever wants to register it through DMV, having a custom frame makes it a lot more difficult.

As compared to the Savvy/Currie Jeep, this body and roll cage are going to be removable from the chassis, which presents it's own set of problems. One problem is since the rear shocks are to be cage mounted, the triangulation at the rear of the cage and where it meets the frame has to be very rigid, both for performance and durability reasons. The second hurdle was to make it easy to remove the body from the frame. I had Jim Christiansen, formerly of Inchworm gear, machine up some tube inserted bungs that will make bolting the cage to the frame a piece of cake (pics below).

One feature of this FJ that was very important to the owner was that it be a 4 seater and that getting in and out of the rig be easy for the rear passengers so cage triangulation is now important not only for the suspension, but for the safety of the passengers. That means I can't have a bunch of roll cage tubes in the rear where I need them the most. We will be building the cage here shortly so expect an update on that front soon.

Here are some pics.

Bungs for the cage mounts welded into the very rigid slider assembly.


Reinforcing the body tub where the cage tubing will pass through. The tubes will be fully welded through these areas.


Additional plating in the center to support the seat belt bars and seat mounts.

 
Not much to report at this time. Took a couple weeks to get other jobs done. Started on the roll cage and will post pics soon.

Thank you for your patience.
 
Great fab work!
 
Your welds are fantastic, wish I had those skills.

Yep - I reckon I'd give up my dashing good looks for those skills ;)

Subscribed!
 

Users who are viewing this thread

Back
Top Bottom