First FJ40 build in a long time

This site may earn a commission from merchant affiliate
links, including eBay, Amazon, Skimlinks, and others.

Now THAT'S better. This part of the truck is why I don't like '79 and up. It looks just like it's supposed to. If I were to end up with one of the later ones I'd swap out for this look as soon as I could.

The cylinders cleaned right up with a mere .020 over. Too bad we couldn't find .020 over pistons. So, off to .040 over we go. Should have all the engine parts ready to re build by mid week. (Long weekend off for my 30th reunion for the UT Rugby Club. We were the first nationally ranked UT squad. They're regulars now.) So the build may have to wait another week.
IMG_1939.jpg
 
Last edited:
The more I look at it the more I'm glad I black powder coated the headlight rings instead of chrome.
 
what position did you play? I played hooker for my u19 team and hooker and flanker for the mens club up here in saint cloud.
Sean

Sent from my H866C 2
 
Scrum half. I started my first year at wing being the fastest runner. I enjoyed scrum half better though.
 
ah nice, I have hit many a scrum half very hard! That is a tough position to play since the flankers are after you as soon as that ball is out of the scrum. Very cool.
Looking forward to more pictures, keep up the amazing work.
-Sean
 
I'm getting close enough now to be able to list all that I'm doing to this truck. A few of these items were a part of the 2NDCHNC abandoned FJ40 I bought for this build but very little. A few more items have yet to be purchased or completed like the engine parts and headliner and Raptor Liner.

Drive Train:
Toyota 2F in-line six Re-built. .040 over pistons and rings. New cam and lifters.
New starter, clutch and alternator.
Toyota FJ60 power steering conversion.
New tie rod ends and Pitman arm.
Newly built front and rear drive shafts with new u-joints.
Front steering knuckles rebuilt.
New axle and spindle seals.
New premium Warn hubs.


Interior:
New white-faced gauges.
New Black Denim Bestop soft top.
Front seats new upholstery.
Rear jump seats new upholstery.
New head-liner.
New front floorboard sound deadener with rubber floor mats front and rear.
Interior tub sprayed with color matching Raptor-liner.
Roll-bar was blasted and powder coated.
New front shoulder harness seat belts.
Powder coated dash panels.
New dash pad and lower dash pads.
All new hood hooks and pads.
New shifter knobs.
New shifter boots.
New OEM shift pattern plate.
New door inner panels.
New Toyota OEM window winders, door handles, window channels, and felt seals.
All hardware either restored zinc-plated or stainless steel.


Exterior:
Frame wire wheeled and coated with Rust Bullet.
New rear cross member and corner bracing.
New Old Man Emu Dakkar complete suspension kit with grease-able bushings.
New custom front bumper powder coated.
Custom built rear bumper with spare tire swing out powder coated.
New Toyota OEM door weather stripping and window glass rubbers.
New rocker and rear quarter panels.
New rear wheel wells and supports.
New front fenders.
New paint job in Toyota Dune Beige with Cygnus White top and grill bezel .
New turn indicators, marker lights, headlights and rear lights.
The tub was stripped and sprayed with epoxy primer, seam sealed then a high build polyester primer.
New brake hoses and all stainless steel hard brake lines.
New rear brake shoes and new Calipers brakes and rotors on the front.
5 new Rock Crawler wheels.
5 New BF Goodrich All Terrain 33/10.50 tires.
All new OEM emblems.
 
Last edited:
Finally! The tub is finished. This is the tub I always wanted on my truck. This one won't rust for a looooooong time.

Enjoy.
IMG_1946.jpg
IMG_1950.jpg
IMG_1952.jpg
IMG_1954.jpg
 
Pistons, rings, cam and lifters have arrived. Rugby this weekend and then engine building by Tuesday I'm guessing. Turns out the front fenders from CCOT are not a good fit. They're angled upward by about 3 (very noticeable) degrees looking from the front. Going to have to do some convincing on the fender braces. Hopefully that's it. Once the fenders are fixed...
Mount the FJ60 PS box and order the remaining pieces needed.
Trim the fender and get then get them painted.
Oh!
Classic Tube sent a batch of pre bent lines that are almost worthless. That's going to slow down the tub install. I don't want to make the brake line fabbing any harder than it is.
More next week.
 
So are you going to renew your TLCA membership? It's a proper magazine now. We are a bit shy on cartoons, but perhaps that can be sorted out by you re-joining.:D

hmmm... Maybe we can make a deal. Should I have to pay AND work for my membership?

wink, wink...
 
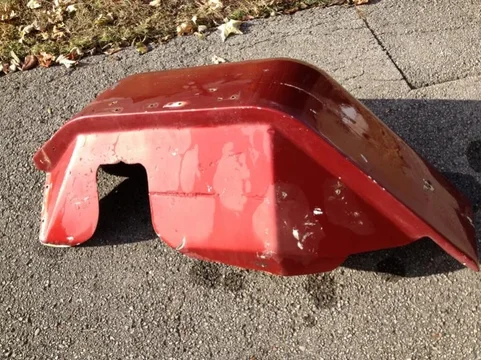
Well the great deal on fenders from CCOT wasn't that great of a deal. Just being perfectly honest here. The brand spankin' new fenders from them (Taiwanese I believe) look great until you mount them. They look like the truck is pulling up it's skirt. Very odd looking. Here you can see that they angle upwards about 3-4 degrees. Then the shot where I've pulled them down under a LOT of pressure to get them right. It took both sides before I could place the bib between them. It needed about 1.5 to 2 inches to clear. I'll have to massage the braces a bit to get them to stay. Not sure if I'll have to cut and weld yet. CRAmP!

All a part of the game at this point I guess...
IMG_1973.jpg
IMG_1974.jpg
 
Oh... And everything but the top side of the hood and these fenders have been painted. I am just soooo close to being able to put this thing together it's killing me...
 
Rainman said:
Well the great deal on fenders from CCOT wasn't that great of a deal. Just being perfectly honest here. The brand spankin' new fenders from them (Taiwanese I believe) look great until you mount them. They look like the truck is pulling up it's skirt. Very odd looking. Here you can see that they angle upwards about 3-4 degrees. Then the shot where I've pulled them down under a LOT of pressure to get them right. It took both sides before I could place the bib between them. It needed about 1.5 to 2 inches to clear. I'll have to massage the braces a bit to get them to stay. Not sure if I'll have to cut and weld yet. CRAmP!

All a part of the game at this point I guess...

Those fit really really well for ccot fenders. I spent days with a set and finally scrapped them.
 
Those fit really really well for ccot fenders. I spent days with a set and finally scrapped them.

You mean they never worked for you? Wow. These needed a severe pull on the support bracket and a bunch of very loud hammering at the first bend above the mounting bolts. After that the spare bib I have fit right in. Not perfect but within assembly margins.

Actually, the picture above showing the straps pulling on them has the first set of straps used. I had to switch to car hauling straps to handle the load. The orange ones are 2300lb straps and one broke. The 10,000lb ones worked real well after that.

Crappy fenders... But hey, after Kiwi gets through with them they should look great.
 
Vae ... you might want to reconsider your offer... this is what my taiwanese fenders looked like after 10 years DD... rust started showing up within 4... i switched to fiberglass :)

you guys probably dont get the salt we get up here LOL

PITA to work the taiwan fenders... but they do look great once done... i had my taiwan fenders on a week when i creased the drivers front on a tree :meh:
IMG_4612.jpg
IMG_4613.jpg
 
Holy tamoly, Batman. Those look like they were mounted without any primer OR paint underneath. These fenders that will go on my project will have epoxy primer, seam sealed and topped off with high build primer. After that, they'll get a coating of color matched Raptor Liner like inside the tub. I'm not worried about these fenders looking like that. Ever!
 
Rainman said:
You mean they never worked for you? Wow. These needed a severe pull on the support bracket and a bunch of very loud hammering at the first bend above the mounting bolts. After that the spare bib I have fit right in. Not perfect but within assembly margins.

Actually, the picture above showing the straps pulling on them has the first set of straps used. I had to switch to car hauling straps to handle the load. The orange ones are 2300lb straps and one broke. The 10,000lb ones worked real well after that.

Crappy fenders... But hey, after Kiwi gets through with them they should look great.

They were not for my rig but for my friend Steve's '78 fj40. We screwed around with them for a long time and Steve rang Steve McClung at ccot about what to do. McClung got stroppy with my mate Steve and said 'if you're not capable of doing bodywork you shouldn't own a Land Cruiser." After all this, a friend of ours who was a parts guy at Boulder Toyota stopped by and said 'I can still get those from Toyota.' (this was in about '99 or so) Steve ordered them right then, they arrived a few days later and were mounted an hour after that easy as pie.

We then used the ccot fenders for target practice behind Steve's parents' cabin. I think my 45 improved them tremendously. To this day Steve won't buy anything from ccot and still has his '78 with those same factory fenders.
 
I must admit, I originally thought these fenders were Toyota parts. The brace, the marker light support and the seam for the two sheets of metal all look original to me. The tack welds for the supports are too visible and a few of the tack welds for the fender brace were weak but the overall look was dead on. They just didn't fit at first. Only real issue was the angle. I haven't put the tub on with them but I'm confident they will move into place just fine.
 

Users who are viewing this thread

Back
Top Bottom