Do-it-yourself booster overhaul

This site may earn a commission from merchant affiliate
links, including eBay, Amazon, Skimlinks, and others.

Back into it

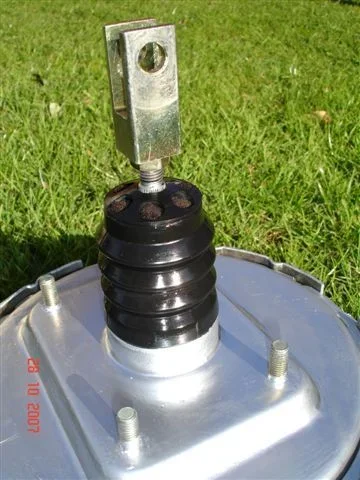
Made a temporary repair of the tear in the boot using XXXXXX. This photo is looking straight at where the tear was (and the boot is shiny because it has been sprayed with Silicone Spray). By the way, it looks better than it is and I still intend to replace it:
TearRepair.webp
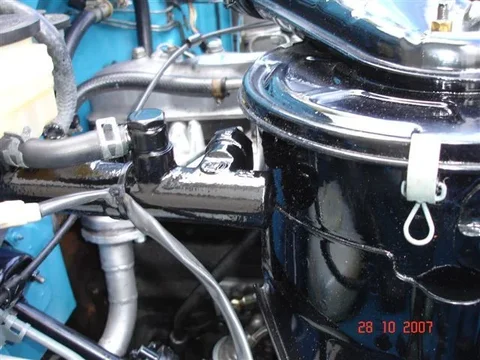
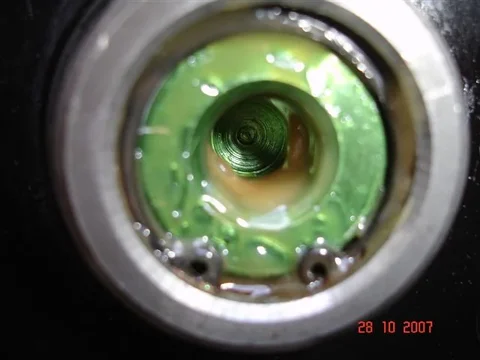
Throughout the booster I have used Silicone Grease but I chose to use Rubber Grease for the end of the mastercylinder (simply because I've always used this grease near brake seals):
RubGrease.webp
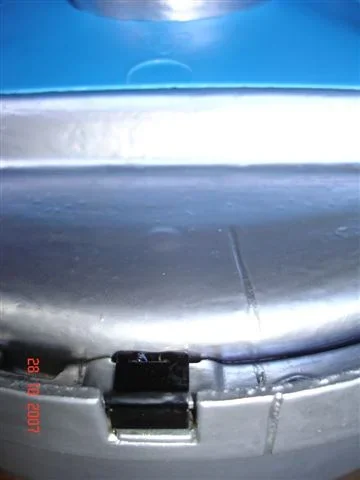
Oh yes. A psychiatrist would say I suffer from OCD (Obsessive Compulsive Disorder) and my neighbours think I'm an "eccentric perfectionist" And as reinforcing evidence for these "diagnosii" - I have even painted that little clip before refitting it:
Clip.webp
TearRepair.webp
RubGrease.webp
Clip.webp
 
Last edited:
Funny how one's memory plays tricks (or is that just us old folks?). I always thought the PBR-brand mastercylinder was longer than the AISIN original. But now that I have the original back on - It is still only about 2mm away from the air cleaner!
Clearance.webp

This type of spanner is really needed for refitting the brake lines unless you want to "round the hex's":
BrakeSpanner.webp

Fitting stainless washers and locknuts was a nice "finishing touch" I thought:
Stainless.webp
Clearance.webp
BrakeSpanner.webp
Stainless.webp
 
At this point I was quite pleased with progress.
Nice.webp

Did I say "finishing touch" earlier on? Damn it! Jinxed myself again. It may NEVER be finished now!

Bleeding the brakes hasn't gone well at all. (But at least I gave that rubber boot a good workout to test my repair job and it IS holding!!!)

The inside of the mastercylinder was clean and I'd just fitted a 04493-60020 repair kit ($43.40A from XXXXXX. (Taiwanese brand that has been used in some new Toyotas.)

The reservoir is full of fluid too but I can't even get any to come out either outlet port from the mastercylinder. I suspect those "check valves thingies" there are blocked with "hardened rubber grease" (that I applied everywhere when I placed it in storage all those years ago). I have even tried using Trekker's syringe to back-flow fluid into them.

I don't want to open up those valves now because the area is all nicely painted (but it wouldn't be the first time I've ruined fresh paint by covering it with brake fluid). I've decided to leave it to sit for the rest of the day and overnight before trying again. (I'm getting too "agravated" to work on it now anyways and the time should help the brake fluid to soften any hidden chunks of rubber grease.)

Anyone know what the story is with those "check valves thingies"? REAL check valves only allow flow in one direction but the brakes would never release if these things actually did that! Would they? (That's probably why I never took them apart - I couldn't see the point of them even being there.)
Nice.webp
 
Last edited:
Completetion?

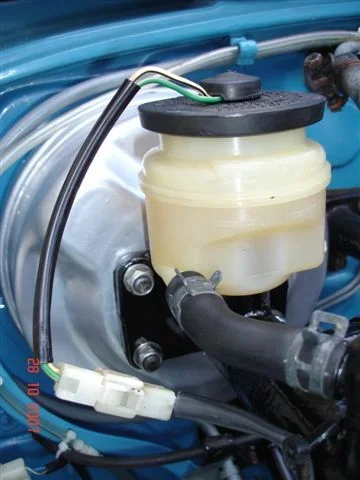
Well here is a picture of the booster reinstalled in the engine bay with the mastercylinder attached, lines connected, air cleaner reinstalled etc:

Boost.webp

Now here's a photo of the full engine bay as it looks now:

FullBay.webp

I had an ulterior-motive for removing things from this area. Those side-panel louvres were very rusty and it enabled me to get at their inside sufaces to clean and repaint them.

Some of you will know from my other threads that I have "master cylinder issues unresolved at present". I am waiting for next weekend to be able to have another attempt at bleeding things and getting fluid to pass through my "reconditioned" mastercylinder. (I bought one of those cheap "one-man bleeding kits" - but I've decided to ditch it in favour of the proven/better 2-man method.)

I've run the engine and checked the vacuum system. (It's fine because the vacuum isn't lost when the vehicle sits unused.) Also the booster still appears to work perfectly.

I'll let you know if I discover any problems resulting from my "booster overhaul". Otherwise consider the job COMPLETED.
Boost.webp
FullBay.webp
 
Excellent write up and great job.

Thanks Trekker. Next phase is to do-up the heater-fan assy, tackle the rusted air intake lourves there (and the rotted "fan/assy to louvre-panel" gasket), and repair/repaint the rusted kick-vents on both sides. (They have rotted gaskets too and I'll be looking at using better materials than the factory "water-absorbing/rust-promoting foam".)

I really admire those people who can completely strip down a vehicle and then do a "ground-up restoration". Such a massive job would overwhelm me and I'd never be able to get the "minor detail" to a standard that would satisfy me. On the other hand, this never-ending "rolling restoration" style of work suits me well.

At least I'll be able to keep driving it while doing this next phase. :)
 
Tom, great writing and documentation with photgraphs!
Your attention to detail is great.
I wonder how you resolved your MC bleed issues you were having? If I get ambitious, I'll have to search for your other threads.
Thank you!

Thanks Pablo...

I'd obviously have written less nonsense if I'd waited till the job was completed before starting the write-up..

But I must have done a reasonable job overall because I can say now (6 years later) that my booster and master are still performing faultlessly.

As for how I overcame the bleed issues ... I do recall removing the "residual valves" and cleaning in that region of the master. But I think my real problem was with trapped air in the high points of the external brake lines.

Back in those days, I was bleeding using the 2-person bleed method with one person engaged in pumping the brake pedal and the other (me) topping up the reservoir and bleeding at the wheel cylinders. And I believe with this method, when we stopped to refill the reservoirs (before resuming the push-bleed process), the trapped air would simply go back to the high point so we were achieving nothing.

Nowadays I have no trouble with brake bleeding because I have a Wurth air operated vacuum brake bleeder that can continuously suck on a wheel cylinder (without anyone manning it) while I keep the reservoirs topped up. So bleeding has become a more-convenient one-person job now and there's no chance of trapped air being able to back-flow to high points.

I use this Wurth bleeder for periodic brake fluid flushing/replacement on the :princess:'s Nissan car as well as on the BJ40.

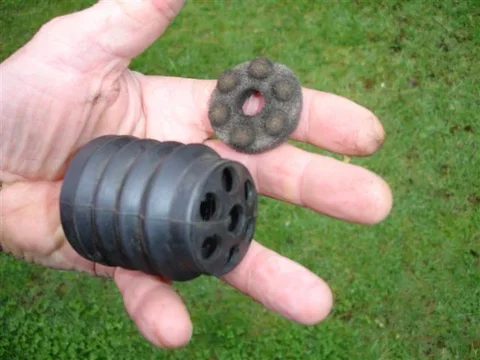
And since 2007 I've replaced the rubber boot with a second-hand one I got off a 60-series booster that I bought on eBay/Trademe.

BoosterBoot2.webp

:beer:

Edit: Oh...
And in case anyone thinks the booster overhaul kits are STILL available in 2013 (even at $600+) ... No.... I believe they're all sold out and now unobtainium..
BoosterBoot2.webp
 
Last edited:
Great write up!!! and that engine bay is just awesome!!
 
Oh yes. A psychiatrist would say I suffer from OCD (Obsessive Compulsive Disorder) and my neighbours think I'm an "eccentric perfectionist" And as reinforcing evidence for these "diagnosii" - I have even painted that little clip before refitting it:

So let me get this straight:

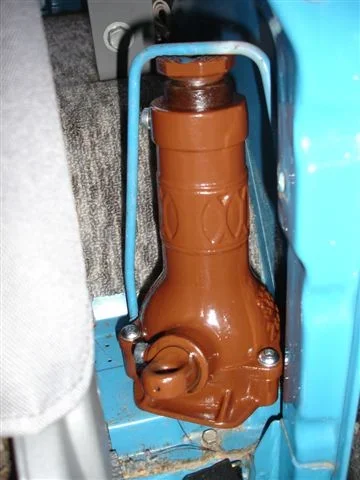
You start out with having OCD by rebuilding an OEM brake booster and then maybe 5 years later it progresses into full on turd polishing by rebuilding an OEM screw jack?

I just want to know the warning signs.
 
If you are reading this thread it is already too late.
 
Great write up!!! and that engine bay is just awesome!!

Thanks Froggy..:)

So let me get this straight:

You start out with having OCD by rebuilding an OEM brake booster and then maybe 5 years later it progresses into full on turd polishing by rebuilding an OEM screw jack? ....

Turd polishing?

I hope you're saying that just because I chose BROWN for the colour Charlie.
JackReplaced.webp

...I just want to know the warning signs.


If you are reading this thread it is already too late.

Yep. Only people with too much time on their hands read my verbiage. (Resthome residents, the bedridden, recluses, social outcasts, general misfits, etc.)

Another sign of onset is when you start offending people by mixing up letters in usernames..

And last but not least .... the memory loss... (Is it you that I keep calling Pighead or Pighead that I keep calling Pinhead?)

:beer:
JackReplaced.webp
 
In my case the symptoms were a steady flow of cash out of my bank account, the total loss of time to do anything, but work on the Cruiser and the final clue was when I started working on OTHER peoples stuff and had no time for my own! :D
 
I started working on OTHER peoples stuff

we greatly appreciate that I promise!

I'm glad I saw this thread... I want to re-plate my booster but I was afraid to take it apart myself. Seems a waste to spend $300 bucks to send it out to "rebuild" it when all it proabably needs is to be shiny again! Now I can get the two halfs apart and send it out to be blasted/plated

I'm hoping this style booster will be easier to take part since it has the bolt clamp
DSCF0291.webp
 
When I showed off the plywood SST I made for clamping together the booster halves, I'm sure I heard some "snickering" and "tee heeing" in the background!

YES. DAMN THING WAS TOO WEAK TO SQUASH THE RIM OF THE DIAPHRAGM SUFFICIENTLY DURING REASSEMBLY FOR ME TO TURN THE LOCKING RING. But never fear - Here's what I used for assistance:
View attachment 182837

Painting the ring and the outside of the shell halves would have made it more difficult for me to turn the locking ring but I figured that the extra paint thicknesses would help in obtaining an air-tight seal (by leaving additional clamping pressure) -bearing in mind that it is not a new diaphragm.

Well now it is back to the reassembly task (Well - With what little time I have left before I need to get ready for work anyway.)

Lostmarbles, it's me again, popping up in another thread to annoy you again. (where will I stike next???....) :popcorn:

OK, so I now see you've pretty much turned your hand at everything. I'm interested in your master cylinder rebuild, as I too must do a rebuild. I fear I'll be going the same route as you, with a scruce up as opposed to new parts given the price.

Anyway, I previously managed to get one of these reassembled in the past using my two friends, Brute-force and Ignorance. They were a great help.

However this time I'd like do it in a more controlled way. You're homemade SST looks the job, do you have any more photos? Was it difficult in re-instate the locking ring? Did it involve lots of chisel work?

As always, thanks
 
I kind of like the earlier post where someone described using a vacuum pump to suck it all back together. Vacuum (in reality ambient air pressure acting on a lack of pressure) is a really strong force that would be hard to replicate in a homemade press.
 
This is a valuable thread--I was just thinking I might want to do the same thing--for the same reasons-even though the brake system is working ok(well, maybe ok-the master cyl. reservoirs have a lot of black looking gunk in them-so the whole system prob. needs a good drain/clean/refill)-if that is done, I would prob want to do the vac/boost system too-- Please keep the posts up-it will help all of us--
Gary
 
Lostmarbles, it's me again, popping up in another thread to annoy you again. (where will I stike next???....) :popcorn:

OK, so I now see you've pretty much turned your hand at everything. I'm interested in your master cylinder rebuild, as I too must do a rebuild. I fear I'll be going the same route as you, with a scruce up as opposed to new parts given the price.

Anyway, I previously managed to get one of these reassembled in the past using my two friends, Brute-force and Ignorance. They were a great help.

However this time I'd like do it in a more controlled way. You're homemade SST looks the job, do you have any more photos? Was it difficult in re-instate the locking ring? Did it involve lots of chisel work?

As always, thanks

I kind of like the earlier post where someone described using a vacuum pump to suck it all back together. Vacuum (in reality ambient air pressure acting on a lack of pressure) is a really strong force that would be hard to replicate in a homemade press.

I haven't tried vacuum but with the assistance of the G-clamps I had no trouble turning the locking ring in my plywood setup (which still sits in my garage).

Certainly didn't need to use a chisel!

Are you searching all my threads Corglass? If you are ... Beware! The further back you go the more likely you are to find silly nonsense. I'm always learning and some of the things I've done in the past I wouldn't repeat now.

:cheers:
 
I kind of like the earlier post where someone described using a vacuum pump to suck it all back together. Vacuum (in reality ambient air pressure acting on a lack of pressure) is a really strong force that would be hard to replicate in a homemade press.

There is no way this would work..
 

Users who are viewing this thread

Back
Top Bottom