CCOT Quarter Panels: has anyone done thread on this?

This site may earn a commission from merchant affiliate
links, including eBay, Amazon, Skimlinks, and others.

Well, as you're finding out, none of this stuff is plug and play. Nothing that can't be done with a little fabbing. Looks like you're on the right track, perseverance is the key. That, and learning body work :)

Yeah. Wasn't expecting "plug and play," but they forced me to put a seam in places I'm not so sure I'd otherwise place it....

Either way, it's coming along VERY nicely. Definitely better than patching it with sheet and forming it. For bits that big, it's really nice to have them at least "close" to the right side and shape before I have to start working it.

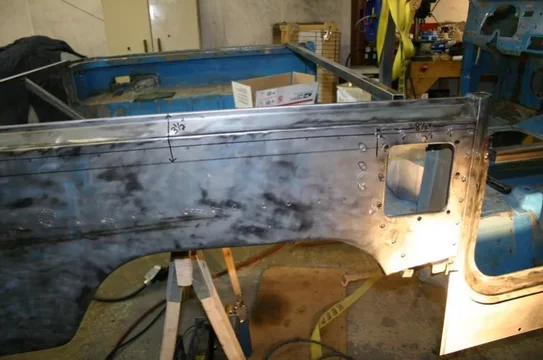
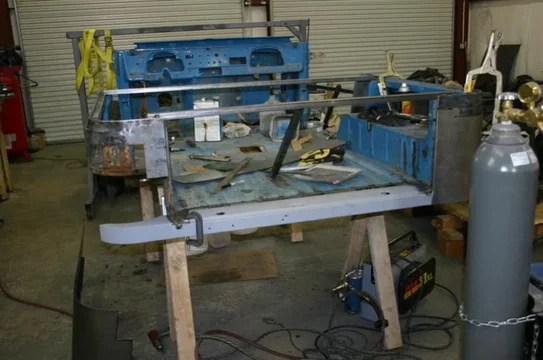
So, I wanted to keep the seam for the panels well clear of the flange along the top of the tub, but I also preferred to use the whole new gas filler cutout, and put the door hinge into a single piece of metal, so the ends of the quarter panel will be higher than the rest of the seam.
cut prep 1.webp
cut prep 2.webp

And, with a few swipes of the plasma cutter...
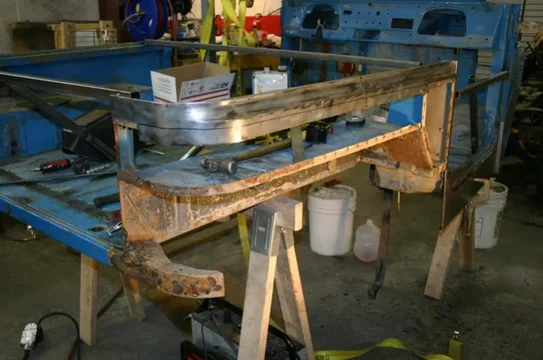
cut complete.webp
cut prep 1.webp
cut prep 2.webp
cut complete.webp
 
I'm debating if I want to simply butt weld it together, or if it would be worth my time to flange the existing metal, and use a lap weld.

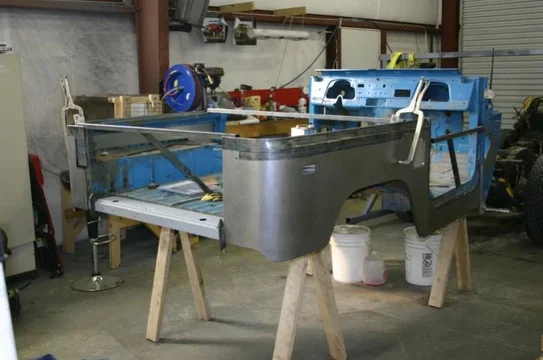
Here's the quarter mocked into place (haven't trimmed it all the way, because I haven't decided about flanging or not).

mocked 1.webp

Now, there's a bit more of a gap at the front that I like at this point, but I'm guessing that it will close up a bit when I trim the last bit of the quarter panel to fit snugly.
mocked 2.webp

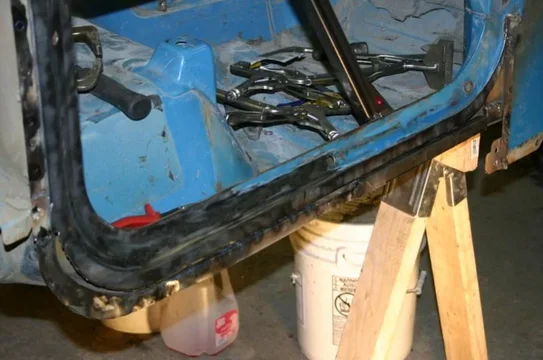
Here's the CCOt quarter panel with the original sill. It's about the exact same gap as their sill. I'm pretty confident that it will all fit up once I can start putting some clamps on it to hold it in place.
mocked 3.webp
mocked 1.webp
mocked 2.webp
mocked 3.webp
 
Man I've been jonesing for a report. Looks good!

How do you know where to cut the existing quarter panel to line up with the CCOT piece.

I see you have drawn a line 3 1/2 " from top of rail. Was that in the instructions or did you just decide to keep that much.

I thought you would cut out the spot welds that attach rail to quarter panel per CCOT diagram. Could you spot weld from the inside of the tub to the rail versus butt weld?

Oh well, I will keep watching and try to be more patient...:crybaby:
 
Quick sidenote: that line at the top is where the CCOT panels come to naturally. It is right in the middle of the line of spotwelds along the top channel. You could use a cutoff wheel along that line and then butt weld it against the flange. This way you would not see the seam from the inside (good). The problem with this method would be that the entire seam would effectively be welded to the flange on the backside, which is great for rigidity. HORRIBLE if you ever have to cut them out and repair it again.

That would put you squarely into the "need a new body" category. That's the biggest reason I didn't want to do that. Also, the plasma cutter would cut right through both pieces of metal, leaving an unsightly cut, or repair for the trained eye to spot (we're talking about a flange that is underneath the top rail--not exactly obvious).

I think if I flange the panels that they'll not only be stronger, and easier to work with (virtually impossible to burn through a lap weld, even for me :hillbilly:), but also because on the inside you'd just see the straight line of the lap joint. Still not convinced that I want to flange the joint (mostly because there are parts I cannot flange, and how to transition smoothly between the butt and lap joints), or that I have the equipment (my flanging tool might not be deep enough to flange two 16GA pieces to end up flush).

Dan
 
What kind of flanged do you have?

I've seen these at Eastwood and Harbor Freight...

I think it's a HF unit. I picked it up at a garage sale in a box with some other stuff, so I'm not real sure.

I don't even see a name on the flanger, but it will flange and punch holes, and it'll do 16GA without much problem I think. I have done lots of little pieces, and it works just fine for that.

I'm just sitting here by the fire, letting the sun come up so it can warm up the shop a bit before I head back up and get to cutting out the left quarter and getting the sill off too! Fun stuff!

Dan
 
those panels are not bad but for 65.00 for a 4 x10 sheet of 18 gauge i prefer to make my own.its enough to do the whole truck and then some .maybey a thread on making some would be nice .i use simple hand tools and a mig welder ,however im not good at photos or or the way i explain things some times good luck
 
Nice progress today IMHO.

First off, a quick picture of the flange and the new panel sitting in it.
flange.webp

Next, I finished taking the left quarter off.
left off.webp

And then, after missing two spot welds (the furthest outboard spot welds on the sill go through THREE layers of metal, I only drilled it out from the top) the sill came out easy as pie.
sill removed.webp

those panels are not bad but for 65.00 for a 4 x10 sheet of 18 gauge i prefer to make my own.its enough to do the whole truck and then some .maybey a thread on making some would be nice .i use simple hand tools and a mig welder ,however im not good at photos or or the way i explain things some times good luck

The quarters I like. If I made them myself (I've got plenty of sheet 16 and 18GA in the shop) I'd have to weld on the flange along the bottom of the quarters, and frankly I like having that flange formed by a press. I'm hoping it will be less prone to collect dirt and rust with the smooth flange from these panels.

The rockers, I'd need to have a serious discount to make me purchase them again.

The sill however, is a fabulous piece. Very happy with that.
flange.webp
left off.webp
sill removed.webp
 
With all of that out of the way, it's time to get to mounting the sill...

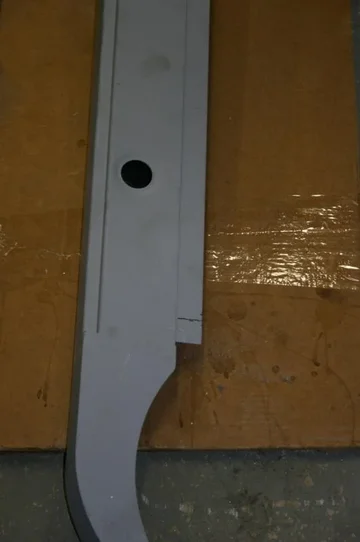
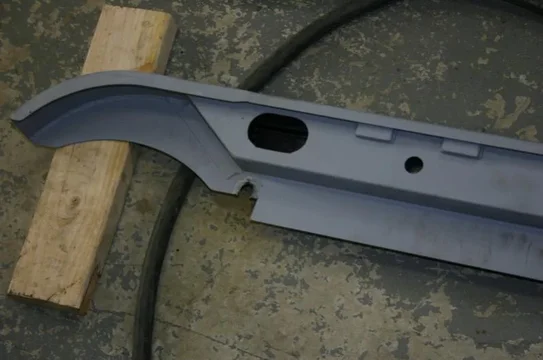
The CCOT rear sill fits nearly without modification, or at least it did for me. Here's where I cut it out so that it wouldn't hit the fender well anymore. The first pic is just cutting 1" out of the flange. That wasn't enough, so I cut two channels to clearance it for the fender well.
sill cut 1.webp
sill cut 2.webp

And voila! It fits!
sill installed 1.webp
sill cut 1.webp
sill cut 2.webp
sill installed 1.webp
 
Back to that fancy curve in the corner.

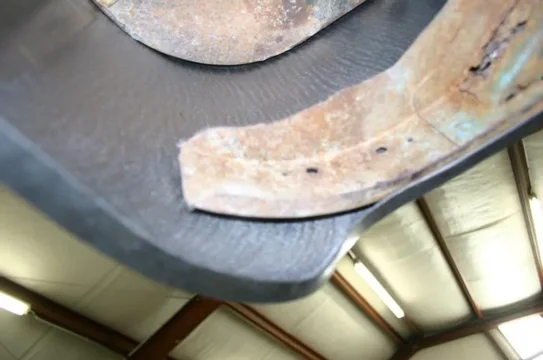
The left side wasn't so rusted out, so it got in the way of the new quarter panel.
curve cut needed.webp

Since I don't mind the vertical cut, I decided that the best thing to do would be to simply cut a slot in the corner curve so it would sit flush. I'll weld all this together when I finish it off. It'll look pretty close to original, and provide a good seal for the amby door when it goes back in.
curve cut complete.webp

And here's how it all looks clamped together.
overview.webp

Very exciting!
curve cut needed.webp
curve cut complete.webp
overview.webp
 
And here's three pics of the left quarter now trimmed to fit.
left quarter 1.webp

The gap at the front is very nice.
left quarter 2.webp

And here's where the business is. Yes, I mismeasured (5 times) and made a cut where I shouldn't have. I'll use the bit I cut out and just fill it in, so no big deal, but seriously--I was on a roll.
left quarter 3.webp

Tomorrow I'll be doing minor rust repair on the flanges and brackets that the body panels attach to, and with any luck--I'll be at least tacking them into place tomorrow before I have to go back to work for a few days.

Dan
left quarter 1.webp
left quarter 2.webp
left quarter 3.webp
 
Last edited:
Are you going to weld the the quarter from the inside of the tub or outside of quarter?

If outside do you just tack in spots then use seam sealer or try to run a bead the length of the quarter?

Keep the pics coming...:D
 
I'm planning on just drilling holes in the quarters, and then spot weld from the outside. I'm going to be very careful to put the spot welds in the same places as the factory, just so it'll be easy enough to find them should I ever have to take them off again. ;) That is, unless I can find an actual spot welder somewhere. That would be wicked awesome.

So, to answer the question more completely:
1) spot welds from the outside.
2) soda blasted (or maybe acid dipped, haven't decided yet).
3) epoxy primed.
4) seam sealer.
5) After all that, it'll get a color matched bedliner on the inside of the tub to help seal it all up.

I'm hoping that with all of that I'll be able to stave off rust for a long, long time. I'm hoping that Dad will never have to deal with the rust again. By the time it creeps back in, I hope to be an old man myself.

Dan
 
Nothing too exciting today. Not only did I make a trip into town (it's about 45 minutes one way) this morning to get weld-through primer, but I ended up making a second trip into town to try and get new tips for the welder. Mostly, I wanted to switch to 0.023 wire, and realized I didn't have tips for it sitting around. Was sold out, so oh well, only 2 hours down the drain...

Basically all I got done on the truck was rust repair on the flanges and brackets that the outer body panels attach to.

Here's some pics!

New flanges under the rocker....
new flange.webp

And some general rust repair in the fender well.
rust repair.webp
rust repair 2.webp

Unfortunately I have to head to work tomorrow, and won't be back until Sunday night. But then I have four whole days to tinker.... Fun stuff.

Dan
new flange.webp
rust repair.webp
rust repair 2.webp
 
Great info! keep it coming
 
Well, I'm back to tinkering. Don't have to go back to work until Friday.

Much slower progress now. Repairing the little brackets and whatnots behind the visible panels is a pain, but important, IMHO.

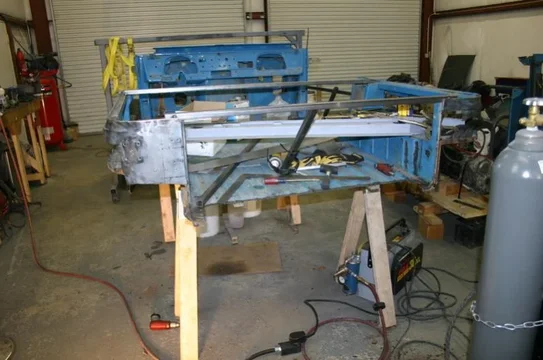
And I'm going to fab up a rotisserie for it. Not onlly would it make it much easier for me to deal with a couple floor repairs, but I'll need to be able to paint the underside at some point in the (hopefully) near future...

I've also decided that I need to do something about those vertical supports. Which gets complicated, as I don't really feel comfortable just taking them out without some more bracing to hold the body straight, but I also don't want to put bracing in that will be in the way of me fitting the body panels (to make sure it's still all square and true before I weld the corner posts back on)....

Decisions, decisions... I'm also not wild about waiting the month or so for CCOT to send me the right vertical channel (I think that's the only one I'd need to outright replace, although maybe I can work with the one I've got instead...)

Dan
 

Users who are viewing this thread

Back
Top Bottom