Builds BoltRipper's 2-year Overdue Build Thread (4 Viewers)

This site may earn a commission from merchant affiliate
links, including eBay, Amazon, Skimlinks, and others.

7/6/14 - 90,221 Miles

Interior Electrical Project:


So my "D" light went out right around 88,000 miles. Since I had most everything out I decided to replace the bulb and also work on a Floppy Vent I had.

Here is the cluster being pulled out enough to get the connectors disengaged...

22490577-E0EA-42D9-B0CE-FE1985A7E067_zpsbhivaqul.jpg


Here is a shot of the connectors on the rear of the cluster....

0EFBB757-3B10-4931-895C-0C6829DC0B11_zpstfcsfuyb.jpg


All out...

23DC6CDC-C887-4138-AF32-A03EBFCFF444_zpsf3bhr2kt.jpg


80243F45-296D-4673-9691-19C63C562DAC_zpsv9efbxm7.jpg


Replacing the Bulb required removal of the Sub Panel for the PRNDL..
6C67BD2D-9430-44BB-BDB0-474939ADE1A8_zpspysiqbl3.jpg


Should be good for another 17 Years :cheers:

A40A1FCA-4890-4AD6-AA2F-32196F77C47B_zpsakwviyjw.jpg


Before I put the cluster back in I needed to take care of all the scratches on the plastic... Looked horrible...

C35568DB-B621-4279-819D-F6841799E89D_zpsldtrtbpe.jpg


About 5 passes with the 3M cleaner and polish and she looked brand new...

7E65E582-7256-4E6D-8EC0-6029A6DF9B05_zpsdw1fw1eb.jpg


Next up was the "Floppy Vent" Modification.

When you remove your floppy vent this is the piece that separates...

1938056D-F2B2-47CF-97A3-92EC91B0B247_zpsrq8qzgzc.jpg


To repair it start with drilling out the inner vent...

D7F63424-AF2F-41C7-9E97-153B0AC6A073_zpsiztb47e0.jpg


76BEFF75-D1B8-4FE8-9978-A42CBEF6852E_zpsccoqjygn.jpg


Next find yourself a green screw so it looks all "JDM" and cut it off a bit ;)

F195AE4B-520C-4E77-8B1B-7B01BCC4CAF2_zps8rz1dypj.jpg


Put it all back together and you've Viagra'ed your floppy vent...

CE710EBB-3E33-429B-BFDA-65934A011FA3_zpszv9qi4g2.jpg


As an update mine is still 100%, stays tight and where you place it...
 
10/14/13 - 84,450 Miles

Replaced the drip moldings and all the window runs.. That sped up the windows considerably.

Added LC Phils Front Sway Bar Disconnects and a set of sway bar spacers to correct geometry from the lift.


1/17/14 - 86,560 Miles

Replaced and extended the front and rear axle differential breathers and added small fuel filters to keep water out.


1/30/14 - 86,950 Miles
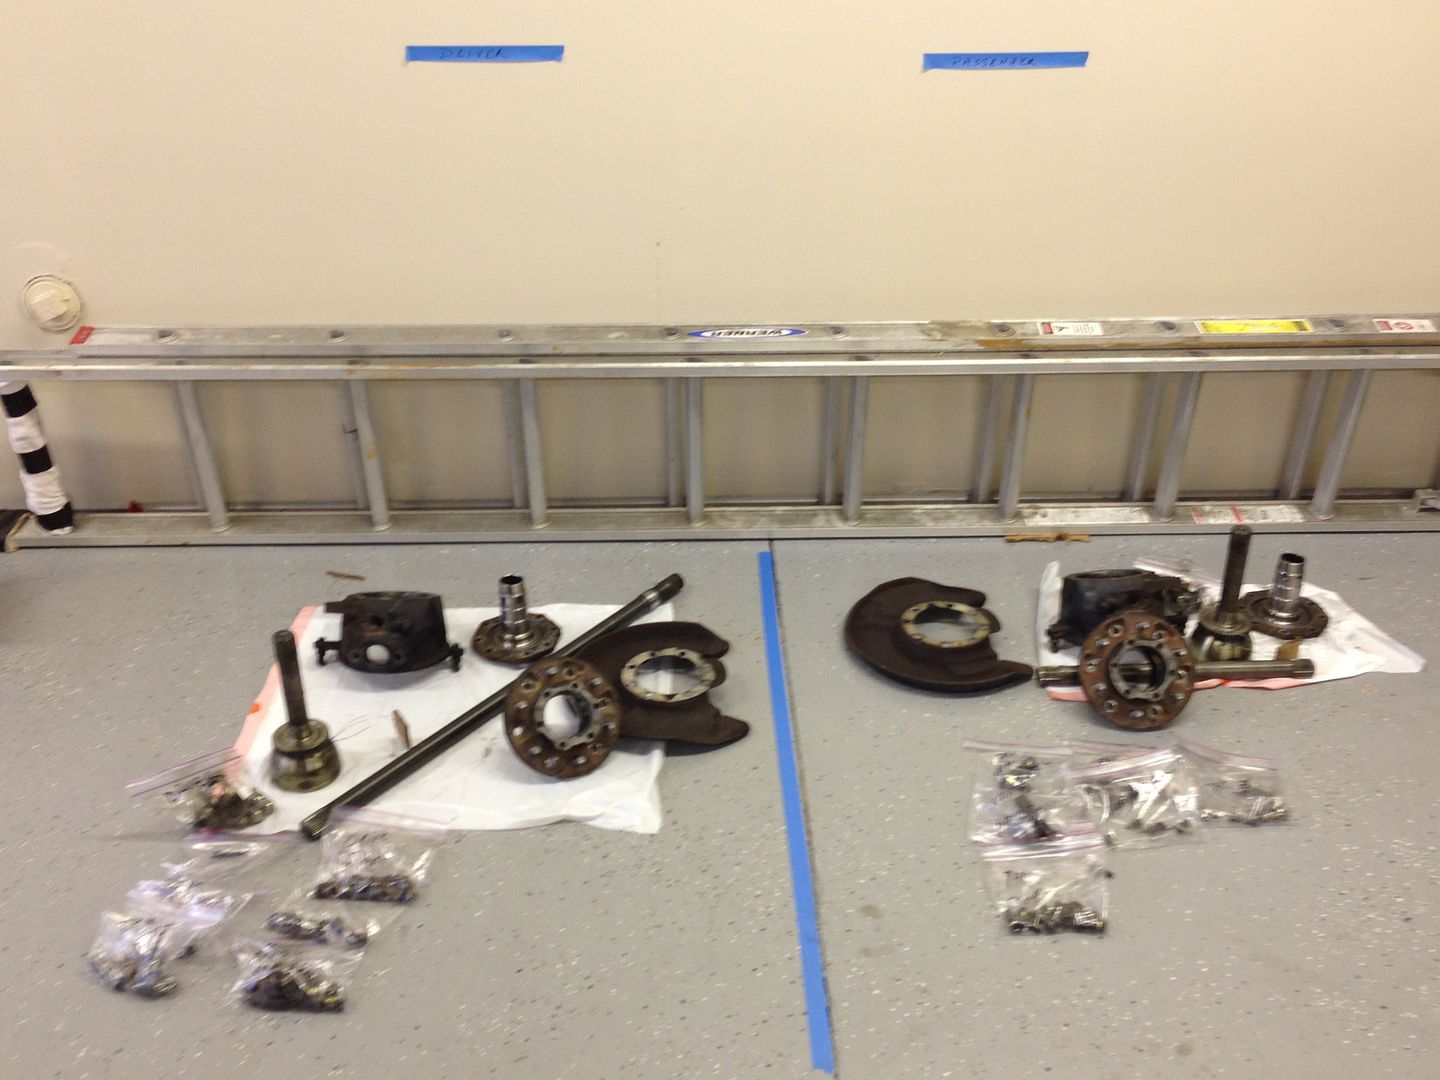
Started receiving all the front axle parts from Onur and decided to tear into it.


Come to find out that the truck had 1 previous front axle service so that was good news. I didn't have any clicking, but decided to swap birf's since I was doing the service.

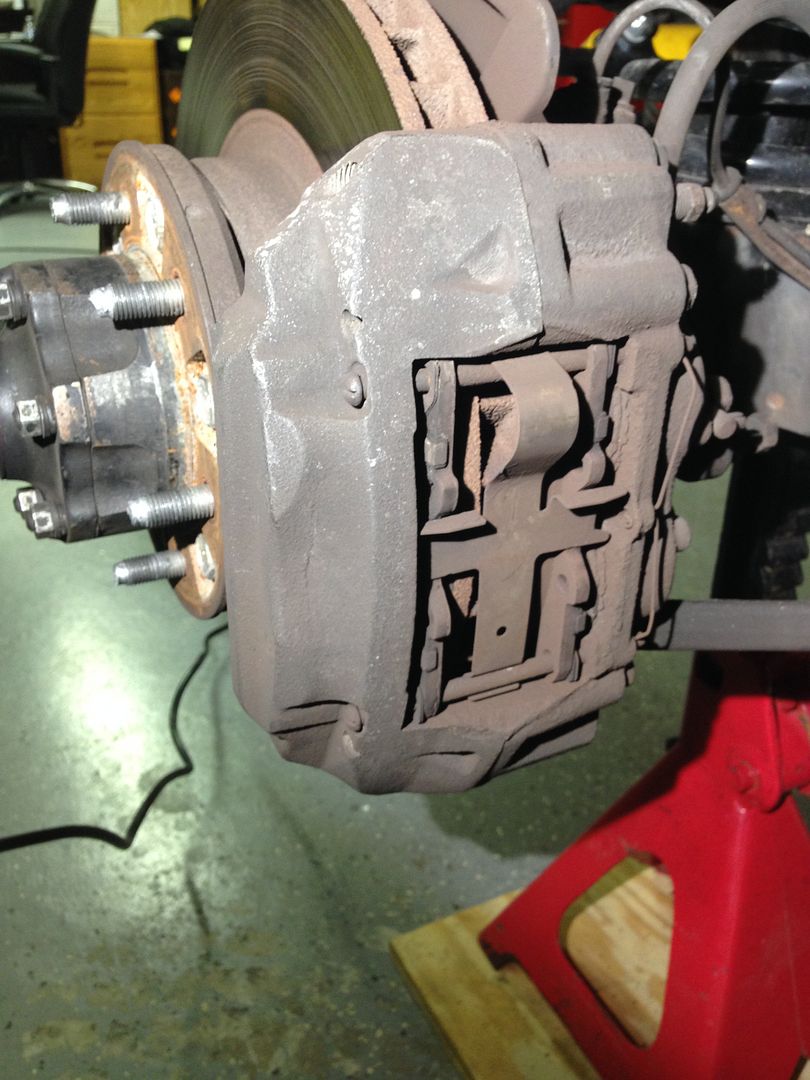
Here is what I started with:
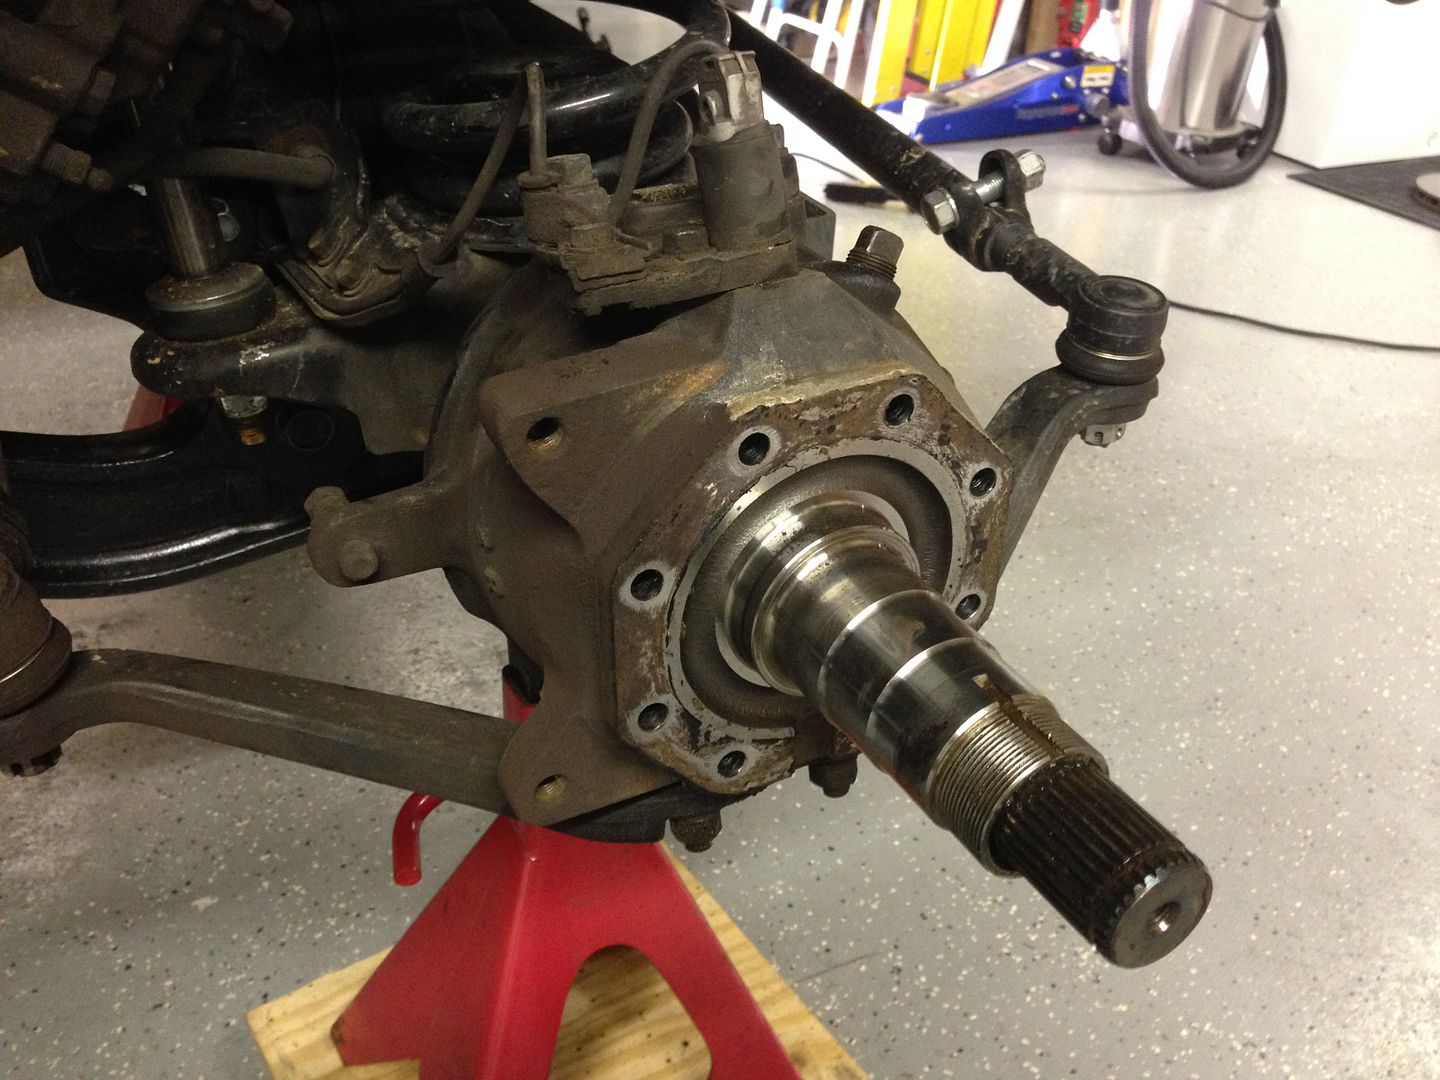
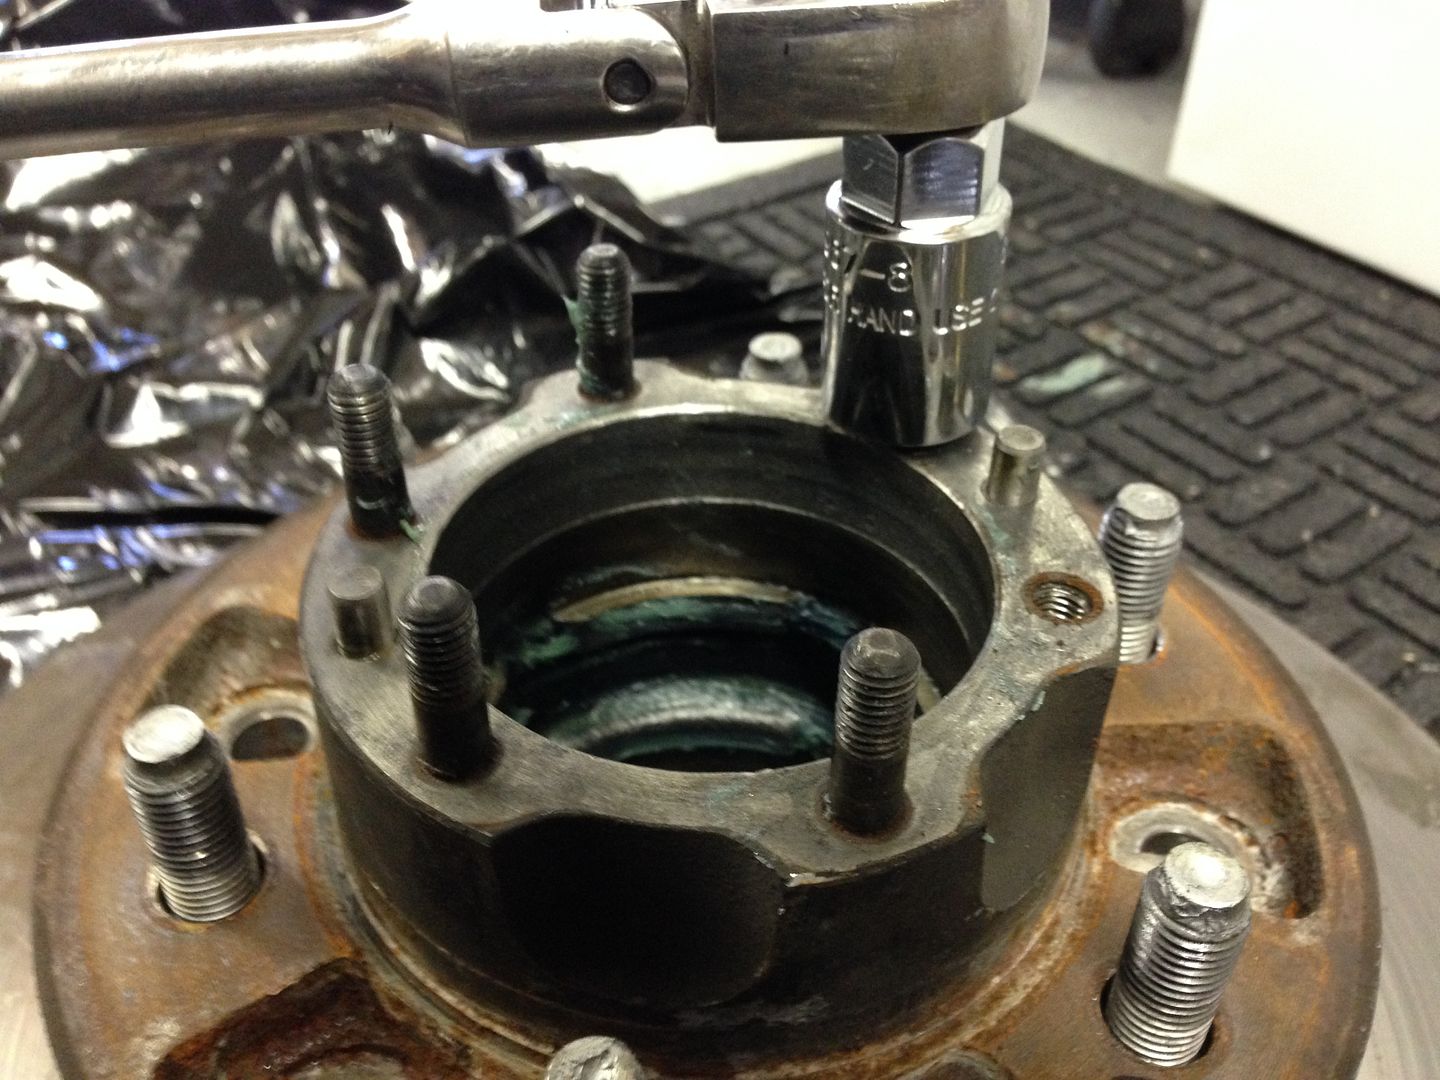
203D3D6A-DFF6-46C5-90A2-0491217CEC06_zpsq0mkxcgn.jpg


Getting closer:

F6DA9FD4-87AE-4427-8496-2F90C166BBD1_zpsnhvewq3j.jpg


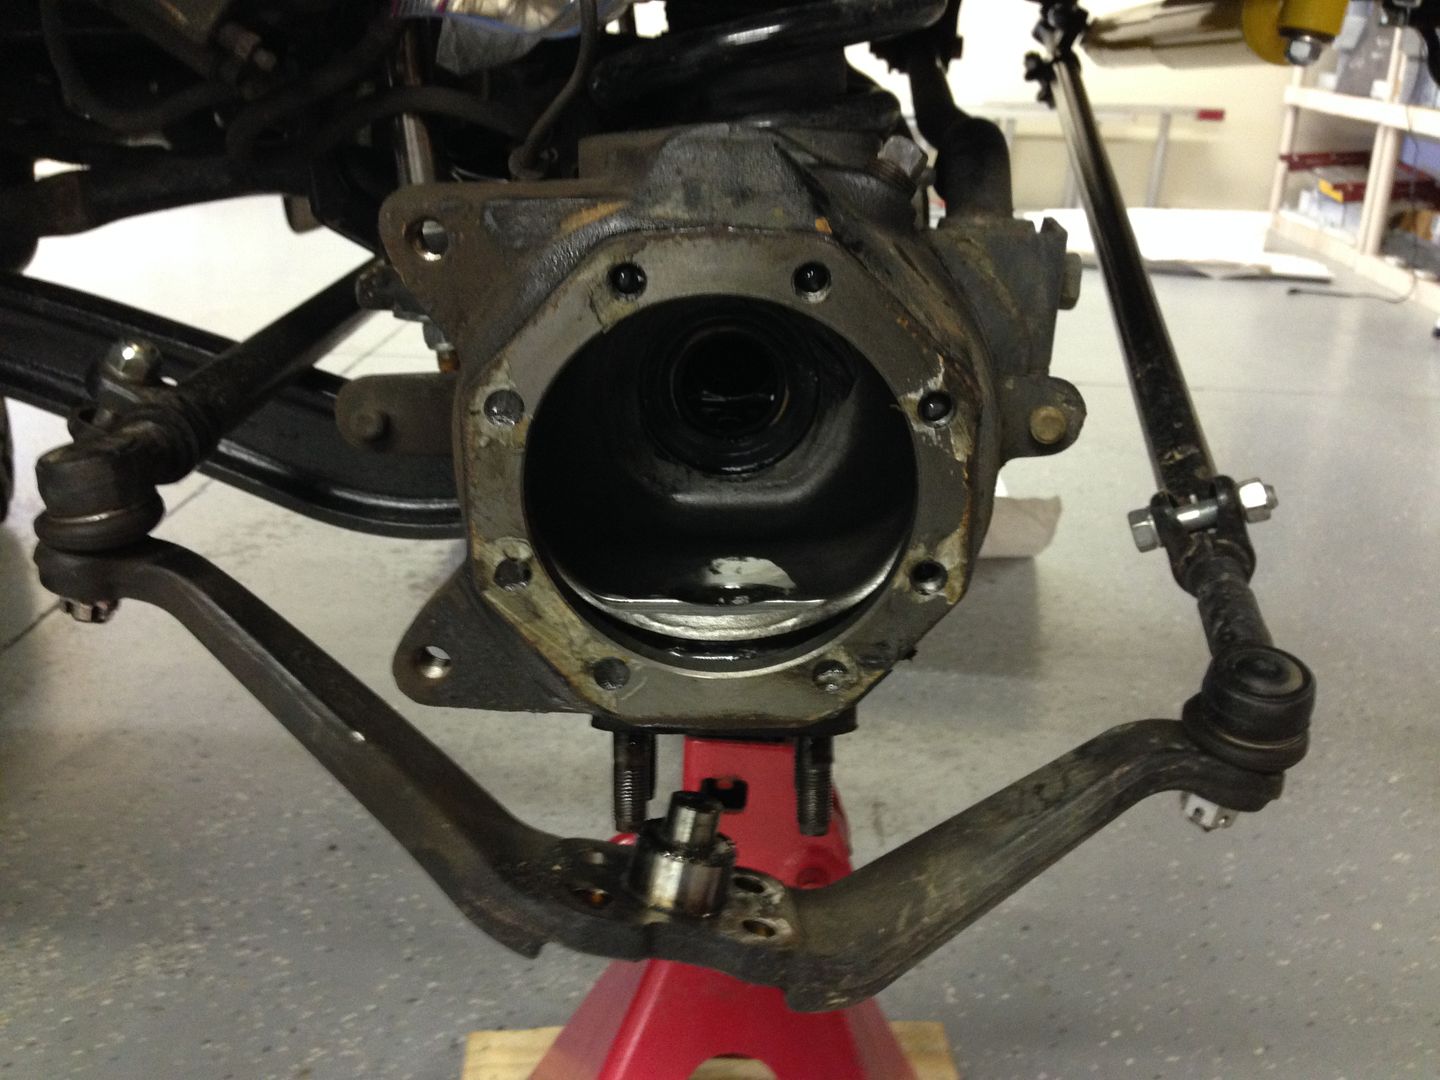
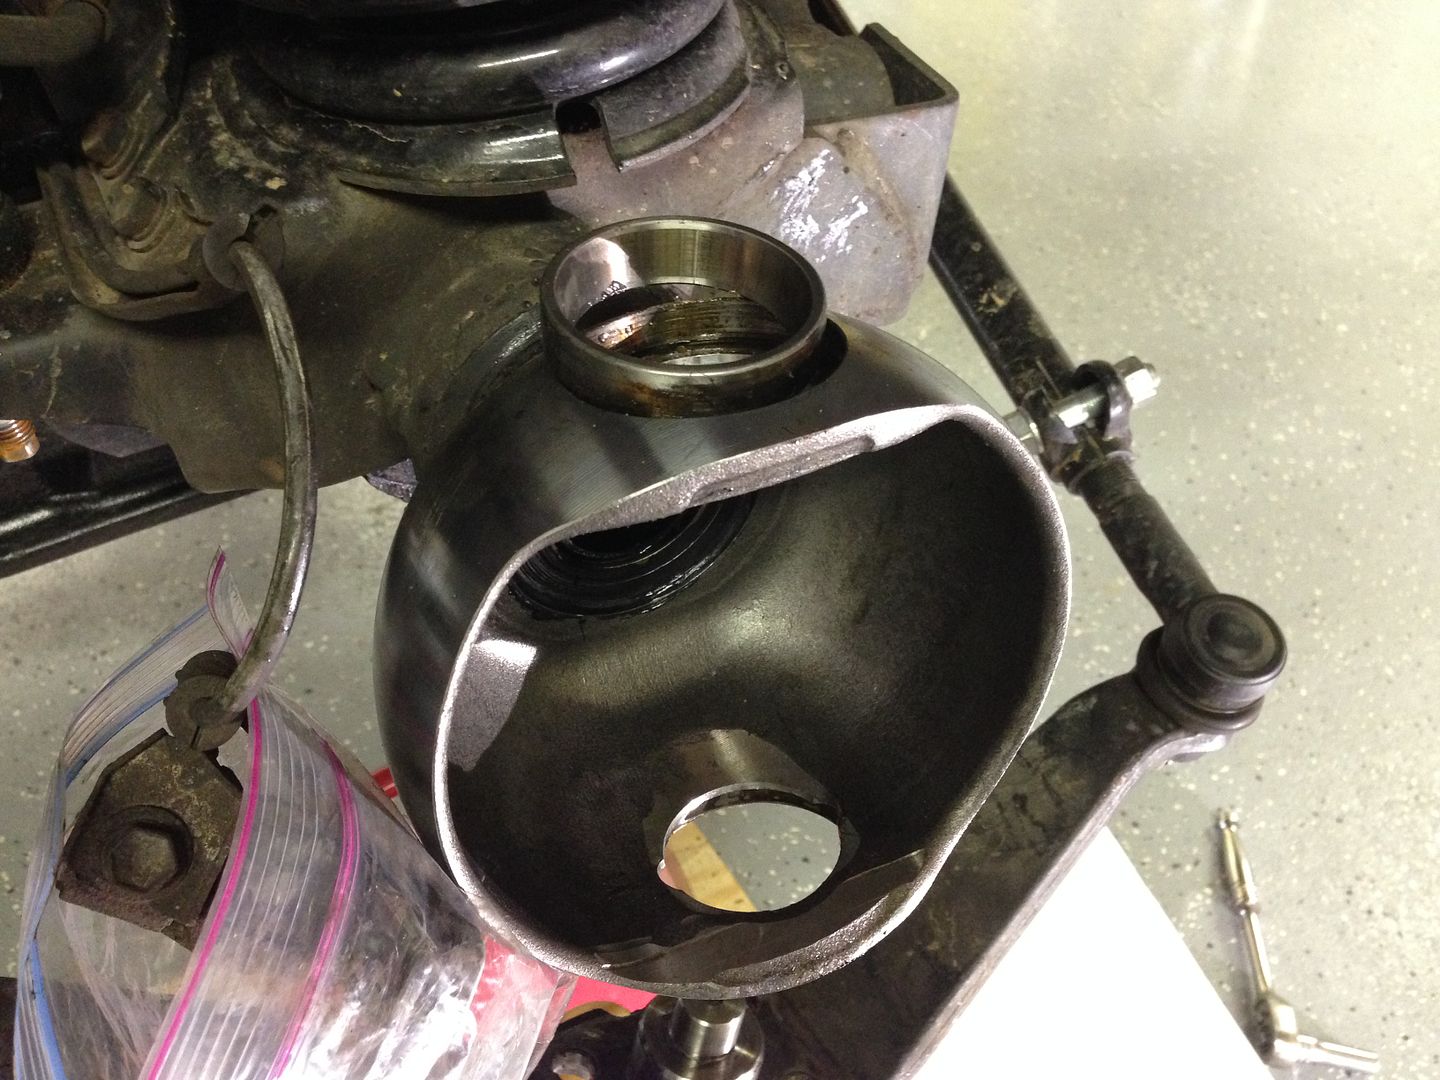
Not too bad a condition inside the knuckle:

31879CF2-D75F-4E6A-B08D-81A29C9DA4BF_zpstrsmnikk.jpg


The messy job done for now:

D9433EEE-E989-4A4E-BDB0-868A7515FF3E_zpstxcnrjwq-1.jpg


I replaced everything, bearing & Races, All Seals, Studs - Nothing was reused....

19AC97FD-8D6D-46CB-B782-807DD623DA4D_zpsfn0vi67f.jpg


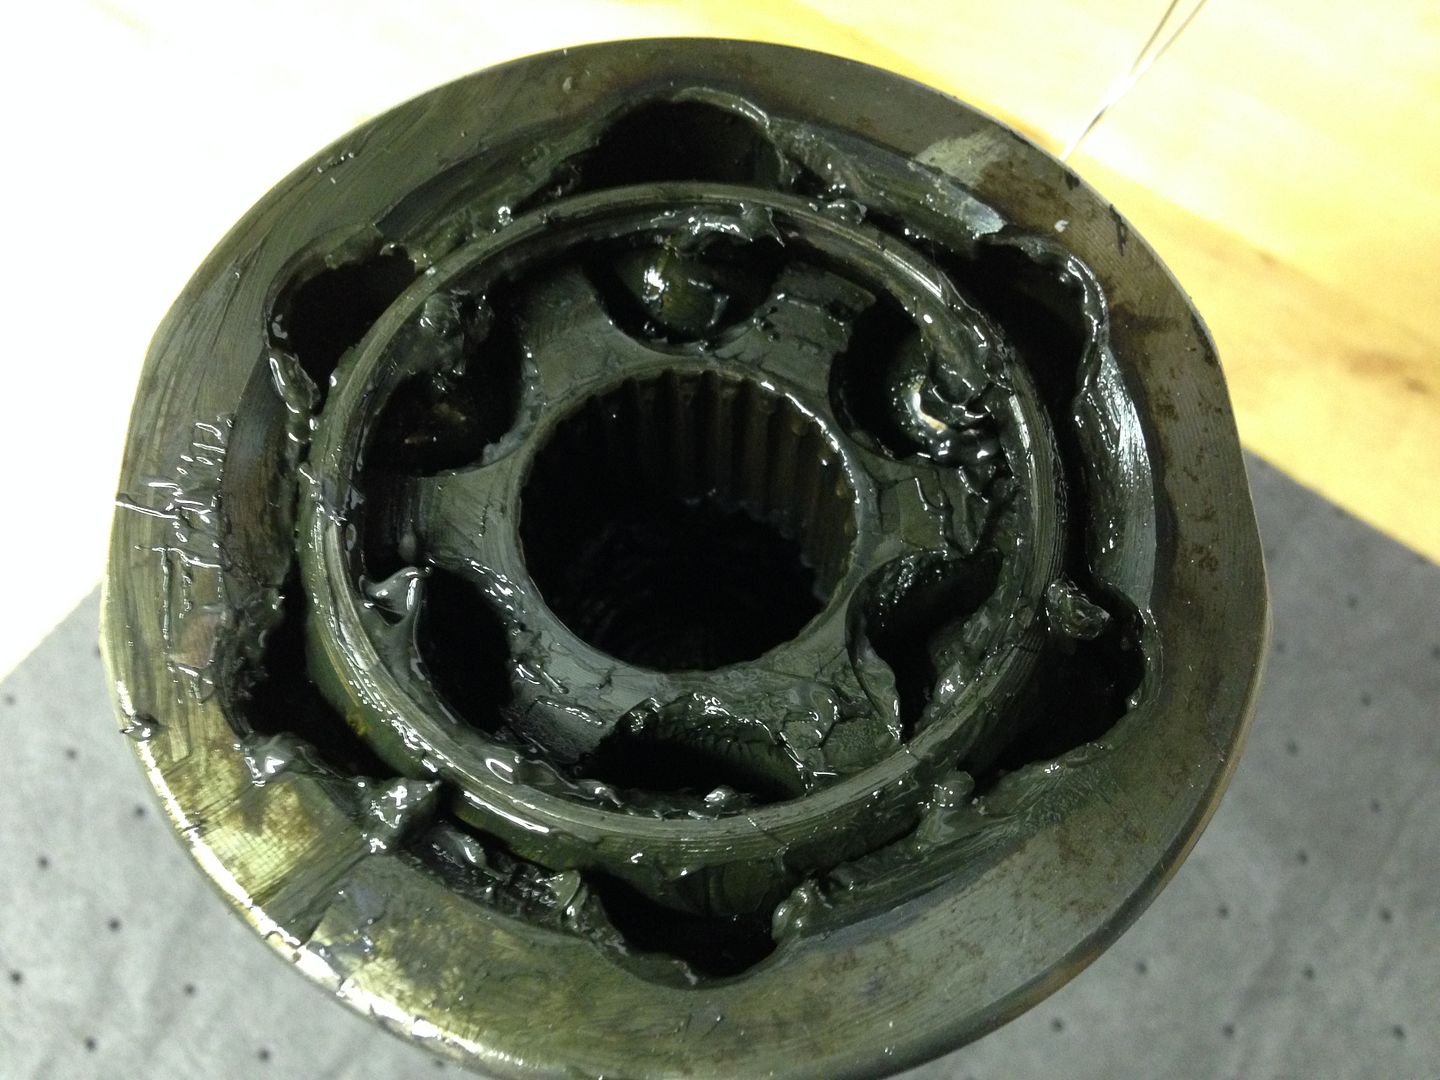
Before tearing the Birf's apart:

13018AEE-ADB7-472E-BA2E-44C7D1ED4404_zpsy8e4vvot.jpg


After a good cleaning:

7C130F26-DB46-4223-8153-28D510D65061_zpstxhxluog.jpg


Keeping Everything separated:

17962D15-AEF5-4E91-9E29-38523C76FB74_zpsppbqqdw8.jpg


Replacing the Studs along with Cone Washers, Flat Washers and nuts.....

130D9267-4F50-4131-9968-8095659FEF84_zpsnpjcujck.jpg
Nice work so far on the awesome cruiser! Any chance you have the part numbers for the drip moldings and all the window runs
 
Nice work so far on the awesome cruiser! Any chance you have the part numbers for the drip moldings and all the window runs

68141-60010 Window Run, Front Door PAX
68142-60010 Window Run, Rear Door PAX
68151-60010 Window Run, Front Door, Driver
68152-60010 Window Run, Rear Door, Driver

75552-60020 Left Side Drip Moulding
75551-60020 Right Side Drip Moulding

I think the above is correct...
 
Wow! Ok thank you! Gonna order and do this.
 
Interior Projects Continued:

So at this point I have run my second battery power and ground to the rear of the vehicle. As seen in previous posts I fabricated a bracket that will hold power distribution posts that will send dedicated power to a 12V Blue Sea Box, Wagan 400W Pure Sine Wave Inverter and new Sub.

Here is the Power Distribution Posts and 12V Blue Sea Box:

19F88E1B-AD33-4B27-BBDD-254516CF0054_zps1lz3z4wh.jpg


Using a Whole Hog Sub Mount I had just enough room for the Kenwoood Excelon Amp and Wagan Inverter. On the back of the Sub Mount I have 2-Dedicated 30amp relays that will power my Inverter and also Back-Up / Task Light that will be described later.

9180FE10-D884-41CE-9E99-9DFB38B9DA4C_zpsu7pco7t7.jpg


The next photo shows the Short Run 10G wires for the ARB Fridge (You can see the Yellow Angle Connectors in the pic) and the smaller wires from the Blue Sea that feed all the USB Power in the vehicle.

E1382870-E54D-4218-8419-292947D711C8_zpsjfvodn53.jpg


The Wagan Inverter send 120V power to the front of the vehicle and the rear of the vehicle:

FRONT 120V / USB:

E4120D77-7F48-42E9-A717-79C829FD14CE_zpsbvqcaqtg.jpg


Rear 120V / ARB 12V and USB Power:

1EE3D922-F642-4FFF-89E4-66F9D3A0186B_zpsmgr5a7gh.jpg


I'll detail the individual installations a bit later in the build thread...


Thanks -
 
Impressive electrical modifications, I really like the center console setup.
 
Wow nice truck and great work.! One question ,how much$$$$ have you spent to this point.Love to do this to my 80 but spending that kind of money the wife would -------- me. lol
 
Wow nice truck and great work.! One question ,how much$$$$ have you spent to this point.Love to do this to my 80 but spending that kind of money the wife would -------- me. lol

Rocrunr -

Not sure to this point in the build thread, but overall it's not for the faint of heart. At the end of the build thread I'll throw the number out, but for now you'll just have to wait......:hmm:
 
I think John's wife is quite happy keeping John at home working in the garage as opposed to out and about with ruffians! ;)

She is very good about my addiction, but is still pushing me towards the Hundy.... I believe she is a keeper... ;)
 
John,

I just took my interior out today, my truck has double the miles and 10x the abuse (new to me), how did you remove the padding under the carpets?

Thanks
 
Interior Continued: Rear Sliding Window Install


With all the new electronics under the passenger side slider windows I wanted to make sure they stayed dry. I didn't have any leaks, but "Since I was in there" I figured I would change out both driver and passenger side slider runs and gaskets. New Rear Vents were also installed along with the exterior base moldings on both sides.

6239987D-7C8E-455F-A3A8-2F48240B5A13_zpseduxj8iy.jpg


After the slider was removed I disassembled everything, scrubbed it and started the reinstall with new runs and gaskets.

71D49B58-5D74-4B3C-866A-B5E4FAB7237B_zpsy56hti17.jpg


Here is a shot of all the components removed....

59E456DC-B69F-42CE-B2F3-FD2DC38B01CB_zpsqvdhgecn.jpg


All back together, sliding smooth with new rear vents as well...

AF842D20-30FF-4C55-9462-EFECBB5CE1C4_zpsmt68t9wr.jpg
 
Last edited:
This build is beyond amazing. It is what I aspire to, but in reality I just bolt rusty parts back on during my front axle service, sometimes break bolts and don't replace them (my rear sway bar), never get around to that leaking valve cover gasket...you get the idea.

Awesome job!!!
 
Interior Continued: CB Install


At this time I wanted to add a CB Radio, but wanted something small and nondescript so I decided to use the "Slee" method and install a small Cobra unit in the dash. I stared by trimming the faceplate / ashtray location to fit the radio tight.

7E8B6425-5BFD-4E94-9902-ECEDEC917B6C_zps8jmflt3a.jpg


After completion of the faceplate modification I used heavy duty Velcro to support the rear of the radio and make a super snug fit.

02597CF8-02FF-4261-910A-E35D5B55C09E_zpscsxsyxe3.jpg


Final Test fit with faceplate....


343C6095-3088-48EC-BC29-57D846F270FE_zpscrzsqdqf.jpg


I wanted to utilize the kick panel speaker as an external speaker for the CB Radio... I started by removing the resister as this is noted to produce a more clear voice signature out of the speaker.

330EC4DB-E256-4089-8BD8-D0A334000A26_zpsfkdbudwl.jpg


I purchased a 3.5mm Jack Cable from Amazon and soldered that to the speaker and just plugged it into the eternal jack on the back of the Cobra.

B21A371A-A651-458D-A425-355B668E8CA8_zpsacilnxvh.jpg


Here is a shot of the Finished install under the Kenwood DNX 771HD

70A9D7EC-2478-4ABA-92F2-80D9051E5EDE_zpswcgo7j5g.jpg


Antenna Mount was one of Shane's with a 3' FireStick Antenna...

51CF2228-5607-418B-9BD1-3CE7EAB709A4_zpsrvxbk1cq.jpg


Completed Antenna Install...

F15C0ABF-D48E-4A9A-9C8C-253F9C43747A_zpsvdkw527k.jpg


The kick panel speaker mod is an A+.... Good voice clarity and excellent volume even with the windows down and at highway speeds.

:cheers:
 
Last edited:
Interior Continued: USB Additions


So my 9 and 11 year old girl's don't smoke and neither do I, so I was wondering one day what I could do with these.....

9AEB2177-5E0B-4F31-9BF8-DA1E639B88A6_zps05txrwsm.jpg


Seems every device we have from cell phones to tablets utilizes USB charging. I figured that I could do a neat mod and remove the ashtrays and fabricate USB charging ports...

After completing the center console modifications, I was getting good with the ABS/Kydex so I started making some plates to hold a Blue Sea USB Port.

Here are my cover plates ready for install in the rear doors....

25D924EF-0DDE-46AB-A905-8C1A43263862_zpsgsy1qu5l.jpg


The thinner rear plate goes under the window switch molding and the Blue Sea USB Lock Ring sandwiches them together for a very tight fit.

3F2BC0AA-DA0D-49B0-A66C-54D7014D5D09_zpspytohl0x.jpg


Next I made up some custom wiring harnesses with abrasion resistant covering.....

1A90B965-6B0E-4B33-89DF-23425FFBD158_zpsigrgpmrm.jpg


Here is the finished look....

5837133E-2B57-4F28-839B-2BBC7EBDE43C_zpsudzytwai.jpg


40842F87-4031-4B7B-AD63-6D9F05DBE4B9_zpsvdd5m7xa.jpg


Couldn't neglect a possible 3rd person sitting in the middle and not having a charging port, so I installed a third Blue Sea USB port on the rear of the center console.

CBE46A79-03BE-4B31-AFDE-1BDAB47F6253_zpsvq54pea1.jpg


Next came the Front and Rear of the vehicle. I ran a USB Port on the driver side rear panel...

07379375-025B-4A95-92EA-F79BFBFA3E93_zpsu5ogdysa.jpg


Then I decided to place a Blue Sea dual 12V and USB Outlet on the Passenger side so I could have a very short run of wire from the distribution blocks to connect the ARB Fridge.

734A0A21-B2DA-4C8B-BA37-12A276150501_zps20rh8kh6.jpg


59A6109C-2DD4-4592-9442-A3A5B8A5BD0A_zpssvyaau0v.jpg


86E4820E-A3CC-44DD-8F92-74CB1486F981_zpspgl9jj0b.jpg


BAM... Another ashtray GONE....

5D5D279C-F005-4380-815D-6735A8F97343_zpsvq8lpbfe.jpg


For the rear 120V power I utilized a shallow mount residential box from Lowe's, and fabricated a flush mount cover to finish off the install.

61973B1B-4CEF-4CBE-B730-74C4BC58818A_zps4rki8c2b.jpg


514CA4D3-14ED-412A-8A24-FE09F7C67CB9_zpshmr0xjhx.jpg


9EC6CA17-AE09-45D2-A7F3-4349D138EE31_zps91rtdo2r.jpg


Finished the rear Electrical off with the addition of a OEM Dome Light installed onto the lift-gate. This adds light for getting into the ARB Drawers and camping.


null_zpsb1189329.jpg


8C705B31-CC62-4DD7-AB98-61B8EE4DADCE_zpsv0scwk3h.jpg


For the front of the vehicle I ran power from both the Wagan Inverter and also the Blue Sea 12V Distribution. below you can see all the wiring being brought to the front of the truck. I sleved the wires in abrasion resistant covers for a clean install and protection....

9CED9670-2656-4F2C-A57A-73AEEEDB2E34_zpsa6v8m47c.jpg


Made a small modification to the center console to bring all the wires up to the dash for their respective parts.

44E46BBE-FB1D-402F-85CA-E9C1BFD6F9E2_zps6d8arikw.jpg


You can see in the below photo the Toyota Matrix 115V switch that I utilized for the install. The switch is correctly wired through a 30AMP Relay to the Wagan Inverter and I was able to figure out the pin-outs on the switch to get it to light when activated and also back-light when the vehicle lights are on.

You can also see where I made a custom bracket to mount the National Luna Dual Battery Monitor.


F441C733-DB2F-4903-9E54-0BE356BF854B_zpsvxl20fst.jpg


:cheers:
 
Last edited:

Users who are viewing this thread

Back
Top Bottom