Builds 95' FZJ80 Build with 6BT swap

This site may earn a commission from merchant affiliate
links, including eBay, Amazon, Skimlinks, and others.

The hose provided in the kit works fine, it keeps things easy for the average joe doing the swap, I have worked on a couple of swaps and I like this set up
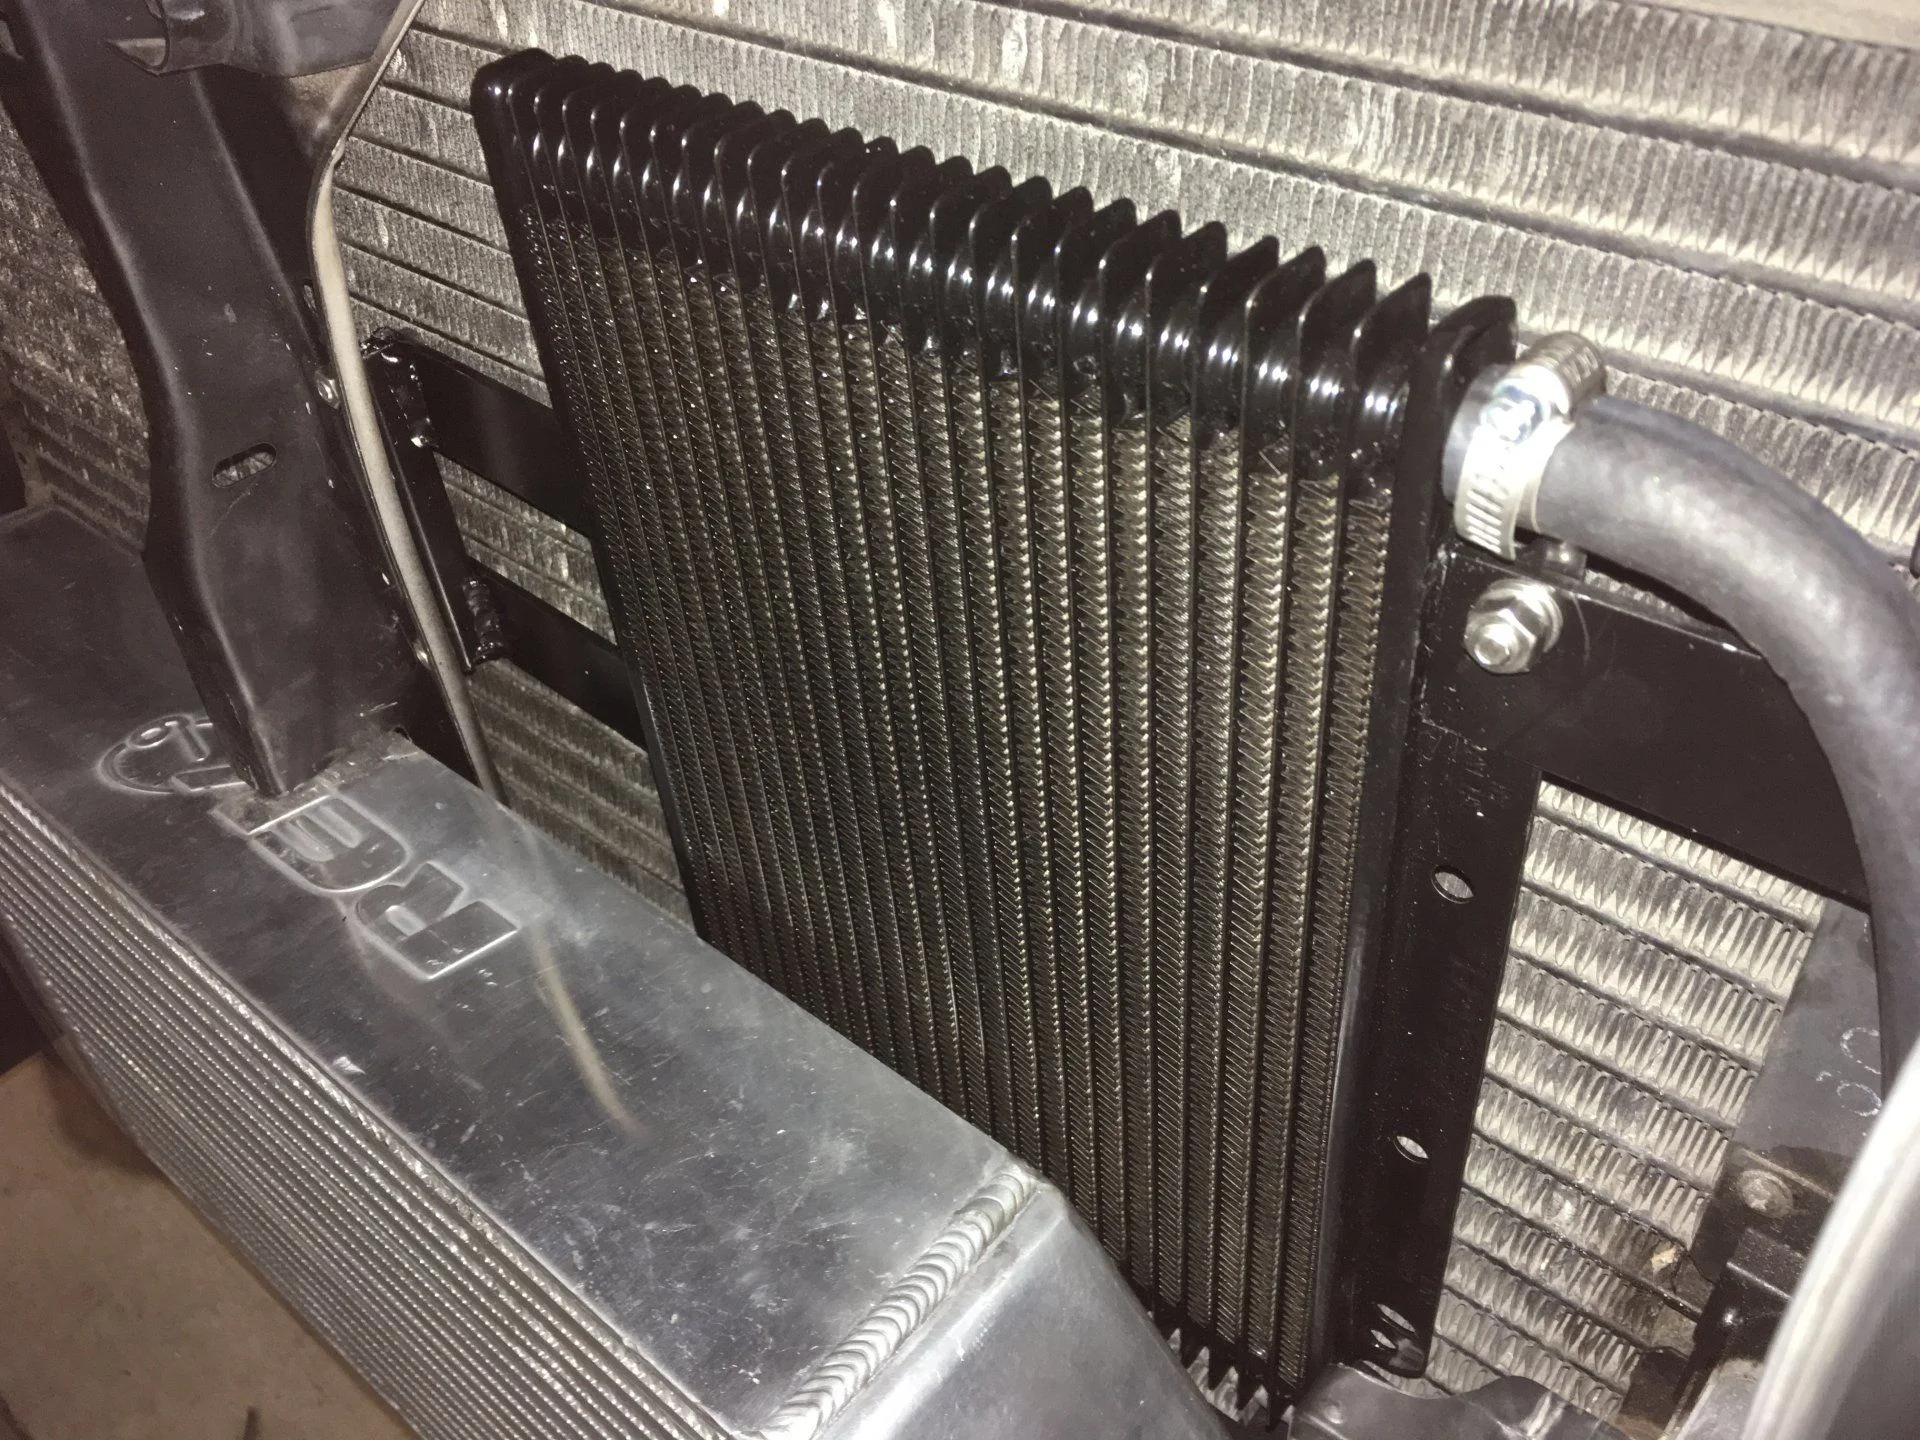
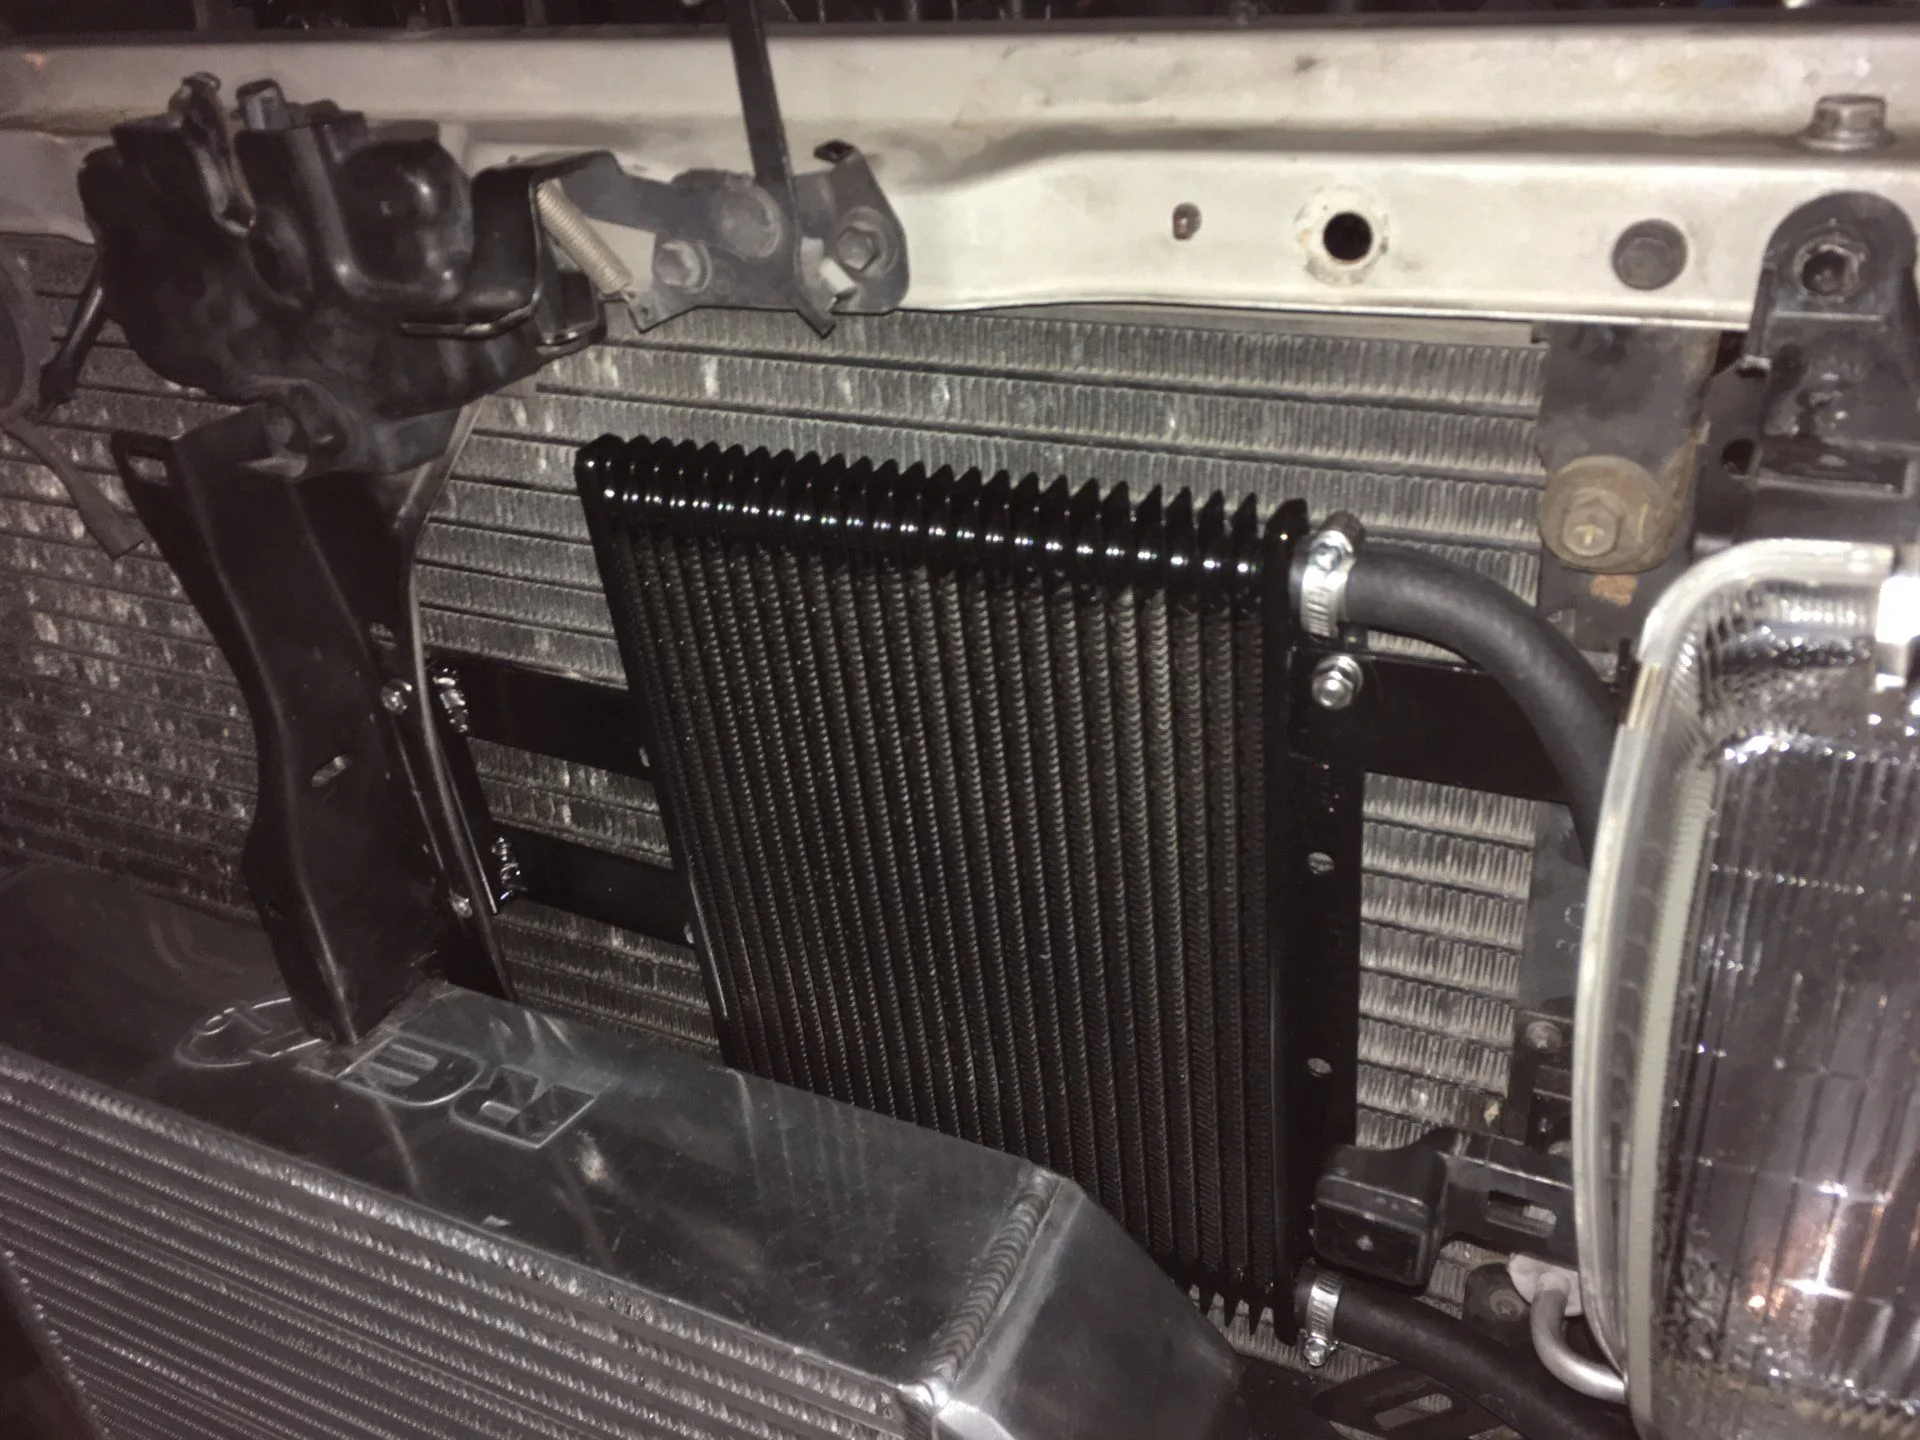
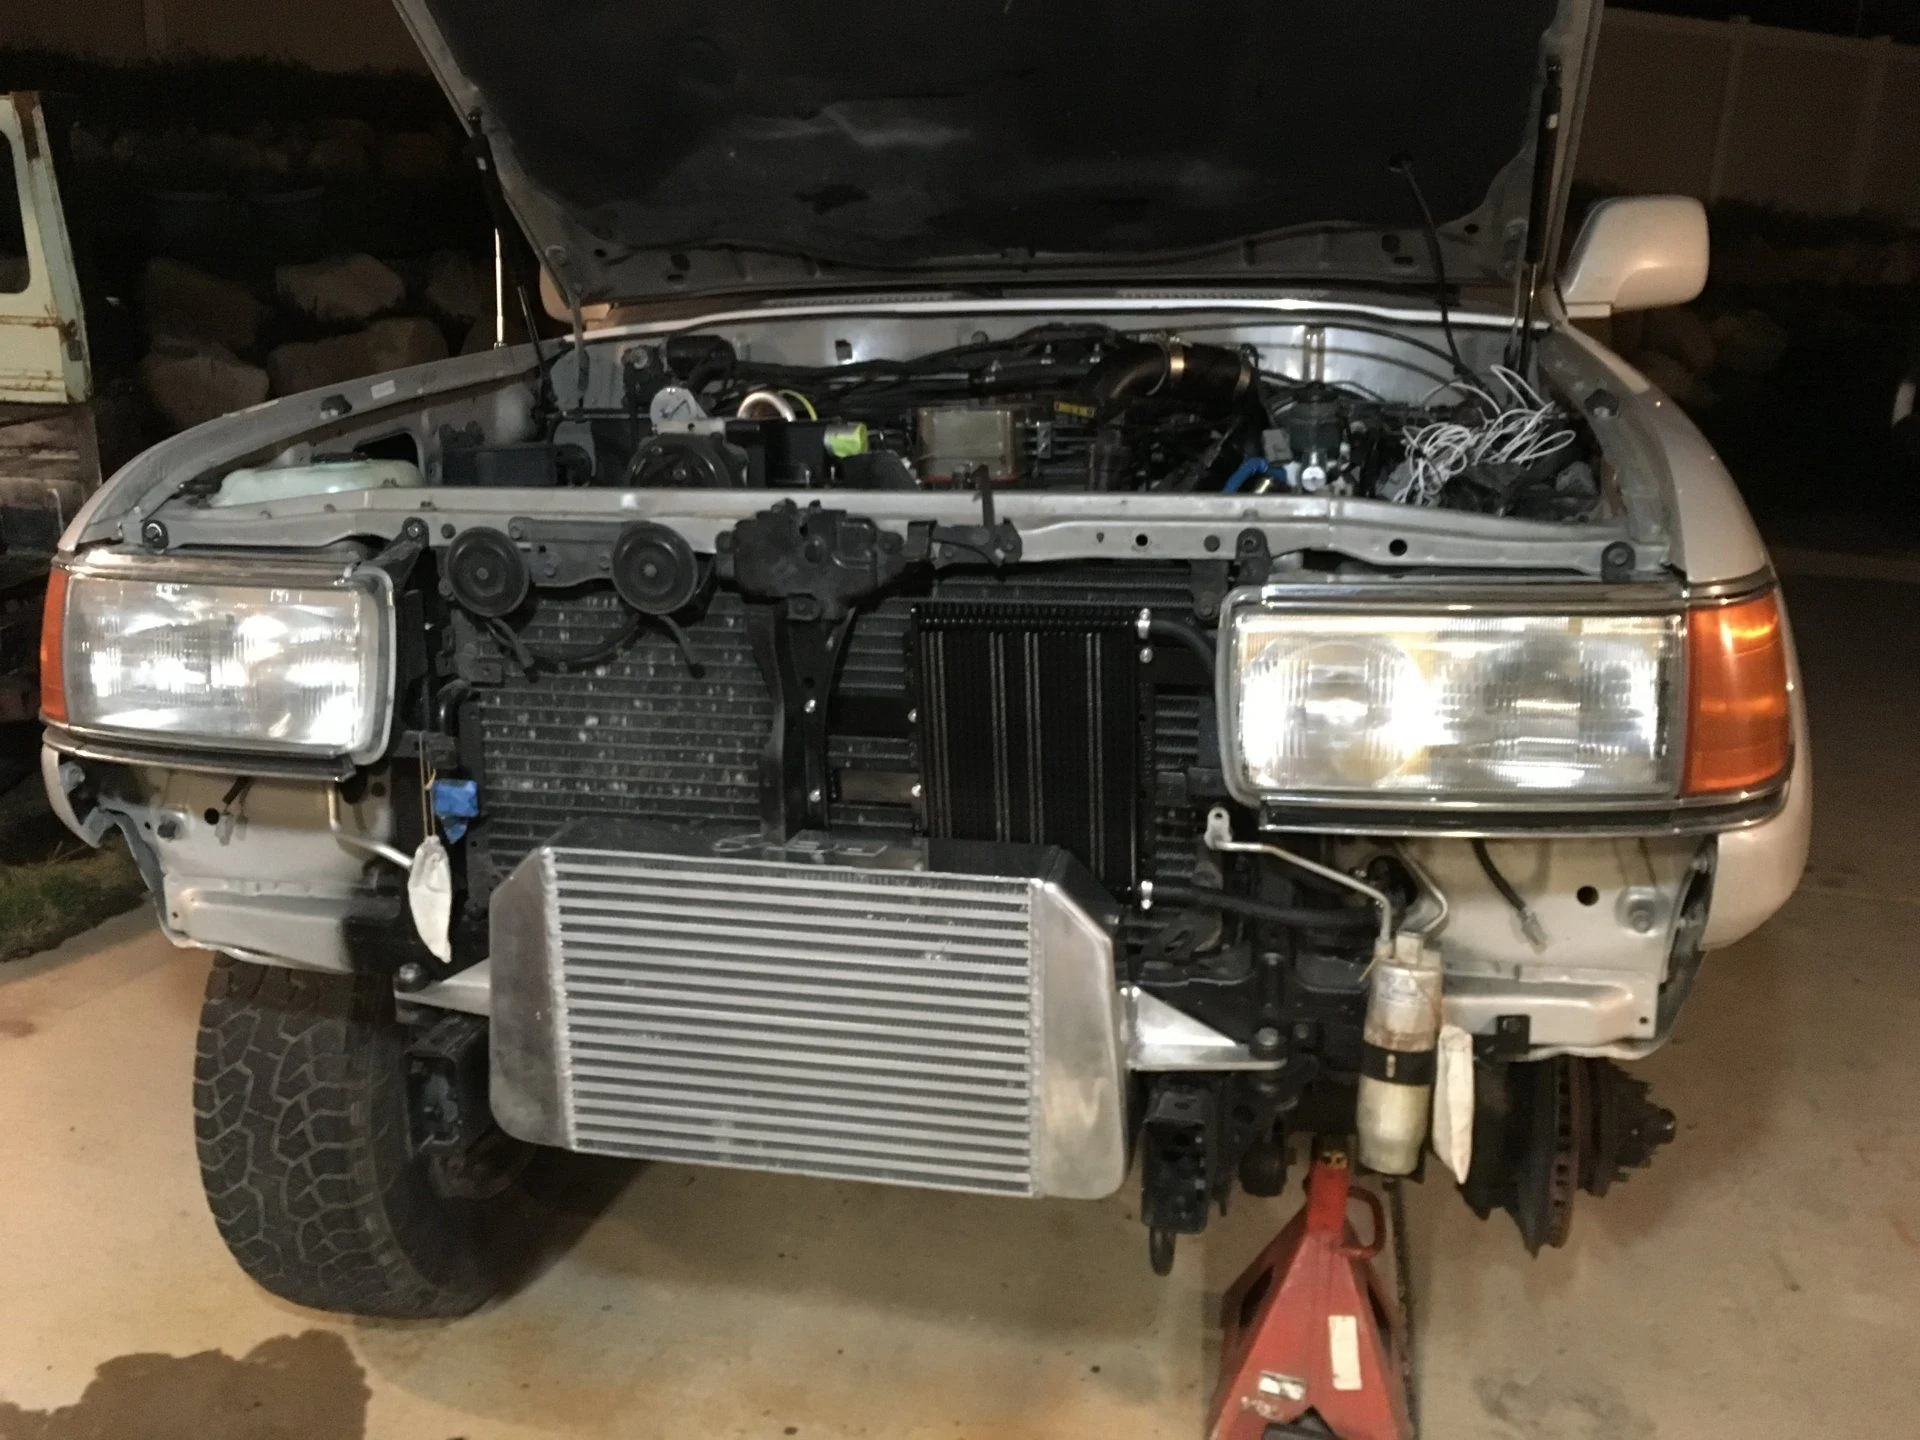
I am sure it works, but he could just as easily provide the adapter fittings and a hose discussed above or something similar. His solution introduces unnecessary complexity and more potential failure points IMO, but to each their own I guess.
 
Here is what I got done this weekend on Coalbert:
- Installed the power steering lines
- Installed the accessory belt
- installed all the intercooler plumbing
- installed all the heater hoses, along with a new heater valve
- bolted the wiring harness up to the firewall and got it fed into the cab
- bolted up the throttle linkage assembly

At this point I have pretty much all the unknowns figured out. I think the only thing I still need to order is a different output for the exhaust coming off the turbo, anyone have a part number for the one that will work so I don't have to track that down?

I also need to buy an air filter, anyone know what filter is designed to work with the diesel adapter airbox?

You are chugging right along, nice work.

For the exhaust, I picked up a replacement output flange for the HX35 that is machined for a 3" pipe. I then got a 90 degree mandrel bent 3" pipe that I will weld to the plate and then weld a v-band collar to the discharge side.

Below is the flange I picked up, it fits well.

HX35 flange for 3" Pipe

Perfect, thanks for the link. What bend radius did you get for the 90 pipe?
 
What year motor are you using and what year did you get your starter motor for?

I have a 97 6BT and a new 97 starter motor, but I read that Dustin calls for a 6.7 starter. Interested to see what you have done.
 
What year motor are you using and what year did you get your starter motor for?

I have a 97 6BT and a new 97 starter motor, but I read that Dustin calls for a 6.7 starter. Interested to see what you have done.

I have a 95 6BT, and bought a new 6.7 starter that Dustin recommends. I am actually working on getting it put in now, I got the wiring worked out last night so I should be bolting it up tonight. I think the reasoning for going to the 6.7 starter is it gives you better clearance with the frame rail. I still have the 95 starter, maybe I will hold it up in place and see what the difference is just for kicks.
 
I actually ordered a 1st gen starter, not the 6.7 starter, and I can't remember why I ended up going with it. It fits but there is not quite as much room as I would like between the starter and frame rail. I held the 2nd gen starter that I have that came with the engine in place, and it seems to have plenty of space, not sure what the advantage of the 6.7 starter over the 2nd gen is. I am going to stick with the 1st gen for now since it is new and the second gen I have is pretty worn out.
 
Interesting, I couldn't get that hose to fit nicely, but then I cut it and really couldn't get it to fit. I guess i'll pick up another one and try again without cutting it.
 
Interesting, I couldn't get that hose to fit nicely, but then I cut it and really couldn't get it to fit. I guess i'll pick up another one and try again without cutting it.
I is not perfect, and definitely takes a little bit of work to get it oriented just right. I will take a pic of mine when I get a chance.
 
I never posted up what I ended up doing for the transmission cooler. I couldn't figure out a clean way to mount the factory cooler, so I ended up ordering the Hayden model 678 trans cooler. It is 3/4 inch x 11 inch x 9-1/2 inch, and fits nicely above the intercooler. It is a little smaller than the stock one, but it is rated for GVWR up to 24,000 pounds, and towing up to 5,000 pounds, so I think it will get the job done. I fabricated up a couple brackets, and it worked out nicely.
 
That hose fit's easily, the upper one needs to be clipped
 
Making some good progress now
Sat: Installed air intake box, Installed drive shafts, installed new throttle cable, did initial setup on trans controller, trimmed and painted front valance so it clears intercooler, and put the front end together, mounted winch, and installed bumper.
Mon: Finished up install of winch(installed controller box, wired it up, and ran wires to battery), Installed Depo side mirrors. Put on jacks and pulled wheels so I can have the tires dismounted.

Next Steps: Paint rims, have new tires mounted. Bring to muffler shop to have exhaust put in, have windshield replaced. At that point I should be able to pass safety and get this thing registered, then I have about a million little things to do, but will work on a new list and prioritize them once it is drivable.

Here are a few pictures, need to take some more.
 
Some notes for anyone wanting to install a Warn VR10000s winch in an 80 ARB bumper. Here is what I did:
Rotate both ends for vertical installation:
- On the motor side pull the two bolts, pull out enough that the pins are out of the holes and rotate and insert in holes so it is oriented correctly.
- On the lever side pull all the screws, rotate and line up holes and replace screws.

Mount winch:
The winch will need to be spaced out as the motor side contacts the the bumper. I accomplished this by buying longer bolts for the bottom, I believe I ended up with 2" bolts for the bottom that attaches the fairlead and used the longest bolts that came with the winch for the top (the ones that came in the little envelope). I put three washers between the bumper and winch on each bolt and that spaced it out perfect. If you like to spend money there is a kit you can buy with a spacer.

You will need to slide the winch up as far as it will go in the slots before tightening everything down, otherwise the fairlead will not clear the bumper.

There is a ton of room to work with so I waited until the bumper was mounted to install the control box, line, and finish wiring it up, this part is pretty self explanatory so I won't go into detail. Just follow the directions that came with the winch and you should be good.
 

Users who are viewing this thread

Back
Top Bottom