looking good. thats a great rig
Navigation
Install the app
How to install the app on iOS
Follow along with the video below to see how to install our site as a web app on your home screen.
Note: This feature may not be available in some browsers.
More options
You are using an out of date browser. It may not display this or other websites correctly.
You should upgrade or use an alternative browser.
You should upgrade or use an alternative browser.
Builds 79 FJ40 build thread (1 Viewer)
- Thread starter dunntexas
- Start date
This site may earn a commission from merchant affiliate
links, including eBay, Amazon, Skimlinks, and others.
More options
Who Replied?- Thread starter
- #22
more pictures of the build
More photos of the progress.


As you can see, the nasty brown stuff has been removed and the front qtr. is straight again. I am really looking forward to getting the windows out and spraying the channels that they sit in. There were several places where cancer was starting to show it's ugly face.


More photos of the progress.

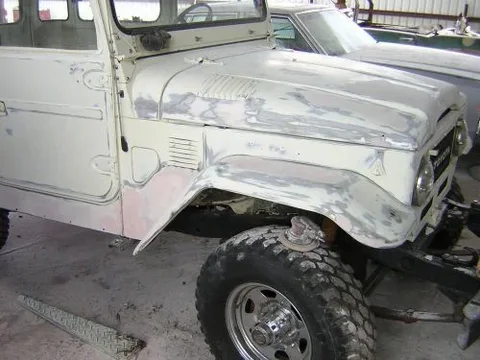

As you can see, the nasty brown stuff has been removed and the front qtr. is straight again. I am really looking forward to getting the windows out and spraying the channels that they sit in. There were several places where cancer was starting to show it's ugly face.
looking good. thats a great rig
X 2
- Thread starter
- #24
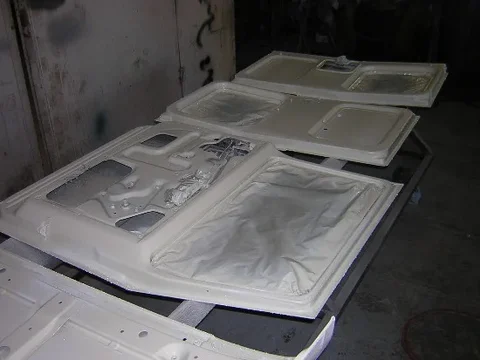
Well time for another update on the rigs progress. The top along with the doors and hood have all been removed. The rain gutter on the top has been straightened and more rust being removed.

Here is where we are at currently.

I was shocked not to find any rust under the winsheild gasket.

Very little rust at the top post attachment.
More to come in the next post.


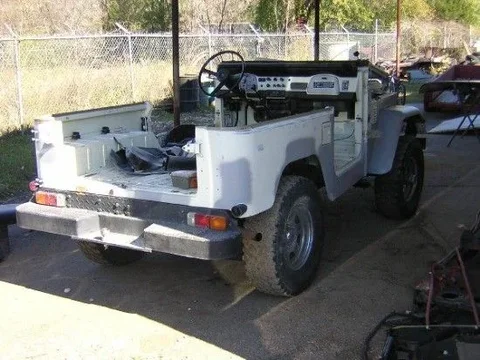
Here is where we are at currently.
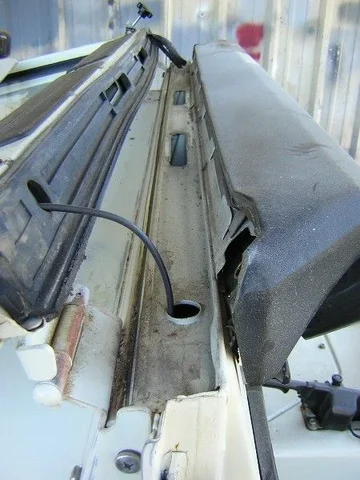
I was shocked not to find any rust under the winsheild gasket.

Very little rust at the top post attachment.
More to come in the next post.
- Thread starter
- #25
Still more of the progress.

The hood has been primed on the top. Still have some rust issues underneath to deal with.

The top actually staraightened out with cracking the fiberglass! Unfortunately the headliner was a casualty in the repair efforts.

This is the last of the major rust demons that must die prior to primer.
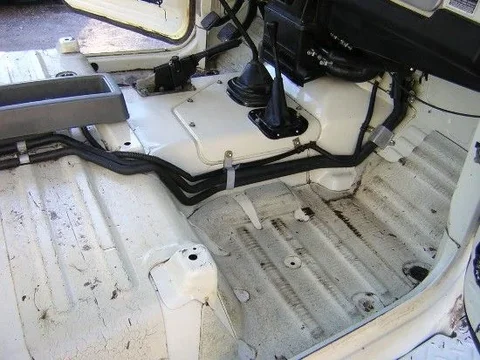
This week the floors will have the matting removed and surface rust dealt with. The parts keep coming in and the dollars keep going out. If everything continues as planned we will shoot primer and possibly paint before the week is up.


The hood has been primed on the top. Still have some rust issues underneath to deal with.
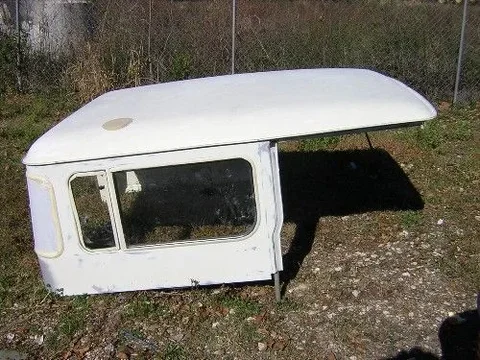
The top actually staraightened out with cracking the fiberglass! Unfortunately the headliner was a casualty in the repair efforts.
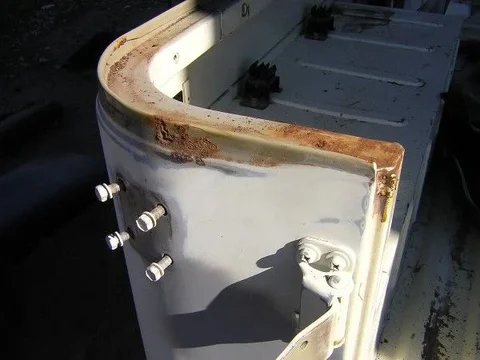
This is the last of the major rust demons that must die prior to primer.
This week the floors will have the matting removed and surface rust dealt with. The parts keep coming in and the dollars keep going out. If everything continues as planned we will shoot primer and possibly paint before the week is up.
- Thread starter
- #26
Well, say what you will about POs. I just left my POs house this evening. He called me up to let me know he had found some things for my cruiser. When I got there he had the 5 original wheels, all five original hubcaps and the original radio. As a bonus he gave me an aftermarket steel box that mounts between the frame rails and behind the front bumper. What a guy!
looks great!
- Thread starter
- #29
I need the expertise of the list in a bad way. Our local paint supplier said they can't come up with a paint mix for color code 031 white for the 79 FJ40 as well as the pewter or silver for the bumpers. Does anyone out their know the base mix formula for the single stage paint for this color? Your help will be much appreciated.
For the white, try T31 or T031. I think that was the code for PPG Single Stage Enamel when I bought it here in California a few years ago. Most of the enamels are no longer available here. I would seriously consider a base+clear 2 stage. Omni (PPG) is very good and not too expensive. Its a good do it yourselfer paint. Allows for mistakes to be corrected in the base coat before you commit to the clear. Also, the clear can always be sanded and recoated if you have any issues with its application.
Also, code 012 , T12, or T012 is very, very close to 031. Code 033 is another one which is very close. I painted an fj40 with 012 and another one 031 and sitting next to each other, they look very close. I would say that 012 appears just a bit creamy compared to 031, and 031 looks just a bit grayish compared to 012.
Anyway, I don't think that's exactly what you were asking for but hopefully it might help.
This cruiser is code 012 painted with Omni (PPG):
Last edited:
- Thread starter
- #31
Thanks Mike. Great looking rig youv'e got there. Did some digging late last night and found some info on the autocolorlibrary. The misleading part is you have to go back to 77 to find the right color code and mix. It make the statement that the color was used for 77-79.
- Thread starter
- #32
Well we are making progress slowly but surely. After search for the color we finally hit it right. The rig is now in the booth for the first of color shoots. Today we will get the tinted bed liner in. The original wheels have been stripped of the old meat and are being preped along with the jump seat frames and the seat backs off the front seats.


- Thread starter
- #33
Well the bed liner was sprayed in today. Not quite sure about the color yet. Under the flouresant lights in the booth it looks a little on the yellow side. All of the original paint has been sanded in prep for the paint to come. Although when I look at it from different angles it looks pretty close. It was too cold and too late in the day to roll it out into the sun to check it out. Also have the wheels nearly prepped for paint as well. Monday will see undercoat with the POR. Hopefully, Tuesday will be paint day!


This shot was taken outside in the sunlight.

This shot was taken in the booth with flouresant lights.
More as things progress.


This shot was taken outside in the sunlight.

This shot was taken in the booth with flouresant lights.
More as things progress.
Looking good! From what I can tell, the color looks perfect.
- Thread starter
- #35
Thanks for the boost Mike. I am sure I am the only one on this list that has ever sat and worried over the silly details of color fit etc. Anyone else ever have a dream involving your rig. Maybe I should reword that to nightmare. I really can't complain. So far this color thing has been my only real worry other than the money thing and we aren't going there.
Hear what your sayin.... my nightmare is lack of time and garage space!!! I'm gettin sick of beautiful weekdays and storms rollin in on the weekends (my only days off)! This is killin me!!! I'm thinkin now that my timeframe of May isn't realistic now! 
- Thread starter
- #37
- Thread starter
- #38
Last week's progress
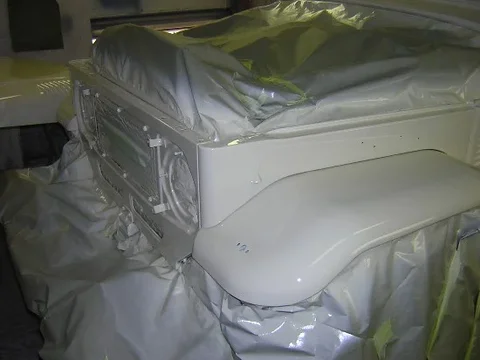
Man whoever came up with the old saying "a watched pot never boils" was right. Sometimes you feel like you will never see the end of things. But all is well. The body of the rig is now painted and setting up. I am very pleased with the original look of the single stage paint. Here are a couple of shots to show the progress.


Man whoever came up with the old saying "a watched pot never boils" was right. Sometimes you feel like you will never see the end of things. But all is well. The body of the rig is now painted and setting up. I am very pleased with the original look of the single stage paint. Here are a couple of shots to show the progress.

- Thread starter
- #39
Well I spent the weekend teardown the seats preparing them for recovering. What I found was more of the evil brown stuff. I proceeded to break them down, sand, prime and repaint. I did the same with the seat rails. The rails needed a thourough soaking in degreaser to remove 25 years of junk. Here are the before and after shots.


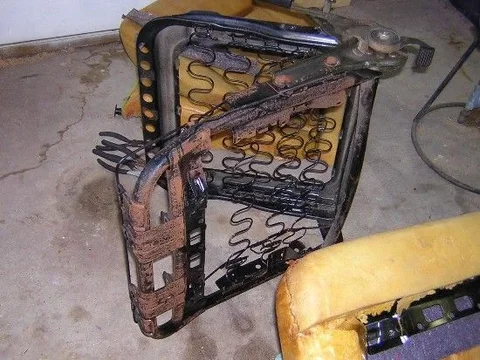
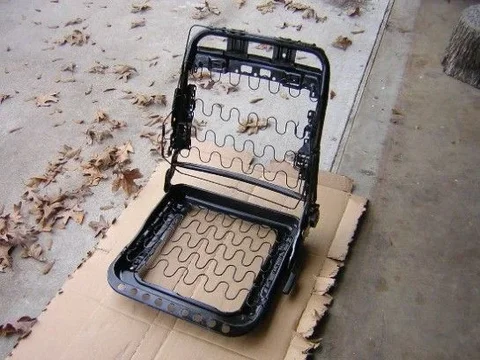
- Thread starter
- #40
Well everything is finally starting to go back together. The only parts left to paint are the bezel, the fiberglass top, and the jump seats. I have rat holed the parts I have been collecting along with fasteners etc. For those of you thinking of going through this process a word of wisdom. Print out schematics from spector or the manual and staple these to the zip lock baggies with the small parts inside. You can the highlight or circle the part on the schematic so you will know where it goes after days weeks or months of being off the vehicle. Dont be fooled into thinking you will remember where each one goes. After the first 100 or so they all begin to look the same.


Similar threads
Users who are viewing this thread
Total: 2 (members: 0, guests: 2)


