Thanks man! Its always a little underwhelming when you do oem stuff haha but i think it looks really nice and tidy in thereLooking sharp!
Navigation
Install the app
How to install the app on iOS
Follow along with the video below to see how to install our site as a web app on your home screen.
Note: This feature may not be available in some browsers.
More options
Style variation
You are using an out of date browser. It may not display this or other websites correctly.
You should upgrade or use an alternative browser.
You should upgrade or use an alternative browser.
What did you do with your 60 this weekend? (55 Viewers)
- Thread starter MrMoMo
- Start date
This site may earn a commission from merchant affiliate
links, including eBay, Amazon, Skimlinks, and others.
More options
Who Replied?Changed the oil. Two gallons Napa 10w-30 and Napa Gold 1515 oil filter.
All expenses since 1/01/22 (except ins. and lic.) It costs me $.98/mile ($.43 is fuel) or $8.63/day. That includes knuckle rebuild, 4runner brakes, new clutch, etc.
It seems harsh, but compared to a new vehicle with financing, it's not bad at all.
All expenses since 1/01/22 (except ins. and lic.) It costs me $.98/mile ($.43 is fuel) or $8.63/day. That includes knuckle rebuild, 4runner brakes, new clutch, etc.
It seems harsh, but compared to a new vehicle with financing, it's not bad at all.
banieldowen
SILVER Star
Have you detailed how you traced the hot start issue for the fuel solenoid? I feel like I may be having the same issue.snow is the best time to play with them guys!!
i just got mine out back together. fuel pump and injectors rebuilt as part of chasing a hot start issue. ended up being some old wiring that wouldn’t send enough power to open the fuel solenoid when it got warm. in the process by starter also went. all of that is fixed now donut runs again!! it’s so nice to drive it again after i’ve been just working on it for the last 5 months just to get it to run. now for some stuff that i can fix while still being able to drive it. it’s going in for a webasto service. then i need a new windshield. then i need to fix my rear wiper and fix some wiring in my dash and put in a new speedo cable and and and…. you know how it is. at least i can drive it again!!
Have you detailed how you traced the hot start issue for the fuel solenoid? I feel like I may be having the same issue.
i kind of went through all the ideas and things i tried in my fuel solenoid thread in the diesel section but maybe it’d be a good idea to put it into a concise post to finalize the thread. really what i did was start with the fuel system and move to the electrical system. in the end what was the simplest thing to do was actually the last thing i tried because i had convinced myself that i was getting 12v to the solenoid. i just don’t think i was getting enough amperage through the old wire though to get the solenoid to open when the wires warmed up.
so the simplest thing was run a wire direct from battery to fuel solenoid and see if it clicks (it’s really an real audible click. not a maybe i heard it maybe i felt it click. a really audible click). if it clicks loud your solenoid is working and it’s something else.
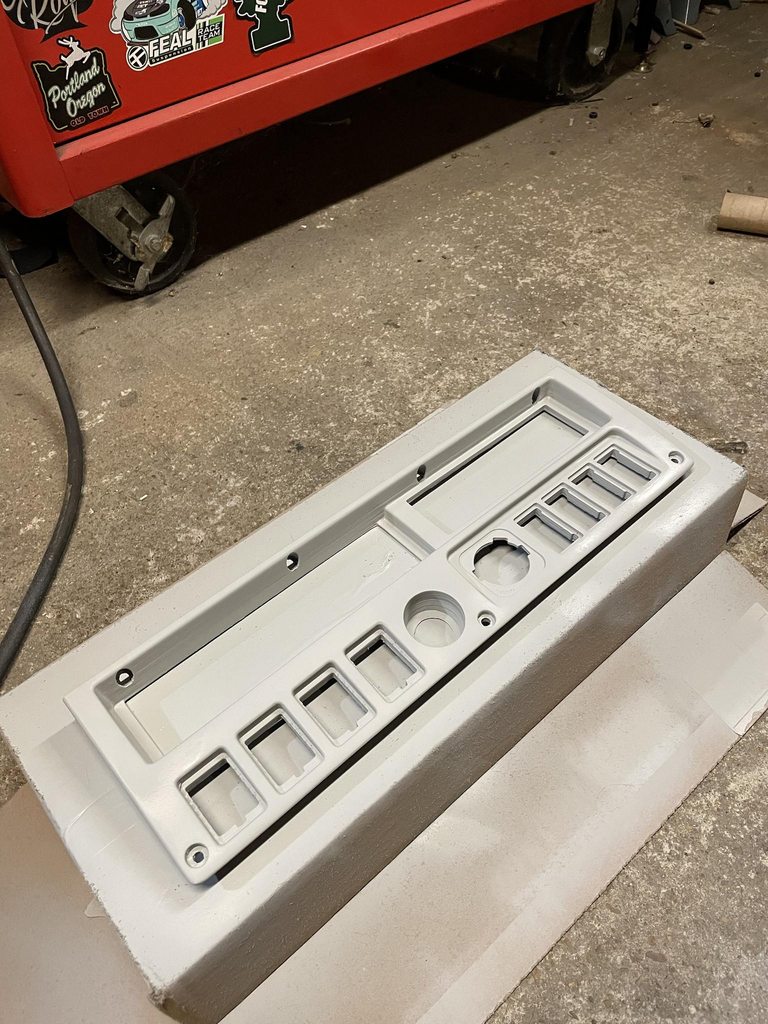
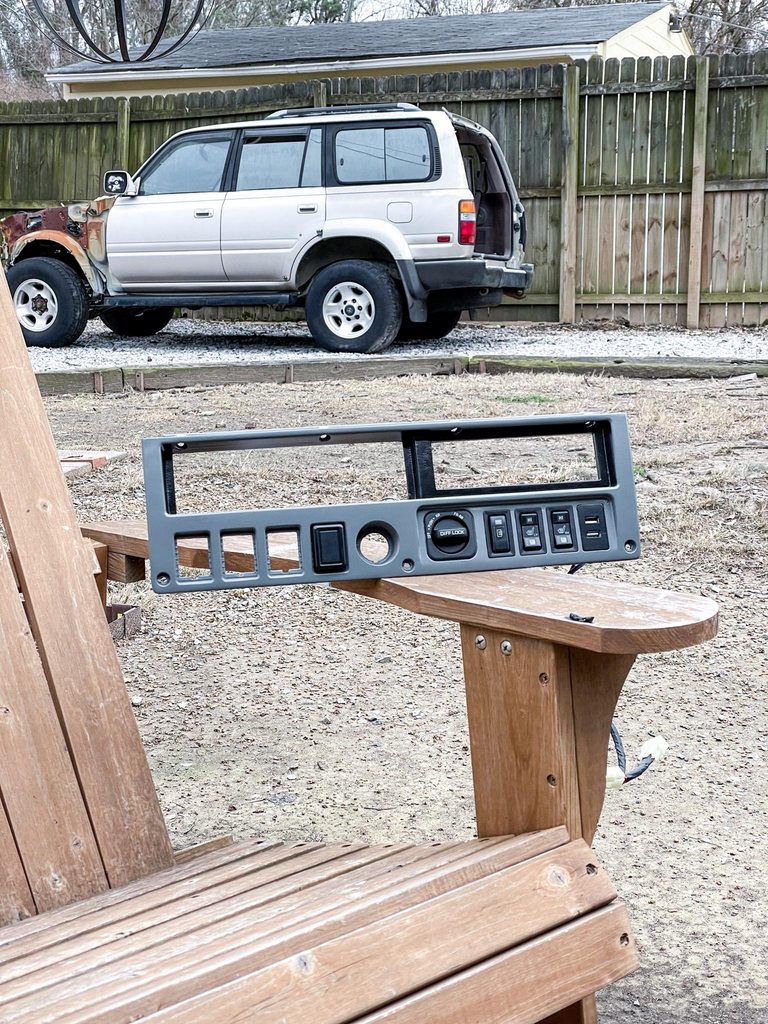
Love the use of the 80 locker switch. Feels and looks right at homeGot @ChaserFJ60 to print me a new bezel 3.0. Used an 80 series dial switch for front and rear ARB lockers and an 80 series Defrost switch to activate the air compressor. 2 JDM vertical seat heat switches are for the seat heaters, and Chase's fj62 flush mount dual usb port on the right. The left side of the cig lighter is all stock fj60 stuff. All the switches light up and dim off of the rheostat thats relocated under my cruise on/off switch.
Ive still got to laser cut an air compressor decal for the defrost switch and it will be done. Dont have the ARB Lockers yet because i havent built the 80 axles yet, so when you twist the dial it just shoots air out of the solenoids pretty violently. Sounds like youre shooting nitrous.
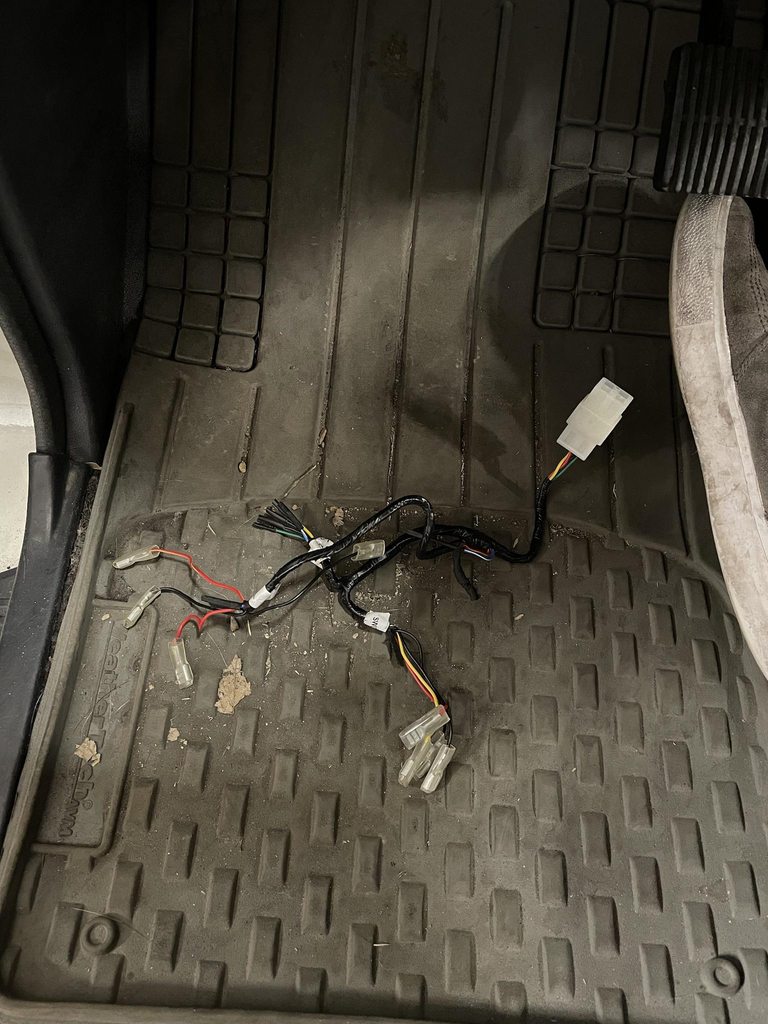
Thanks @NLXTACY for posting your wiring harness instructions for running the dial switch with ARB Lockers. It works perfectly
Was able to get rid of so much wiring from the ARB compressor harness too. The way they have their switches set up is kind of a ton of extra wires.

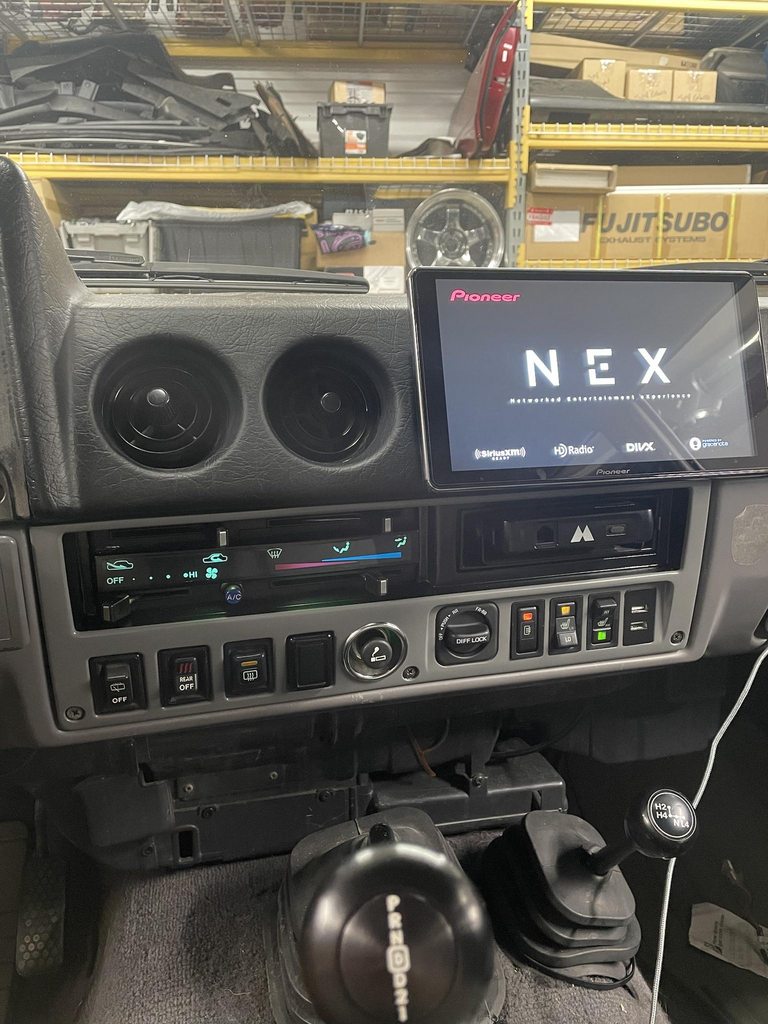
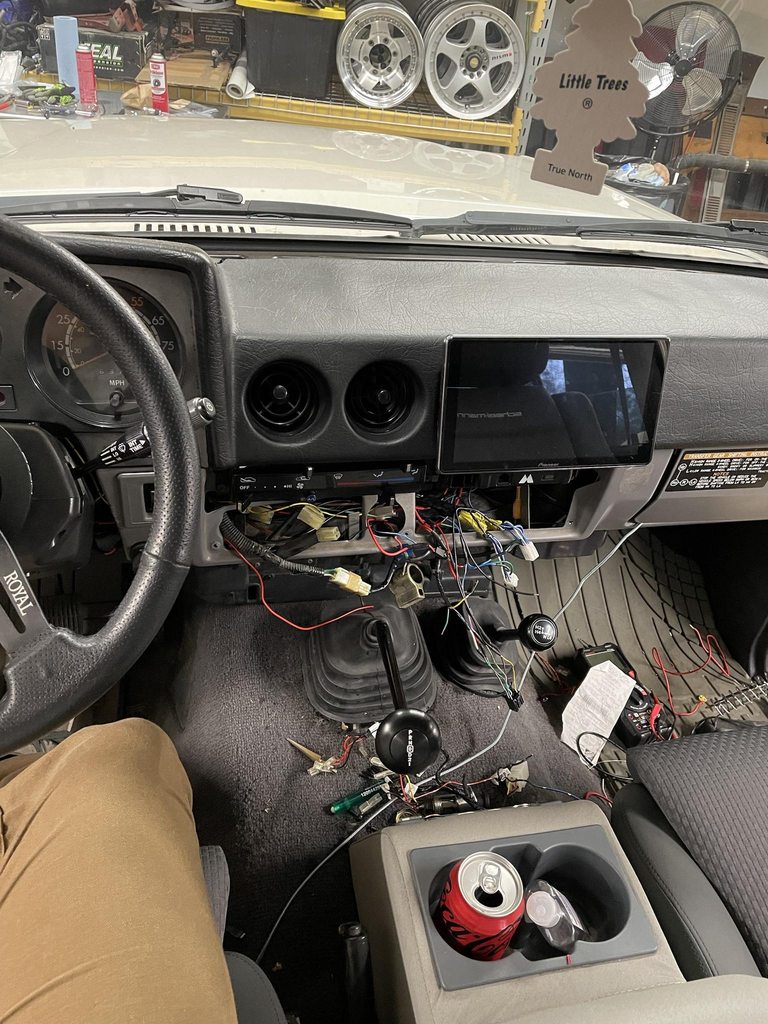
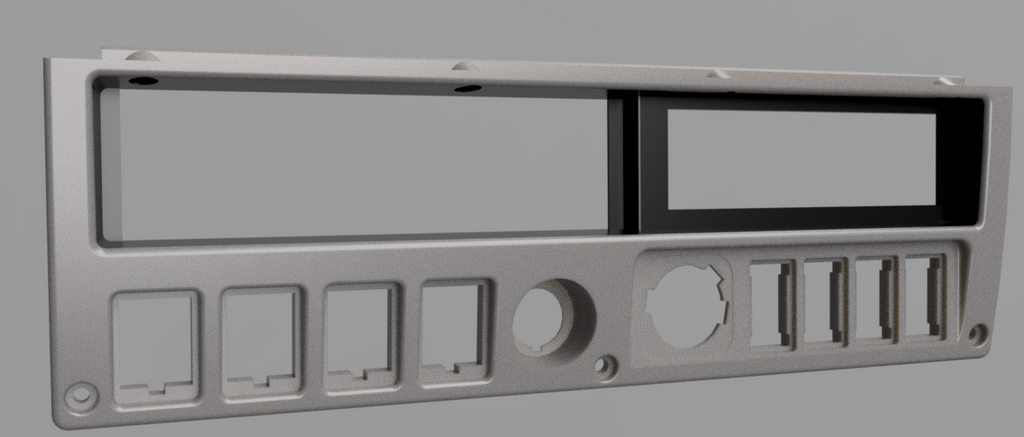
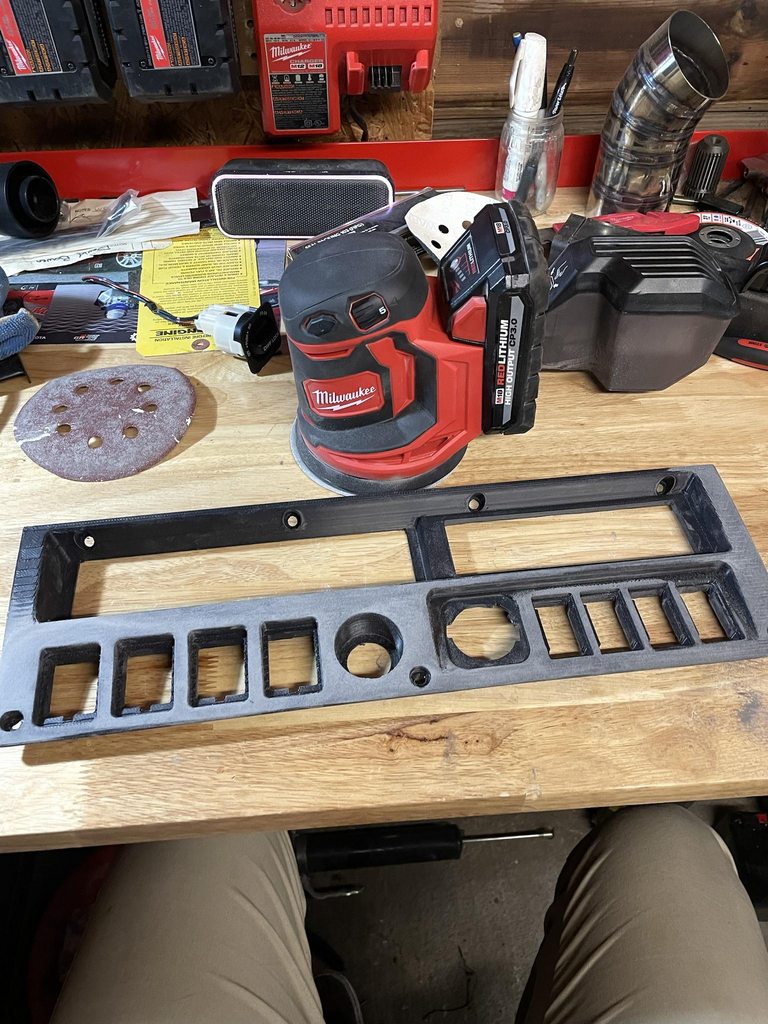
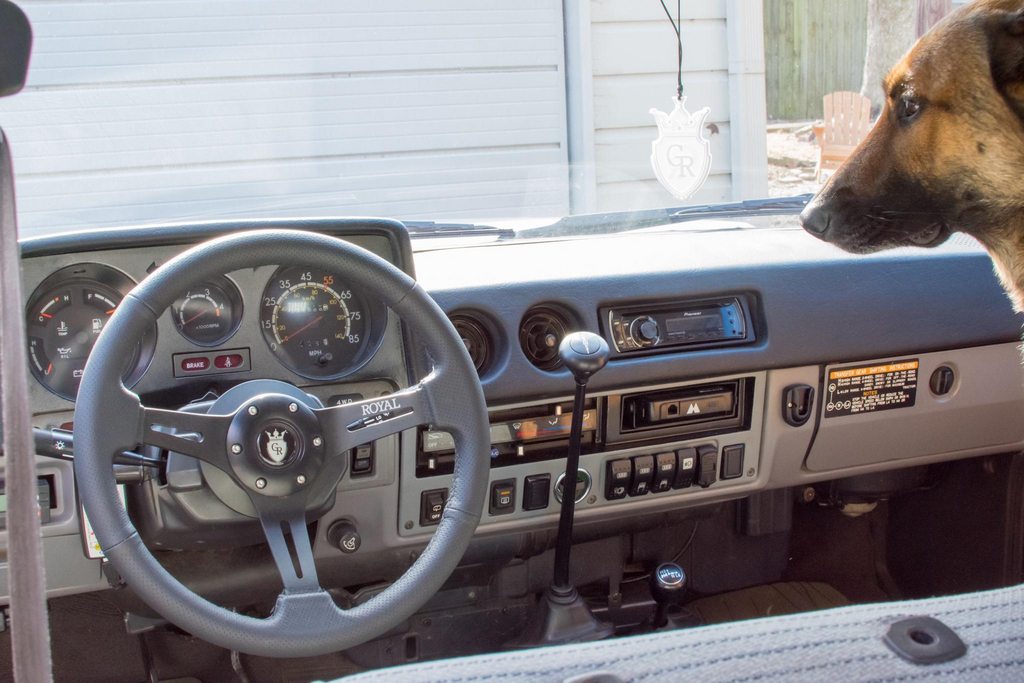
This is the first dash Chase printed for me using carling rocker switches.
Looks great! The seat heaters are a real gamechanger!E46 seats with heaters and some new Weather Tech trim to fit mats… such a huge upgrade. Used @torfab brackets and lots of wiring (courtesy of @SkeeLo22 ) but in the end it’s a game changer…
View attachment 3234697
View attachment 3234698
View attachment 3234699
View attachment 3234700
View attachment 3234701
Thanks man! I was thinking that it looked like it fit in there better than the carling switch. very OEM ish looking. Just wish it was backlit hahahahLove the use of the 80 locker switch. Feels and looks right at home
I accomplished two things I have been putting off but glad they are done.
1. Oil Galley plug, I tapped deep enough to put two set screws, both of them I coated the threads with FIPG.

2. Driver side engine mount. Glad I did this the old one came out in two pieces.

1. Oil Galley plug, I tapped deep enough to put two set screws, both of them I coated the threads with FIPG.
2. Driver side engine mount. Glad I did this the old one came out in two pieces.
I replaced my janky hood latch, now just need to adjust it a bit, the hood doesn't really sit flush with the fenders, always looks popped and moves around a bit when going down the road...
RodrigzCrzr
SILVER Star
Also Replace/check your rubber stops and adjust them.
86aggie
SILVER Star
Where in VA are you? I have a set of bumpers that you can have - the front one is straighter than the one in the picture...Not this weekend but:
View attachment 3230731View attachment 3230729
Just a small note, I 100 percent mounted the rad a hole too low (why is the f***ing fan rubbing!); But my MiL was able to help me shimmy it up. Close one.
In the spirit of spending all of my college funds on Cruisers (a few 40’s, LV’s, an 80, and now this), my father and I jumped on this and in a few hours were driving to an AutoZone on the way home with our new to us, 1982 FJ60. My father has owned a 60 series or two back in the day, and he’s always had a soft spot for them (as he does with any LandCruiser). It’s been a farm/hunting tour rig for the past 20 or so years on a 30,000 acre ranch. It’s got 157,XXX miles on it. The interior is great condition but has a terrible smell of dead animal. She’s got the typical rust around rear wheel wells, good brakes, great transmission.
With that being said, we’re still mainly 40 and 80 guys, so it’s definitely going to be fun to switch it up.
Cheers


With that being said, we’re still mainly 40 and 80 guys, so it’s definitely going to be fun to switch it up.
Cheers
DickM
SILVER Star
I will keep my eyes out for your new addition.
Congrats on the find.
Congrats on the find.
Picked up Girl Scout cookies with my daughter on a beautiful Saturday morning. Another troop parent took their HDJ81, so we showed up in style.


These trucks are forever useful, and always lend themselves to a good time. The girls hung out in the back, laughing and carrying on. That will be a good memory when they’re older I bet.
These trucks are forever useful, and always lend themselves to a good time. The girls hung out in the back, laughing and carrying on. That will be a good memory when they’re older I bet.
Replaced my sway bar links with longer beefier ones from trail tailor. Only $85 and very easy to swap. Bushings on my old ones were toast and I upgraded the suspension a long time ago so probably should of added these back then.

- Joined
- Jun 21, 2011
- Threads
- 235
- Messages
- 21,868
- Location
- Redding, California
- Website
- trail-tailor.com
Another front coil conversion.
I have passed the 100 kits sold/installed worldwide (19 countries- USA and Australia mainly)
Jason


I have passed the 100 kits sold/installed worldwide (19 countries- USA and Australia mainly)
Jason
White knuckle off-road sliders installed. Solid product.


I want this eventually. I appreciate the original design but it is archaic on today's highways with the front shackles and bump-steer. I got more important things to address first. I love that you look after us .Another front coil conversion.
I have passed the 100 kits sold/installed worldwide (19 countries- USA and Australia mainly)
Jason
View attachment 3238993View attachment 3238994View attachment 3238995View attachment 3238996View attachment 3238998
Similar threads
Users who are viewing this thread
Total: 56 (members: 7, guests: 49)