What did you do with your 60 this weekend? (9 Viewers)

This site may earn a commission from merchant affiliate
links, including eBay, Amazon, Skimlinks, and others.

I have fine tuned the JDM Pure Yellow LED diodes in my 10/88 FJ62LG-PNEK with a 60 front end conversion …

I installed originally 8000k Cool white ones first and was …..like yeaaaa 🤔

So so so , too typical rest of FJ60 corner lamps society for me …

Instead of the standard 67 / 87 twist lock miniature single filaments the owners manual Calls for ….?

Using LED Diodes that do not generate any BTU heat to really speak
Of ?

I pondered the how can I install a real Full size 1156 size spec Diode LED ?

Well a little bit of this and a bit of that with a dremmel too to the main bulb sockets housings , nothing to compromise them water tite to be clear here ..

Presto a 1156 is now my norm and bench mark standard

The simply LUMENS difference is significantly substantial in every single way too !


Note : these images have NOT been photo shopped in any way ..

I make this point because typically I do adjust for simple sharpness and brightness 🔆 tone to make good look better ..

But , I feel strongly that the original color tone and sharpness and clarity be shown exactly as original as it should because then others can make a better well informed decision on the whole JDM LED Pure Yellow upgrade and non-USA far away look , feel , fit , form , and function. …

Note : the color tone Lumens of the japan Spec. HJ61 front amber-oarnge side markers

My final thoughts 💭 are simply 1 word. “ SICK “ 😎


I plan on installing the same Rear 2 color / clear and. Red only , tail lamps lenses @TRAIL TAILOR utilized , so I can have balance and pure JDM yellow in the stern as my turn / flasher lens cavity too …


4E9C3FA8-E197-47B7-8F2B-9DE7ECA35BAA.jpeg
EE9C85C5-2BEA-4F6D-A95D-E0C161B4E0E6.jpeg
8CAB354E-A34D-4D06-B6E3-C987F9BBDEA4.jpeg
 
Last edited:
@ToyotaMatt

Those lenses make the best front side markers.
 
I wonder if you printed those a little larger if they could work for people who installed larger 6 inch speakers. That way it would look 100% stock but with the larger, better performing speakers. If you install round 6 inch grilles, the outlines of the old square grille are still there. Printing these larger would cover those up.... Just a thought

We are working on that as well. Window crank and the carpeted edge of the door card are limits that we have to design around.

First up are the stock size reproductions.

C0A8166D-2D4C-4651-8B28-8AE9B5075591.jpeg


041D22F1-3A6F-452D-BF39-985A6518118A.jpeg
 
I’m “super” impressed how quickly this turbo spools up and how fast the boost climbs. Need to get a wastegate adjustment fitting installed next. Factory setting is 20psi boost then the wastegate opens. The HX-30 I had could get up to ~28psi boost, the wastegate was sealed off. This HX-30 super should easily get into the upper 30s. So far the responsiveness is the most noticeable. The turbo whistle also give ya goosebumps.

What is the difference between the HX-30 turbo & HX-30 super?
 
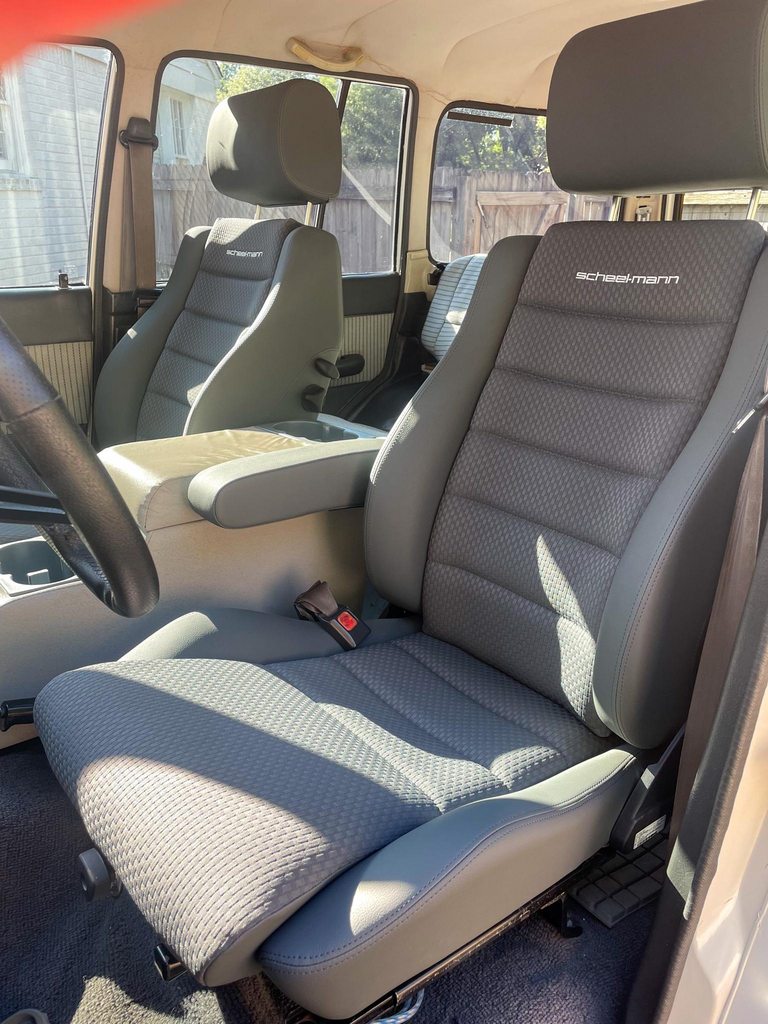
The armrest fits aftermarket consoles on scheel mann seats in the 60. If you modify the outer seat rail and leave the spacing alone on the inner rail, you should have about 5 inches of space between the side of the seat and this VDP center console, and even more space with the stock console.

Scheel mann sell two types of arm rests, they are both 3 inches wide on the pad part. They offer a 0 offset bracket which puts the arm rest directly on the seat so it only adds 3 inches of width, and a 1 inch offset bracket that offsets the pad an inch to give you 4 inches of total added width. This is the 1 inch offset arm rest and ive still got an inch of room between the armrest and the console.

The passenger side will not fit an armrest, but the console is spaced about an inch or less from the edge of the passenger seat, so the console makes a great arm rest for the passenger since there isnt a hand brake on that side.

Gotta say, the arm rest is an absolute game changer, and if you are planning on changing your seats, figure out an arm rest. Probably one of my favorite things ive done to the 60 to date.

42DDJdth.jpg

wAijytph.jpg
how do you like the seats tho?
 
AADA90A2-4DFC-40D3-94EA-9FE6BAB56DCF.jpeg
Went camping up in Nantahala over the weekend, had the dealer replace the alternator since I was in a time pinch and it let go just before the trip. They also changed out some of the steering linkages up front and now the truck tracks smoother than I thought it would around bends. Definitely give your linkages a check, it slipped by me since I never had a good reference for what the truck should feel like.

I need to build up a WNC trail repository.
 
Dude theyre a gamechanger. Its insane how good they are compared to the stock seats. Enough time has passed where im not mad at myself for paying for them anymore and i freaking love them. 10/10 would get them again
Fantastic to hear....wasn't ecstatic spending 5k. Cant wait to test 'em out!!!!
 
The 1989 HJ60 has a solid frame, but this is what Mahindra is after 5 years of running.This was not an accident, just the result of five years of off-roading. If you look at the car body, you can see that it did not continue to run intense off-road. I also confirmed with the owner, but it seems that they do not carry a large amount of luggage or people. It should be rare for the frame to crack on a Land Cruiser.

 
Mcgyvered my igniter problems with help from a post by Lugar in the FAQs. Using a GM ignition module and a resistor I replace the NLA/unobtanium/pricy toyota igniter. I got two quotes ...$175 and $250 for 35 year old solid state circuitry that could go at anytime just like mine did. The GM module is around $25.00 unless you want to go real cheap then like $10. I also installed a better heat sink (not shown)

20221020_110617.jpg
 
Was each end cap 1 or 2 pieces? Mine are rusted inside and I can't tell if I need a bumper end bracket and rubber cap or if the mounting bracket is part of the rubber cap itself.
The bumper end cap is one complete piece with metal bracket, bolts and rubber all molded together.
 

Users who are viewing this thread

Back
Top Bottom