TWT -- The Wrenching Thread (3 Viewers)

This site may earn a commission from merchant affiliate
links, including eBay, Amazon, Skimlinks, and others.

Hard to tell in the picture but managed to install the new 5” springs in the front. The new springs gained me 5” on top of the 2.5” lift that brand new old man emu springs.

She is going to be pretty tall but I needed to gain at least 3” to keep the 35” tires from rubbing the cab.

The rear springs will have to wait a while.

C09E09D8-3F21-453F-872C-9E622EF8086E.jpeg
482F42F0-B106-459E-90F6-02F363EC79E8.jpeg
 
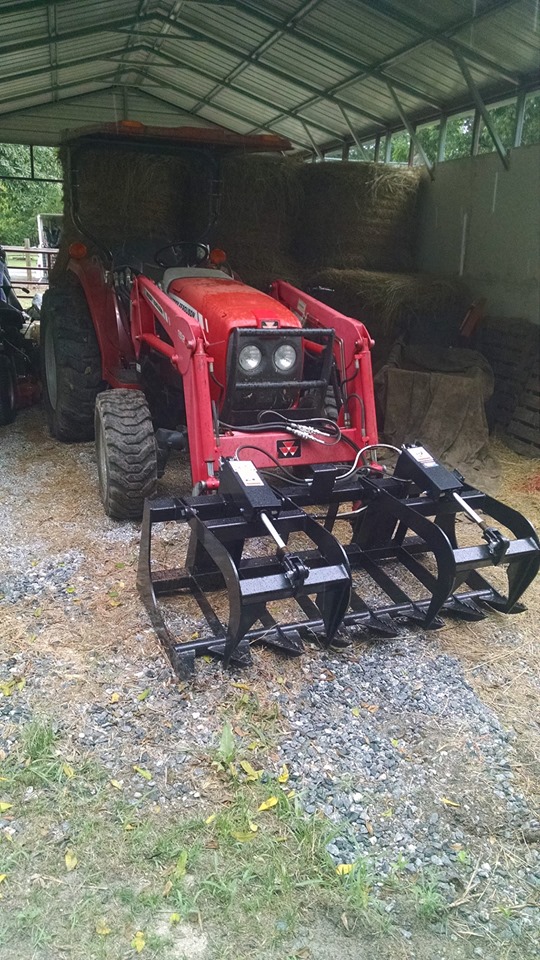
I picked up a Root Grapple in Thomasville Friday afternoon and had diner at Jerry's new place. Great spot, love the pond! i was fortunate that our tractor has a set of lines run to the rear of the tractor that we currently have no use for. I moved them to the front, put a new set of disconnects on the lines and all works well. I have to add a solid mount for the lines up front to secure them. This allows using all three functions at once.

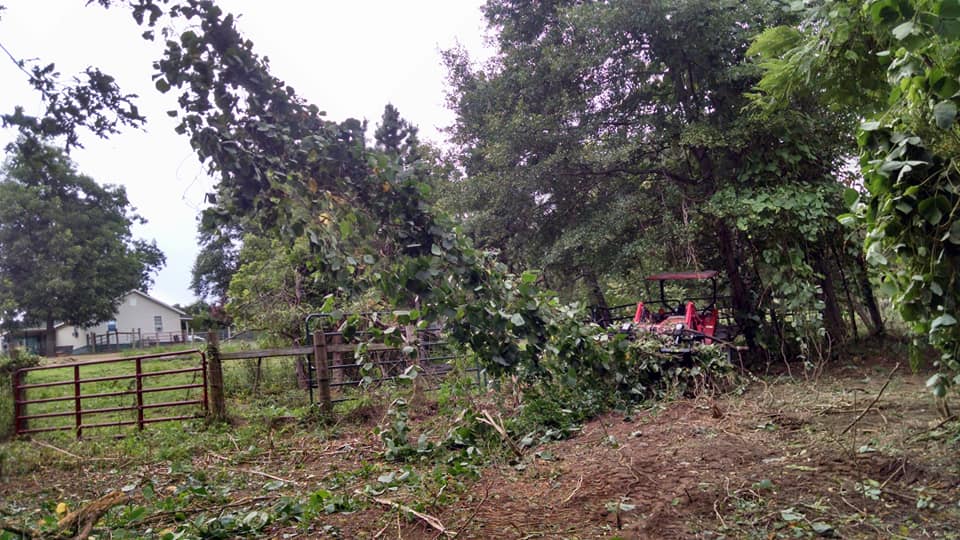
I started using it yesterday and moved a bunch of brush and started stripping brush and saplings out of the ground. Fantastic tool for the job, this tool will save me hours upon hours of time. Once I have the last of this final paddock cleared the next task is a 5' "warning track" around the ravine side fencing. Kudzu is a constant enemy and a dead zone down there is the only way to keep it off the fence. Being able to pick up a tree will also make cutting with a chain saw a bit easier on the back.

66706947_2559813600716182_5522918357394784256_n.jpg
 
That's a vine !!! I love this thing!!! Cleared about half an acre this afternoon. Looking to clear,level as good as possible and stone for parking, between lower fence and the ravine.

66803163_2561641363866739_1076443298299641856_n.jpg
 
Bucky update: Chevy Trailblazer seats installed with brackets I fabbed up. The seats have integrated belts and are super comfortable. New mats cut from a 4x8x1/4 sheet of work mat from Home Depot. Relocated rear heater. Fabbed a console mount for a modified ammo can console.
1857F2D4-852E-47AD-A91D-B5172A2AD0D0.jpeg
E0C0B21E-464B-41D3-842C-74CC8CFC5E16.jpeg
29F71CB6-5DEA-446D-BE18-B87A1E2ED333.jpeg
E4C39D6B-57DB-4E75-B1C4-46FEC99B9469.jpeg
6950F55F-FB82-4D29-A32A-FA89EDB3E07C.jpeg
 
Rebuilt the LS430 calipers, new SS brake lines, new pads and rotors.

20190720_152230.jpg
20190720_154608.jpg
20190720_150641.jpg
20190720_150947.jpg


20190720_151433.jpg
 
9C55EE54-A14E-43C8-BA32-9F54C9791E8C.jpeg


Anyone have any idea how I’d go about fixing this? I smashed it on a rock and Uwharrie and it stops the control arm from moving down at all. Not experienced with metal stuff and it’s pretty thick so can’t be hammered out. Any help would be awesome
 
thats gonna be tough. I actually believe that part may be available from toyota but thats a cut and weld RnR situation.
Id try and pull the control arm and use a 6' landscaping pry bar or similar to massage back into position. Caution not to distort the other side. Heat may be of benefit. I have seen other builds cut that out and replace with trapezoid of like shape (usually to move the hole an inch or 3 forward) Ill see if I cant find a pic. Maybe try Redlines tale of two cruisers thread; pretty sure they made their own plates, but again a cut and weld issue.

Or ... :D

start with the easy stuff and fix that sway bar bushing first ;)

That’s what I figured. I’m gonna try and pry it back into place but if that doesn’t work I have a couple buddies with welders so I guess that’s my only other option.

Some day I’ll 3 link it. As a broke 18 year old that however is not an option at the moment haha
 
View attachment 2045834

Anyone have any idea how I’d go about fixing this? I smashed it on a rock and Uwharrie and it stops the control arm from moving down at all. Not experienced with metal stuff and it’s pretty thick so can’t be hammered out. Any help would be awesome
Mine look a lot worse. But hey, they still move as needed, so I haven't done anything yet.
 
Heat and bend like @jfz80 said. That should get it out enough that the control arm can move again. Don't concern yourself with making it perfect.
 
Had to put another new starter in the ferd today. I believe this is the 3rd starter in three years, not too happy about that. One Motorcraft and two Bosch down so far. Hopefully this Mahle starter will last longer.

Got the ferd's center console mounted up finally. Came out well. Hope to get some lockable storage under the bed in not too long so I can get my tools and spares out of the interior.

IMG_20190805_193232.jpg


IMG_20190805_200740.jpg
 
Another starter seems crazy. At least this one was in your driveway i hope.
 
Another starter seems crazy. At least this one was in your driveway i hope.

If only. At the dump last Thursday.
 
Not worthy of its own thread but there may be a few folks that are currently running a GM charging system or one day wish to convert.

Here is the back story.

When I did the original engine swap on the 40 the alternator I went with was a high output (140 Amp) 10si unit. "10si" is a family of alternators introduced in the 1969 corvette and installed in a majority of early model GMs. They never came as 140 Amp units but several aftermarket makers filled the need. Issue .... it did great and lasted almost 20 years but it produced a fair amount of electric noise and the output at idle was poor.

Last week the old 10si finally died and while a rebuild wouldn't be a big deal I thought it a nice excuse to perform an upgrade.

Goal: Convert 10si charging system to CS130 charging system.

With the advent of more car accessories GM needed a better alternator. One that could produce cleaner electricity, had better cooling, better total output, and better output at low RPM's. What replaced the 10si is the CS130 (and later the CS144).

The unit is smaller but if you grab the correct part # the bracket bolt pattern is the same. Here are the details:

Part number: AC Delco 334-2355A (One application is a 1990 Buick LaSabre 3.8 liter).
Maximum output = 105 Amps
Output at 2000 RPM (Alternator RPM, not engine RPM) = 68 Amps. :bounce:

So, Job one .... head to the store and let the young one watch the awesome conveyor belts:

20190806_120448_resized.jpg


While you are there you will also want to pick up the connector that will allow you to make an easy connection from the alternator into your harness. Here is the part number:

20190806_135140_resized.jpg


Because of my old school V-belt setup I needed to swap pulleys.

CS130 on the left, 10si on the Right:


20190806_131118_resized.jpg


After bolt up and changing from old style to new style connector:

20190806_142422_resized.jpg


And for the best part ... Engine idling at 800 RPM, turn on the lights, and the voltmeter didn't budge.

20190806_142943_resized.jpg
 
Last edited:
Not worthy of its own thread but there may be a few folks that are currently running a GM charging system or one day wish to convert.

Here is the back story.

When I did the original engine swap on the 40 the alternator I went with was a high output (140 Amp) 10si unit. "10si" is a family of alternators introduced in the 1969 corvette and installed in a majority of early model GMs. They never came as 140 Amp units but several aftermarket makers filled the need. Issue .... it did great and lasted almost 20 years but it produced a fair amount of electric noise and the output at idle was poor.

Last week the old 10si finally died and while a rebuild wouldn't be a big deal I thought it a nice excuse to perform an upgrade.

Goal: Convert 10si charging system to CS130 charging system.

With the advent of more car accessories GM needed a better alternator. One that could produce cleaner electricity, had better cooling, better total output, and better output at low RPM's. What replaced the 10si is the CS130 (and later the CS144).

The unit is smaller but if you grab the correct model the bolt pattern is the same. Here are the details:

Part number: AC Delco 334-2355A (One application is a 1990 Buick LaSabre 3.8 liter). Maximum output = 105 Amps
Output at 2000 RPM (Alternator RPM, not engine RPM) = 68 Amps. :bounce:

So, Job one .... head to the store and let the young one watch the awesome conveyor belts:

View attachment 2051107


While you are there you will also want to pick up the connector that will allow you to make an easy connection from the alternator into your harness. Here is the part number:

View attachment 2051110


Because of my old school V-belt setup I needed to swap pulleys.

CS130 on the left, 10si on the Right:


View attachment 2051122


After bolt up and changing from old style to new style connector:

View attachment 2051124


And for the best part ... Engine idling at 800 RPM, turn on the lights, and the voltmeter didn't budge.

View attachment 2051134

great upgrade, I upgraded the turbo diesel in the suburban to a CS144... one of the best upgrades I did on it.
 
Ferd got new glow plugs today in hopes of easier cold weather starting, to help preserve this new starter.

Not too bad of a job. Ford manuals say to go in through the top, but I found it easier to remove the inner fender skirts.

As evidenced by the three wet glow plugs, these three were not working. The remaining five glow plugs looked normal, as the fourth in the pic.

Test start this evening produced a somewhat quicker start with less smoke, but the real test will be this fall/winter.

Here you can see the glow plug boots at the bottom of the passenger side aluminum rocker cover.

IMG_20190806_185419.jpg


Here are the four plugs from the passenger side.

IMG_20190806_185448.jpg
 
Ferd got new glow plugs today in hopes of easier cold weather starting, to help preserve this new starter.

Not too bad of a job. Ford manuals say to go in through the top, but I found it easier to remove the inner fender skirts.

As evidenced by the three wet glow plugs, these three were not working. The remaining five glow plugs looked normal, as the fourth in the pic.

Test start this evening produced a somewhat quicker start with less smoke, but the real test will be this fall/winter.

Here you can see the glow plug boots at the bottom of the passenger side aluminum rocker cover.

View attachment 2051441

Here are the four plugs from the passenger side.

View attachment 2051442

Did it not throw codes with the failed glow plugs? My DMax had one die and only way I knew was the code. Replaced all on that side of the engine while there, but I've read that the DMax isn't really sensitive to NC type cold temps.
 
Did it not throw codes with the failed glow plugs? My DMax had one die and only way I knew was the code. Replaced all on that side of the engine while there, but I've read that the DMax isn't really sensitive to NC type cold temps.

Dmax don’t care...at least not mine (knocks on wood). I’ve had a #8 code for 6 years, lol!
 
Dmax don’t care...at least not mine (knocks on wood). I’ve had a #8 code for 6 years, lol!

Ha, must be the first one to go... mine was #8 as well.

ETA - super easy and cheap fix that I lived with until a week before I listed it for sale. Same with the blower fan resistor - top speed (4 setting of 4) quit working about a year before I sold it. I often laugh at myself for living with those little things when I could have fixed them so easily early on.
 

Users who are viewing this thread

Back
Top Bottom