Tighe's 2nd FJ60 Thread (1 Viewer)

This site may earn a commission from merchant affiliate
links, including eBay, Amazon, Skimlinks, and others.

Joined
May 5, 2014
Threads
47
Messages
562
Pretty basic title!

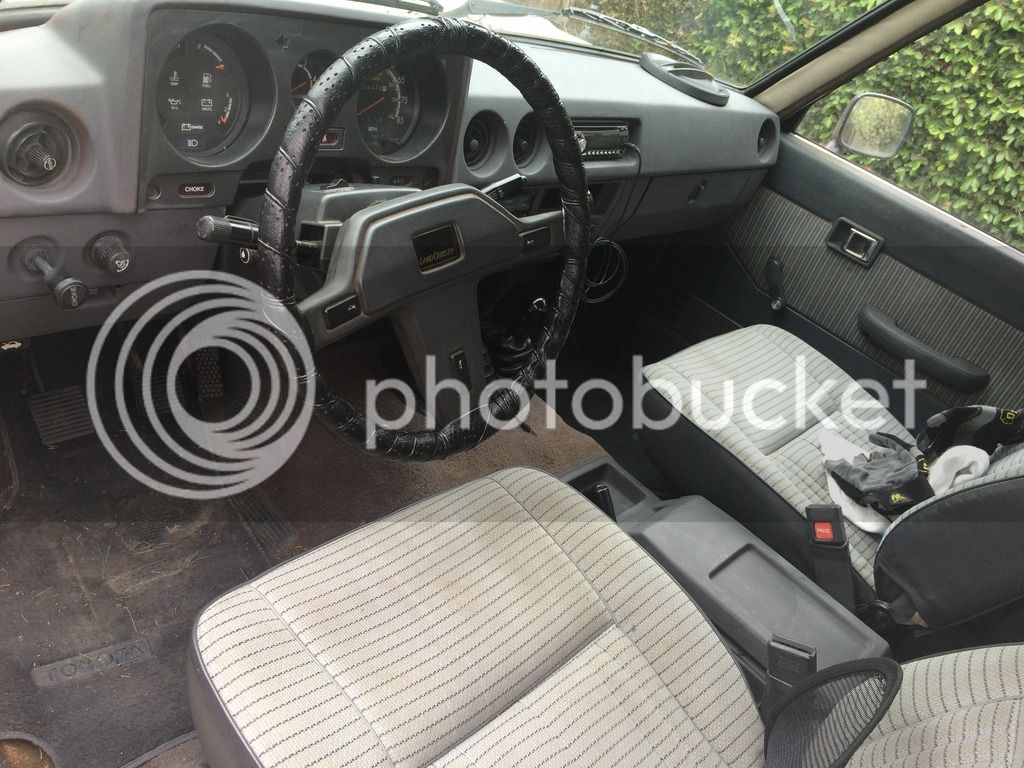
Just wanted to start this thread to keep track of any changes to my latest addition, a 1984 FJ60 with 223k on the body, a rebuilt engine (2009) and a fresh coat of paint. So far so good. Picked it up just north of Los Angeles a few weeks ago, and slowly been getting it into shape. I sold my last one and really missed it, so here goes round two.

IMG_3899_zps41fe7da2.jpg


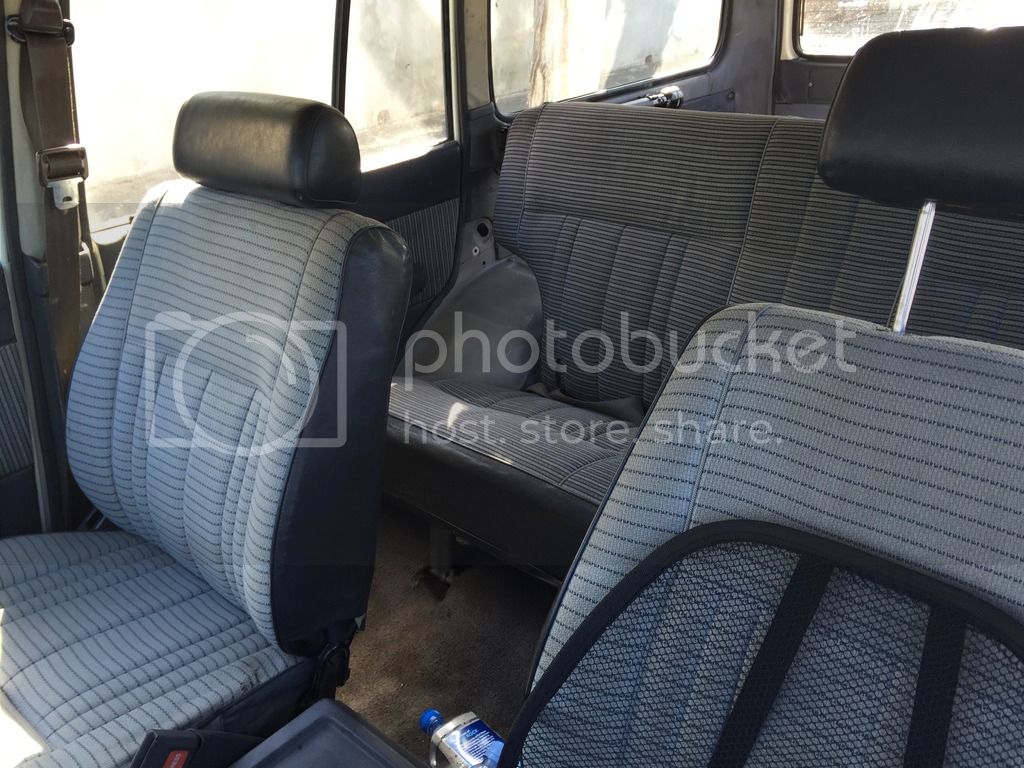
It was disgusting inside. None of the seats are worth saving, and ultimately I'm going to completely replace the tan interior with a blue one. Should be within a few weeks. As with my last FJ, I found the only way to really clean it was to strip it bare and power wash it, and then put down a few layers of primer to provide a fresh starting point.

IMG_3897copy_zps8c187d84.jpg


Had the cracked windshield replaced today- surprisingly there was no rust at all behind the glass. What a wonderful thing it is to drive behind a brand new windshield...so clear.

IMG_3992_zps99e64b20.jpg


I do have a few questions going forward. I've searched but haven't found topics that precisely cover these issues. Any help is appreciated!


When I first picked it up it was very difficult to prevent bucking at low speeds. I replaced the gasket between the carb and the air cleaner (PN 17848-61020) which helped considerably. Plugging the EGR also helped. But on a flat surface, first or second gear will not idle forward smoothly- it's very jerky.

Low speed drivability in general is not great. The PO told me the clutch had been replaced recently, and it certainly doesn't slip, but it's difficult to get a smooth shift from 1 -> 2 and 2 -> 3. Not a big deal- I assume this is more related to a carb in need of a rebuild than anything in the transmission.

PO said he'd adjusted the timing but hadn't "gotten it right relative to the carb idle." I will investigate this. I would like to rule out/fix some issues before having to rebuild the carb as I'm not familiar with them at all.

I would like to devane the smog air pump. On my last FJ60 the smog air pump gave out and left me stranded, with a screeching belt. I don't want any repeats. Lot's of info on that process, thankfully. My question here is whether I have to be concerned about a leaking PS reservoir/pump seizing up a devaned smog air pump. Is this possible? If the devaned pump's bearings are good, can PS fluid ruin them?

With the choke pulled out, there is considerably more power in all of the gears. It's more noticeable in first and second, but it's definitely felt throughout. Pulling the choke out also improves low speed drivability- shifting is smoother and idling forward in gear is smoother. Not sure what else to make of this other than another sign indicating it's carb rebuild time. Thoughts?
 
Last edited:
Quick update:

Spent a lot of time on this rig recently. Stripped the interior and replaced it with a blue one in good shape. I was very thankful to get rid of the tan interior which was in tatters.

IMG_4851_zps66kzxbif.jpg


IMG_6025_zpsx9qe14ue.jpg


Swapped the seat bottoms from the driver's seat to the passenger's seat so I had a nice fresh starting point.

IMG_4871_zpsrijkudll.jpg


Dropped in some tubular bumpers which look much better than the stock, somewhat beat ones. The only issue with these bumpers is that it's very difficult to get the spare tire down with the bumper on. Not sure if that's a design flaw or what. Have tried installing it every which way but it remains an issue.

Had some fun at the lcoal State Beach a few weeks ago. The path leading down to the beach is pretty rough and my lowered Volvo wagon always bottoms out and complains when I take it here. The FJ does not have that problem...


IMG_5133_zpsfl7gck9z.jpg


Gutted the smog air pump, as I didn't want to get stranded on the highway - I was particularly sensitive to this because my last FJ left me stranded about 45 minutes after I bought it with a seized pump.

IMG_6212_zpsashqxnls.jpg


And most recently I installed extended shackles and new bushings in the rear, and painted the grille and headlight bezels black. She finally sits level again, and I really like the light/dark paint scheme. I left the anti-inversion pins out because they could not be snugged up against the shackle and I didn't really want them clanging around. Any particular reason they're too long? The unthreaded part is about .5" longer on the pin than it is on the two thicker bolts. I don't go wheeling, this truck is my surf truck only, but I would prefer to have the pins in. Any reason I can't add a spacer on the pin and snug them up, being careful not to pull the front of the shackles together?

IMG_6374_zps9x4ypmwv.png


IMG_6368_zpsgdofad2h.jpg


Thanks to all for helping me when I had questions. The last box I need to check (for now) is to install the carb currently in the mail from Trollhole. She runs well now but mpg are pretty low. Hoping the new carb will help with that and overall power.
 
Last edited:
The Trollhole should help a lot...love mine. Was wondering tho, don't you have to have the air pump and all the smog crap to pass out there in Kali??
 
Hi all, this past weekend I crossed my fingers and attempted a Trollhole carb installation. 84 FJ60, partially desmogged. My air pump has been gutted, and I removed the HAC valve when I purchased the truck a year ago. Otherwise everything is stock.

I have been driving it daily for the past year slowly diagnosing and fixing other issues, and the time has come to tackle the carb. During this time it has run fine, more or less. Between 8 – 13 mpg, depending on city/highway. It would diesel when turned off, and was difficult to start when warm. When cold, a few pumps of the gas, and it would fire right up (with choke). Never any signs of smoke. I thought the new carb would solve these issues, so I did not spend too much time trying to diagnose them before installing.

The install itself went fine. The 4 nuts holding the stock carb to the manifold were not very tight at all, and the inside of the carb was pretty grimy. The new one went on fine- the nuts are a lot tighter now despite some difficult to reach angles.

The issue I’m having now are the following:

Will not hold an idle. If I stay on the throttle I can keep the engine running, but if I let off it’ll die after about 10 seconds.

Smoke and smell – light gray smoke from tailpipe, as well as quite a bit of water(?) coming out of the tailpipe. I say water because it does not smell like fuel, however, there is quite a bit of unburnt fuel smell both from the engine compartment and from the tailpipe.

The fuel window shows ½ full consistently.

I have been using the following threads as a guide:

TrollHole Cruisers Carb Install on a 60

http://everythingfj60.com/wp-content/uploads/2013/06/How+to+Desmog+an+FJ60-2.pdf

Some photos, with main vacuum routing lines highlighted. If anybody has some suggestions on what should be rerouted, please let me know! The small white dots indicate a port that has been capped.

IMG_7432_zpsxt7xysef.jpg


IMG_7434_zpsckaoxel5.jpg

I have not seen anything conclusive about how to deal with this hose- this is my makeshift plug for now.


IMG_7433_zps28wmpsse.jpg

In this photo some of the auxiliary switches have been unplugged. My understanding is that all of these can come off during a desmog. They plugging/unplugging them did not seem to effect the idle.


IMG_7436_zpsaralkwxr.jpg

This hose routes under the air cleaner to the base of the carb.


Any help is appreciated, thanks all!
 
Best bet is to get ahold of Marshall and ask him... In your photos above you can tell the #1 in the connectors is still powering some sort of VSV/VCV or something so I would reconnect that.

Fuel smell in the exhaust with liquid coming out of the tailpipe is more than likely unburnt fuel. There will need to be some tuning to the carb that will have to be done so I would start with fuel mixture and timing. Again, though you want to talk with Marshall and have him give you recommendations.
 
Thanks for the response. I have not been able to track down a comprehensive routing diagram for a Trollhole carb as there are lots of variables that change for each desmog thread I've read.

My AI system has been completely removed. Plugs were put in place of the air rail. The smog pump is just a shell, and the rubber hose coming from the exhaust has been sealed. Should I have used any threadlock at the injector plugs?

The EGR system is in place still, however there is no vacuum to it and the modulator has been removed. I believe this renders it useless but I'm wondering if I should reconnect it, as I'm still using the stock dizzy.

I have not adjusted timing. I have never done this and am not equipped but I can learn how to do it and buy the tools if necessary. I figured that because the truck ran well when I pulled it into my driveway I would not need to adjust the timing after desmogging. Perhaps that was a bad assumption.

After installing the Trollhole, I adjusted idle mixture screw. It was 4 full turns out when I received the carb. I experimented adjusting down to 1 turn out. ~2 turns out seems to be the best, but it still will not stay running.

Still getting a lot of liquid from the tailpipe. I assume it's gas, although it doesn't smell as strongly of gas. Also still getting smoke from the tailpipe. Light gray. Neither of these occurred before I started desmogging. It will run for about 15 seconds before dying. Sputtering liquid from tailpipe the whole time, and lots of fuel smell from the engine bay and the tailpipe. No visible gas leaking from carb, and sight shows fuel level half full. Choke helps and I could probably keep it alive by revving it, but it runs so poorly and shaky that I'd prefer not to.

I have continued to tinker with the vacuum hose routing and have landed on the following routing, which I've sketched out for clarity. Also some photos as well.

The carb has only one vacuum port, which I have plumbed into the dist advance port, below.

Vacuum%20Advance_zps6wbgwnib.jpg


The altitude advance port has been capped. The dizzy vent port gets tee'd into the passenger side VCV, as drawn below.

Pass%20Side%20VCV_zpsxqajw5gn.jpg


As I write this I realize I need to connect the top HIC to the PCV port through the stock vacuum tee. Is this drawn correctly?

On the driver's side, the VCV is connected as drawn:

Driver%20Side%20VCV_zpsrsxiau2z.jpg


AC idle solenoid connected as it was stock, as drawn:

Unknown_zps0bonldgx.jpg


And lastly, the electrical connection on the carb is as follows:

IDLE%20SOLENOID_zpshltzooyd.jpg


And some photos of the latest round of routing:

IMG_7471_zps9eqaed9s.jpg


IMG_7476_zpsq7vdwaav.jpg


Tailpipe sputter:

2_zpsuuv3dtpd.jpg


Any help is appreciated...running out of ideas!
 
Finally up and running.

Went through all the hoses again and had a few misrouted. They're all connected like the sketches above. I didn't let it run for long, as I noticed some exhaust leaking past the air rail hex plugs, but it did idle under its own power. Progress...

Any recommendations for sealants/threadlock to use on those plugs? Or just bottom them out completely? Torque specs?

Thanks.
 
Sorry I didn't get back to you sooner but looks like you got it figured out.
As for the exhaust leaking... I used red locktite on mine and have never had any issues. Did you buy a JimC desmog kit of did you just try and match plugs?
 
Thanks Greg. I did not buy a JimC kit. I bought the plugs from O'Reilly's (link to actual screw) but I did not use Locktite. I will redo it with Locktite and make sure they're all bottomed out. I was approaching everything pretty gingerly so perhaps I did not tighten them sufficiently. Now that I have everything routed *correctly* I will buy all new silicone and vacuum fittings, and will redo the whole thing in proper fashion.

I still have the EGR in place. This is for a few reasons - I cannot weld so I don't really have a plan to cap it, according to the desmog document once vacuum has been removed from it it's effectively removed anyway. Because I am still using the stock dizzy I will pay attention to any signs of pinging and will hook the EGR back up accordingly. I want to get it running well before I shell out for a recurved dizzy.

Thanks again for the help.
 
Ok dont know if those are the same that JimC sells but look like it. Definitely bottom them out and use loctite. Mine went in tight and have never given me issue. For the silicone hose look at boostcontroller.com and I believe you need 3mm and 6mm ID stuff.. There is a thread floating around with the information. Mine has been great all these years.
 
Another quick update for posterity.


Cap and Plug set ordered and installed from JimC, along with an EGR blockoff plate. I found the screws could not get enough grip going back in so I ended up using slightly longer screws. Otherwise the removal of the EGR system was straightforward. Pretty crusty up there but no broken bolts, and no rust, which was nice. The valve itself was modified per JimC’s recommendations here.

IMG_7746_zpse6q4hz0q.jpg


Compression tested with a rental gauge from O’Reilly’s and all numbers were between 155 and 165, warm engine, dry test. Seems high but engine was rebuilt a few years ago so maybe it’s just in good condition...


I bought a good condition used PS pump from Mark Algazy and the install was straightforward. Regreased the smog air pump while I was in there.

IMG_7738_zps0yjtghq2.jpg


Replaced front left motor mount. The previous owner told me he thought the grinding sound (of the fan hitting the shroud) was either the exhaust rattling around, or the tire rubbing on something. After that misdirection I eventually took a gamble and bought a mount not knowing if that was the issue- thankfully it was. Relatively straightforward job but make sure the engine is supported adequately. It needs to be lifted pretty high to get the new mount in. My old mount came out in two pieces- it was totally sheared. I Hear this is caused by PS leaking onto it over the years.


I also had Toyota replace the gas tank as part of their recall this past week. It took them about a month to get all the parts necessary. I just picked up the truck yesterday and it looks good. Never had any issues with the tank but nice to know it’s completed.

IMG_7795_zpsxoamakgx.jpg
What Dealer did you go too and have the tank replaced ? Marina or Santa Monica, Culver City?
 
In diagnosing some hesitation under load I replaced the fuel filter, and cut open the old one to see what was inside. A bunch of red plastic bits were in there, maybe from the new gas tank? Cheap and easy insurance, although it did not change how the truck runs at all. Still a flat spot around 2k that can be cured with pulling the choke out, and still some hesitation/bogging when accelerating from a stop.

7BAB0F49-C552-479C-A3C4-1ABCC022E9FA_zpswd3neo3o.png
 
Last edited:
Noticed a bit of a list today while the truck was parked - looked underneath and found a broken leaf in the driver's side spring pack. Lucky nothing happened while driving but a bummer nonetheless. Must have caused the pack to shift around as the two pieces of the leaf are about 2" apart, and the shackle is now horizontal, as pictured. Guess I'm in the market for an OEM (uncracked!) spring pack, or just the individual leaf if there are any out there. It is the top-most leaf that broke.

BFE35190-8A0D-45B2-BA04-A74AF87966A0_zpsqflnrhfl.png


Edit: all fixed and buttoned up with new bushings. Thanks to Mel Lowe for always being willing to ship anything!
 
Last edited:
Small update, learned a few things recently about my truck that I thought I'd share.

While learning how to time this thing I found I get better results from having a spotter watch the #1 cylinder until it's at TDC and then setting the rotor, instead of using the flywheel. Despite cleaning and painting the BB, it still proved basically impossible for us to use and a reference mark. We set the cylinder to TDC by hand cranking at the crankshaft, and knew immediately that we were going down the right path. Idles much better now and the flat spot that I've lived with for a while now is gone too. Mpg's are up about 25% too. Too bad that only equates to about 3 mpg! Anyway, if you're struggling to get the timing right, try this method. Seems to have worked for me.

I noticed recently a ticking sound after the engine has warmed up. Relatively loud, and coming from driver's side of engine. Will require some digging. While searching for the source of this tick I was testing for exhaust leaks and thought I found a big one where the down pipe meets the manifold. See pic of soapy water foaming at this area.

7FD70597-7C85-4E65-8F18-E66C668A5ECD_zpspb63wd07.jpg


I thought for sure the gasket was just shot but after I cleaned it up a bit I stick my camera underneath and took a shot of it from the bottom and found the welds here had actually separated.

B16A058F-2E13-4A21-B799-138668000523_zpsvail27gi.jpg


This leak, combined with a pretty rusty muffler led me to the nearest muffler shop where I left with a new Magnaflow and a new cat. They welded up the down pipe for me too, and it totally cured this thing of any exhaust smells. I was getting strong exhaust smells in the cabin, particularly when in traffic. It's totally fine now, and has a nice little growl too.

IMG_9142_zpsaxdj3rji.jpg


So much happier with it as a daily driver now that it doesn't smell like exhaust.

This past weekend we camped outside of LA and got in a few miles of light off-roading. Very fun. These are capable trucks, even on street tires!

DA6CD42F-5ABB-45C2-BD4F-915B53F572C0_zpssnn814ku.jpg


E83A714C-0872-4907-A137-9B2EA38425C9_zpsvhlpqmv7.jpg


989483C6-E886-4D3D-A118-8D260BFE8386_zpswlplypco.jpg


Naturally, after some progress was made, there was a step backwards. On the way home from camping I noticed the temp gauge had stopped working. Never had any overheating issues with this truck but I want to make sure I fix it sooner rather than later. I'll start reading up on it, but in the meantime any suggestions on where to start the diagnosing process would be appreciated!
 
Last edited:
Gotta take the bad with the good sometimes. Was driving in traffic and within the span of about a minute I lost all function of the clutch. The reservoir was totally empty. Drove in first to a gas station, refilled with DOT 3, and got another mile before it gave out again. I filled it up, looked under the truck, and watched it pour back out. Slave and master cylinders need to be replaced. Couldn't justify filling/driving/refilling for 30 miles so I had it towed... :( At least it didn't happen in the mountains!

IMG_9247_zpskjunnp84.jpg


IMG_9249_zpszcbyd4lm.png
 
Growing pains of a new truck - thanks for sharing. Most of us have been there with this!
 
Had the truck towed to Dirty Parts in LA, where they replaced the master and slave cylinders, getting me back on the road. Great shop from the few experiences I've had with them. I decided to take it out of commission for a while to fix some lingering issues, particularly a ticking noise which I believe (hope!) is an exhaust leak. Dirty Parts corroborated the idea, thinking its a warped manifold.

When I removed the manifold from the downpipe this is the gasket that I found in there. Is this normal? New parts in the mail from Beno, regardless.

EF8576A7-6FE1-4A89-9815-E3B02737742E_zpsgkzpqbz9.jpg


Manifold is off to be planed, while the dizzy is off to Jim C for a recurve. While the truck is down I decided to tackle some interior issues.

Tried cleaning the speedo cable from the speedometer-end. It 'brackets' the driving speed, swinging back and forth by about 20mph, up to about 40mph where it steadies out. Hopefully this fixes it. Would like to avoid buying a new one...

Repaired some minor cracking on the dash by repairing with flexible epoxy and painting.

7AC997A7-2249-4AA1-ADA7-93793409EDA0_zpsjijsdvby.jpg


Also removed the bezels to clean the instrument housing and took the opportunity to polish the three of them.

Before:

65AECCC1-A4B6-4D2B-AAD4-87768F9A1255_zpsek0alsvk.jpg


After:

6CC653DE-7059-472D-9147-01F5CD764481_zpsxs0upbl7.jpg


Repainted some bits and pieces and reinstalled everything for a nicer, cleaner dash. Hard to believe there's a beige dash and dash pad under there...

60C5427B-F607-4CE5-BE95-2BB32CC458EC_zpsprr2nilk.jpg
 
Last edited:
Wow. Nice work on that cluster and dash resto. More info on how you got the plastic so clean. :)
 

Users who are viewing this thread

Back
Top Bottom