The Great Gazoo from 1972!

This site may earn a commission from merchant affiliate
links, including eBay, Amazon, Skimlinks, and others.

Weekend Update

I was fortunate enough to be off Friday and then was not bothered much over the weekend so I got some stuff done.

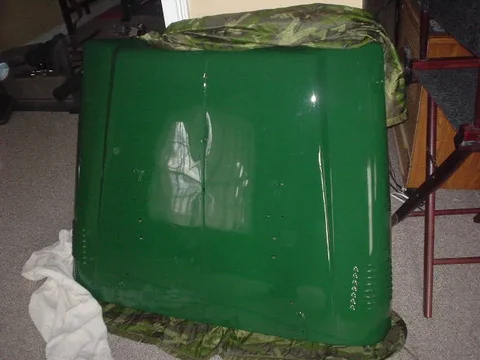
First and foremost, I picked up the front clip at the painter. Over all for the price and efforts I am pleased. The guy is super nice and seems very honest. We hung out in his shop and chatted for about 45 minutes after we loaded the truck. Just about whatever - state of the union blah blah.

I had him paint both hoods but the Split hood really came out great. I am surprised and Malphrus should be too. He gave me the hood because it was such a basket case.

DSC00012.webp

DSC00013.webp

DSC00015.webp
DSC00012.webp
DSC00013.webp
DSC00015.webp
 
I got a little box from JT Outfitters...it came very promptly and I received a bunch of emails from purchase to shipping so that was cool.

If you use a stock PS pump out of a 60 like I did and a Mini Truck box you will need three of these little gems.

DSC00016.webp

DSC00017.webp

Then I got my parking brake handle installed. I had two in the bin and discovered they both had studs on them but the body had nut plates.

DSC00018.webp

That was a kinda WTF moment that was easily solved by just drilling the studs out. I do not know if the studs are early or late but if you ask me they would have been a helluva lot easier to deal with then the two bolts way under the dash. :bang:
DSC00016.webp
DSC00017.webp
DSC00018.webp
 
To my surprise, I found that the stock parking brake cable I had (I think it was stock) was long enough for the H55 and split case. I cleaned it and then trimmed off the melted bits and covered it in a long piece of 1/2" shrink wrap that sells fro cheap in a little roll at Harbor Freight. Then I got busy under the truck...

H55 and a split case in a 40....

DSC00020.webp

Brake all assembled...

DSC00022.webp

Tightening the jesus nut with my home made special tool...

DSC00023.webp
DSC00020.webp
DSC00022.webp
DSC00023.webp
 
And there you go...

DSC00027.webp

I also have been trying to salvage some badges I got from Trollhole.

This one was chromed metal and super heavy. I cleaned it up and wire bruched some blemishes off. The pegs on the back were stripped out so I fixed them with POR15 putty and retapped them.
I searched around for some light eggshell paint and ended up buying a little spray can of flat white from Testers and a little jar of red and silver. Not sure what people will say about the white but I think it will really pop against the green truck.

DSC00029.webp

I need to put a couple more coats of red on there and then either do silver lettering and a clear coat. I am doing the rear Toyota badge and front Toyota badge too - anything to save a couple bucks!

I also installed a new parking brake switch and started working on brake and clutch lines. Just have to make two more hard lines and a couple frame mounts and I will have that knocked out.

So that's it for the weekend. Time for a :beer:
DSC00027.webp
DSC00029.webp
 
looks great!!!! lots done...

why did you paint both hoods???
Neither the painter nor I were sure which one would look best so he shot them both. Happily, they are both great but the split hood turned out super. I will just wrap the other one up in a safe place in case I drive through a hail storm or something.

Advice to the Cruiser world - DO NOT STAND ON YOUR HOOD, THE NEXT OWNER WILL FIND IT HARD TO FIX :mad:
 
Update

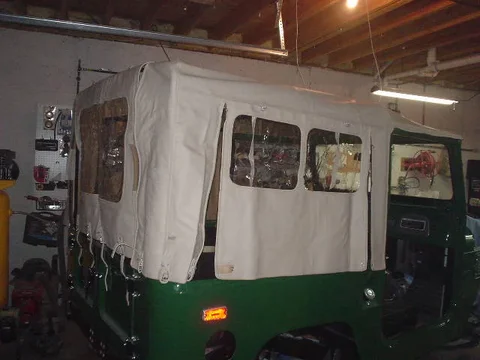
So the :princess: and I got the Paki top in place today.
DSC00032.webp

DSC00033.webp

Just like everyone points out. It is a really tight fit front to back. I need it to stretch almost an inch and a half to get it to fit right. I plan on pushing the truck outside next time we have a warm day and letting it bake in the sun and see if that will help us get the rear seam where it should be over the rear cross bar.

And here is my are work. Hand painted emblems. Saved myself a bunch of money doing this. I have to touch up a few spots and then spray them with clear but I am pretty please.

DSC00035.webp

I also discovered that the mounting pins on the script style emblems I bought for the aprons do not line up with the holes. I guess the Aprons I have are a later year model. Live and learn I guess.
DSC00032.webp
DSC00033.webp
DSC00035.webp
 
Last edited:
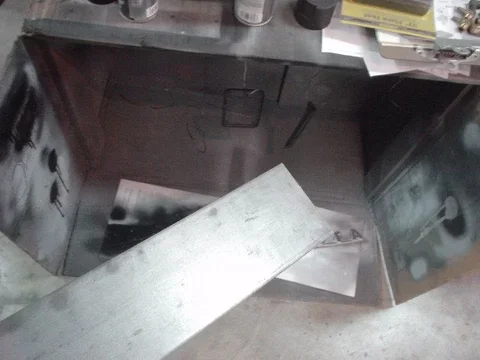
I also made a bracket to mount my rear soft brake line to my frame and the hardline in the rear.

DSC00031.webp

DSC00030.webp

I often have trouble cutting stuff straight and drilling holes where they should be :bang: Weird too cuz my dad is a furniture and cabinet maker but I did not get that gene. He is extremely handy but is amazed at the progress on the truck.
Anyway, as simple as this bracket was, I was proud how well it turned out. :hillbilly:
DSC00031.webp
DSC00030.webp
 
I have not. Although I did bounce it of my life partner here at the house. After close examination, I am thinking that this top was made prior to the quality really falling off. I have had the top for about three years I guess and the guy before me had it for about two or three. There is no yellowing in the plastic and the sticking seems a bit more ample than some of the others I saw that started to come apart. Anyway, I figure if they break, I will cross that bridge then. Probably would have been easier to do it now but :meh:
 
Nice work dude...you have a boatload more patience than I do.
 
Nice work dude...you have a boatload more patience than I do.
Yeah. I assess the progress at the end of the day and realize how little happened.
I made a mount/bracket for the wiring under the steering wheel and made a mount for where the clutch hose meets the hard line. I also got the long brake line that runs along the frame to the back made and installed.
(I am re-purposing brake lines from the FJ60 I parted and becoming a master at the bubble flare.)
I also got about half way through bending the hard clutch line. That is surprisingly difficult and time consuming to get the line to fit against the firewall cleanly but I figure if I do it once just right, if I have to make another I will have something to model it by.

And now the work week begins. :bang:
 
badges look good!!! you going to put clear over the top or just leave them like that?
Yep. I still need to do a little touch up but I am going to clear them. I am pretty pleased. While we were chatting the other day, I know we were both thinking that one should buy new. After all the work that goes into one of these trucks why hang garbage off it but given the way they turned out, I think they will work for me just fine. The white is a kind of a matte texture but really pops against the green.
 
Well, it is a lucky thing I only paid about $150 for the Confer tank I got a while back. I dropped it off to get boiled out, etc and the guy called today apologetic that it had taken so long. He asked how much they are new. I immediately had a sinking feeling. He explained that since it has a baffle in it and was in such bad shape on the inside, they are going to have to cut a hole in the side opposite the sender hole to ensure it is properly cleaned.
After some conversation that sounded like the guy was reluctant to do the cleaning, sealing and repairing he told me it was going to cost close to $400 to fix it.
s***.
I told him to go ahead and then I looked at the MAF site and discovered I still will be at about 50% of a new tank. Still, pretty expensive.
The guy was trying to tell me he would have two weeks of work in the tank. I did not want to argue with him but in reality he will only have about two days. The chemicals pretty much do all the work. I just redid a tank for a tiller and it took over a week for me to clean the thing and dry it and then put in the POR15 sealer and let it dry. :meh:

I am not sure what the reluctance was. I hope they do a good job. They are the only shop in town for radiators and fuel tanks.
 

Users who are viewing this thread

Back
Top Bottom