the dragonship (2 Viewers)

This site may earn a commission from merchant affiliate
links, including eBay, Amazon, Skimlinks, and others.

i know, no pics, it didn't happen :flipoff2: well, i got the fool tank mounting done this aft. n thanks to @diesellibrarian, i've got a fuel filler neck that doesn't think it's swiss cheese. that landed late last week. for the life of me i cannot find the diagram of the tank venting that was posted up in the 60 section here awhile back. i think i've got it figured out in my head, but i'm second guessing myself. a big thanks if some one could steer me in the right direction for it
 
This is the one I have saved. Is this what yer lookin for?

1677838124246-png.3262796
 
@diesellibrarian , a little bit. what i'm after is the name of that vertical manifold. for some reason in my head i recall it being called a gas or vapor filter. to me that would be like gas/vapor filter that's in the i think distributor venting system. or am i a mile n half off base? on your schematic, that hose on the right side i assume ties in at the top right on the manifold then down to the center port on the bulkhead fitting, then from there to the tank? that's not making sense to me as there's nothing, that i see, heading towards the charcoal canister.
thanks for posting that up
 
I think the plastic thing is called the "fuel evaporator separator."

You are right: the four lines coming off the bottom of it go to the tank. The line coming off the top goes to the bulkhead fitting - the one small guy in the centre of the fitting, below the larger-diameter hose. It barely shows up on that schematic. That runs to up to the charcoal canister in the engine bay.

This little guy here. They're often rusted away, I think. Hope yours is still hanging in there!

1679353286574.png
 
I think the plastic thing is called the "fuel evaporator separator."

You are right: the four lines coming off the bottom of it go to the tank. The line coming off the top goes to the bulkhead fitting - the one small guy in the centre of the fitting, below the larger-diameter hose. It barely shows up on that schematic. That runs to up to the charcoal canister in the engine bay.

This little guy here. They're often rusted away, I think. Hope yours is still hanging in there!

View attachment 3278064
This one:

View attachment 3278067

All the rest go to the tank.
ok, that's clarifying things for me. n nope, my bulkhead fitting has pretty much returned to it's base elements. i've got some redneckineerin' to do.
thanks
 
man am i slow some days, once again i can't seem to get pictures posted up. :bang:
any way, to bring you some what up to date. fuel tank is in for the final time n plumbing connected. as mentioned earlier, a 31 gallon 'burban tank. i scribed 11/2"x 2" uhmw to the top of the tank n bolted it to the channels running front to back. the tank straps are a combo of old n new utilizing stock mount points......sorta. yeah, lost a wee bit ground clearance but made room for the sending unit above. also, that kept all the vent lines above the tank. did that to try to alleviate an issue our resident cruiser whisper mentioned in the ford/gm tank test thread of vent lines filling with fuel. we'll see if it works. with only one evap line coming out of the tank i debated eliminating the fuel evaporator separator but didn't. had a work client fab a manifold to tie into the bottom where the 4 stock evap lines tie in. had to rebuild the rocker panel manifold to suit the new layout, it was pretty well fawkered anyway n needing rework. can someone tell me if losing the section of evap line that crosses the underside just ahead of the tank is going to adversely affect the evap system....as it's out now.

of course there was a "while i'm here" project. the rear diff vent line was compromised. ripped the line out, popped off the valve n got it functioning smooth, installed new line all the way to behind the fuel fill door. the valve is between the hinge n the gas cap. up n outta the water n no gear lube odor inside.

oh yeah, a big thanks out to @diesellibrarian for the fuel filler neck. it's in n lovingly hugged by a new 'yota grommet.

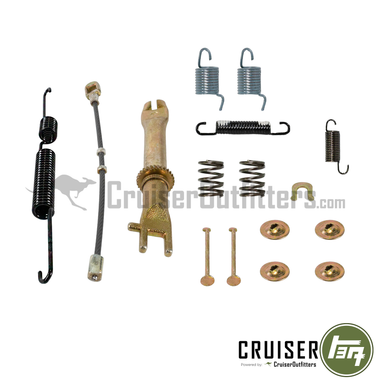
the bell cranks for the e-brake were a pain in the @$$ to free from the backing plates, of course they didn't come off without breaking a bolt on each one despite being soaked with pb blaster for weeks ahead of time. :meh: they are now soaking in a mixture of whatever lubes that get dumped into one container draining lube jugs completely. we'll let them soak a day or 2 more before i fawk with them. thankfully the e-brake cables aren't seized.

probably start to cobblef%$k exhaust from the cat back tomorrow evening. it's pretty well just the brakes n exhaust to go for safety

yeah yeah, wall of text n no pics. read the first sentence again:flipoff2:
 
can someone tell me if losing the section of evap line that crosses the underside just ahead of the tank is going to adversely affect the evap system....as it's out now.

I deleted mine. Both the line and mounting bolts were rusted beyond recognition. Have not noticed any ill effects.

Glad the filler neck worked out for you! Did you have to mod the GM tank (i.e. cut a hole in it) to get the Toyota filler neck to work?

Sounds like you're making good progress. Keep at it! :cool:
moved the fill point from the top plane of the tank to the very top of the side plane. if i'd left it on top i'd 'ave lost another 2 1/2" of ground clearance. nope, not playin' that game as i tend to push limits with my stuff. where the filler neck comes out of rear 1/4 it's about 1/4" higher than the inlet to tank. prefect!
yup, we'll keep pluggin' along, thanks man
 
@cruiseroutfit , mornin' kurt, do you sell e-brake parts for 60s? namely looking for the bell cranks, boots for the same n the equalizing pivot. gonna try one more time to free my bell cranks up but they are fighting me tooth n nail. on the equalizer the bolt broke dismantling it. i see it's shank is the pivot point with some sort of plastic bushings which have long since left this world. when i got it apart there were only a couple of crusty pieces large enough to id as plastic. my local stealership is of no help on this. thanks for your time
 
@cruiseroutfit , mornin' kurt, do you sell e-brake parts for 60s? namely looking for the bell cranks, boots for the same n the equalizing pivot. gonna try one more time to free my bell cranks up but they are fighting me tooth n nail. on the equalizer the bolt broke dismantling it. i see it's shank is the pivot point with some sort of plastic bushings which have long since left this world. when i got it apart there were only a couple of crusty pieces large enough to id as plastic. my local stealership is of no help on this. thanks for your time

Absolutely, 100% of it!

Example:


Absolutely, 100% of it!

Example:


thanks for the timely reply. if i don't succeed breaking them loose tomorrow, i'll be in touch. how quickly could you get them shipped to N4S 7V6, ontario can if i ordered on monday?
 
thanks for the timely reply. if i don't succeed breaking them loose tomorrow, i'll be in touch. how quickly could you get them shipped to N4S 7V6, ontario can if i ordered on monday?

We have some fast (overnight) options and international priority that is 7-10 days?
 
fawk you bell cranks! i win! 😤 a little love, a little violence, a little more love, fawk it, a lot of heat n violence n they finally see things my way. @cruiseroutfit , i'll be calling tomorrow to order a set of the boots. thanks again for your time yesterday👍
 
well fawk, now i know why custom exhaust n headers run the $s they do! building my exhaust from the cat back. ALL. F&%KING. DAY. n i've still got 2 pcs to fit to connect tail pipe to muffler:bang: cat to muffler will be the simple one:meh: it'll get done.
good news is, e-brake parts that were rust froze or broke are all freed up or repaired. just waiting on snail mail to get my bell crank boots, those were ordered up monday last week from the boys at cruiser outfitters. tracking is showing me they've left the toronto sorting station sunday morning. might see them tomorrow.
one step at a time, the journey will be completed
well so much for "might see them tomorrow", they landed on friday. i don't believe this $h!t, my local stealership parts counter person said they couldn't find a part number for them :meh:
@cruiseroutfit , hey thanks kurt, boots are on. n your man jason who took the order was patient with an old hard of hearing fawker👍

Thank you!
 
yup, draggin' this out of the morass. floor patching turned out to be more than what i first thought. drivers side needed base of A pillar rebuilt before floor could be patched. passenger side had a void i totally missed when doing the rocker. both rear fenderwells needed lovin' at the front. :meh: all done, bedlinered on the inside. rockerguarded underneath. i've been using DOMINION SURE SEAL products n not being a body man i wouldn't know if it's good bad or ugly. it's laid down very acceptably for me. it's not being built as a pavement princess, just patched up like an old warrior n sent back into the foray😤
was pickin' away at the brakes n i'm eliminating the hard line at the caliper. @g-man , my parts house (car quest) could find nothing with the # you gave me. but no worries bud, the dorman #96940-33005 that was mentioned in another thread discussing this unearthed PRONTO Tech Select #H38162. it fits perfect. also interesting is that it's that same length as the frame to axle flex line on the 60 front axle. the fittings look like they are a match. if i have to repair hard line upstream of the knuckle i'll test it. nope, ain't taking it apart to test:flipoff2:
in other news, my :princess: got me a set of window visors from climair in the uk as per the recommendation of @David*BJ70 . those will get installed after the construction grime gets scrubbed off. with the seats out for floor repair, i quickly tested the fit of the '87 4rnr seats n it looks like a fairly simple swap😎 one thing at a time, it'll get done, is something i gotta keep tellin' myself so i don't get bummed out by it.:hillbilly:
yeah, yeah, wall of text n no pics:flipoff2:
 

Users who are viewing this thread

Back
Top Bottom