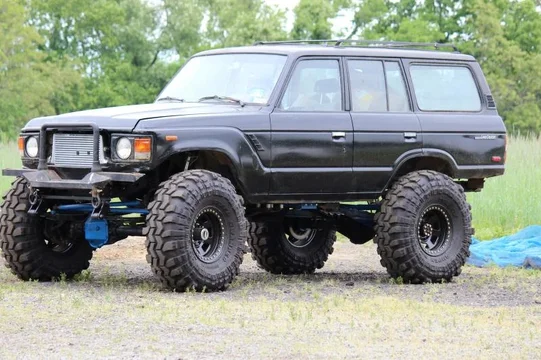
The joy only gets better. Its been raining here for two days and my son's friends like playing in the mud with their chevys and fords. We spent yesterday pulling them out. That's when you will really feel the joy!
Navigation
Install the app
How to install the app on iOS
Follow along with the video below to see how to install our site as a web app on your home screen.
Note: This feature may not be available in some browsers.
More options
Style variation
You are using an out of date browser. It may not display this or other websites correctly.
You should upgrade or use an alternative browser.
You should upgrade or use an alternative browser.
Builds Stevo's 6BT60 Build Thread
- Thread starter StevoJonesFJ60
- Start date
This site may earn a commission from merchant affiliate
links, including eBay, Amazon, Skimlinks, and others.
More options
Who Replied?- Joined
- Nov 22, 2010
- Threads
- 44
- Messages
- 2,144
- Location
- Wilmington, NC
- Website
- www.kindredspiritscsg.com
- Thread starter
- #582
Thanks everyone, its been a long time coming but its nice that the end is in sight now.
Tapage I think you might be right about the rear wheel well trimming. I am going to run it this way with some bumpstops installed to see how it works for the time being, but I will most likely shift that rear axle back a bit and cut out the rear body some.
Well here are some updates and whatnot, I never posted how I managed to get the clutch to work so here is the info.
I installed the new clutch master from a 2000 ford truck, conveniently it bolted right in place of the stock toyota master cylinder. All i needed to do was pull the top stud off of the ford master and drill it out. Once that was done it bolted right in the stock locations, I was even able to reuse the stock nut off of the toyota master because the ford master had metric threaded studs on it. Its not exactly straight up and down, but it still does moves fluid the way its supposed to so I don't care too much.

I also cut and welded the stock toyota pushrod to the one for the ford so I guess it isn't exactly a drop in thing.

After doing this though I realized that I did not get enough adjustment out of the stock pushrod fitting so I took a trip to the machine shop I used to work at and machined a new end piece out of some scrap 7075 aircraft grade aluminum.
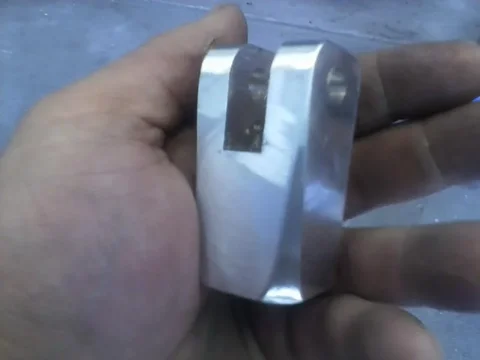
I sure do miss making chips, but its nice that they still let me use the shop when I need to.


Tapage I think you might be right about the rear wheel well trimming. I am going to run it this way with some bumpstops installed to see how it works for the time being, but I will most likely shift that rear axle back a bit and cut out the rear body some.
Well here are some updates and whatnot, I never posted how I managed to get the clutch to work so here is the info.
I installed the new clutch master from a 2000 ford truck, conveniently it bolted right in place of the stock toyota master cylinder. All i needed to do was pull the top stud off of the ford master and drill it out. Once that was done it bolted right in the stock locations, I was even able to reuse the stock nut off of the toyota master because the ford master had metric threaded studs on it. Its not exactly straight up and down, but it still does moves fluid the way its supposed to so I don't care too much.

I also cut and welded the stock toyota pushrod to the one for the ford so I guess it isn't exactly a drop in thing.

After doing this though I realized that I did not get enough adjustment out of the stock pushrod fitting so I took a trip to the machine shop I used to work at and machined a new end piece out of some scrap 7075 aircraft grade aluminum.

I sure do miss making chips, but its nice that they still let me use the shop when I need to.
- Joined
- Nov 22, 2010
- Threads
- 44
- Messages
- 2,144
- Location
- Wilmington, NC
- Website
- www.kindredspiritscsg.com
- Thread starter
- #583
Also tonight I decided to spend a little time in the shop after work.
I welded up the downpipe for my exhaust. I just need to pick up some 4" exhaust pipe and I can convert it from 2.5" ID at the turbo to 4" right after it turns down. Then dump it right out under the passenger door.
And since the welder was getting along pretty nice with me tonight I decided to do the linkages for the transfer case. They turned out pretty good. I had picked up some 1/2" round stock from mcmaster a while back and some 1/2" - 20 threaded rod. I made tabs for the linkages to attach to the transfer case and I have heims on the bottoms of the shifters so I just needed to measure them out and weld on some threaded rod stock.
Here is what I came up with.


Tomorrow after work I will get some paint on them along with the shifter for the transmission and get them fully installed as well as the covers for them.


I welded up the downpipe for my exhaust. I just need to pick up some 4" exhaust pipe and I can convert it from 2.5" ID at the turbo to 4" right after it turns down. Then dump it right out under the passenger door.
And since the welder was getting along pretty nice with me tonight I decided to do the linkages for the transfer case. They turned out pretty good. I had picked up some 1/2" round stock from mcmaster a while back and some 1/2" - 20 threaded rod. I made tabs for the linkages to attach to the transfer case and I have heims on the bottoms of the shifters so I just needed to measure them out and weld on some threaded rod stock.
Here is what I came up with.


Tomorrow after work I will get some paint on them along with the shifter for the transmission and get them fully installed as well as the covers for them.
Stevo are you going to be able to get this thing to GSMTR?
Sent from another Galaxy
Sent from another Galaxy
Stevo, that looks to be the same clutch MC I used. Instead of drilling out the MC to slide over the stud ( probably a better idea than what I did ) I cut / pounded out the stud so that I could use two bolts like was intended for that MC.
Does your slave have a bleeder screw on it? My slave does not and therefore I can't come up with a good bleeding method. What did you do?
What did you mean that you couldn't get enough adjustment out of the stock clevis? What was your symptom and how did that custom clevis fix it?
My master / slave were given to me assembled and somewhat bench bled.
- Joined
- Nov 22, 2010
- Threads
- 44
- Messages
- 2,144
- Location
- Wilmington, NC
- Website
- www.kindredspiritscsg.com
- Thread starter
- #586
Stevo are you going to be able to get this thing to GSMTR?
Sent from another Galaxy
Sam, unfortunately I am not going to be able to get off any time from work. We are slammed with getting jobs completed before the summer heat begins. Hopefully I will be able to make it next year. Are there any other events coming up soon?
Stevo, that looks to be the same clutch MC I used. Instead of drilling out the MC to slide over the stud ( probably a better idea than what I did ) I cut / pounded out the stud so that I could use two bolts like was intended for that MC.
Does your slave have a bleeder screw on it? My slave does not and therefore I can't come up with a good bleeding method. What did you do?
What did you mean that you couldn't get enough adjustment out of the stock clevis? What was your symptom and how did that custom clevis fix it?
My master / slave were given to me assembled and somewhat bench bled.
The slave I got with the transmission has a bleed screw. Sorry I couldn't help with that.
And the slave needed more pedal travel so even maxed out that MC clevis didn't allow for it.
Sam, unfortunately I am not going to be able to get off any time from work. We are slammed with getting jobs completed before the summer heat begins. Hopefully I will be able to make it next year. Are there any other events coming up soon?
There are a few around this time of year. I think you've missed a couple of the bigger ones already though. There is the Southern Cruiser Crawl in October (at Superlift in Arkansas) and the ACC invitational in November at GMP (usually the first weekend in Nov). I would check all the local chapter forums and the TLCA sanctioned forum as well. I'm sure there will be somewhere you can test it out.
I think there was also some talk of a ride out to Hawk Pride or Adventure Offroad Park sometime in the next couple of months. I'll shoot you a PM if I hear anything.
Edit: Those two may be a bit far for you though.
- Joined
- Nov 22, 2010
- Threads
- 44
- Messages
- 2,144
- Location
- Wilmington, NC
- Website
- www.kindredspiritscsg.com
- Thread starter
- #588
Cool keep me posted.
I spent some more time in the shop and made up an exhaust system for the truck.
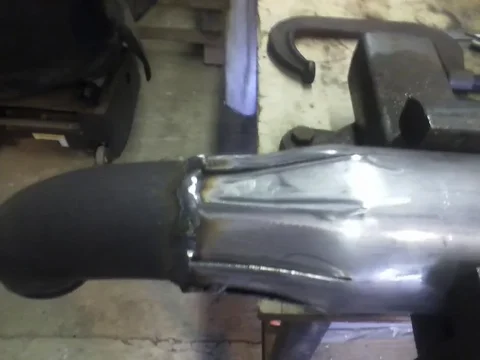
I didn't want to spend a bunch of money on it so I went to a local exhaust shop and bought some 4" pipe and a 90 degree elbow. I was looking to find a adapter to go from 2.5" ID to 4" ID but I could only find them for way too much money so I made my own.
Here is the adapter I made:
Painted up:
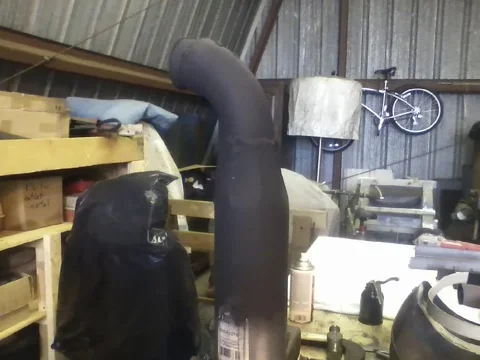
Elbow welded on:


I spent some more time in the shop and made up an exhaust system for the truck.
I didn't want to spend a bunch of money on it so I went to a local exhaust shop and bought some 4" pipe and a 90 degree elbow. I was looking to find a adapter to go from 2.5" ID to 4" ID but I could only find them for way too much money so I made my own.
Here is the adapter I made:

Painted up:

Elbow welded on:

- Joined
- Nov 22, 2010
- Threads
- 44
- Messages
- 2,144
- Location
- Wilmington, NC
- Website
- www.kindredspiritscsg.com
- Thread starter
- #589
I bought some exhaust heat wrap and managed to use up 50' on my 3' downpipe. Should keep the temps down.
Here it is installed:
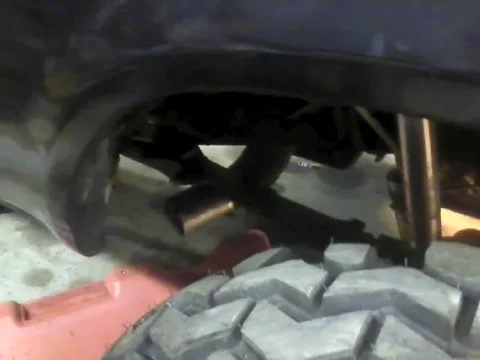
The picture is pretty junky, but it shoots out right under the rear hanger for the front leaf packs, its fairly well protected and shouldn't get smashed up.
I also reinstalled the hood and have to say that having a shock hold it up is pretty great. I used one of the McMaster 120# shocks and it is perfect for supporting the hood on its own.
It opens and closes very easily.

I also have to admit the truck looks a lot better with the hood on for some reason.
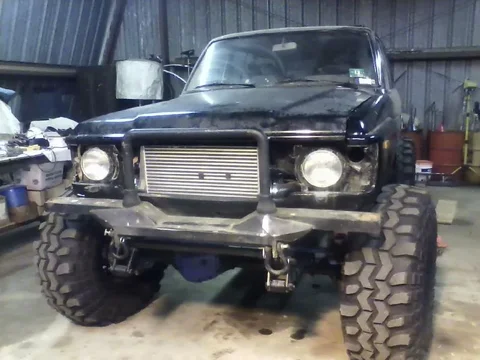


Here it is installed:

The picture is pretty junky, but it shoots out right under the rear hanger for the front leaf packs, its fairly well protected and shouldn't get smashed up.
I also reinstalled the hood and have to say that having a shock hold it up is pretty great. I used one of the McMaster 120# shocks and it is perfect for supporting the hood on its own.
It opens and closes very easily.

I also have to admit the truck looks a lot better with the hood on for some reason.

She's starting to look like a cruiser again!!! Get a grill back on this beast and she's golden 
That exhaust is going to be looooooouuuuuuud. Ask me how I know
That exhaust is going to be looooooouuuuuuud. Ask me how I know

Stevo, we wrapped ours the same way and then painted it with the heat sealing rattle can. Seems to work good. Can't feel anything through the floor but i also added
some peel n seal roofing material on the pan inside. Much much cheaper than the high dollar heat shield stuff!
some peel n seal roofing material on the pan inside. Much much cheaper than the high dollar heat shield stuff!
- Joined
- Nov 22, 2010
- Threads
- 44
- Messages
- 2,144
- Location
- Wilmington, NC
- Website
- www.kindredspiritscsg.com
- Thread starter
- #592
Cool, What heat sealing stuff did you use?
I am not sure what the stuff is really named but I'll find out. We just call it peel-n-seal roofing. It has an aluminum layer and a real sticky asphalt layer that you peel paper off of and apply to the surface. Works great as a sound deadener as well. I actually ended up doing my whole floor in it, and a lot of the inside of the body. Made a huge difference/reduction in all of the noises that I used to hear.

I actually did this before i dropped in my 5.9. It is really comparable to all the sound deadening and heat shield stuff that is out there but is less than 1/10 the cost


I actually did this before i dropped in my 5.9. It is really comparable to all the sound deadening and heat shield stuff that is out there but is less than 1/10 the cost
- Joined
- Nov 22, 2010
- Threads
- 44
- Messages
- 2,144
- Location
- Wilmington, NC
- Website
- www.kindredspiritscsg.com
- Thread starter
- #594
Gauges are in and working, Turns out I have a boost leak in my system which I think is by the intake horn.
I put some RTV on it to make a gasket so hopefully that fixes the problem.
View attachment 760538
Once I got the gauges installed I took it for a couple more test passes down the driveway, and have to say it sounds great. Within the next few days I will get the gopro and get it mounted on the dash for some video of it in action.
Also there is a new edition to the shop that I am pretty stoked about.
View attachment 760539
Its going to be great for getting things fabbed up.
- Joined
- Nov 22, 2010
- Threads
- 44
- Messages
- 2,144
- Location
- Wilmington, NC
- Website
- www.kindredspiritscsg.com
- Thread starter
- #595
also here is a pic of it sitting outside of the shop while the plasmacam is getting installed.
It's a beast
- Joined
- Nov 22, 2010
- Threads
- 44
- Messages
- 2,144
- Location
- Wilmington, NC
- Website
- www.kindredspiritscsg.com
- Thread starter
- #597
It's a beast
Thanks, I have to say my favorite part is those tires. Testing them out is going to be the best part of the build.
That picture is great.
Looks awesome
Looks awesome
- Joined
- Nov 22, 2010
- Threads
- 44
- Messages
- 2,144
- Location
- Wilmington, NC
- Website
- www.kindredspiritscsg.com
- Thread starter
- #599
That picture is great.
Looks awesome
My buddy Keith took that one, he got some other sweet pictures of it in some rye.
I got all of the lugs on it and started testing out what she has, I hit 28 pounds of boost, and I still haven't maxed out the pump and dialed it in.
Here are some more nice shots of her:
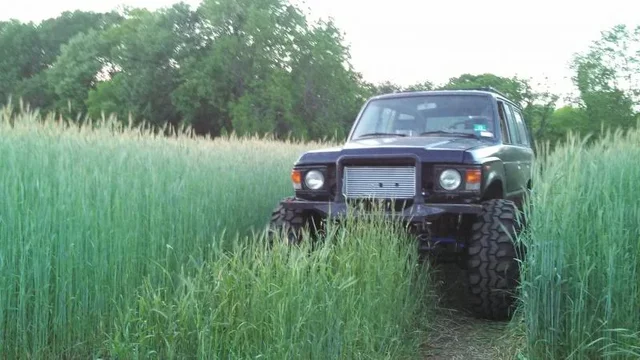
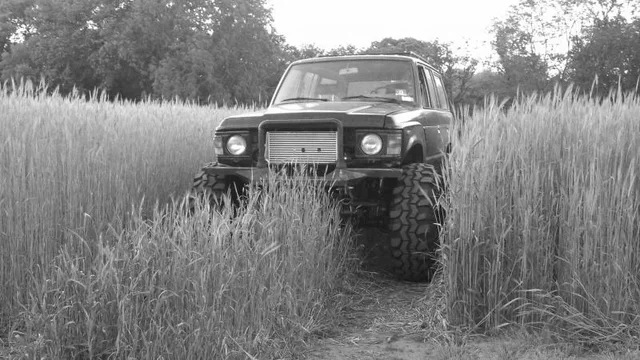

28lbs of boost!
Jebus.
You should paint the intercooler (I think thats what I'm seeing) black.
Jebus.
You should paint the intercooler (I think thats what I'm seeing) black.
Similar threads
Users who are viewing this thread
Total: 1 (members: 0, guests: 1)

