Builds Stevo's 6BT60 Build Thread (1 Viewer)

This site may earn a commission from merchant affiliate
links, including eBay, Amazon, Skimlinks, and others.

I am going to try and run the mechanical fan if it is at all possible. From looking at the placement of rastaforte's 6bt, it looks like I might be able to just get away with it if I cheat my engine back a bit. and put the radiator for the water to air intercooler in front of my radiator behind the grille. I should have more room up there considering I am not going to be running an AC system.

If not I will run an electric fan. I'll know for sure once I start test fitting the engine.
 
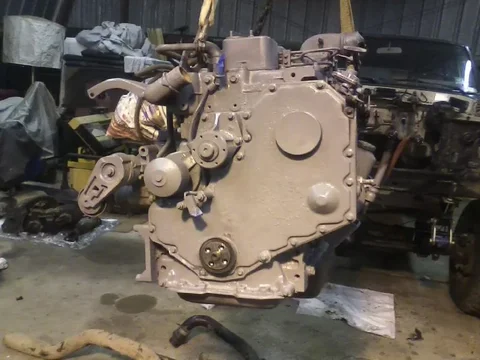
A little more progress, I installed the new aftermarket freeze plug as well as replaced the rear main seal. I will probably do the front main seal while I have the engine out.

Here is what the back of the engine looked like before,

0425121702.jpg

After a little cleanup and some paint.

0425121726.jpg

I also picked up some new filters

0425121746.jpg

Tomorrow I will pull my injection pump apart to replace the leaky throttle shaft seal, and get the engine primed and possibly painted.
0425121702.jpg
0425121726.jpg
0425121746.jpg
 
fyi...if the water sensor widget on the filter gives you some grief,you can run a different fuel filter...fletguard fs-1221 will replace the one you have,and has a more rugged drain,but no sensor port.

the old cummins sensor probes are known to cause intermittant readings,as well as crack and leak when they get older.
Baldwin filter bf1221 is the baldwin cross over for the fleetguard 1221 if you need a filter option

Cool thanks for the tip, I wasn't planning on hooking that sensor up unless I could think of an easy way to do so. Maybe just to a light of something on the dash. It probably would be good to know the condition of the fuel entering the engine.
 
I did a little bit of painting today after I pulled my pump apart and installed some new gaskets.

Here is the motor with some primer on it.

0427122010.jpg

0427122053.jpg

It looks a lot nicer with some paint on it. :D
0427122010.jpg
0427122053.jpg
 
Two coats of Cummins beige.

0427122205.jpg

0427122202.jpg

Tomorrow I will pull the timing cover and do the KDP fix, then hit the cover, the exhaust, the valve covers, and the oil pan with some black paint.
0427122205.jpg
0427122202.jpg
 
Motor work is all finished.

I pulled the front timing cover today to check on the Killer dowel pin issue that affects this motor and fortunately mine was still well recessed. Just to be on the safe side I made up a little tab and installed it. There really is no reason to buy one of the kits they sell for this because all it takes to fix this is a small piece of metal and some threadlocker.

0429121624.jpg

I repainted the timing cover as well as exhaust today.

0429121907.jpg
0429121904.jpg

The valve covers will be painted black as soon as the new valve cover gaskets arrive.
0429121624.jpg
0429121907.jpg
0429121904.jpg
 
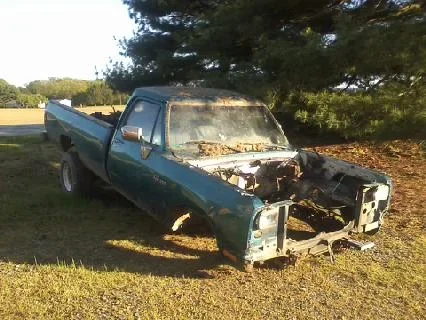
I also worked on pulling some more off of the dodge donor truck. The front axle was removed along with an engine crossmember.
The glow plug solinoids also got pulled and the front leaf packs.

downsized_0429121823.jpg
downsized_0429121909.jpg

Hopefully it won't be too much work to get axle mocked up under the cruiser so I can start test fitting the drivetrain.
downsized_0429121823.jpg
downsized_0429121909.jpg
 
The new air filter came in the mail. hopefully there is enough room for it under the hood.

I will make a custom box to house it and keep it from getting coated with mud.
0430121647.jpg
 
Tou're making some good progress there. I should be getting started on mine soon.

Hey thanks, when you get started on yours you should start a build thread. Its a great way to get answers to questions you may have and get encouragement from other members.
 
I was able to do a little work on the truck tonight. Reinstalled the harmonic balancer along with the fan clutch pulley. I also put the adapter plate, flywheel, clutch, pressure plate and starter back on the engine.

I need to make a plate to lift the trans to mate it to the engine. Hopefully tomorrow I will be able to make it during my lunch break. I am thinking about bolting the plate to where the shift tower bolts in. There are 4 3/8th bolt holes there which should be plenty strong enough to pick the trans up by.
0501122109a.jpg
0501122109.jpg
 
I've been creeping on mud for years getting my dose of toyota smut that I can't seem to do myself but your build has finally got me to register and post because it is that fing sweet! Not to mention that's my dream truck you're building. Thanks for the photos and detail, I've followed every word from way back to the first build. best of luck.
 
I've been creeping on mud for years getting my dose of toyota smut that I can't seem to do myself but your build has finally got me to register and post because it is that fing sweet! Not to mention that's my dream truck you're building. Thanks for the photos and detail, I've followed every word from way back to the first build. best of luck.

Hey thanks a lot and welcome to the forum.

I know how you feel, I used to lurk on here all the time but once you can start posting you can really help yourself get some things accomplished. I wouldn't have attemped anything like what I am doing now without this site.

And you never know what you can do until you try so don't be discouraged from trying things for yourself.
 
So I was expecting a full two day ordeal getting this transmission bolted to the engine but pleasantly after about 30 minutes of work I had this accomplished.

0502121908.jpg
0502121848.jpg

I set the engine down on the wooden chest I had made and supported the sides with some 4x4 blocks of wood under the motor mounts to keep it from tilting.

I then attached a lift plate to the top of the shifter housing of the trans and using the overhead lift positioned the transmission. I had my buddy Keith eyeball it for level and once I got the pilot started a quick twist of the output and it slid right in. I put the bolts in and that was it, the only one I left out was under the clutch slave, I'll get to that before the drivetrain drops in. I also got a call from XDP. Apparently they thought I wanted to pick up the valve cover gaskets from the store nearest me so I had them shipped and they should be here soon. That will be the last of the work needed on the engine.
0502121908.jpg
0502121848.jpg
 
Correct me if I'm wrong, but it looks like a yolk on the rear of that transmission, not an output shaft. How are you going to hook up the transfer?
 
Correct me if I'm wrong, but it looks like a yolk on the rear of that transmission, not an output shaft. How are you going to hook up the transfer?

I'm wondering the same thing.
 
Correct me if I'm wrong, but it looks like a yolk on the rear of that transmission, not an output shaft. How are you going to hook up the transfer?

I'm wondering the same thing.

Well wonder no more.

I thought I mentioned I had a divorced NP205. I will be running that behind the clark transmission with a short intermediate shaft.

As of right now the length of the motor and trans is right around 60 inches which is approximately 10" shorter than the stock drivetrain I pulled. I plan on running a short intermediate shaft of around 4-5" and then the transfer case is 14" long so that puts me at about 9" or so longer than the stock Toyota drivetrain. Which leaves me plenty of room for a rear driveshaft which the stock one I pulled was about 42" long

Divorced means that you can unbolt the transfercase from the transmission without disassembling anything, but what you're talking about is a whole different story. It sounds like you'll have enough room to pull it off, but 6 u-joints to get power to the axles, really? There's got to be a better way to get power to that transfer. Is there some sort of adapter kit you can get for that transmission to make it a spud shaft at least?
 
Divorced means that you can unbolt the transfercase from the transmission without disassembling anything, but what you're talking about is a whole different story. It sounds like you'll have enough room to pull it off, but 6 u-joints to get power to the axles, really? There's got to be a better way to get power to that transfer. Is there some sort of adapter kit you can get for that transmission to make it a spud shaft at least?

"Divorced" means that the transmission and transfercase are seperate. Any time that the trans and T-case are connected they are considered "Married".

I could machine a spud shaft and have a flange mated to the rear of the transmission but the extra amount of work required for that would take a while. It would also cost a lot of money.

People run divorced cases all of the time, and the interdediate shafts never change the angle they operate at so they last a long time.
 

Users who are viewing this thread

Back
Top Bottom