Builds SAS 89 Mini--Triple cased Mashed Potato (1 Viewer)

This site may earn a commission from merchant affiliate
links, including eBay, Amazon, Skimlinks, and others.

Forgot to mention. Got all my shocks gathered up including nuts and bolts, replacement pitman arm and a 5.29 diff. Also picked up the 2.5" square tubing today, $29.82 as promised and ready for pick up in under an hour. If all goes well on Saturday it will be road worthy again. (crossing fingers)
 
Last edited:
Light at the end of the tunnel

I can't tell you how excited I am about the overall outcome of this little project. Honestly, I had hopes for the results but never really thought it would actually come out the way it has.

I'm now full court press to get this thing back on the trails. I took off about noon again today and shot over to "the shop" and met Josh to knock out the final list.

In short order we had the rear shocks mounted, the front hanger finish welded, the steering box mount finish welded and a bunch of other stuff. Then we built the shock tabs and tack welded them to the hoops I'd built last week. Finally, we mounted and tacked on the front shock hoops in all their glory :flipoff2: BLING, actually I think they look pretty good.
P1070229.webp

Once we were happy with the location of the shocks we moved on to fabbing up a bent front shackle. Knocked out 2 of these fairly easily and got 'em all painted and bolted on. TASK DONE!! :bounce:
P1070226small.webp


After talking about how long the rear shocks are in recent posts I never imagined they would be too short. Well... after mounting them up doing some tests I may actually have to return them. I don't know for sure yet but it may require a 36" inch shock for the rear, we'll see :eek:
P1070228.webp

I could move the mounts perhaps but I'm gonna let it play out.
P1070226small.webp
P1070229.webp
P1070228.webp
 
Last edited:
Poser shots

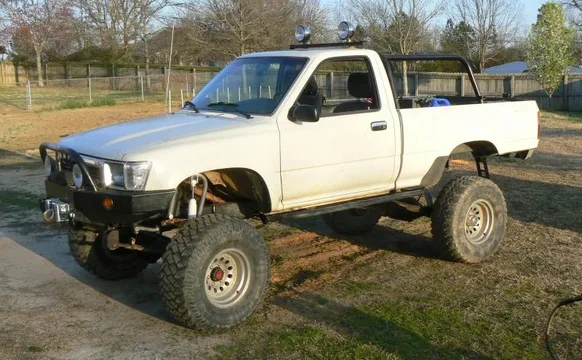
Here's the stance with the the 33s. I need some new tires in a bad way.
P1070233.webp

Can you say AXLE, wooohoooo :cheers:
P1070237.webp

No BOB yet and the bumper is still not on but we're closing in on it.
P1070238.webp

Next Up--Square Drive Shaft
P1070237.webp
P1070238.webp
P1070233.webp
 
Last edited:
Damm That Yard Looks Familiar!!!:cheers::cheers::cheers:
 
:eek: And I thought Farr Offroad was the king of extended shackles :hillbilly: Are those over a foot tall?You need to link the rear, those shackles are :rolleyes: I think you're up high enough you won't need to bob the bed. Still shopping around for beadlocks? Lookin :hillbilly: dude! ;p
 
:eek: And I thought Farr Offroad was the king of extended shackles :hillbilly: Are those over a foot tall?You need to link the rear, those shackles are :rolleyes: I think you're up high enough you won't need to bob the bed. Still shopping around for beadlocks? Lookin :hillbilly: dude! ;p

Haha, yea they're long but not that long, 8.25" eye to eye I think. Also, I will guage the height once the new tires are installed but yes, it may be a touch too high.

Update:

Got the truck back in once piece yesterday including the driveshaft construction, took a few progress pics but did not get one of the finished product, dang-it. Anyway, short version is the drive shaft is built, I included one Zerk fitting for grease and then put it all together.

Obviously you'd like to get everything as true and balanced as possible but I could not find any good description/method of ensuring this. So I measured, eyeballed and remeasured everything as best I could and then tack welded it together
SAS 043.webp
SAS 047.webp

John suggested capping the end of the inner shaft to keep grease from building up inside, this would also force the grease to the outer walls of the inner shaft which is where it should be anyway.
SAS 050.webp

I'll post up some pics of the finished product later but it came out just the way I'd hoped.

After I got it installed it was time for the maiden voyage. We went down an undeveloped neighborhood street within a stone's throw. Everything was great until we hit 35mph, then the death wobble hit. This was not entirely unexpected as the pinion angle is out of whack. This is common with SAS projects and is most likely a caster angle and alignment issue. I took some angle measurements of the driveshaft, output flange and current caster angle and will most likely shim it to get it drivable. A little more reading a research will also help.
SAS 043.webp
SAS 050.webp
SAS 047.webp
 
Death Wobble is almost always cased by worn out steering components. Check all of your ends, knuckle studs / preload, and Steering Box. Your caster should be between 1* (stock) and 5* which is where I set SOA rigs at. However, If you didnt "cut and turn" you may have issues with the pinion pointing at the ground (or at least not at the t-case) once you get the caster correct.

My steering box is sloppy, so that is what is causing my wobble. Also Ram Assist almost always completely cures the wobble or at least dampens it enough that it isn't an issue, which is next on my to do list after my Orion.

checked the steering parts and everything seems tight and in good condition. The drag link ends are all brand new so shouldn't be an issue there. I am reusing the tie rod and existing ends but I really don't believe that is the issue.

Caster--Ding Dong!! I think you hit the nail on the head. I'm all new to measuring and correcting this so please bare with me. I read some last night but it was late, so I went back and reread it all this afternoon after taking some measurements.

Here's what I think I know. took a few angles using an angle finder placed on top of the steering arm (controversial idea pulled from Pirate). Assuming the top of the steering arm is parallel to the top of king pin hole I'm about 8.5-9* positive caster, in other words way too much. I've read Toyota specs are somewhere around 1.5* - 2.5* but you're experience says 5* is good which I trust.

Using the Toy specs I'm 6.5-7.5* too much positive and using your 5* setup I'm 3.5-4* too much positive caster. If correct, I should start with a 4* shim and go from there.

Once i have the above close to riding good then I'll add the stabilizer but would much prefer to fix the problem before putting a band aid on it.

Please correct If I missed something. Thx
 
Last edited:
Looking good Ted. Got a new axle. Hopefully can make it on a trip soon.

cool, let's hear the rest of the story. Did you end up finding one in a salvage yard or have to buy a new one?
 
I had a 5:30 appointment off Glenridge Rd tonight so on the way I swung by and picked up a solution to my death wobble...hopefully! I also picked up a steering stabilizer so I can iron this out. Frankly, If the truck were in my driveway I'd be under it right now! :flipoff2:
6 deg spacers 001.webp

2 6* axle shims. I called on my way down to ensure they were in stock which they were. I asked and was told they were steel shims, which, they turned out not to be. For $10 I'm not gonna gripe about it though.
6 deg spacers 001.webp
 
Last edited:
Don't forget that you may have to lengthen your centering pin to compensate for the thickness of the shim. If not, catastrophe could follow.
:beer:
 
Don't forget that you may have to lengthen your centering pin to compensate for the thickness of the shim. If not, catastrophe could follow.
:beer:

Good reminder, Thanks! It would not be good to have catastrophe. If I recall the centering pins I bought were something like 3.5"-4" long. I guess I'll find out when I go to install.
 
Is that cast alum? Make sure you trim to fit on the spring perch w/ no cantilever either sides. If I were subjected to leaf springs, I would have bought steel shims for sure. I had a pair of those crack on me at GSMTR one year :mad:
 
Is that cast alum? Make sure you trim to fit on the spring perch w/ no cantilever either sides. If I were subjected to leaf springs, I would have bought steel shims for sure. I had a pair of those crack on me at GSMTR one year :mad:

Speaking of GSMTR, you going?

I've read about them cracking as well. Had not heard of trimming the overhang but will do. Is the cracking caused by the cantilever or the material or both?

When I called I asked if they were steel I was promptly told they were. As you can see they are not steel (bummer), but since I've not dialed in the caster I'll install these to ensure I have the right shim and then replace with steel.
 
I had a pair of bronze shims for a long time, worked great.

The 6 degree aluminum shims I installed lasted a couple years.


Once you're tired of messing around and still have death wobble, install hydro assist. :D
 
Once upon a time a crushed a set of aluminum shims and I spit out a steel shim so now the only way I install shims is to actually bolt them to the spring pack w/ the center pin.

Hydro Assist is next on my list, I may even order parts today.
 

Users who are viewing this thread

Back
Top Bottom