
i doubt it’s for another vehicle as the diffs won’t fit a 40 axle and it’d have to be the whole u-joint welded to the driveshaft as the u-joints are different sizes too so you can’t “mix and match” the flange through true ujoint itself. i’ve just gone through all this fun too including the new diff i just got as it has the fine spline pattern with adds a whole bag of worms being there are no OEM fine spline flanges that i know of that have the pre 78 drive shaft pattern. hence @cruiseroutfit to the rescue with their multi pattern flanges!!
Navigation
Install the app
How to install the app on iOS
Follow along with the video below to see how to install our site as a web app on your home screen.
Note: This feature may not be available in some browsers.
More options
Style variation
You are using an out of date browser. It may not display this or other websites correctly.
You should upgrade or use an alternative browser.
You should upgrade or use an alternative browser.
Build Rescuing a Basket Case '72 FJ40
- Thread starter diesellibrarian
- Start date
Member Builds and Stories
This site may earn a commission from merchant affiliate
links, including eBay, Amazon, Skimlinks, and others.
Never underestimate the creative Jerry rigging of previous owners - there is a reason it didn't come with a front drive shaft.
- Thread starter
- #303
Other stuff I’ve been working on:
New water pump is in. This is a Gates pump, and it seems to be decent quality. Thanks to this forum, I knew to pull the backing plate off and seal with FIPG before installing.


And fully installed, along with tested thermostat, housing, and gaskets.

Also installed these $10 swap meet bushings. This job went surprisingly smoothly, all things considered.

New bushings in place:


Also, I painted my side step to match the body colour, and then went back over it with some Scotchbrite to bring back some character:


Also acquired a passenger side step that will need a bit of tidying up:

New water pump is in. This is a Gates pump, and it seems to be decent quality. Thanks to this forum, I knew to pull the backing plate off and seal with FIPG before installing.
And fully installed, along with tested thermostat, housing, and gaskets.
Also installed these $10 swap meet bushings. This job went surprisingly smoothly, all things considered.
New bushings in place:
Also, I painted my side step to match the body colour, and then went back over it with some Scotchbrite to bring back some character:
Also acquired a passenger side step that will need a bit of tidying up:
- Thread starter
- #304
It’s so true. The t-case flange, drive shaft, and diff are all from different vehicles - and the driveshaft itself may be a Mongrel as well.Never underestimate the creative Jerry rigging of previous owners - there is a reason it didn't come with a front drive shaft.
guilty as chargedNever underestimate the creative Jerry rigging of previous owners - there is a reason it didn't come with a front drive shaft.

- Thread starter
- #306
Well, I think I have figured out my driveshaft issue. After much googling and whatnot, I have determined that the culprit is a non-Toyota flange and u-joint that someone welded onto the Toyota driveshaft tube. Despite many searches, I haven't been able to determine the type/brand of the flange/u-joint. It's an outer lock type that has a capital "T" in a small circle that is cast into both the flange and u-joint bearing caps. Maybe it's a really old brand that doesn't exist anymore, but ultimately it doesn't matter because it's going to go bye-bye. So I guess I'll be heading back to the boneyard to see if they have a driveshaft for me. So glad I wasted $100 on this useless piece of junk. Caveat emptor, I guess. Some lessons are more expensive than others. 
Anyway. Over the past couple of nights I've been working on building a fan shroud. Is it a masterpiece of engineering and welding? No. It is not. Is it made from scrap steel that I salvaged from my old furnace that I had to replace last year? Yes. Yes it is. So basically I have zero dollars into this thing, which helps make up for the $100 that I flushed down the toilet on the driveshaft fiasco.

To build this, I made a simple template out of cardboard. I cut a piece of cardboard to roughly the size of the radiator (including mounting flange), and held it in place with tape while I marked the outer radius of the fan. I also pushed the cardboard against the rad mounting bolt heads to mark the location of the mounting holes. I cut the template to shape and transferred it to a sheet of pretty thin galvanized furnace steel (don't worry - I removed the galvanization before welding!). I then calculated the length of steel I'd need for the "tunnel" or whatever it's called. Grade 10 math came in handy here: 2πR to determine the circumference. The metal I had on hand wasn't quite long enough, but close. The gap at the bottom will be closed by a removable "bridge" that I will screw in place. I searched the shop for something roughly 18" in diameter to bend the tunnel around, finally settling on my buddy's drain pan. I bent the strip of steel around the pan, then tacked it in place before fully welding the entire circumference. I then drilled the mounting holes and cut into them from the edge with a grinder, so that I can remove and reinstall without completely removing the rad mounting bolts.
Here's the final test fit before painting. I did give it a coat of Rustoleum last night, so next time I'm in the shop I'll be installing it for reals.

So yeah, it's not pretty, but I think it'll work fine.
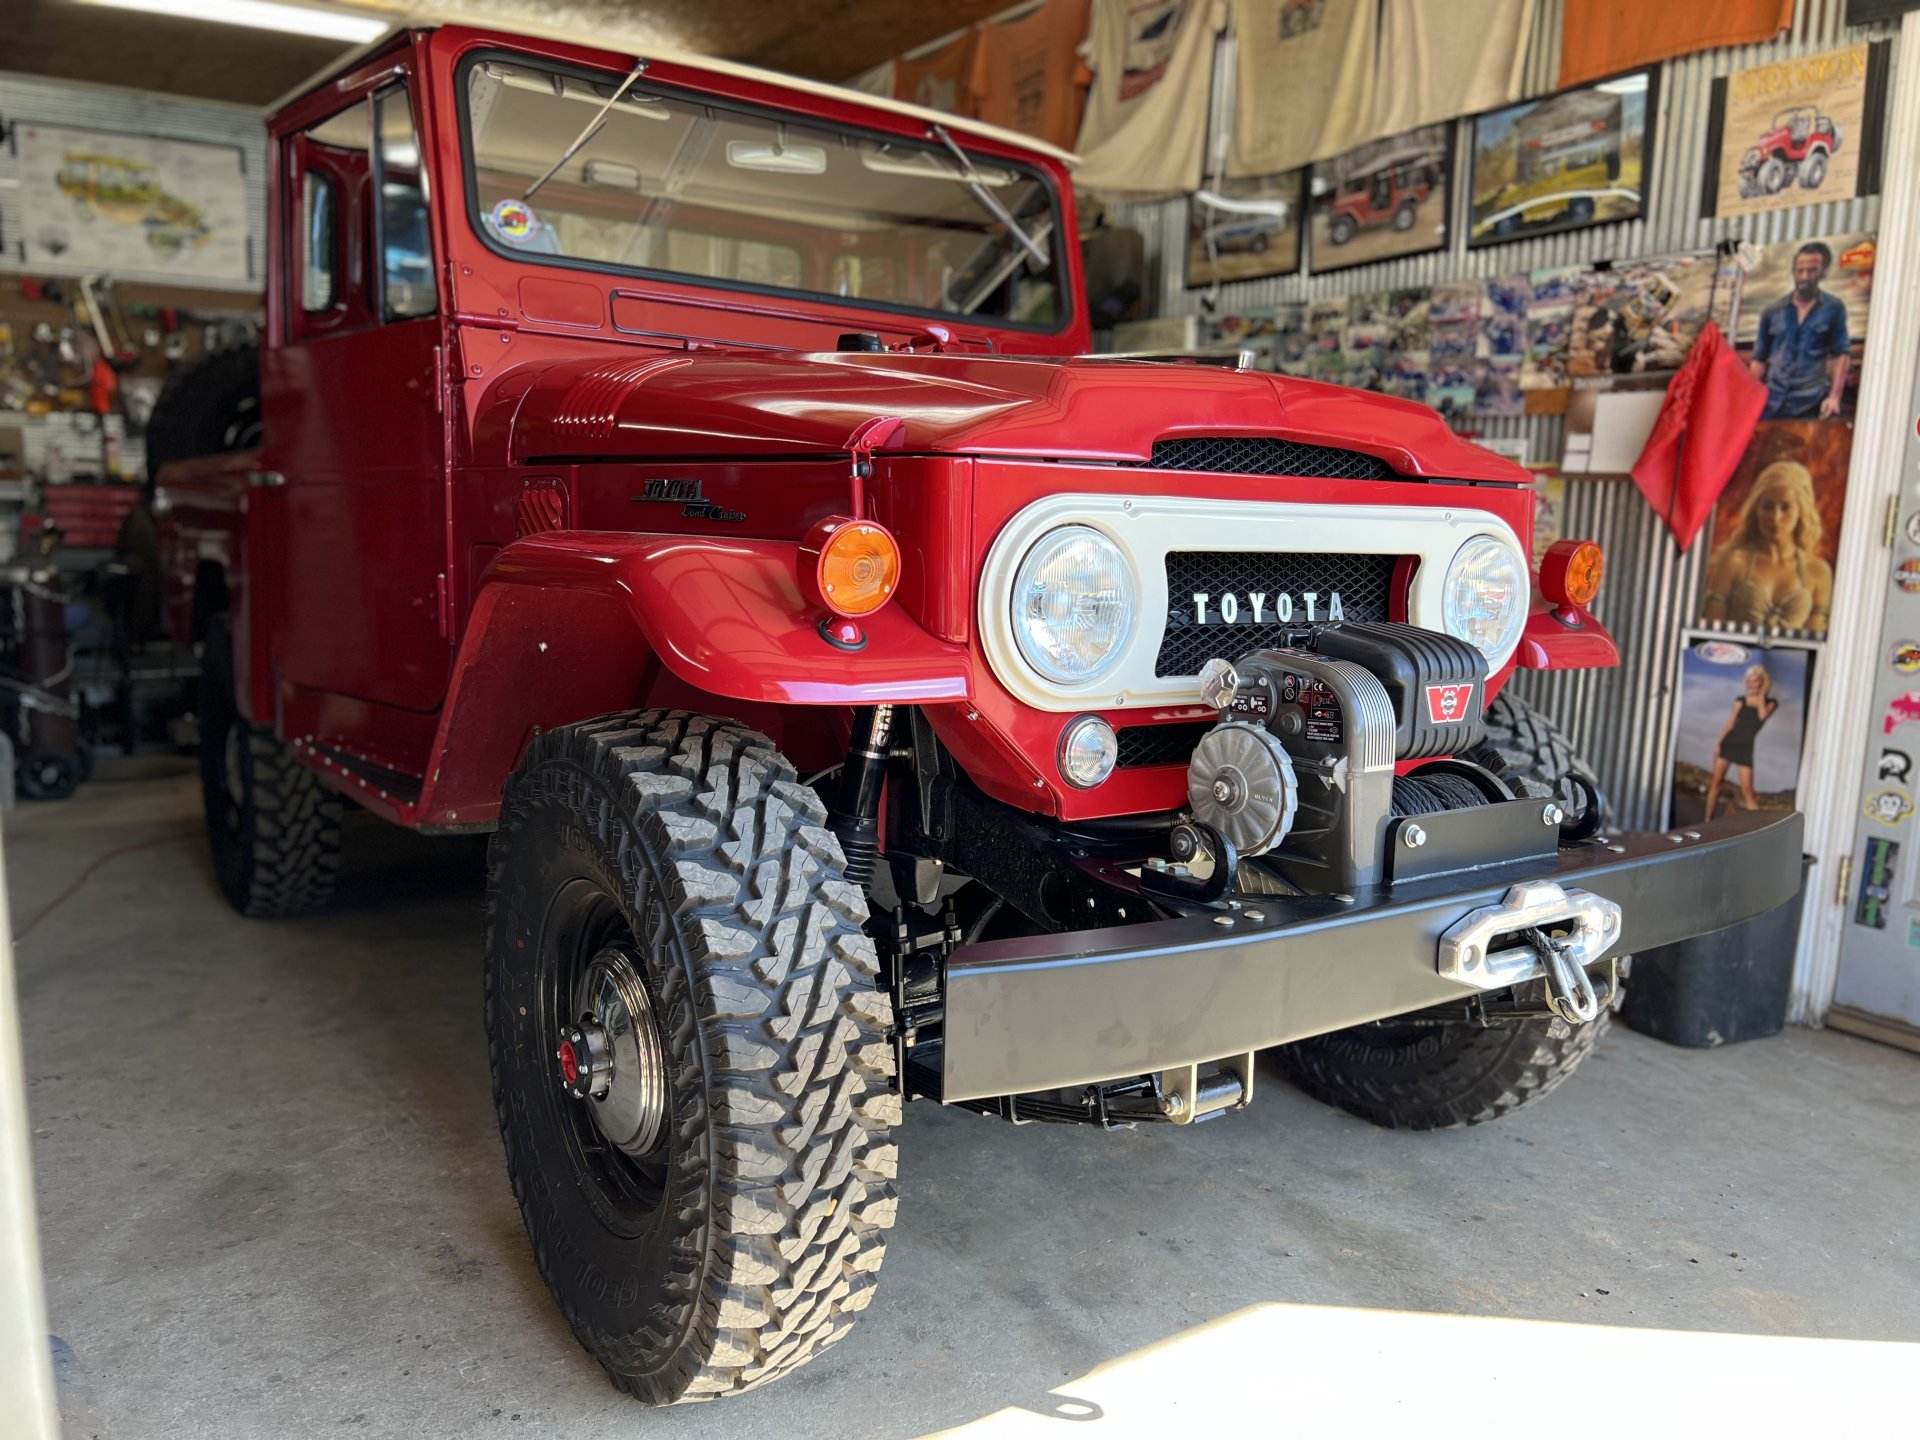
I also brought over my winch, which I plan to install on the 40. I'm starting to think about bumper plans, and I want to incorporate a winch mount into my design. The winch is an old Warn 5687, which should be about period correct for an early 70s Land Cruiser. I've tested it, and it works well. Looks to be in pretty good shape, too. I have the cab controls and cables, too, that I'll be installing at some point.

That's the update for this week! Stay warm out there!
Anyway. Over the past couple of nights I've been working on building a fan shroud. Is it a masterpiece of engineering and welding? No. It is not. Is it made from scrap steel that I salvaged from my old furnace that I had to replace last year? Yes. Yes it is. So basically I have zero dollars into this thing, which helps make up for the $100 that I flushed down the toilet on the driveshaft fiasco.
To build this, I made a simple template out of cardboard. I cut a piece of cardboard to roughly the size of the radiator (including mounting flange), and held it in place with tape while I marked the outer radius of the fan. I also pushed the cardboard against the rad mounting bolt heads to mark the location of the mounting holes. I cut the template to shape and transferred it to a sheet of pretty thin galvanized furnace steel (don't worry - I removed the galvanization before welding!). I then calculated the length of steel I'd need for the "tunnel" or whatever it's called. Grade 10 math came in handy here: 2πR to determine the circumference. The metal I had on hand wasn't quite long enough, but close. The gap at the bottom will be closed by a removable "bridge" that I will screw in place. I searched the shop for something roughly 18" in diameter to bend the tunnel around, finally settling on my buddy's drain pan. I bent the strip of steel around the pan, then tacked it in place before fully welding the entire circumference. I then drilled the mounting holes and cut into them from the edge with a grinder, so that I can remove and reinstall without completely removing the rad mounting bolts.
Here's the final test fit before painting. I did give it a coat of Rustoleum last night, so next time I'm in the shop I'll be installing it for reals.
So yeah, it's not pretty, but I think it'll work fine.
I also brought over my winch, which I plan to install on the 40. I'm starting to think about bumper plans, and I want to incorporate a winch mount into my design. The winch is an old Warn 5687, which should be about period correct for an early 70s Land Cruiser. I've tested it, and it works well. Looks to be in pretty good shape, too. I have the cab controls and cables, too, that I'll be installing at some point.
That's the update for this week! Stay warm out there!
FloridaLife
SILVER Star
Well, I think I have figured out my driveshaft issue. After much googling and whatnot, I have determined that the culprit is a non-Toyota flange and u-joint that someone welded onto the Toyota driveshaft tube. Despite many searches, I haven't been able to determine the type/brand of the flange/u-joint. It's an outer lock type that has a capital "T" in a small circle that is cast into both the flange and u-joint bearing caps. Maybe it's a really old brand that doesn't exist anymore, but ultimately it doesn't matter because it's going to go bye-bye. So I guess I'll be heading back to the boneyard to see if they have a driveshaft for me. So glad I wasted $100 on this useless piece of junk. Caveat emptor, I guess. Some lessons are more expensive than others.
Anyway. Over the past couple of nights I've been working on building a fan shroud. Is it a masterpiece of engineering and welding? No. It is not. Is it made from scrap steel that I salvaged from my old furnace that I had to replace last year? Yes. Yes it is. So basically I have zero dollars into this thing, which helps make up for the $100 that I flushed down the toilet on the driveshaft fiasco.
View attachment 3817676
To build this, I made a simple template out of cardboard. I cut a piece of cardboard to roughly the size of the radiator (including mounting flange), and held it in place with tape while I marked the outer radius of the fan. I also pushed the cardboard against the rad mounting bolt heads to mark the location of the mounting holes. I cut the template to shape and transferred it to a sheet of pretty thin galvanized furnace steel (don't worry - I removed the galvanization before welding!). I then calculated the length of steel I'd need for the "tunnel" or whatever it's called. Grade 10 math came in handy here: 2πR to determine the circumference. The metal I had on hand wasn't quite long enough, but close. The gap at the bottom will be closed by a removable "bridge" that I will screw in place. I searched the shop for something roughly 18" in diameter to bend the tunnel around, finally settling on my buddy's drain pan. I bent the strip of steel around the pan, then tacked it in place before fully welding the entire circumference. I then drilled the mounting holes and cut into them from the edge with a grinder, so that I can remove and reinstall without completely removing the rad mounting bolts.
Here's the final test fit before painting. I did give it a coat of Rustoleum last night, so next time I'm in the shop I'll be installing it for reals.
View attachment 3817682
So yeah, it's not pretty, but I think it'll work fine.
I also brought over my winch, which I plan to install on the 40. I'm starting to think about bumper plans, and I want to incorporate a winch mount into my design. The winch is an old Warn 5687, which should be about period correct for an early 70s Land Cruiser. I've tested it, and it works well. Looks to be in pretty good shape, too. I have the cab controls and cables, too, that I'll be installing at some point.
View attachment 3817694
That's the update for this week! Stay warm out there!
Looks like a great job to me. I really like the way you thought ahead and made the fan shroud so that it can be removed without having to remove the bolts.
I wish I had a crystal ball and could have seen that you might need them, because a couple of months ago I had a bunch of stuff hauled off for scrap, including the driveshafts for an FJ40 3 speed. I had everything posted here on iH8MUD for a while but nobody wanted them.
For your bumper, if you are interested here is a link to a thread where someone is making some that look pretty factory but made for a winch. Very nice. In fact I, if I had not already bought myself a CCOT HFS bumper I probably would have bought one of these:
40 SERIES FRONT BUMPER
We have a few 40 series front bumpers for sale. These were designed to emulate the original OEM bumpers with a provision to hold a M8274 Warn winch and synthetic fairlead. Made here in America with domestic 1/4'' and 1/2'' cold rolled steel. Black or Vegas Gold (pewter) powder coat. Please email...
 forum.ih8mud.com
- Thread starter
- #308
Wow, yeah that's a great-looking bumper. I think I'm going to try to make my own but something along those lines is what I'd envisioned for sure.Looks like a great job to me. I really like the way you thought ahead and made the fan shroud so that it can be removed without having to remove the bolts.
I wish I had a crystal ball and could have seen that you might need them, because a couple of months ago I had a bunch of stuff hauled off for scrap, including the driveshafts for an FJ40 3 speed. I had everything posted here on iH8MUD for a while but nobody wanted them.
For your bumper, if you are interested here is a link to a thread where someone is making some that look pretty factory but made for a winch. Very nice. In fact I, if I had not already bought myself a CCOT HFS bumper I probably would have bought one of these:
40 SERIES FRONT BUMPER
We have a few 40 series front bumpers for sale. These were designed to emulate the original OEM bumpers with a provision to hold a M8274 Warn winch and synthetic fairlead. Made here in America with domestic 1/4'' and 1/2'' cold rolled steel. Black or Vegas Gold (pewter) powder coat. Please email...
Appreciate the thought re: the driveshafts. Since I have a later diff and later t-case output flange, I'll be looking for a 4-speed driveshaft.
Finally, I can't claim to have invented the shroud mounting idea. I tried to buy a stock shroud off the guy that owns the scrapyard where I've been getting my used parts, but apparently he "needs it" for his "FJ40 build." But I did take a good look at it before returning it to the yard, where I'm sure it will sit for years and years.
Last edited:
RevISK
SILVER Star
Those OP Machine bumpers are boss for sure.Looks like a great job to me. I really like the way you thought ahead and made the fan shroud so that it can be removed without having to remove the bolts.
I wish I had a crystal ball and could have seen that you might need them, because a couple of months ago I had a bunch of stuff hauled off for scrap, including the driveshafts for an FJ40 3 speed. I had everything posted here on iH8MUD for a while but nobody wanted them.
For your bumper, if you are interested here is a link to a thread where someone is making some that look pretty factory but made for a winch. Very nice. In fact I, if I had not already bought myself a CCOT HFS bumper I probably would have bought one of these:
40 SERIES FRONT BUMPER
We have a few 40 series front bumpers for sale. These were designed to emulate the original OEM bumpers with a provision to hold a M8274 Warn winch and synthetic fairlead. Made here in America with domestic 1/4'' and 1/2'' cold rolled steel. Black or Vegas Gold (pewter) powder coat. Please email...
- Thread starter
- #310
Minor update:
Cobbled-together fan shroud is painted and installed. In this pic you can see the piece I added to bridge the bottom of the fan tunnel.

And here it is on the 40. Also installed the upper rad hose. I think the cooling system is all buttoned up, though I haven't been able to keep the drain petcock from leaking. It was fully clogged with rust, but now that I've cleaned it up, it no longer seals properly. I'll take a closer look at it tonight. It might just be that both the male and female threads need cleaning.

Items I'll be working on over the next bit:
- rear suspension bushings (on order)
- one final patch to burn in
- steering box overhaul
- figuring out what I'm going to do for seats
- painting and undercoating the tub
Cobbled-together fan shroud is painted and installed. In this pic you can see the piece I added to bridge the bottom of the fan tunnel.
And here it is on the 40. Also installed the upper rad hose. I think the cooling system is all buttoned up, though I haven't been able to keep the drain petcock from leaking. It was fully clogged with rust, but now that I've cleaned it up, it no longer seals properly. I'll take a closer look at it tonight. It might just be that both the male and female threads need cleaning.
Items I'll be working on over the next bit:
- rear suspension bushings (on order)
- one final patch to burn in
- steering box overhaul
- figuring out what I'm going to do for seats
- painting and undercoating the tub
MatthewMcD
SILVER Star
On my drain it didn’t leak until I opened it. Lots of rust came out and it wouldn’t seal with extreme torque. I pulled it apart again and “honed” the female side of the plug then used a drill to chuck the plug and do the same on the male side. I reassembled it and the plug doesn’t leak. But now it leaks from the radiator threads. So no good repair goes unpunished.Minor update:
Cobbled-together fan shroud is painted and installed. In this pic you can see the piece I added to bridge the bottom of the fan tunnel.
View attachment 3820214
And here it is on the 40. Also installed the upper rad hose. I think the cooling system is all buttoned up, though I haven't been able to keep the drain petcock from leaking. It was fully clogged with rust, but now that I've cleaned it up, it no longer seals properly. I'll take a closer look at it tonight. It might just be that both the male and female threads need cleaning.
View attachment 3820216
Items I'll be working on over the next bit:
- rear suspension bushings (on order)
- one final patch to burn in
- steering box overhaul
- figuring out what I'm going to do for seats
- painting and undercoating the tub
I’ll be replacing the whole drain assembly soon.
- Thread starter
- #312
Finally restoring some symmetry to the truck with the addition of a passenger side step. This one was pretty rough, but free. Well, free in terms of dollars, but it did cost me a good chunk of knuckle skin busting it off of the donor vehicle. Every single mounting bolt was seized, so I had to break them all off. Luckily it was freezing outside and my hands were too cold to feel the pain. Anyway, here's the test fit. Had to do a bit of dent removal at the bottom of the fender to get it to fit.

After a little clean-up, some red oxide primer, paint, and then judicious patina blending with a scotchbrite pad:

It's just crappy enough to fit in perfectly with the rest of the truck.
Also finished up the front suspension refresh by replacing the spring pin bushings. The temptation with these bushings is to leave them be. It's an "out of sight, out of mind" thing. But in the end I talked myself into doing the job, and it was definitely needed. The pins were fine, but the bushings were toast.


The worst part of the job is getting the pin to line up with the mounting holes. The best tool I found for the job is the hubcap removal tool from the Toyota toolkit. It gives just enough leverage to twist/maneuver the spring into alignment so that the pin can be slid home. From there, it's smooth sailing.
Will be repeating this whole process on the rear springs, once my Energy poly bushings arrive, hopefully in the next day or two.
After a little clean-up, some red oxide primer, paint, and then judicious patina blending with a scotchbrite pad:
It's just crappy enough to fit in perfectly with the rest of the truck.
Also finished up the front suspension refresh by replacing the spring pin bushings. The temptation with these bushings is to leave them be. It's an "out of sight, out of mind" thing. But in the end I talked myself into doing the job, and it was definitely needed. The pins were fine, but the bushings were toast.
The worst part of the job is getting the pin to line up with the mounting holes. The best tool I found for the job is the hubcap removal tool from the Toyota toolkit. It gives just enough leverage to twist/maneuver the spring into alignment so that the pin can be slid home. From there, it's smooth sailing.
Will be repeating this whole process on the rear springs, once my Energy poly bushings arrive, hopefully in the next day or two.
I use a second bottle jack and a ratchet strap to manipulate the spring around. You can bottle jack upside down, bracing against the frame to push the leaf spring out and more flat, you can brace against the frame and push against the clips that hold the pack together, you can ratchet strap around the eye and tight against something towards the middle of the truck, etc. Using a tool to lever things around never worked that well for me.Finally restoring some symmetry to the truck with the addition of a passenger side step. This one was pretty rough, but free. Well, free in terms of dollars, but it did cost me a good chunk of knuckle skin busting it off of the donor vehicle. Every single mounting bolt was seized, so I had to break them all off. Luckily it was freezing outside and my hands were too cold to feel the pain. Anyway, here's the test fit. Had to do a bit of dent removal at the bottom of the fender to get it to fit.
View attachment 3821034
After a little clean-up, some red oxide primer, paint, and then judicious patina blending with a scotchbrite pad:
View attachment 3821036
It's just crappy enough to fit in perfectly with the rest of the truck.
Also finished up the front suspension refresh by replacing the spring pin bushings. The temptation with these bushings is to leave them be. It's an "out of sight, out of mind" thing. But in the end I talked myself into doing the job, and it was definitely needed. The pins were fine, but the bushings were toast.
View attachment 3821046
View attachment 3821047
View attachment 3821049
The worst part of the job is getting the pin to line up with the mounting holes. The best tool I found for the job is the hubcap removal tool from the Toyota toolkit. It gives just enough leverage to twist/maneuver the spring into alignment so that the pin can be slid home. From there, it's smooth sailing.
Will be repeating this whole process on the rear springs, once my Energy poly bushings arrive, hopefully in the next day or two.
Anyway, I bet that thing is going to ride great with the new bushings - not that you have any comparison from driving it around on the old bushings.
- Thread starter
- #314
I use a second bottle jack and a ratchet strap to manipulate the spring around. You can bottle jack upside down, bracing against the frame to push the leaf spring out and more flat, you can brace against the frame and push against the clips that hold the pack together, you can ratchet strap around the eye and tight against something towards the middle of the truck, etc. Using a tool to lever things around never worked that well for me.
Anyway, I bet that thing is going to ride great with the new bushings - not that you have any comparison from driving it around on the old bushings.
That's a lot of engineering, haha! I found that a single bottle jack under the spring plate worked pretty well to flatten the spring out. I actually lifted the frame off the jack stand, so the spring was about as flat as it would be if the truck was sitting on its tires. That put me in the ballpark, and a bit of levering was all it needed. I suppose a lot would depend on the condition and arch of the springs. I think these are the original springs, so probably pretty clapped out by now. A new set of OMEs or what have you likely would have put up more of a fight?
More arch seems more difficult to work with in my limited (four leaf spring jobs) experience. The important part is that you got it done!That's a lot of engineering, haha! I found that a single bottle jack under the spring plate worked pretty well to flatten the spring out. I actually lifted the frame off the jack stand, so the spring was about as flat as it would be if the truck was sitting on its tires. That put me in the ballpark, and a bit of levering was all it needed. I suppose a lot would depend on the condition and arch of the springs. I think these are the original springs, so probably pretty clapped out by now. A new set of OMEs or what have you likely would have put up more of a fight?
FloridaLife
SILVER Star
On mine, a previous owner welded the steps / running boards in place.
While everything is taken apart for painting I decided that would be the best time to replace all the body mounts. I also decided to replace all the spring bushings, but instead of going with the poly ones that can be a little more noisy, I decided to go with the self lubricating ones from CCOT: Bushings - Graphite / Rubber - 24ea - 40 Series -'58-7/80 - CCOT - https://www.coolcruisers.com/bugrpo24.html
While everything is taken apart for painting I decided that would be the best time to replace all the body mounts. I also decided to replace all the spring bushings, but instead of going with the poly ones that can be a little more noisy, I decided to go with the self lubricating ones from CCOT: Bushings - Graphite / Rubber - 24ea - 40 Series -'58-7/80 - CCOT - https://www.coolcruisers.com/bugrpo24.html
The bushings in the spring eye look overly compressed. It may get torn up pretty quickly. Maybe the shoulders on the new bushings are wider? Not sure if you are running stock springs. Some aftermarket springs are not factory width.Other stuff I’ve been working on:
- Thread starter
- #318
Pretty sure everything is original to the truck, but who knows? Maybe I'll back the bottom nut off a little, see if that reduces the squish-out.The bushings in the spring eye look overly compressed. It may get torn up pretty quickly. Maybe the shoulders on the new bushings are wider? Not sure if you are running stock springs. Some aftermarket springs are not factory width.
- Thread starter
- #319
Rear suspension is now sorted, minus the spring pin bushings. I struggled for an hour to remove the driver's side spring pin, and it would not budge. So I think i'll have to burn them out at some point - but that's a job for warmer weather so that I can move the truck out of my buddy's garage. Luckily the shackle bushing replacement went okay. The shackles were metal-on-metal in a couple of spots, so definitely long overdue.

And here are the new Energy poly bushings installed. So much better!

Weekend plans include pulling the steering box to see if I can take some of the slack out of it. Also hoping to head to the junk yard to see if I can find a front driveshaft that will work!
And here are the new Energy poly bushings installed. So much better!
Weekend plans include pulling the steering box to see if I can take some of the slack out of it. Also hoping to head to the junk yard to see if I can find a front driveshaft that will work!
Last edited:
FloridaLife
SILVER Star
Rear suspension is now sorted, minus the spring pin bushings. I struggled for an hour to remove the driver's side spring pin, and it would not budge. So I think i'll have to burn them out at some point - but that's a job for warmer weather so that I can move the truck out of my buddy's garage. Luckily the shackle bushing replacement went okay. The shackles were metal-on-metal in a couple of spots, so definitely long overdue.
View attachment 3822714
And here are the new Energy poly bushings installed. So much better!
View attachment 3822715
Weekend plans include pulling the steering box to see if I can take some of the slack out of it. Also hoping to head to the junk yard to see if I can find a front driveshaft that will work!
Refresh my memory... is this a 3 speed or a 4 speed? "IF" it is a 3 speed, then I'll see if I can find the phone number of the junk guy that picked up all my stuff and if he does I'll get one of those driveshafts and send it to you free if you cover shipping.
Last edited: