- Thread starter
- #121
Navigation
Install the app
How to install the app on iOS
Follow along with the video below to see how to install our site as a web app on your home screen.
Note: This feature may not be available in some browsers.
More options
Style variation
You are using an out of date browser. It may not display this or other websites correctly.
You should upgrade or use an alternative browser.
You should upgrade or use an alternative browser.
Re Birth BT60
- Thread starter IndianDoc
- Start date
This site may earn a commission from merchant affiliate
links, including eBay, Amazon, Skimlinks, and others.
More options
Who Replied?- Thread starter
- #122
Bit of a sore spot
Well truth is I screwed up in the order, should have just went for a full off frame restore but did not have the equipement and from my initial checking the rear frame minus the cross member was ok. But after cutting out the 6 inch angle iron that the PO has used to cross brace a receiver hitch found that there was a very rusty c channel in the rear. And BT was not on her axle's with half the body lifts cut out. So to keep her rear end together put the bumper back on for temp and now had to wait till the axles back on so the tires could carry the weight of the frame and drivetrain to lift the body for the body lift. Was just about to have too many things hanging over my body. Any way with the lift compleated will have a few more inches of room under there to hammer chisel and grind this mess out, then box in the frame.
and the other side
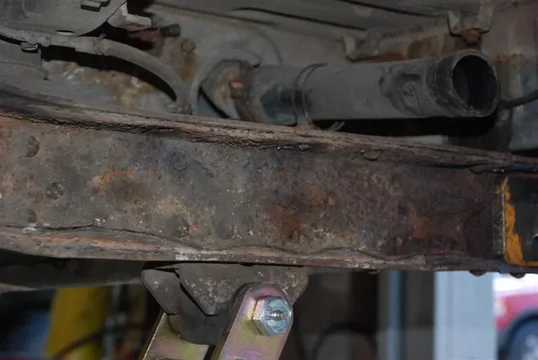
So next is wheels then lift and more rust grinding and some welding to follow pic's as soon as possible.


Anymore done ?
Do you have anymore pics of the rear of the frame.
Thanks in adnace. Forgot to say she looks sweet,,,,,,,,,,,,,,
Vic
Well truth is I screwed up in the order, should have just went for a full off frame restore but did not have the equipement and from my initial checking the rear frame minus the cross member was ok. But after cutting out the 6 inch angle iron that the PO has used to cross brace a receiver hitch found that there was a very rusty c channel in the rear. And BT was not on her axle's with half the body lifts cut out. So to keep her rear end together put the bumper back on for temp and now had to wait till the axles back on so the tires could carry the weight of the frame and drivetrain to lift the body for the body lift. Was just about to have too many things hanging over my body. Any way with the lift compleated will have a few more inches of room under there to hammer chisel and grind this mess out, then box in the frame.

and the other side

So next is wheels then lift and more rust grinding and some welding to follow pic's as soon as possible.
- Thread starter
- #123
Small steps but steps at least
Mounted the bracket for the long range tank and started re routing the air expansion chamber ie vent for the new tank. But my planing was a tad on the short side. Ran out of hose so final pic's of re route to follow when I have time to pick up 6 more feet of 6 mm fuel hose.

You can see the edge of the vent chamber and two more lines still to be attatched will then tuck it up higher above the tail light for max room in the storage area.


Mounted the bracket for the long range tank and started re routing the air expansion chamber ie vent for the new tank. But my planing was a tad on the short side. Ran out of hose so final pic's of re route to follow when I have time to pick up 6 more feet of 6 mm fuel hose.

You can see the edge of the vent chamber and

The GF bought an 86 HJ60 about a week ago, I wanted to see some pics to help with fixing the rear of the frame, because I have never worked on 60s before.
Yours looks a lot better than mine.
I have finished doing the brakes as of this morning, now I will start on the frame.
I can imagine the difficulty of removing the whole body. I had done a SWB toyota truck like that, removed evrything except the windshield, very nice outcome, but you need a lot of nerves.
Good luck , You are doing it the right way , I will keep my eyes on your build.
Thanks .
Vic
- Thread starter
- #125
Right way
Not really check out skinner's build he is going to have the most
rust free LC in the world and a text book guide for us wanna be's
I have more of don't do it this way, ouch in my build. His is the
thread to check for rust and body fixing. But just my .02 cents.
 But then some people need to see someone do it wrong too!
Either way we all learn and have fun with our addiction. Wish
you well with your project.
Not really check out skinner's build he is going to have the most
rust free LC in the world and a text book guide for us wanna be's
I have more of don't do it this way, ouch in my build. His is the
thread to check for rust and body fixing. But just my .02 cents.
Either way we all learn and have fun with our addiction. Wish
you well with your project.

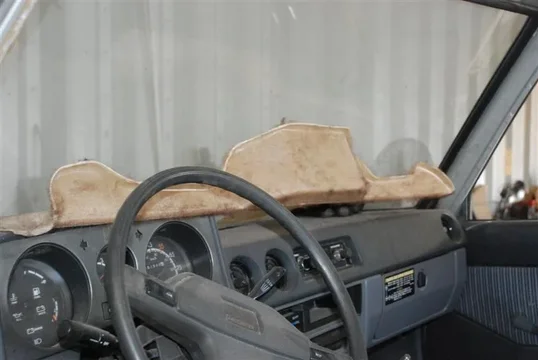
How big a deal was it to remove the headlinner and whatever else required so you could get access to the roof. I've got some body work to do on the roof of mine and so far I've not started on that part of my never ending quest. and the 2nd magic quesiton.....do you see putting it back together (the headlinner) to be a royal pain in the @$$?
- Thread starter
- #127
Headliner
If you can get it out in one piece, and not stretch it beyond use, it is possible to re-use. It is also possible to move ice bergs to the Sahara for fresh water just not common in real life. The thing just comes apart in your hands as you gently remove. In my case I am not going to re use, so I just ripped and tore. The welting removes easily and a few items are held in by the seat belts etc all easy. But where it is glued to the body it is a PITA and a half, would have to say that I would just plan on a replacement, I know others have succeded and I bless there skill and patience but in my hands it is an impossible task to reuse the headliner. Just my .02
If you can get it out in one piece, and not stretch it beyond use, it is possible to re-use. It is also possible to move ice bergs to the Sahara for fresh water just not common in real life. The thing just comes apart in your hands as you gently remove. In my case I am not going to re use, so I just ripped and tore. The welting removes easily and a few items are held in by the seat belts etc all easy. But where it is glued to the body it is a PITA and a half, would have to say that I would just plan on a replacement, I know others have succeded and I bless there skill and patience but in my hands it is an impossible task to reuse the headliner. Just my .02

you can get new headliners from SOR for under $200. It's not worth trying to save.
- Thread starter
- #129
Headliner Price
Thanks VT last headliner I actually replaced was in my pig in the 80's and it was also under 200 with shipping (then) So haven't checked the prices recently. Hope that answered your questions.
Thanks VT last headliner I actually replaced was in my pig in the 80's and it was also under 200 with shipping (then) So haven't checked the prices recently. Hope that answered your questions.
- Thread starter
- #130
Slow and not even all that steady!
Finally got back to the shop to work on BT again. Put her stock tires back on and got her on her feet. finished cutting off all the body lift bolts and jacked up one side to install the lift. Pictures of that to follow when I get all the body lift installed. Did finish the re route of the vent lines and snapped a couple of pic's of that. Gives way more room in the sides for storage behind the new QP's from Wagon Gear.


Also did some grinding and other removal of that rust but not yet to the point for pic's. LOL Doc


Finally got back to the shop to work on BT again. Put her stock tires back on and got her on her feet. finished cutting off all the body lift bolts and jacked up one side to install the lift. Pictures of that to follow when I get all the body lift installed. Did finish the re route of the vent lines and snapped a couple of pic's of that. Gives way more room in the sides for storage behind the new QP's from Wagon Gear.


Also did some grinding and other removal of that rust but not yet to the point for pic's. LOL Doc

kevinmrowland
Forum Lifer
Click and crag, click and drag. Thanks for for the pics Doc!
That shows the move clearly, I think I'll steal your images for an instruction page on the site.

That shows the move clearly, I think I'll steal your images for an instruction page on the site.

- Thread starter
- #132
Click and crag, click and drag. Thanks for for the pics Doc!
That shows the move clearly, I think I'll steal your images for an instruction page on the site.

You sir can not steal what is freely given, If you need highter definition on any photo just shoot me a PM with your email add and I'll send the non compressed file to you, so you can size and adjust in photoshop to your hearts content. Any image is fine with me have a good one, hope it's not too cold in the North.

- Thread starter
- #133
Bad MOJO
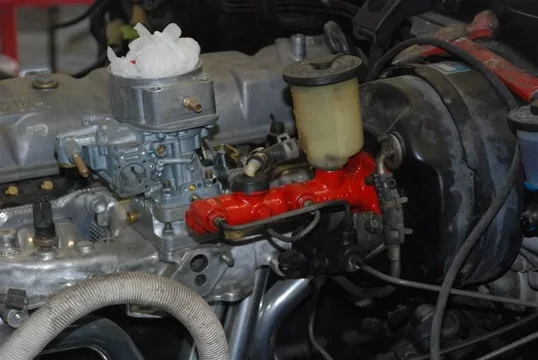
That damn ugly m cylinder finally got to me was working on putting in the plugs for the air rail and smashed into the ugly thing one time too many. Short story it's out and to be replaced by a inch T-100 master pic's to follow.
Bolt in, you have the spacer.
You need to get rid of that rusty master cylinder and put one o those purty T100s in there, it detracts form all that glare on the manifolds.
Thanks for the vinyl pics, you can see the little 1/4 pie shapes I was talking about. Just to be clear, no wheel well trim, and no lans for a gas door cable, or aux wire harness on the passenger side?

That damn ugly m cylinder finally got to me was working on putting in the plugs for the air rail and smashed into the ugly thing one time too many. Short story it's out and to be replaced by a inch T-100 master pic's to follow.

kevinmrowland
Forum Lifer
Good choice Doc! 
Too funny.
And thanks for the pics, the mud ones are fine, you've seen how bad my website is.

Too funny.
And thanks for the pics, the mud ones are fine, you've seen how bad my website is.

- Thread starter
- #135
- Thread starter
- #136
and going
Put the Michelins back on had to put some pressure on the springs and the new tires and rims are not here yet. But this heavy lift gives pleanty of clearance the stockers were just about even with the outer fender in the rear from spring sag in the orginal springs. Not the case now!
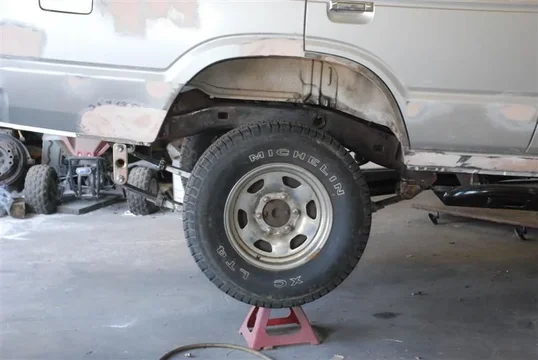
Looks like a vw would fit above the stocker now.
And that is compressed all the weight is on the rear axle so not much compression.
I think i'll fit!!!!


Put the Michelins back on had to put some pressure on the springs and the new tires and rims are not here yet. But this heavy lift gives pleanty of clearance the stockers were just about even with the outer fender in the rear from spring sag in the orginal springs. Not the case now!

Looks like a vw would fit above the stocker now.
And that is compressed all the weight is on the rear axle so not much compression.

I think i'll fit!!!!

- Thread starter
- #137
Drive shafts
Yup there in and functional new u joints and some paint.

All new bolts and washers nuts, Toyota
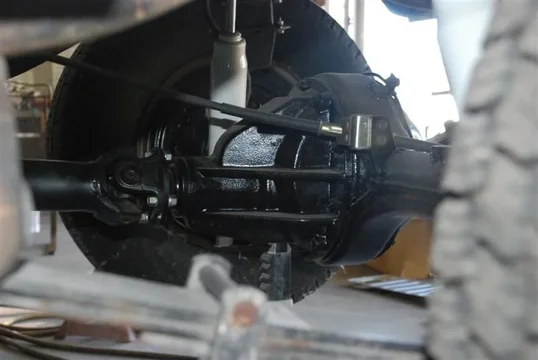


And I know there is a leak in the transfer and transmission, but only has to last few months , stage two mods of new 55, toybox if available and low t, case gears coming after gsmitter this year. Would do it now but I'm too slow to get her ready with that mod too. So will do after the GSMTR ride in June. Have got the transfer tube from SOR to install to let excess oil pumped from transfer to transmission flow back pic's to follow.


Yup there in and functional new u joints and some paint.

All new bolts and washers nuts, Toyota


And I know there is a leak in the transfer and transmission, but only has to last few months , stage two mods of new 55, toybox if available and low t, case gears coming after gsmitter this year. Would do it now but I'm too slow to get her ready with that mod too. So will do after the GSMTR ride in June. Have got the transfer tube from SOR to install to let excess oil pumped from transfer to transmission flow back pic's to follow.
- Thread starter
- #138
- Thread starter
- #139
Similar threads
Users who are viewing this thread
Total: 1 (members: 0, guests: 1)


