Navigation
Install the app
How to install the app on iOS
Follow along with the video below to see how to install our site as a web app on your home screen.
Note: This feature may not be available in some browsers.
More options
Style variation
You are using an out of date browser. It may not display this or other websites correctly.
You should upgrade or use an alternative browser.
You should upgrade or use an alternative browser.
Re Birth BT60
- Thread starter IndianDoc
- Start date
This site may earn a commission from merchant affiliate
links, including eBay, Amazon, Skimlinks, and others.
More options
Who Replied?Damn those wheels look good.
- Thread starter
- #163
Still going
I took the time to go back over this thread and realised that I had a few promises for pic's that I had not fullfilled. Some due to project still in work( i know slower than molassis in January) others I just forgot so this session is catch up on minor stuff and promised pic's
First Body Lift kit, real easy I just cut off the body bolts with a air saw popped the gromets off with the bolt. Lifted the body with a floor jack and a 4X4 post section (one side at a time) dropped in the new bolts. (Word Man a Fre 4+ kit all the bolts were way to long so had to find grade 8 metric bolts here in SC)
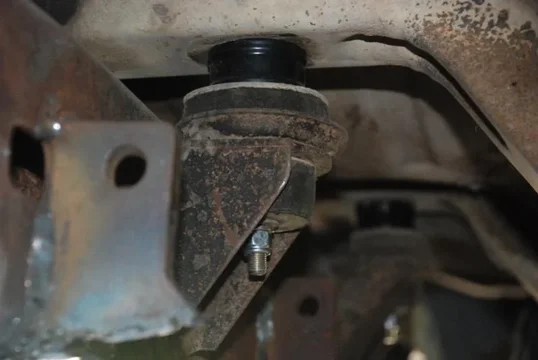


That's it then tighten them up and do the other side.


I took the time to go back over this thread and realised that I had a few promises for pic's that I had not fullfilled. Some due to project still in work( i know slower than molassis in January) others I just forgot so this session is catch up on minor stuff and promised pic's
First Body Lift kit, real easy I just cut off the body bolts with a air saw popped the gromets off with the bolt. Lifted the body with a floor jack and a 4X4 post section (one side at a time) dropped in the new bolts. (Word Man a Fre 4+ kit all the bolts were way to long so had to find grade 8 metric bolts here in SC)


That's it then tighten them up and do the other side.

- Thread starter
- #164
Cleanup continues
Next I installed the oil bypass kit from Specter Off Road as I don't intend to work on this transmission and transfer case now as I am going to a 5 speed and lower gearing ( and a toy box if Marlin gets them back on line)next year. Another real easy modification just take out thefill plugs route the tube and tighten her up.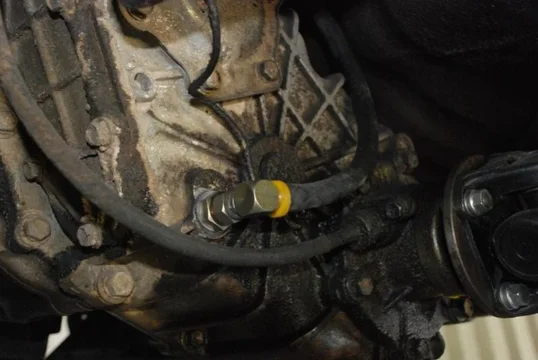


Next I installed the oil bypass kit from Specter Off Road as I don't intend to work on this transmission and transfer case now as I am going to a 5 speed and lower gearing ( and a toy box if Marlin gets them back on line)next year. Another real easy modification just take out thefill plugs route the tube and tighten her up.


- Thread starter
- #165
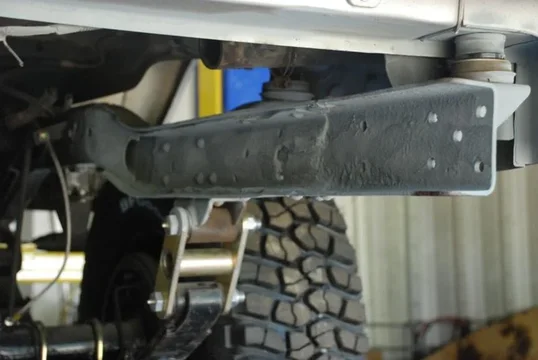
Frame Cancer
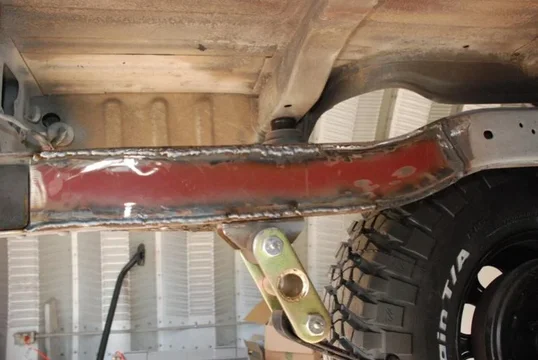
Not the repair I would have liked but found the problem too late to do it really right. Still got most of the loose rust and flaking c channel out of the rear frame and treated with rust primer. The pieces for boxing in frame are cut and sitting in frame may get them welded in this week end we will see. In any event this is a big improvement from the previous condition.


More to follow soon I hope!!!
P.S. so beard size Trapper!!!! Give


Not the repair I would have liked but found the problem too late to do it really right. Still got most of the loose rust and flaking c channel out of the rear frame and treated with rust primer. The pieces for boxing in frame are cut and sitting in frame may get them welded in this week end we will see. In any event this is a big improvement from the previous condition.


More to follow soon I hope!!!

P.S. so beard size Trapper!!!! Give
- Thread starter
- #166
Frame Progress
A shot of making and fiting the cardboard template in to the frame section.
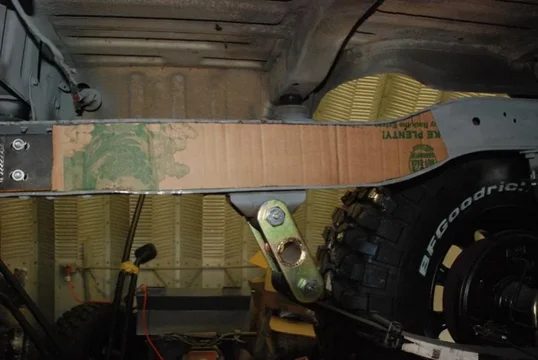
And then fitting the section after plasma cutting the 1/4 inch steel and grinding for final fit.

And a shot of the welding, now folk's this is my first try at welding and I did have a good coach standing by and yelling what a lousy job I was doing. so go ahead i've heard it already. I however was just happy as a hog in a corn crib to be welding it in place myself. As I have said before this hobby is about learning and that means making a few mistakes too.


A shot of making and fiting the cardboard template in to the frame section.

And then fitting the section after plasma cutting the 1/4 inch steel and grinding for final fit.

And a shot of the welding, now folk's this is my first try at welding and I did have a good coach standing by and yelling what a lousy job I was doing. so go ahead i've heard it already. I however was just happy as a hog in a corn crib to be welding it in place myself. As I have said before this hobby is about learning and that means making a few mistakes too.

Those welds aren't too bad. Beats the hell out of my first welds.
Can you elaborate on the oil bypass kit for the transfer case?
Can you elaborate on the oil bypass kit for the transfer case?
- Thread starter
- #169
Those welds aren't too bad. Beats the hell out of my first welds.
Can you elaborate on the oil bypass kit for the transfer case?
The seal between the tranny and the transfer begins to leak and the transfer actually will pump oil into the tranny overfilling it. It then begins toleak out the seals on top that were not designed to handle that level of oil. This kit allows theoil to flow from fill hole to fill hole and the oil returns to the transfer without overfilling the transfer. Best fix is to replace the seal between the trans and tranny however I am going to replace the 4 speed with a 5 and lower gears shortly so the patch is on to lessen the oil leaks and keep oil in the transfer. Available from Spector off road.
looking good doc
- Thread starter
- #171
looking good doc
Got to get BT looking good to run with the colonel. Thanks again Adam. Still got the rims sitting just outside the shop, well no one has swiped them yet. Doc

I know I need to come and get those, What do you have going this weekend?
- Thread starter
- #173
Working on BT
Thursday, Friday, Sat and Sunday will be cutting off some
brackets and re welding new ones on the sliders, finishing the
frame boxing, undercoatine the frame and if I can get it done
install the long range tank. And taking pic's of the work for
posting up,
So plan on being here most of the time. PM me or call to confirm may take a break sat or sun and run to chucktown to pick up lC shirts from Brock.

- Thread starter
- #174
no pic yet
Frame box, finished
Brackets removed, new ones being fabbed.
Undercoating the section above the range extender tank , finished
Installed tank, well got side tracked and worked on plumbing the heater hose and oil cooler hose lines,
 also hooking up the linkage to the weber
 so tank install and pic's will follow later. Pic's tomorrow or next day.
Any body got a set of mounts for the radiator (side mounts) for a 1985 seems mine got left on the radiator and it's been gone for a year no hope of recovery there? Will be a L shpped bracket with
six holes on the radiator side and a single hole on the body mount side. Thanks if you do!
Frame box, finished
Brackets removed,
Undercoating the section above the range extender tank , finished
Installed tank,
 so tank install and pic's will follow later. Pic's tomorrow or next day.
Any body got a set of mounts for the radiator (side mounts) for a 1985 seems mine got left on the radiator and it's been gone for a year no hope of recovery there? Will be a L shpped bracket with
six holes on the radiator side and a single hole on the body mount side. Thanks if you do!

- Thread starter
- #175
And another step done.
Got the area above the fuel tank covered in primer then three coats of undercoating. So began the tank install.

It is amazing the amount of dust the tank has accumulated sitting in the shop , I did wipe it off prior to install. Also note the hardware and that the hoses are tapped on the ends.
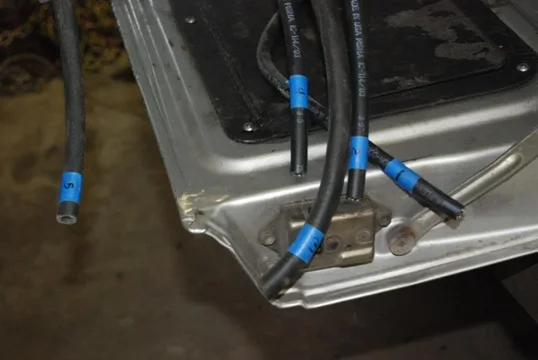
This so that when this heavy thing was over my head it would be easier to know what line to hook up where.


Got the area above the fuel tank covered in primer then three coats of undercoating. So began the tank install.

It is amazing the amount of dust the tank has accumulated sitting in the shop , I did wipe it off prior to install. Also note the hardware and that the hoses are tapped on the ends.

This so that when this heavy thing was over my head it would be easier to know what line to hook up where.
Last edited:
- Thread starter
- #176
getting there
Didn't get a shot of lifting the tank was too interested in fuel line sender hook up and getting the bolts in to hold the tank. Next thing I knew the photo op was gone. Any way had BT on a 2 post lift and put the tank on an adjustable shop table(roll around kink for tools etc.)and lifted BT high to clear table/tank and rolled it under. Then used 4X4's and 2X4's under the tank to lift the last 6 inches in the back after hooking up the fuel tank sender. Used a c-clamp on the brackets to draw it thight for inserting the bolts. Actually it was easier than I was thinking it would be.
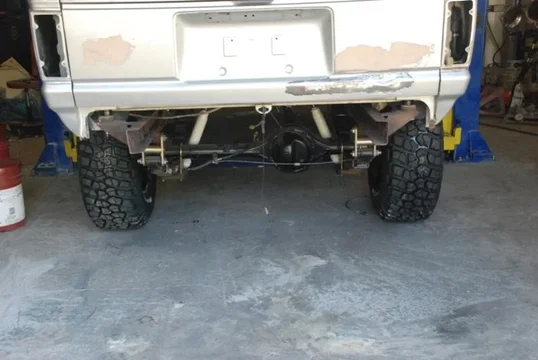
You Can see that with the body lift this tank does not hang down too far, at all. Will be nice to have the range this 40+ Ausie tank will provide.

And again I was happy with the way it's tucked up above the frame and bumper for protection. Just the drain is and it is close to the axel but still several inches above the pumpkin housing.

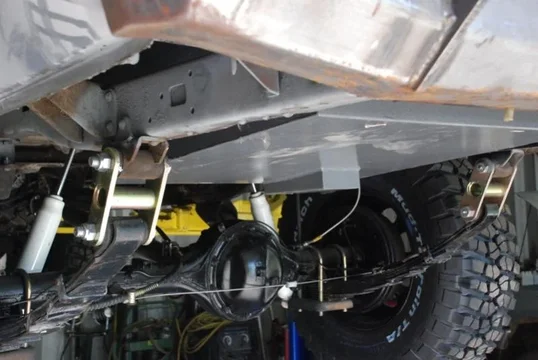


Didn't get a shot of lifting the tank was too interested in fuel line sender hook up and getting the bolts in to hold the tank. Next thing I knew the photo op was gone. Any way had BT on a 2 post lift and put the tank on an adjustable shop table(roll around kink for tools etc.)and lifted BT high to clear table/tank and rolled it under. Then used 4X4's and 2X4's under the tank to lift the last 6 inches in the back after hooking up the fuel tank sender. Used a c-clamp on the brackets to draw it thight for inserting the bolts. Actually it was easier than I was thinking it would be.
You Can see that with the body lift this tank does not hang down too far, at all. Will be nice to have the range this 40+ Ausie tank will provide.

And again I was happy with the way it's tucked up above the frame and bumper for protection. Just the drain is and it is close to the axel but still several inches above the pumpkin housing.


looks great doc!
- Thread starter
- #178
Still going
Thanks trapper, looking back on the orginal list I still need to completion in stage one the following.
Install the radiator
Hook up the Weber carb
Get the rhino liner and paint on the inside and outside
Install the new seats. Wagonear Side Pannels and Tail gate lid. and rubber floor covering.
Fire the puppy up and drive for a whille. Then on to stage two finally: the closer it gets the more little things just drive me crazy
But little steps lead to big leaps eventually. Thanks for your support and thanks to all who have provided encouragement and advice during this long rebirth you know Elephants don't gestate this long, but then they don't need lockers and 35's to go cross country do they. Ta Ta for now more pic's as they get there. Doc
looks great doc!
Thanks trapper, looking back on the orginal list I still need to completion in stage one the following.
Install the radiator
Hook up the Weber carb
Get the rhino liner and paint on the inside and outside
Install the new seats. Wagonear Side Pannels and Tail gate lid. and rubber floor covering.
Fire the puppy up and drive for a whille. Then on to stage two finally: the closer it gets the more little things just drive me crazy
But little steps lead to big leaps eventually.

looking good doc...cant wait to see her on the trail SOON!
- Thread starter
- #180
looking good doc...cant wait to see her on the trail SOON!
Hopefully soon was shooting for gsmiter may still get her rolling in June. Will see, we will see.

Similar threads
Users who are viewing this thread
Total: 1 (members: 0, guests: 1)


