Re Birth BT60

This site may earn a commission from merchant affiliate
links, including eBay, Amazon, Skimlinks, and others.

After removal of the headliner noted two more rust areas on the roof and rain gutter area. So removal of metal and welding in new metal. Only way to go. View attachment 238984 Still think she looks forelorn without her wheels and undercarrage. ;)

Did you fill in the vent holes and the side marker holes on the front fender? Maybe it's just my bad monitor.

Those sliders look KICK ASS! Do you mind me asking how much?

Looking good, subscribed to this thread, can't wait to see the finished product.
 
Last edited:
This beast is shaping up nicely. Keep up the progress.
 
Did you fill in the vent holes and the side marker holes on the front fender? Maybe it's just my bad monitor.

Those sliders look KICK ASS! Do you mind me asking how much?

Looking good, subscribed to this thread, can't wait to see the finished product.

Your eyes and monitor are both working fine Carp, yes they are filled in.

Way too much when the shipping of arroung 400.00 from the west coast was added. I will say this after lookiing at the beef in them I'm supprised it was not a lot higher. Got a discount from MAF so don't remember the actual price, it's on an invoice somerwhere in the file with the rig. Can look it up for you if you really need it for comparision. PM me if you want that looked up.

Hope you get to see it fairly soon at one of the upstate events or the lowcountry events. We are in the same area. Will definatly have it ready for next years GSMTR event we all are looking foreward to that I know.

This beast is shaping up nicely. Keep up the progress.

Thanks Wile E. Coyote will try to get some more pic's this weekend my friend John has been working on the rig while I have been traveling around the carolina's for uncle the last two weeks. LOL Doc:cheers:
 
Update

John's been too busy too, so no progress for the last three weeks, hope to work on baby again soon. But this weekend grand's birthday, and a dinner invitation with a beatiful lady interfering. Keep the faith will be back with post and pictures before long. Doc:censor:
 
interesting

Looks good. I have something similar in mind with a 1985 HJ60 Sahara. Good body but it has rust along the the left side sill. It's getting worse as it is sitting out in the rain.

Why didn't you pull the body off the chassis and do them separately? A mate did that with his 100 series and it is turning out shmicko but not finished yet.

Any tips for the rust repair in the roof sides? Does the liner have to come off the inside. I think it would or it will get burned while welding like last time. Lucky I have 2 more wagons for parts.
 
Headliner question

I am sure that the headliner and that d**n insulation would burn like dry wood if the roof rust were welded with it in, might work but I'm chicken. Also wanted it out for some other mods to come later.

Very little rust on body or frame other than the rear cross member, with the axels out did not want to seperate body and chassis yet. Will do so when the body lift goes in as soon as the axels are able to support weight.
 
Still going darn slow enigerser bunny!

Must.......See.......Tan.........Painted........60

Sidenote: SHOULD be getting my third member back today....(should)
It's driving me crazy not having my rig!!!

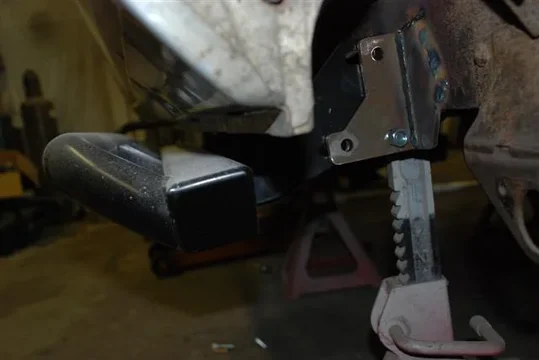
Glad to hear that ingrid is running, got some pic's of the sliders installed, at least temp instalation as final adjustment will be after the body lift install and paint, darn things got to come off again and the 4+ rear bumper is on as intended, it too has to come off for paint etc. Lots more filled in areas and fiber filler, note the sliders are covered in dust didn't have time to clean up for pics.

DSC_0015 (Small).webp

DSC_0009 (Small).webp
DSC_0015 (Small).webp
DSC_0009 (Small).webp
 
and going

DSC_0006 (Small).webp
 
and going

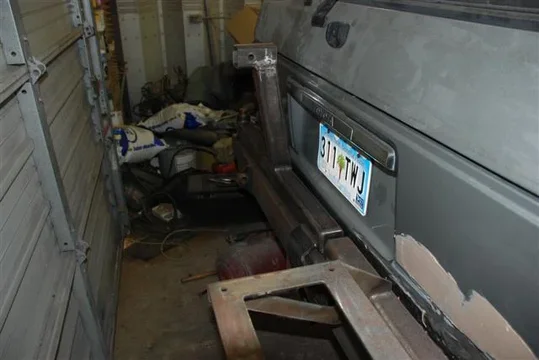
And the rear bumper is in place, man the stuff the po had welded in to that rear frame for a simple bumper hitch was astounding. Took 4 hours with a plasma cutter and torch,and of course a BFH to get it in place correctly. But I think the fit is ok, and the thing is massive to say the least. DSC_0010 (Small).webp

DSC_0002 (Small).webp

DSC_0011 (Small).webp
DSC_0010 (Small).webp
DSC_0002 (Small).webp
DSC_0011 (Small).webp
 
Sanding, aughhhh!

Has been and continues to be the nemissis of the project, weld, fill and sand, weld fill and sand but hopefully rust will be all gone for a long while. :D:cheers:
 
One step at a time

Got to work some on the BT this weekend. Had to work sat and sun so not much done but all progress is progress. The Tailgate door had arrived from Kevin M. Rowland, so that and a couple of other small things were on the agenda. Here's Johnny cutting the tailgate for the new door from wagongear.

DSC_0036 (Medium).webp

That air cut off saw made this a 1/2 :banana:job.
DSC_0036 (Medium).webp
 
still stepping

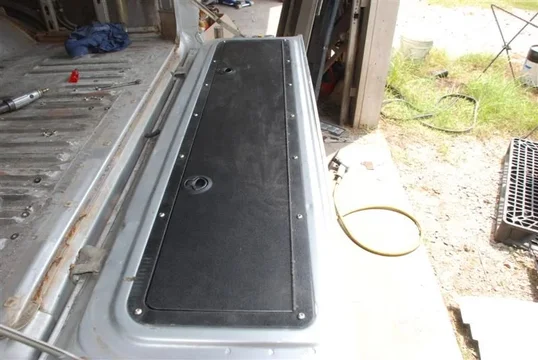
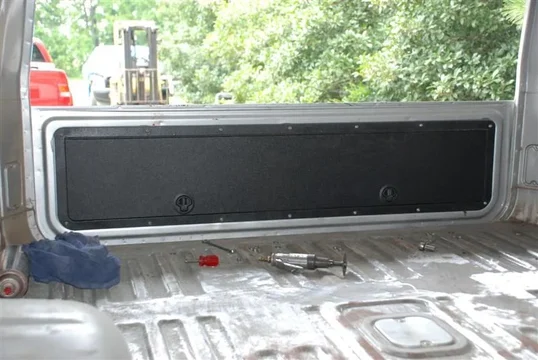
And as the install has been covered in several places and on the wagongear web site some photo's of the dry fitted door. Will have to come out when the bedliner finish is applied to the interior of the tailgate.

DSC_0038 (Medium).webp

DSC_0043 (Medium).webp

DSC_0037 (Medium).webp

It is even better than it looks what a wonderful product and sturdy is not the word, but then this is the heavy weight prototype not the production door. Still it is awesome. :):bounce::bounce::bounce:and again if you have the right stuff to cut the hole a simple install.
DSC_0038 (Medium).webp
DSC_0043 (Medium).webp
DSC_0037 (Medium).webp
 
other little step

While John was sawing away I took the time to do the modification to the transfer shiffter brace that allows the FJ-60 to be shifted into 2 LO and from 2 Lo to 2LO 4X4 directly. This is also covered I think in the Technical Links so just some update shots. Not an indepth photo study.

First the bracket after removal of the tang that blocked the shift lever.
DSC_0033 (Medium).webp

And then the shifter hole where the bracket is located, again a real easy project, if you have a high speed saw just a 1/4 :banana:job.
DSC_0031 (Medium).webp

As I said didn't have much time so that's it for now. Will keep posting as it comes along. :cheers:
DSC_0033 (Medium).webp
DSC_0031 (Medium).webp
 
Oh man, I can wait to get mine!!!! I'm like 25th-26th in line though....Looks great. Good job, looks as easy as kevin says, did you line the chamber with sound deadening?

No just going to bed liner the interior of the door and the FJ-60 ans see what happens , if too noisey or roughf on stuff can always do the liner later . I mean there is not a place inside the tailgate that I can't reach to add coating or sound proofing. :D:D:grinpimp:
 
Looking good!! Just did the 2Lo mod this weekend myself. Really easy and I can't wait to get to use it.
 

Users who are viewing this thread

Back
Top Bottom