Builds Project R2D2 Sixty - 1986 Retro Refresh (1 Viewer)

This site may earn a commission from merchant affiliate
links, including eBay, Amazon, Skimlinks, and others.

Are you de-vaning the existing pump or getting an idler pulley?
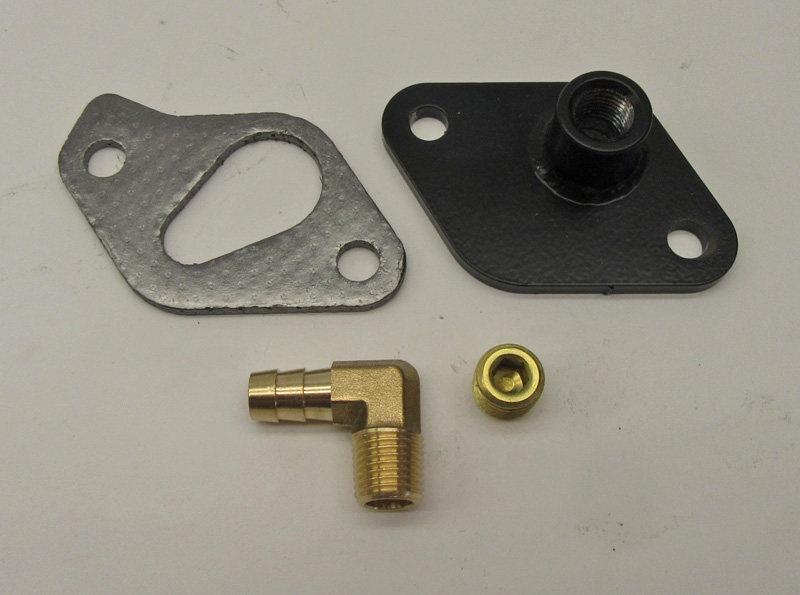
 
Desmog/Sniper has begun.
View attachment 2653080
3 notes:
-The engine woulda run better with the vac hoses connected correctly.

-That is the wrong alternator. The correct alt has the VR on the outside of the case, not smooshed against the heater hose, causing the output to fade. Having a stable voltage source will keep the EFI happier. Bear in mind that the EFI needs 25 amps of 13.8V power to operate.

-The alternator belt is fuzzy looking. See the bit above re. supplying clean power for the increased load of a new EFI system.

Carry on with the deep cleaning. It looks better & better in each picture.
 
That’s funny you mentioned the alternator. I bought a “new” one for another build and the VR was so tight I had to swap back to the old alternator because the factory belt would not work.
Not sure what 60 model they came with the VR over there but that sucks. Agreee.
 
Holley Sniper Install/Desmog
It occurred to me that this is the first Sniper I’ve done at my shop while at the same time doing a Desmog and also keeping the Toyota distributor and stock exhaust manifold. These step-by-steps I’ve done on other Sniper installs have helped a lot of folks so I wanted to write this one up separately.

I started the tear down process a page back but from here forward I’ll document what needs to happen to make this all happen.

I finished cleaning as best I could using a few different wire wheels on drills, Milwaukee die grinders and 3.5” wheels.
B0CB56C3-0F81-4000-B81C-78C88CA4F429.jpeg

First you have to deal with the holes in the exhaust.

To lose the air pump you need and idler pulley from FJ40Jim. He also has the air rail plugs and the EGR block off plate.

Link here.
F7D92287-6894-454C-982B-ACE1BF0A4778.jpeg

This thing can be a bitch. Make sure you soak it good with Kroil and be careful because if you snap off both studs you have to pull the manifold off the truck. If you are not planning on that as I was hoping not to have to do, you take it slow. I’ve been able to get away with one stud by adding a Remflex gasket to the plate but it’s not needed if both studs are good.
2E85001D-FA5C-4A1D-9EA9-6FAF51325A7A.jpeg

I also used the provided clamp on O2 kit. Holley suggests keeping the O2 above the curve and at least 8” back from the collector
8EAF68D6-B51A-4506-AE7E-DED35316A7CF.jpeg

I’m not sure if it’s necessary but I add thread tape to the JimC plugs and install
C5D71A14-BBFE-4060-AE5B-D89F686D5BFA.jpeg
PCV has to be dealt with a when removing the smog. I either purchase the plate kit from Man A Fre or I buy a OEM gasket and weld a nut to the end of the stock setup.

Link to MAF kit

 
One more spot you have to deal with the exhaust. I cut the pipe just below the large nut and rubber hose on the fender and found a plug that just barely fit the tube. I slathered the threaded plug with JBWeld and dropped it in place. The shaft was about 2” long so it has a lot of hold. Before this leaves I’ll tack it from below just to make sure it does not blow out
C79EB9D5-AA74-41E2-A74C-D91529F6E29A.jpeg


The Mosley Motors kit uses the stock 2F isolator plate and if yours is good feel free to reuse but he can supply a brand new one for a bit over a Hundo I think it’s worth it.
This isolator has a small vacuum hose coming out of the base that turns 90*. This will get in the way of your throttle cable later so you need to cut out the elbow.
BE CAREFUL
As we found out on another truck this weekend you can crack the OEM sealant here if not careful cutting and give yourself a nasty vacuum leak. I also like to add a bit of FIPG to the inside hole in case my rubber vacuum cap gives out.
75F845FB-8F20-433B-A641-BAE07EC2C716.jpeg

These isolators are designed to be used without Toyota carb gaskets. That said, you need to eyeball them real good and make sure the machined Mosley adapter fits nice and level. Hold it up to the light and make sure there are no gaps and you can see light under all the corners of the adapter. We don’t want things to bind up.
1D381CEB-2357-48E6-86D6-D054D605EE71.jpeg


B31403ED-051F-48D2-8D0A-AC9117D8A508.jpeg
 
Last edited:
Next, you stack the blocks. Another few tips. 3 of the Sniper studs have to be in the adapter before you flip it down onto the isolator. If you forget you have to pull it back off and wreck your nice form a gasket seal and start over. The machined face of the Mosley adapter faces forward
56116AF7-91E8-428C-910C-BCF4985F8272.jpeg

BDE776FA-903D-4152-A02D-8F4DD34480B3.jpeg

Once you get the adapter in place, make sure the studs are not bound up and they move a bit in the adapter then tighten the adapter to the intake with the Hex heads
36C4BCB8-D8B2-40B1-AD58-EF2DEC441C38.jpeg

The hex bolts closest to the valves go directly into the intake and are another possible vacuum leak so I take some FIPG and fill the voids around the screw in the adapter
17F0D064-107B-4B10-A984-D9499623FC64.jpeg

D26935E4-F507-452E-AD7A-C4891C69B75F.jpeg

At this point once the FIPG around the bolts is dry you can add the Holley provided gasket. You only get one of these with your kit so I suggest putting this one on dry. I’ve never had that surface leak on any Sniper and if you have to remove to chase any leaks you don’t wreck your gasket

That’s all I have today. I’ll pick up tomorrow with the Sniper and throttle cable install and more
 
Final though on the Mosley Motors install for the day.


I got the Sniper, OEM isolator, custom machined base adapter, air cleaner adapter, throttle cable and bracket from him only but he also provides in-line and in tank pump kits that are 100% plug and play.

Don’t forget to add your throttle cable bracket to the front Sniper post before cinching it all down

F7740494-8B25-4F47-8637-563904E749F9.jpeg
 
Last edited:
2024 Edit. I don’t use these anymore. Too
Many places to chase issues. I’ve not had a single issue with Mosley in line pumps


PowerSurge. There are a few threads about them. I’ve used them on 3 vehicles. I’ve had only one issue with one and I ran it dry when my OEM fuel pump died.

Advantages I see.

$300 total. About 2x the price of a nice Walbro but this thing will likely never fail due to heat like a in line pump. It sits in a bath of fuel and if you keep it away from major heat sources it stays cool.

No need to drop the tank and add a inspection door for an in tank pump.

Quiet.

I love being able to keep the clear OEM fuel filter in the system. It’s the quickest indicator of fuel condition and flow. These EFI filters are all solid and you can’t look for crap at a glance.

Other than my weird OE pump failure I had it’s pretty damn rare. Also running a Powersurge empty usually won’t kill it. In the end on that deal I’m pretty sure it boiled down to a kinked fuel hose anyway.

2697D7EB-D283-4D3F-B606-16CF9F5EEFA4.jpeg


Find a good spot for the PS and mount it. I used M6 rivnuts.
5A08CAEC-FFD3-412D-9E18-11523FFF299A.jpeg

Robbie Mac sends 2 fittings and you decide what the other 3 pieces need to be depending on your vehicle. I have a 5/16” copper nipple where the fuel line comes in from the OE pump. I use heat shield on that line since it’s next to the block. The other two are 3/8 for to and from the Sniper. The last one on the right is the 5/16” return line.

E64BB37B-7EFF-41A0-B3E7-488AE9FD8173.jpeg

These are the fittings I used for the sniper and the high pressure pre filter. Add to that 10’ of fuel injection rated 3/8” and 10’ of regular 5/16” rated return line
4DE0FF9F-5B79-416D-AF3B-75BB3893EEEB.jpeg

New OEM filter
9AA06A17-5A1E-49E4-BC68-FEAD3E2E26B5.jpeg
 
Last edited:
I always have used the Davis Unified Distributors and live wires on my builds but this truck has a good electronic distributor and coil. Very clean so I’m staying Toyota on this build.

Beno sent all the goodies to freshen this up.

Rotor. Cap. Wires. Plugs. O Ring.

Also a new PCV with rubber base grommet.

890A9C9A-E658-49E7-8AE8-31DE52E4312C.jpeg
 
You should keep that dude's money, sell my the 60 for $1000 (I'll still need a loan) and, boom...extra grand for Nolen.
 
You should keep that dude's money, sell my the 60 for $1000 (I'll still need a loan) and, boom...extra grand for Nolen.
When we started this over a year ago I told him it would likely end up being over market value with what all we had planned.

Then the dumb virus made everyone go bat**** crazy over 60s. I think he could sell this thing for 2X what he’s got in it today.
 
Back to the Sniper.

With the tune up done I moved to wiring up the Sniper.

This is really so easy.

5 wires.

Black/Red go directly to the battery. No relays.

Pink is your switched 12v. The easiest thing to do is add a spade connector and insert it into the female plug where the carburetor was plugged in.
C77BEE97-E1C8-46DB-AF3C-3A5D29F241C6.jpeg

Yellow goes across the firewall with black and red then attach to the negative post of the coil.

Purple goes to the fuel pump.
889E91A5-3516-4EF3-A07F-95E5AB5BA2BA.jpeg

Loom it up with the provided loom. Since it crosses so much real estate you need to add some length of wire to the Red, Black and Yellow. Also you need a bit more loom.
4896EE83-AD02-49D9-8BBE-86A0829B9D2F.jpeg

Lastly, I ran the handheld LCD screen cable through the choke cable hole. Gotta order a suction mount for it.
7F818E29-FF8C-4D8D-8FDB-9B50CAA78F4A.jpeg

408104D9-1193-4289-967F-E5AB755811BF.jpeg
 
Lokar Throttle Cable install

The 60 series is the easiest for the cable install because it comes with an OEM hand throttle provision.

Go to Lowe’s and grab a 2 pack of these plastic plugs.
B5721643-0F0A-46F3-A7A2-52E11DD870E2.jpeg

Snap the plastic cap into the arm and drill out the center until the cable just slides through
28F0F385-4A07-4F60-993E-B5AD418493F3.jpeg

Next, mark the spot on the firewall directly across from the plug on the firewall to drill. You will have to trim the firewall blanket in this area some to get a clean firewall (below photo just for a photo and the pedal is not bolted in)
07B2D955-F841-47E1-BCF9-10C4617D4EB9.jpeg


Dissect the cable. Bolt in the Lokar cable to the firewall then bolt the pedal back in then feed the cable into the engine bay
D153B434-0B96-49F3-8622-0FBE008A2FBA.jpeg


33F96851-0A8B-4C61-848D-B04ACC25A820.jpeg
 
Pro Tip.

Mock up your cable to the throttle body and slide the adjuster on before you trim the cable. Once it’s cut it’s almost impossible to feed the clamp on a cut/frayed cable.
89645A2C-0316-4DE1-8F0A-5163132896C4.jpeg


Once the cable is installed you can fine tune on the Mosley supplied bracket to where the cable is tight but not pulling or too loose.

Note the little piece of tape. That keeps the sheath tight while adjusting.
89D173D5-1AC7-4AA5-B152-DCDBBD58B3BE.jpeg

Also. See where I am pointing. You want to zip tie your cable to something to keep it away from the hot manifold. It WILL melt and you will not have a smooth cable.
 
This is a good time to check for fuel leaks. Programming the Wizard will cycle the fuel pump and pressurize the system.

One thing that is different on all trucks is the amount you need to bend and adjust the pedal to get 90-100% TPS.

Also, on the 60 make sure you adjust the limiting bolt below the pedal so when you smash the pedal you get full throttle but the bolt stops you from snapping your cable.

One fun thing @Dustin Messina showed me was how to change the LCD tach to a normal range from the default 10,000 RPM

You don’t have to start the truck to set up the initial Wizard. This needs to happen to make sure your throttle cable is adjusted correctly.

While there set the tach.

3306290B-BEAA-427F-8449-73692237F67F.jpeg

Set to this page and select Monitor

B8083BDE-E263-4E41-83C4-FB4BB5253E55.jpeg


Bottom right

DA3D1250-D8F3-4C16-8C51-7BAF82FA6DED.jpeg

First button
9C0EFE5E-8A5D-413B-AD6C-09F0453030E7.jpeg

Select the max RPM you want to see. On a 60 you have a dash tach but on a 40/55 this is a nice feature and you can install parameters so it blinks at you. I just wanted the dial right
EEB8FBA5-C811-47F1-BFEC-46DAF32ADC3F.jpeg
 
@wngrog Great tech on the Sniper. I’m itching to install mine. Telling myself I need to replace my valve stem seals first and then I can install the Sniper. I got mine from @FJ60Cam too :)

Side note: Are you running catalytic converters on your Sniper equipped rigs? I wouldn’t mind deleting mine.
 

Users who are viewing this thread

Back
Top Bottom