Mike's 1978 FJ40 Build (1 Viewer)

This site may earn a commission from merchant affiliate
links, including eBay, Amazon, Skimlinks, and others.

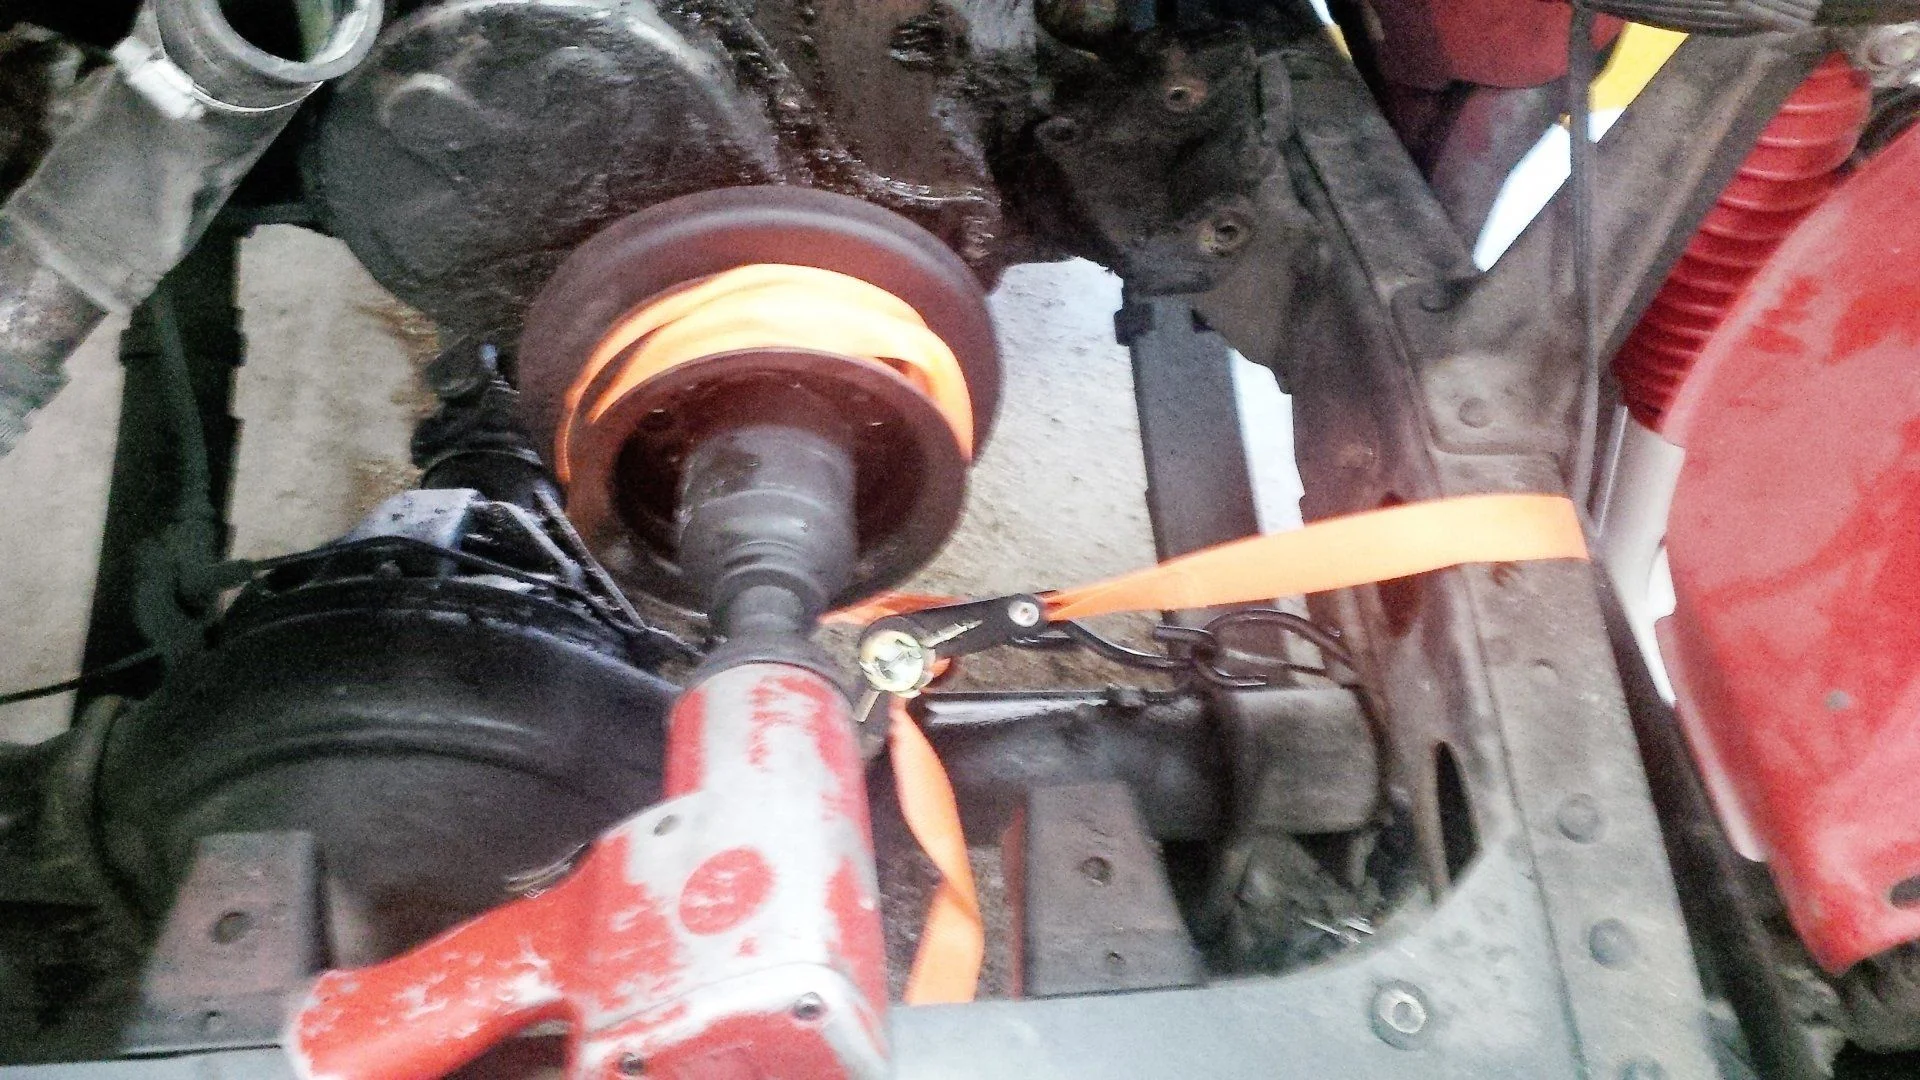
This afternoon I fitted the new throwout bearing on the old hub after pushing out the old throwout bearing.
IMG_20140728_132100_zps8f7a0c1e.jpg


Then I attached the hub and throwout bearing with the little wire clip to the fork.

IMG_20140728_133257_zps661b2c61.jpg


IMG_20140728_133222_zps65a2e135.jpg


IMG_20140728_133215_zps4d99cfa9.jpg


The clutch fork arm is completely assembled with throw out bearing and holding pins.
 
Last edited:
FYI don't need a strap when using an impact. Another FYI-on bolts this large inch sizes work fine. Don't know what 46 is in inch though.

I had to use the strap to hold the pulley in place since the flywheel and tranny is not installed as yet. I tried without the strap and the pulley would turn slowly and the impact wouldn't remove the nut. As soon as I tied down the pulley the nut came right off.


full
 
Last edited:
FYI don't need a strap when using an impact. Another FYI-on bolts this large inch sizes work fine. Don't know what 46 is in inch though.

46 mm = 1-13/16"
 
I finally removed the timing gear cover and cleaned the end plate.

IMG_20140729_184318_zps18edebec.jpg
 
When and where did you reinstall the slave and fork?
Did you mount that on the transmission

Or the bell housing?

I'm a bit lost with thus and how it all get lined up


...via IH8MUD app
 
Next step is to deal with water pump installation and also remove clean and paint the thermostat housing.

IMG_20140728_133530_zps101d9909.jpg
 
When and where did you reinstall the slave and fork?
Did you mount that on the transmission

Or the bell housing?

I'm a bit lost with thus and how it all get lined up


...via IH8MUD app

The clutch gets mounted on the flywheel within the bell housing and then the tranny will slide in the bell housing and bolted in place.
The clutch and tranny installation will be the last thing I do, I'll be taking plenty of pics during the entire installation, stay tuned.
 
Next step is to deal with water pump installation and also remove clean and paint the thermostat housing.

IMG_20140728_133530_zps101d9909.jpg
 
I've been doing a lot of cleaning and painting lately, I need to start re-assembly soon and finish before the winter sneaks in here in the PNW.


Pic of fuel pump prior to cleaning
IMG_20140810_134611_zpsd35d9a24.jpg


Fuel pump and oil filter bracket cleaned

IMG_20140810_171320_zpsd3e3139e.jpg


Distributor prior to cleaning

IMG_20140810_171336_zpsbfdb6268.jpg


Cleaning block surfaces for new water pump and T stat housing

IMG_20140810_171346_zpsf3b5ee48.jpg


Side valve cover removed for cleaning
IMG_20140810_171358_zps06d9b70b.jpg


A lot of cleaning involved!

IMG_20140810_171405_zps8f2ddc43.jpg
 
Here are a few updates; Yesterday I started the re-assembly process (right side of engine)
Cleaned all components, painted, new hoses, new water pump, new thermostat, new double clamps, new fuel filter and hoses with new fuel injection hose clamps.

IMG_20140830_124515_zpsaa89744d.jpg


IMG_20140830_124527_zps6fb394a6.jpg


Installed timing gear cover and crank pulley

IMG_20140830_124536_zps124b8f13.jpg
 
Sorry about the crappy pics, phone camera

IMG_20140830_124554_zpsf5b8b592.jpg


IMG_20140830_124704_zpsad1c5d07.jpg


New fuel filter (relocated and mounted on the charcoal canister) for easy future access

IMG_20140830_124721_zpsbc03dd14.jpg


IMG_20140830_124728_zps3536caf2.jpg
 
IMG_20140830_124827_zpse23b4554.jpg


Today I started dis-assembly of the left side of engine, removed air cleaner housing, removed valve cover and carb.
I will be removing and replacing intake/exhaust manifolds gasket since there's a small leak, it may be a cracked exhaust manifold, I don't know for sure, the exhaust leak appears when the engine is cold and as it warms up the leak goes away. If it's a cracked manifold I might be looking for a new header, but I don't know how that will work with a stock carb.

IMG_20140830_153709_zps3b0e4b09.jpg


IMG_20140830_153743_zpscef7bcd9.jpg


IMG_20140830_154035_zps4bd7014b.jpg


IMG_20140830_154042_zps53b3dcf6.jpg


More cleaning and painting to come, I hate the cleaning part but love re-assembling the engine.
 
Last edited:
Did you test fit your pilot bearing on the trans before installing it. Sometimes the input shaft? needs to be sanded down for the new pilot bearing to slide onto. Ask me how I know. :bang:
 
There's flexible connector on the carb where the engine breather tube is connected, it is toast, where can I find a new one, does anyone know?

IMG_20140830_154245_zpsae3fb550.jpg
 
Last edited:
Did you test fit your pilot bearing on the trans before installing it. Sometimes the input shaft? needs to be sanded down for the new pilot bearing to slide onto. Ask me how I know. :bang:

Thanks for the heads up! Yeah I sure did and it fits perfectly. Does the input shaft need to be lubed for easy install of the tranny into the pilot?
The tranny install will be the last thing I do.
 
Last edited:
I didn't. Just takes a little patience to get everything lined up and put together.
 
P
I didn't. Just takes a little patience to get everything lined up and put together.
Pulling the tranny was a pain in the arss, I'm sure the re-install will be just as bad, specially trying line it up and push it back in place, I'll be ready in couple of weeks for that part.
 

Users who are viewing this thread

Back
Top Bottom