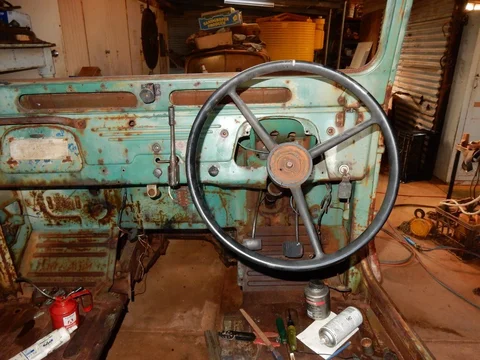
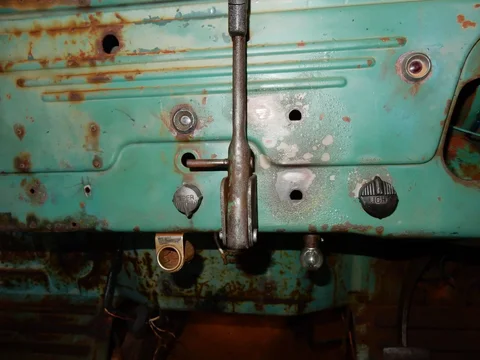
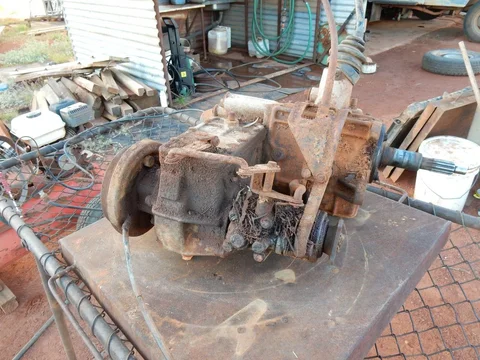
This comes out of a '66 (I think) owner's manual. You will notice that the "room light" position is omitted from the description. That is because a separate dash-mounted pull switch is described in this particular manual for operating the room light. But the other lighting position descriptions apply across the years . . . I believe?

Navigation
Install the app
How to install the app on iOS
Follow along with the video below to see how to install our site as a web app on your home screen.
Note: This feature may not be available in some browsers.
More options
Style variation
You are using an out of date browser. It may not display this or other websites correctly.
You should upgrade or use an alternative browser.
You should upgrade or use an alternative browser.
Look what I found.... 1961 FJ40 FST
- Thread starter west aussie
- Start date
This site may earn a commission from merchant affiliate
links, including eBay, Amazon, Skimlinks, and others.
More options
Who Replied?I have the 62 owners manual. I'll take a pic tomorrow.
There is a weird thing: you have or the parking lights or the headlights on, never both. After checking the owners manual it turned out that was correct.
There is a weird thing: you have or the parking lights or the headlights on, never both. After checking the owners manual it turned out that was correct.
- Thread starter
- #303
thanks red and hdjtachtig; as helpful and reliable as ever! a peek at the 62 owners manual would be great to see how 'darth vaders room light' fitted into the switch combination pre 65 as per factory specs.
this really interests me now. i didnt realise front park didnt come on with headlights, or that tailights and parkers exited the switch at different points. (have never bothered with rear lights on any of my projects yet; the rear harness is invariably long torn out.)
for one thing it explains why every old switch i see is different, has been messed with and has wires looped and joined and omitted etc, as owners worked out their own combinations regards what suited them best.
i have always found it strange that you cannot turn on the room light with the headlights on. i plan to wire the room light as per specs, but run a seperate loop from the headlights to the room light with its own under dash switch so you can flick it on while rattling down the road. the problem is always that lone can of lemonade that is mixed in the esky with the emu bitter; you will grab it every time in the dark. it sets you up to fail this darth vader light!
hdjtachtig - your wiring diagram via pdf in post #240 has been a great help. i have it printed in a3 and laminated. a shame it doesnt have the wire colour codes incorporated into the diagram but i am making a few notes as i go. so the way i understand the 5 terminals on old lightswitch are;
- power in from fusebox
- lights to dimmer sw
- parkers
- rear lights
- room light and dash lights
what i do not understand from the pdf is the dimmer switch. what i take to be power out to the dash high beam indicator light seems to go to the ignition switch. and what i take to be the dash high beam indicator leads back to power at the starter motor. i feel that the draftsman 'got his wires crossed' so to speak. in fact i am sure of it because there is no other batt power to the ignition.
anyways thanks again for your help; much appreciated. im not good at wiring. so this is great practice; and a fair mess ive got to play with to boot.
The bit I don't understand is why there is a can of lemonade...
Henry, I emailed you some pics of pages of the workshop manual and from the owner manual. HTH. Will upload it here later.
- Thread starter
- #306
mr hdjtachtig - thanks for that. see you email but haven't studied it fully as yet.
lemonade - yea i have never understood that either??
BUT... let there be light....


....and there was light haha! long way to go yet but tiny steps. even so, as far as this ridiculous project is concerned this is a big milestone.
lemonade - yea i have never understood that either??
BUT... let there be light....
....and there was light haha! long way to go yet but tiny steps. even so, as far as this ridiculous project is concerned this is a big milestone.
Haha, she is winking to me.
Here are the pics of th 61/62 workshop manual concerning the wiring. I didn't realize it was this detailed, I could have shared it earlier.


Here are the pics of th 61/62 workshop manual concerning the wiring. I didn't realize it was this detailed, I could have shared it earlier.
more


more


And this is the explanation in the owners manual of the light switch. upside down again . edit: fixed. View attachment 1080121

 . edit: fixed. View attachment 1080121
Last edited:
- Thread starter
- #311
mr hdjtachtig - that is great info. got all that printed and bound together; everything i need!
well things are quiet in the hollow again! got a couple solid arvos in on rusty and made a bit of progress.
regards wiring ; achieved most of my objectives.
- light switch sorted and fitted; power to the terminal block, dash power to the connection and (for what its worth) tail light power to the juntion.
- darth vader light sorted.
- wipers - power to the switch.
- indicators - power to the trafficator. (not delving deeper into the indicators for now; has been hacked and surplus to requirements really)
- inspection light - bugging me the most; cant get power here.
- but the best bit is this oem ignition switch and key i forgot i had....

im sure in due course this will find its way back into an fj45 project (and pair back up with its original door lock) bit is a nice thing for now!
well things are quiet in the hollow again! got a couple solid arvos in on rusty and made a bit of progress.
regards wiring ; achieved most of my objectives.
- light switch sorted and fitted; power to the terminal block, dash power to the connection and (for what its worth) tail light power to the juntion.
- darth vader light sorted.
- wipers - power to the switch.
- indicators - power to the trafficator. (not delving deeper into the indicators for now; has been hacked and surplus to requirements really)
- inspection light - bugging me the most; cant get power here.
- but the best bit is this oem ignition switch and key i forgot i had....
im sure in due course this will find its way back into an fj45 project (and pair back up with its original door lock) bit is a nice thing for now!
- Thread starter
- #312
If you mean the cigarette lighter socket: that is not stock. the inspection light socket is located in the firewall. You can see it on this pic of fjfjfj's 62, just beneath the grommet for the starter motor wires. Yours will be on the other side I think? Looking at the loom drawing in the workshop manual it would be a red/white wire, and with RHD it gets out close to the generator wires.

- Thread starter
- #314
that old cig lighter was removed yesterday. i mean the inspection socket proper (had to change socket) but losing power somewhere in the old harness.
got a bit more done. removed the terminal blocks. these were baked rotten as usual and not the slightest hope of unscrewing anything. broke the red crumble up and ground away back of the screw on each wire one at a time. fiddly work.
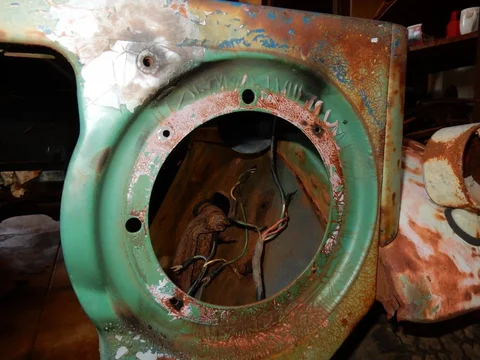
pulled headlights. i have heated and played with these a lot but again no hope. simply chiseled off the 4 screws that locate headlight carrier to the bezel. removed bezel, and this parker po gem.

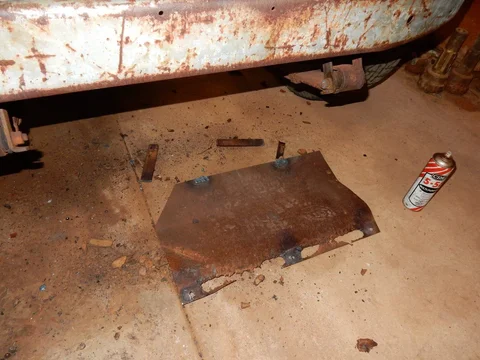
removed this homemade bash plate under the bumper; did not like the swelling rust against the rare as original bumper. was going to reinstall this as a period mod but there wasnt much to keep once it was out!

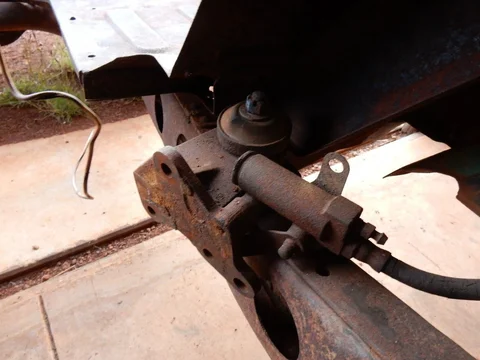
have been unable to get this bellhousing mount undone from the chassis. gassed that off also.
got a bit more done. removed the terminal blocks. these were baked rotten as usual and not the slightest hope of unscrewing anything. broke the red crumble up and ground away back of the screw on each wire one at a time. fiddly work.

pulled headlights. i have heated and played with these a lot but again no hope. simply chiseled off the 4 screws that locate headlight carrier to the bezel. removed bezel, and this parker po gem.

removed this homemade bash plate under the bumper; did not like the swelling rust against the rare as original bumper. was going to reinstall this as a period mod but there wasnt much to keep once it was out!


have been unable to get this bellhousing mount undone from the chassis. gassed that off also.

- Thread starter
- #315
pushed her outside for another shed sweep.

- Thread starter
- #316
now on front axle stands ready for finish front brakes. also pulled donor fueltank and headlight hardware. quick test fit of fuel tank to see what needs modification at the filler neck. also pulled horns and (because i am a geek) the horn carriers. heat and patience again. reinstalled these immediately with lube so they are an easy pull when i want to play with them. and knocked a little bit of rust out of the bib. (sorry meant bib not bezel in above posts)


steady progress but a bit done all in all. nice to be tinkering a little again.


steady progress but a bit done all in all. nice to be tinkering a little again.
- Thread starter
- #317
- Thread starter
- #318
got a few hrs in over the last couple evenings. brakes nearly done. master kitted and fitted and new shoes fitted and adjusted. pulling the hard lines one at a time and getting compressed air through them; cleaning junction points etc. just the front pipe to go; may need to replace this. cracked most of these before but is still time consuming work.


also sorted rear brakes....

few other things done. all clamps on the tierods etc been undone and lubed; not the rods themselves just the clamps. got one end of the steering damper out (its a bit tired...) still working on other end. few things sorted on the front wheel hubs; snapped drake drum locating screw. missing drive plate dowel sorted etc. sourced drive plate dust caps and axle circlips. pulled a donor 64fj45 fueltalk which i think will be a better fit (regards filler angle) than the late 60s one already proposed. got a couple po broken studs out of the radiator support panel (still working on this also). wish i had kept all the po broken studs i have got out of this project would fill a tobacco tin; been a nice glovebox ornament.
anyways... nothing too visual but progress nonetheless.


also sorted rear brakes....
few other things done. all clamps on the tierods etc been undone and lubed; not the rods themselves just the clamps. got one end of the steering damper out (its a bit tired...) still working on other end. few things sorted on the front wheel hubs; snapped drake drum locating screw. missing drive plate dowel sorted etc. sourced drive plate dust caps and axle circlips. pulled a donor 64fj45 fueltalk which i think will be a better fit (regards filler angle) than the late 60s one already proposed. got a couple po broken studs out of the radiator support panel (still working on this also). wish i had kept all the po broken studs i have got out of this project would fill a tobacco tin; been a nice glovebox ornament.
anyways... nothing too visual but progress nonetheless.
- Thread starter
- #319
so... beers in the late arvo and took my favourite jack down to parts wreck #1 and plucked the motor out. need the bellhousing but theres a bit more to the plan than that eventually.


what do people make of this old motor? 67 build with later head etc? motor turns free, oil is clean, but dirty raided and long unloved; will go in deep storage out of the weather once i pull the bellhousing.


what do people make of this old motor? 67 build with later head etc? motor turns free, oil is clean, but dirty raided and long unloved; will go in deep storage out of the weather once i pull the bellhousing.


- Thread starter
- #320
made a start on bellhousing but light beat me so tinkered inside. mocked up donor 64fj45 fueltank. very nice; think i can get away with no mods at all. later 60s fueltank i originally earmarked has a different angle on the filler neck where it leaves the tank.


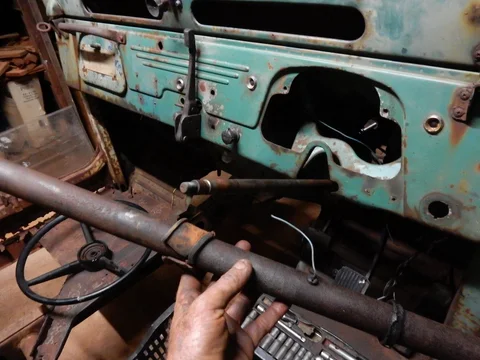
ignored brakes for the moment and started pondering the deeper secrets of the horn circuit...
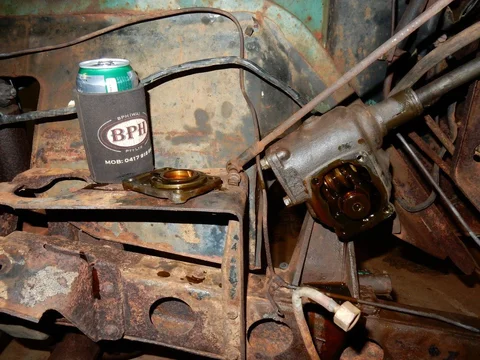
also had a bo peep inside the steering box. all seems nice in there; prob should never have touched it but i thought moisture may have seeped in after 40 years in the weather.


ignored brakes for the moment and started pondering the deeper secrets of the horn circuit...

also had a bo peep inside the steering box. all seems nice in there; prob should never have touched it but i thought moisture may have seeped in after 40 years in the weather.

Similar threads
Users who are viewing this thread
Total: 1 (members: 0, guests: 1)

