Look what I found.... 1961 FJ40 FST (1 Viewer)

This site may earn a commission from merchant affiliate
links, including eBay, Amazon, Skimlinks, and others.

anyway.... meanwhile back on project rusty. got the mysterious damage on my oil pickup line bronzed up last night. fit this with a new copper washer is next then rear main seal (presuming the 69-73 one i have to hand is the same??)

so my 67 F motor book reads:

"...Replacement of the crankshaft rear oil seal after the crankshaft and the oil pan are assembled. Pry out the oil seal with a screwdriver, and remove it..."[sic]

i havent touched the crank or main journals and cannot see at all what difference it makes whether the oil pan is in place or not to replace this seal but the book is quiet specific about it. anyone have an opinion on this???
 
It is strange west maybe it because they like to seal the cork gasket before fitting the main seal.
iphone6 001.JPG
 
really cannot see how it makes a lick of difference; just intrigues me because the book is so specific about it. same book as mine. plenty of things loose just a little in translation. for example:

"...Do not loosen and remove the head bolts at one time. Perform the removal in twice or three procedures..."

anyway had a tinker. pulled the rocker gear for a clean and inspect. plenty of sticky old oil gum and condensation rust but pretty good all in all; cleaned it all up with some clean petrol, a toothbrush and some fine emery.

012.JPG

what intrigued me was some very distinct wear on a couple of the rocker block bolts; but didnt keep these in sequence.

013.JPG

got it all oiled up and finger tight and retired to refresh valve clearances.

018.JPG
 
It's just a poor translation. What the manual is trying to say is:
"To replace the crank rear seal after the engine is assembled, use the SST..."

Go forward a couple pages and it says in assembly step 5:
"Install crank bearings onto cylinder block, then install crankshaft and crank rear seal."

It obviously makes more sense & gives a better result to set the rear seal in place after the crank is layed in the block, then install & torque main caps. The FSMs assume the user has a certain level of knowledge/experience, so they leave out things that are well understood by a line mechanic.
 
cheers fj40jim. rear crank seal replaced (with sump off haha). old seal shattered like a piece of glass as i pryed it out. very happy with the crank surface where seal runs and glad i bothered to replace this.

valve set done, oil pickup installed, sump on, pushrod cover on. tinker tinker; starting to look like an engine!
 
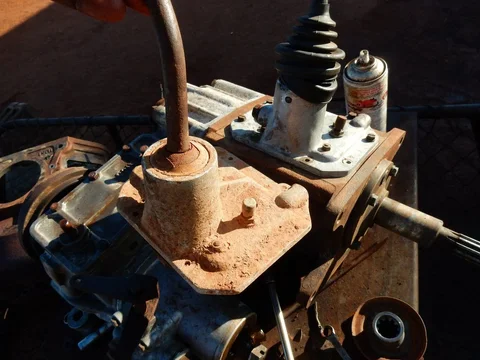
tinker tinkerslowly . got my donor gearbox lid apart and cleaned up. made gasket. pulled all the box seals prior to a little jaunt to the city.

003.JPG 010.JPG
 
recent quick trip to the city caused another budget blowout. new thrust and spigot bearings, all new gearbox seals!

012.JPG

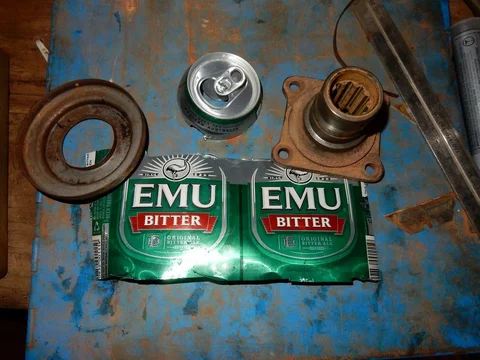
turned my attention to the front gearbox yoke. these, and diff yokes often damaged in my parts. missing or damaged stoneguard and poor seal surface; usually both. this seal surface tolerable but guard has been run loose. decided for an experiment to try repair. found some ...ahem... shim paper and stuck it all together with some retaining compound or threadlocker or whatever this old loctite product is. only so happy with it but no great loss if it fails.

001.JPG 002.JPG
 
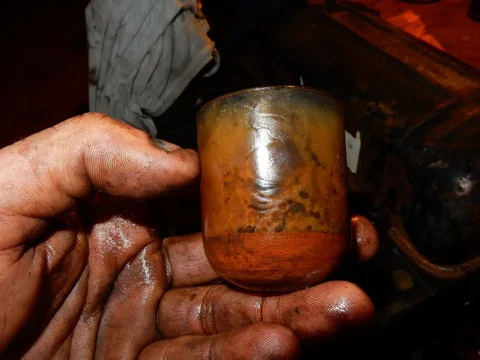
pottered along cleaning a few things. handbrake mechanism and fuel bowl. plenty of old sediment in the fuel bowl! set like concrete it is. no filter of course.

007.JPG 008.JPG 009.JPG

started pondering coreplugs and front engine seal. unsure whether to tackle this seal just now.
 
Westaussie is that bottle of metho there for when the beer runs out hehehe

There use to be a few metho drinkers around my area years ago, guess you would have had them too?

My old grandfather had a bottle in his pocket at all times for injuries, don't know if it did anything other then make you bleed like a stuck pig if it was put on a cut
 
You know I have one of those fuel bowls, glass, lines n all.
 
There use to be a few metho drinkers around my area years ago, guess you would have had them too?

my parts are full of old metho drinkers stories. one old bloke (still alive but now long time teetotal) told me you must first pour the metho into a flat dish and light it up. as soon as the flame changes colour extinguish the flame quickly and then it is good to drink. apparently this burns away most of the ethanol or blindness causing impurities or somesuch; but burn it too long and you are wasting alcohol. havent tried it myself but must light a dish up oneday to see the flame colour change he means. apologies moderators!

You know I have one of those fuel bowls, glass, lines n all.

nice things cult; dont lose it. this one will clean up eventually.

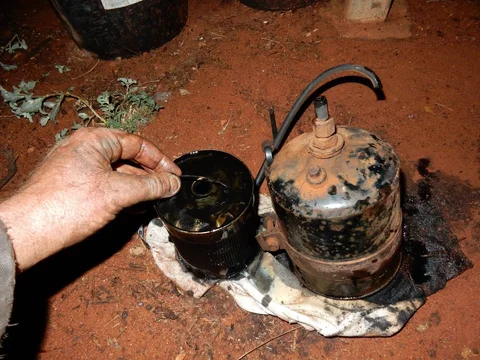
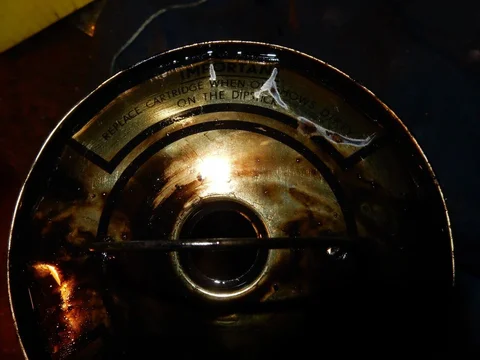
so tinker tinker; tonight; nothing too serious. cleared a space and got gearbox inside. installed new seals, made a few more gaskets, and cleaned a few things. decided to clean the oil canister. this had long been bypassed. found this cool old oil filter of a type i not seen before with a little metal loop to carry/insert it by. very heavy (as far as oil filters go). wondering if anyone seen one of these before. my inner geek loves finding unusual things!

016.JPG 022.JPG 023.JPG
 
g'day punters, just checking in

been a bit flat out of late and the junk is starting to pile up on the old girl again. scored a few weeks bobcat tipper work and all the flat tyres, dismantled startermotors, back roads and conversations with the constabulary that are the daily greasy lot of blokes who run old and barely registered gear. also a rush job to get an old xr falcon ute out of the stable and running for a local movie of sorts. anyways had a potter tonight and lined a few things up plotting my next move.

have sourced some coreplugs; a set in both stainless and brass. im guessing the procedure is give them a solid whack in the middle of the concave to seat them. haven't tried yet.

also pondering front main seal. am I right there is nothing holding the front pulley on the crank other than a press fit over the keyway?? this all makes me a bit nervous because the pulley threads are somewhat butchered (reckon I can get away with a long stud and decent nut/washer on the inside though). can anyone direct me to an early front seal 101 thread?
 
found a good harmonic link in Ken Whites thread on the 40 page. gotta learn how to do this link thing myself.

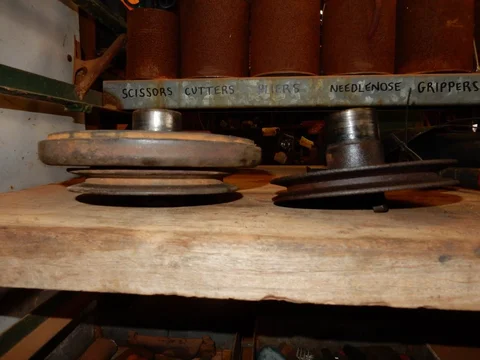
anyway baby steps. got harmonic balancer off. here the 61 and a newer pictured together. note the different size keyways. 5mm v's 7mm wide

026.JPG 030.JPG 034.JPG
 
the puller threads were pretty sad but made them to be m10 x 1.5, at any rate that's what I tapped them and put a nut washer behind also. on removal this seal was just not going to go the distance!only so happy with the seal surface; prob speedi sleeve this. wondering when the HB's changed; there was a bit of discussion in that link most my old junk has had motor swaps but a 63fj45 with orig motor has the later type. I would presume the crank keyway changed then also. (and is that when the teq casting was removed from the crank??)

028.JPG


anyway anything else I should do while im in here apart from change out that fibre cam gear? any tips for getting the fibre gear off with cam in situ? and any tips regards reassembly appreciated also.
 
Saved from page two - a fate worse than death! Welcome back WA.. ;)
 
Pay attention to the oiler and return? Make sure its clear..............and secure.
 
just found and read the "Barn Rebuild" thread by mudder "Heirloom" over on the 40 page. its a great motivating read and makes me realise this project is overdue for another kick in the pants!

for want of other ideas I think I have determined to pull all the valvetrain again and pull this crankshaft to effect the gear swap. none of my pulling gear suits the old fibre gear and destroying the old gear doesn't appeal to my sentimental side (it may make a good candlestick holder or somesuch). im also a bit concerned about disrupting the coreplug at the rear of the camshaft but haven't studied this yet.
 
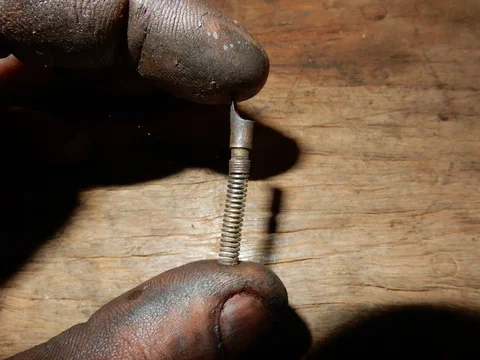
pondering. studying my horn circuit; had a little refresh via notaclue resto thread and nuclearlemons horn thread. guessing my horn contact/spring is not supposed to be worn/shaped like this?

016.JPG


006.JPG
 
so complete lack of progress to report. but did find these tatty old troopy jump seats?? for the correct price at my local rubbish dump this morn.

003.JPG

ive got no idea what they are out of. hoping they are Toyota; guessing 70 series troopy? but at any rate they are the seats I have so started mocking them up. plotting a couple bolt holes in my rusty floor and keeping them easily removable. hoping to find some canvas seat covers so they match my great oem seats. reckon this will work well.

002.JPG
 

Users who are viewing this thread

Back
Top Bottom