Builds Here we go (FJ-40 getting a 3B/Turbo/H55f)...

This site may earn a commission from merchant affiliate
links, including eBay, Amazon, Skimlinks, and others.

Dan,

In adition to all your other talents, it appears that 'photographer' will have to be near the top; those photos of the injector lines are pure artwork. If my wife would let me I would blow that shot up to 3' x 5', frame it with a lovely welded picture frame (with baked-on enamel, of course) and hang it over the fire place.

Josh
Don't tempt me. Fair warning, steel doesnt clear quite as nicely as aluminum. :(.

Thanks, I do like taking pictures, but I both need a new camera, and I'm pretty hit or miss. As good as the pictures make it look though, FEELING the parts is incredible. They are so smooth to the touch!

Dan
 
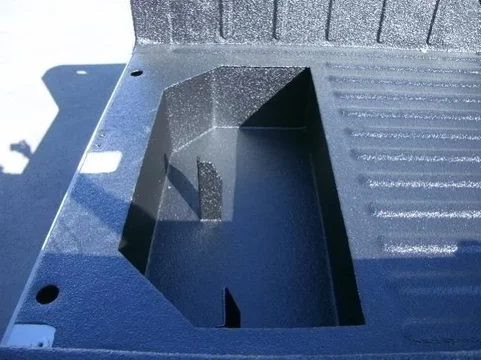
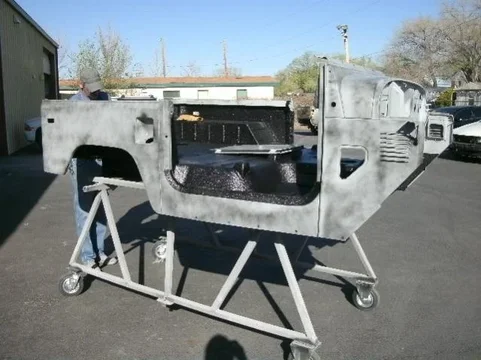
So.... we got an email from the body shop. I'll let the pictures speak for themselves. My bodywork on the floors didn't come out half bad!

GEDC0137.webp

GEDC0149.webp

GEDC0145.webp

They'll start the paint very soon. Hopefully we can pick it up next week and get busi(er) driving!
GEDC0137.webp
GEDC0145.webp
GEDC0149.webp
 
The underside is done too...
GEDC0141.webp

And the Bellhousing is in clear coat...
IMG_1620.webp

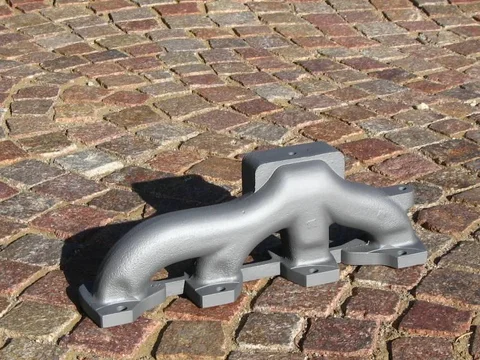
And here's why we aren't changing exhaust manifolds.... Ceramic coated baby!
IMG_1612.webp

That's it for now. I'll be in the shop for a few days later this week. Chances are HIGH that the driveline will be in the frame just waiting for the tub to come back from paint... ;)

Dan
GEDC0141.webp
IMG_1620.webp
IMG_1612.webp
 
That Rino line looks fantastic, Dan!! Did you have those guys in Bernalillo do it?

I know you lowered the drive train slightly, but if you find that the top loader still interferes with the inspection cover, let me know and I'll send an 82-84 cover up.

Cheers,

Josh
 
Thanks for the offer Josh, but since I moved the drivetrain forward, I'll be sticking with this top cover for Dad's truck. Pretty sure the correct 40 series top cover would put the shift lever through the heater! ;)

The lining was done by Smith's Ultimate Coatings (they're just off Juan Tabo). Pappy used them on his 40, and the finish came out great, plus, they are just down the street from the paint shop, so they were able to just wheel the tub between the two and we didn't have to go move it across town between bedline and paint.

It's a rubbery kind of liner, and it's paintable, so the paint shop is just going to paint the whole shebang for us in the body color. Other than the texture, you shouldn't see the bedliner when it's all said and done.

The timing should be perfect for us to get the engine in the frame, just before the tub shows up and gets plopped on there. I can hardly wait!

Dan

PS--we should talk about that top loader one of these days though, pretty sure it would look great with my 45, whenever I get around to tinkering with that... ;)
 
Wow dan ive been reading this thread for a couple weeks now. Just got an account yesterday. I wanted an fj40 since the first time i saw one and this month i went out and spent a buncha money, got myself an fj40 and bj60. (girlfriends not to happy, but whatcha gonna do ;p ) Your conversion and restoration are a big inspiration every time i get on here i cant wait to jump into mine(unfortunately i got no place to work on it for a few months). I guess for me my situation will be reversed from yours, ie my dads gonna be helping ME with MY cruiser. All the same i cant wait. BTW, That engine looks perfect, and i never thought about putting that much effort into mine, but after seeing yours it seems a shame not to. :)
 
Also with regards to your broken turbo, are you gonna try and replace the compressor wheel or get a new turbo? Im considering going with the AXT turbo system for my 3B, but they also just sell the turbo, worth taking a look?
 
I guess for me my situation will be reversed from yours, ie my dads gonna be helping ME with MY cruiser. All the same i cant wait. BTW, That engine looks perfect, and i never thought about putting that much effort into mine, but after seeing yours it seems a shame not to. :)

Oh, Dad helps me with my cruiser plenty too. In fact, we were debating whether to pull his 40 into the shop or my 45. We decided to bring his 40 in because it was "just an engine swap" and I was "just" going to pull the tub to have more room to work. Obviously, you see how our project crept from that. :)

As anal-retentive as I can be, I do kind of like just wrenching to fix things and make them work. I have the ratty 4-runner and 60 for that kind of low budget fun.

As to your turbo question, our turbo/diesel shop is trying to source just a replacement intake plate, so we don't have to change anything else. If we hadn't already fabricated the intake, and had the exhaust manifold coated, I'd be getting a kit from Diesel42. If they can't source that piece, I'll be on the hunt for an adapter and making a 2052 or 2056 fit on there I think.

Thanks for the accolades. There's more to come tomorrow.... ;)

Dan
 
over the decades i have seen this happen more and more.
"just a quick patch job" and thousands of dollars and hundreds of hours later a truck that is too nice to wheel
"just a quick engine swap" and away it goes again.

but in the end, if you do it right, the pride shows through and the enjoyment is there for years to come. this is a fine example of doing it right.
 
Got a nice package in the mail from Canada (thanks again Bob!)....

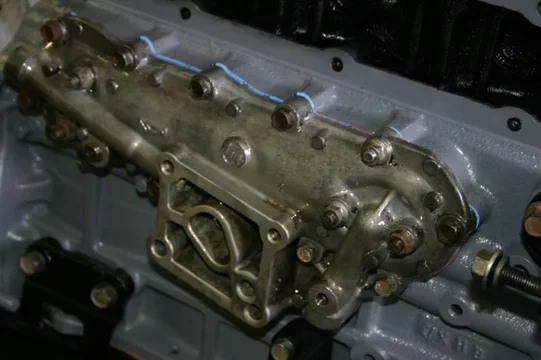
By 10:30 this morning I had the bits cleaned up and powder coated. About a half hour later, they were bolted onto the engine.

engine 1.webp

engine 3.webp

engine 2.webp

You can also see the side cover (which was repainted) and the exhaust manifold temporarily bolted in place. It's interesting to me that the pictures make it look like I slathered the RTV on there. I really just use a skim coat on, with a little "dam" protecting the bolts from water or oil, and then use the paper gasket. I'm a firm believer that the pits that develop in used mating surfaces are best dealt with that skim coat of RTV.
engine 1.webp
engine 2.webp
engine 3.webp
 
With everything bolted onto the engine, it was time to pull it from the engine stand and get it mated back to the transmission.
engine 4.webp

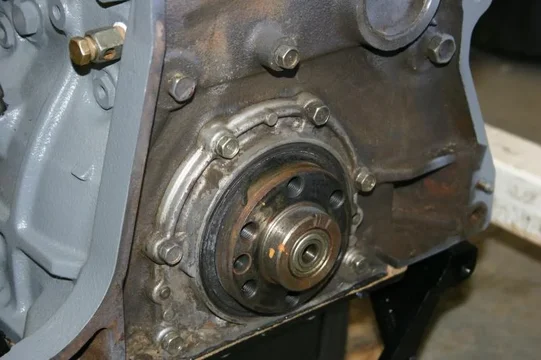
Here's the original rear main seal. It had something that looked like felt or fur in it?!?! Either way, it got replaced with a new one.
engine 5.webp

Why haven't I known about weatherpak connectors? I bought a crimper and a rather large assortment of connectors, because I think it's the easiest way to deal with a few of the wiring issues. For instance....
weatherpak.webp
engine 4.webp
engine 5.webp
weatherpak.webp
 
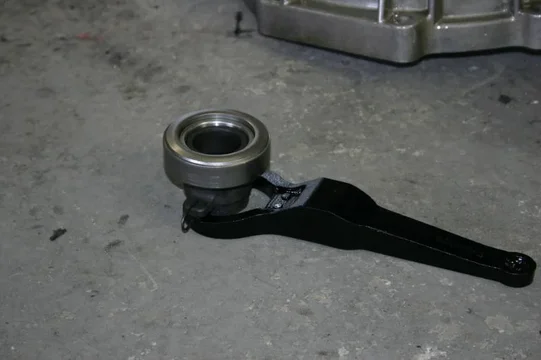
Since I found out that the clutch kit we bought had a new throwout bearing, but not a pilot bearing, I've got to run to town tomorrow morning to get a pilot bearing, but in the meantime, I powdercoated a few bits, notably the clutch fork here. New throwout bearing attached to the powdercoated fork. Nice, eh?
engine 6.webp

And here they are installed into the bellhousing (which is itself not attached to the transmission).
engine 7.webp

Here's a better view of the finish on the bellhousing. It looks incredible in person. Not blingy at all, just nice and clean.
engine 8.webp
engine 6.webp
engine 7.webp
engine 8.webp
 
As I already noted, the big project tomorrow is to go get a pilot bearing and some bits from beno and CDan.

But, here's a taste of what else will be done...
tcase.webp

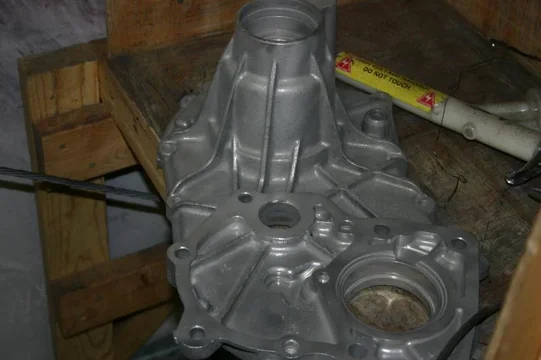
The T-case halves were lighly "polished" by a local shop, because they just weren't coming clean for us. That did the trick! Some clear powder coat and these guys will look brand new for years to come!

Dan
tcase.webp
 
no tooth missing
good time to heat and bend that shifting fork for full engagement, this helps prevent the notorious 5th gear pop-out later in life.

Please expand on this mod Crushers , or point in the correct direction, pm is fine also .

VT
 
Please expand on this mod Crushers , or point in the correct direction, pm is fine also .

VT

x2

Wayne, I know you've mentioned it before, but I'm curious on this too. The transmission on this truck has been into before, and I'm wondering if it wasn't already done, just because there's not much space before the collar engages the 5th speed splines anyhow, so I'm wondering how much I would bend the fork to make it work better.

Dan
 
the old style seal was refered to as a "rope seal". used for years and very reliable.

how can i explain this?
disengage 5th, look at how much space is between the gear and the collar. now engage 5th and take a look at how much gear over lap has occured.
you want to make sure the 5th overlaps completely since both the collar and the gear have tapered teeth and if they do not engage fully then eventually the tapped ends wear and 5th starts to pop out when the load is taken off the drivetrain.
usually a heat and bend of 1/8 to 1/4 inch is sufficient.

clear as mud?
 
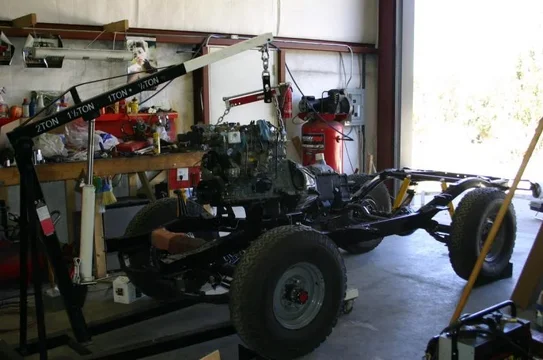
And the engine naturally fit in the frame the same way it did before...
engine 4.webp

And then I installed all the ancillary stuff that I hadn't installed already, like the PS pump, the alternator, and the EDIC motor.
engine 5.webp
engine 6.webp
engine 4.webp
engine 5.webp
engine 6.webp
 

Users who are viewing this thread

Back
Top Bottom