- Thread starter
- #901
Navigation
Install the app
How to install the app on iOS
Follow along with the video below to see how to install our site as a web app on your home screen.
Note: This feature may not be available in some browsers.
More options
Style variation
You are using an out of date browser. It may not display this or other websites correctly.
You should upgrade or use an alternative browser.
You should upgrade or use an alternative browser.
First Time Pig "Build"
- Thread starter Delancy
- Start date
This site may earn a commission from merchant affiliate
links, including eBay, Amazon, Skimlinks, and others.
More options
Who Replied?You just spent $350 to have a perfectly tuned and functioning carb, now you're gonna tear it apart. Have to be a little IMO -
Tucker
Well, whatever you want to call it, it's making him happy and he knows best what that takes. We're all alittle crazy in most people's eyes, just ask your neighbor.
tucker74
Moderator
Didn't mean to throw stones, that carb is sexy 
Tucker
Tucker
- Thread starter
- #904
We're all alittle crazy in most people's eyes, just ask your neighbor.
Don't have to go that far in my world.
Just ask my wife. Haha.
Didn't mean to throw stones, that carb is sexy
Tucker
I set myself up for it, honestly, plus I don't live in a glass house.
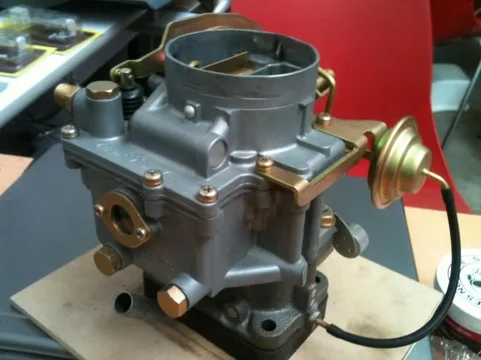
Best pic I can find and seems easy enough to mimic.
Yeah, I left the Wives out of it, getting no support there.
LAMBCRUSHER
SILVER Star
pigwidows....my wife thinks there's a bunch of em out there and wonders when they'll start their own forum. if she didn't love her 62 so much, I'd be a less pleasant person
LAMBCRUSHER
SILVER Star
oh yeah, and I'm just working the bugs out of the truck I built for the boy, see, and the girl has stated she wants a 45 series but we're not sure on style just yet- she's got some time. Dads poor old wagons got a line in front of it, but, see, I'm doin MINE last
Don't be afraid of the carb. It is not black magic or anything. Take pictures count turns to seat mixture screws and record, and do it in a distraction free atmosphere where your stuff cannot get messed with. If you can do it all in one day, it will go smoothest. Carbs are not to be feared! (To prove that I am not just talking the talk, I rebuilt mine that would not idle or accelerate and it now runs like a dream.) And no, you are not crazy to want what you want. Do it. simple is usually right... 1973 fj55Touché. But in an effort to restore to this..... Best sample I can find a picture of. Appear to be correct?
- Thread starter
- #909
So says the automotive technology instructor.... 
Have actually watched an hour of Pinhead's Youtube productions on carb rebuilds and feel as empowered as a hour long Karma Sutra video tutorial.
Ron has graciously donated his fir the greater good of appeasing OCDism, so will remove, plate, replace, rebuild his, and return to him, all for the experience.
Now, if I could find a similar circumstance for the Karma Sutra stuff......
Chris,
I started out on Briggs & Stratton carbs, then to VW solex carbs, from there to the 4 barrels. It's not unachievable. Keep mine and take it apart few times, you'll like it.
When I was a kid, my Dad gave me a typewriter and said take it apart and put it back together. Never did get it back together right.
With your mind set, you'll figure it out.
I started out on Briggs & Stratton carbs, then to VW solex carbs, from there to the 4 barrels. It's not unachievable. Keep mine and take it apart few times, you'll like it.
When I was a kid, my Dad gave me a typewriter and said take it apart and put it back together.
 Never did get it back together right.
With your mind set, you'll figure it out.
- Thread starter
- #911
With your mind set, you'll figure it out.
We mastered the Kama Sutra to the point of boredom, so had to move on.....
Oh, you mean figure out the carb...
Bahaha.
I'll have it down by the time this is done.
- Thread starter
- #912
Thanks again, Ron.
Used Pinhead's tutorial on YouTube to disassemble, though I've an obvious older version, and all went relatively well.
Will have more questions tomorrow, regarding further disassembly for plating, but so far all I've encountered was not being able to extract this

And uncertainty as to what cause, what purpose the scarring has here

Pics for posterity, so I'll have a reference point later.
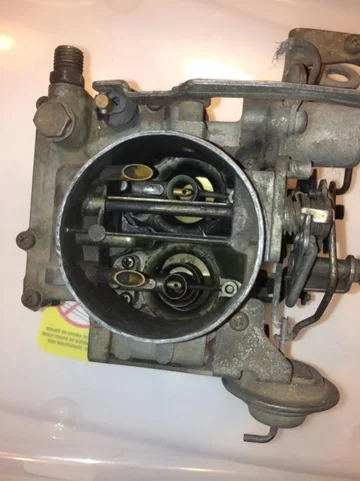


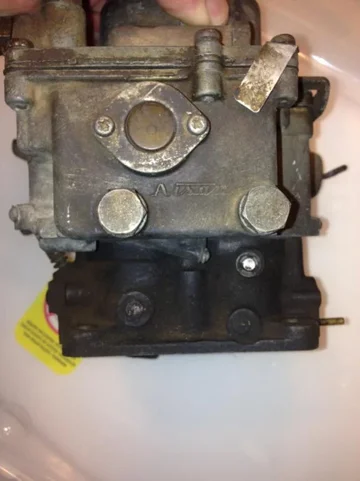


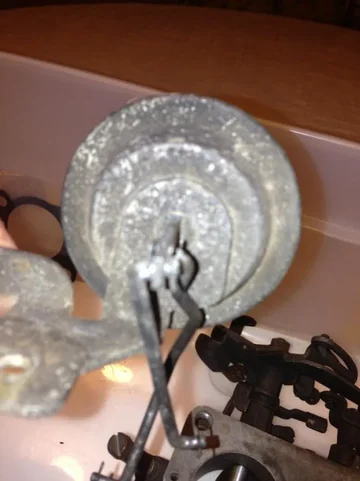
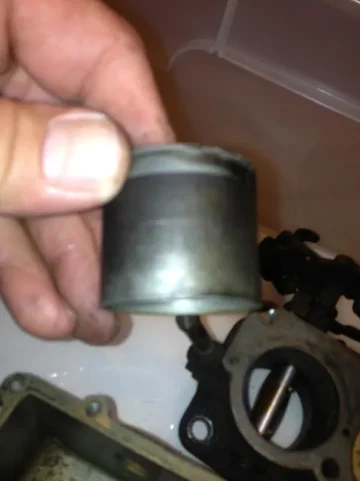
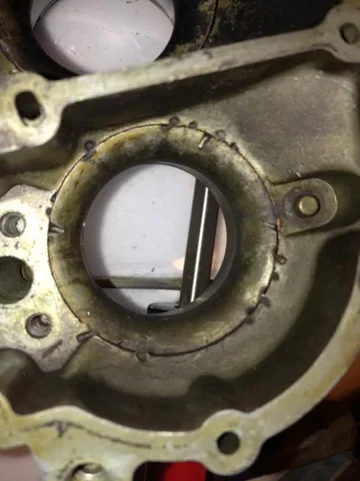



Used Pinhead's tutorial on YouTube to disassemble, though I've an obvious older version, and all went relatively well.
Will have more questions tomorrow, regarding further disassembly for plating, but so far all I've encountered was not being able to extract this

And uncertainty as to what cause, what purpose the scarring has here

Pics for posterity, so I'll have a reference point later.


You make it look simple.
- Thread starter
- #914
You make it look simple.
Surely you jest.
Though I don't understand how to set one up, yet, it's not as complex as I'd imagined and is remarkable close, in theory and design, to the small FCR quad carb....only bigger.
Can't express my appreciation for Ron's loaning, since I don't believe I'd ever get all the linkages swapped properly. I'm going with Jim Cs as the correct carb, since Ron's differed in some orientations of the little rods.
Anyhow, my questions.
First, Pinhead's had a serviceable diaphragm in the video, allowing removal of the diaphragm itself.
This one does not. Holds a vacuum well, Andy question is, how do you prep for glass blasting and plating, since the diaphragm isn't removable?
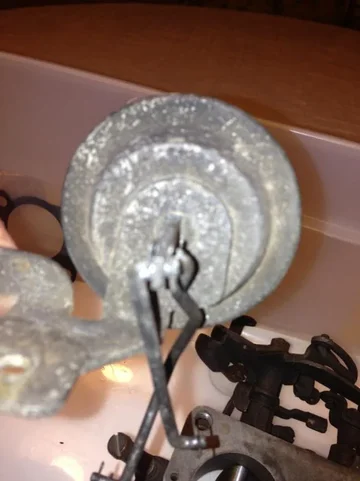

I believe Ron said that plating doesn't affect plastic, which is assume this to contain, but betting glass shards would.
Tape it off, blast, remove tape, plate?
Next question is, how do I remove this sleeve?

I've tried getting behind it with a small pick, to no avail.
Can I wedge a small punch in then pry out?
Does it need to come out to dip?
Lastly, and eluded to in previous.
What caused this scoring?
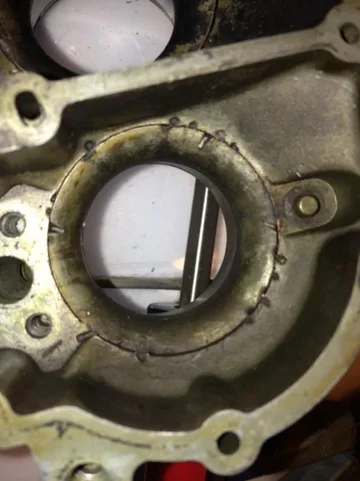

At first I thought they were alignment marks, but there's good sized pits, too.
Something to be concerned about?
Don't see a way to correct, anyway.
- Thread starter
- #915
Few other notes, primarily since my short term memory sucks.
This carb must've been rebuilt before it was last used. Speculation due to lack of any odor in the gaskets, plus their like new condition.
That, and the jets were opposite of Pinhead's tutorial, so assuming an error on last builders part?
Not sure if it ran, as it was set up, so guess the determining factor. I do want to return a rebuilt, runnable carb to Ron.
Lastly, have been around long enough to have read a lot of Pinhead's posts, get a general feel for demeanor. Didn't spend a lot of time with mental imagery, but the old Hellraiser Pinhead came to mind, and stuck.
Turns out, the dude's a yank, if accent an indicator, and anticipating him to say "now, it's time for tea" Or "wine and cheese" at any point in the video.
Bahahaha.
Doubtful he'll ever read, but not ragging on you, as I appreciate the videos, tremendously. Felt empowered enough to rebuild the F, if a video were produced similar, and much better than what I've gathered from the manual or other step by step tutorials, so many thanks.
Chris,
I would definitly cap that inlet, when media blasting and I bet the plater would want it capped, also. Maybe make a small plug to fit in there, so you can plate the whole nipple.
On the sleeve, seems you could plate it all. Hard to tell from picture. A question for the plater.
Don't know about the grooves. This PO didn't do it.
Probably the PO's attempts to re-peen them back in place...
Factory peen marks are the longer ones, like they were made with a screwdriver blade, PO's are the dimple marks, like they were made with a nail punch.
Factory peen marks are the longer ones, like they were made with a screwdriver blade, PO's are the dimple marks, like they were made with a nail punch.
At first I thought they were alignment marks, but there's good sized pits, too.
Something to be concerned about?
Don't see a way to correct, anyway.
- Thread starter
- #918
When you say, cap the inlet, were discussing the vacuum side, right?
What about the back side where the linkage attaches?
Inside where that connector goes, is it to a metal plate?
Thinking: I'd assume that if the connector on the back side does attach to a plate, it'd have to be a right seal, so as long as the diaphragm doesn't move during blasting (capped inlet. Vacuum holds in place) that it'd be secured enough to eliminate any debris....also eliminate plating from getting into the diaphragm.
Pighead,
What's re-peen?
I'm assuming (ass-me) that its to eliminate the body from spinning in the bore.
One of these is solid, one falls out.
Relevant?
Yes, cap the inlet nipple. As far as the back, I'm not sure about the media getting in. I don't have any experience blasting one.
The motor did run, when parked. Not too well, but I drove it off the trailer.
I'm truly not worried about getting a rebulit carb back. Do what you have to, in order to get one good carb for your wagon.
The motor did run, when parked.
I'm truly not worried about getting a rebulit carb back. Do what you have to, in order to get one good carb for your wagon.
LAMBCRUSHER
SILVER Star
the venturi bowls are seperately machined and then fit into the venturi bore and peened into place( a punch used to drive a score mark into the casting whose edge overlaps the lip of the bowl in order to hold it in place. I don't think the bowl have a correct clocking to them, just need to flush out in their bores and then be staked into place...not sure how to keep all the blasting media from entering that diaphram; maybe a rubber vacuum line plug over the nipple and some tape or maybe even some rtv around the plunger arm. can peel the rtv off after blasting...???
Similar threads
Users who are viewing this thread
Total: 1 (members: 0, guests: 1)


