First Time Pig "Build"

This site may earn a commission from merchant affiliate
links, including eBay, Amazon, Skimlinks, and others.

I'm with you on the AC as well ... not to bash you guys but you can't understand the 2-3 months we spend over 100 degrees (90+ days in Austin last year, and we're not talking dry heat).
Tucker

Yeah, if it doesn't have AC, she'll be a late fall through early spring driver.

I'm cool with that, considering I've secure locations for long term storage that won't eat up precious driveway space.....and know this isn't the last Cruiser.

I've paid my dues driving in the intense summer months without AC out of necessity.

Not doing it for "fun"...ever.
 
i looked at a 78 with solid frame, excellent front clip, good runner, passed on it due to rust and poor repair in the past ... i hate rust, you just can't get it to go away.

if you can find a decent body then that is the best way to deal with it. personally, i would rather rebuild a drivetrain than deal with the body rust.

you can also shop in Japan for a body and interior, ship the truck over then you will have a rust free body and (usually) a mint interior to work with. once again, just a suggestion.
 
I can't access the shared Google Drive photos until tonight and there's no hope of a drive by this morning, BUT a glimmer of good news.

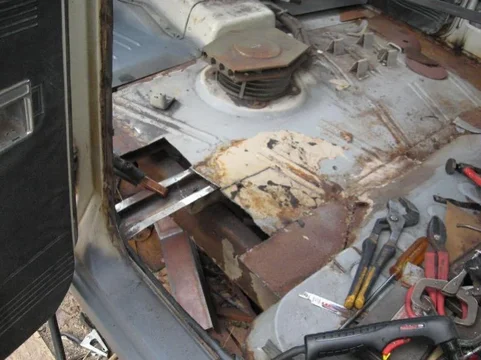
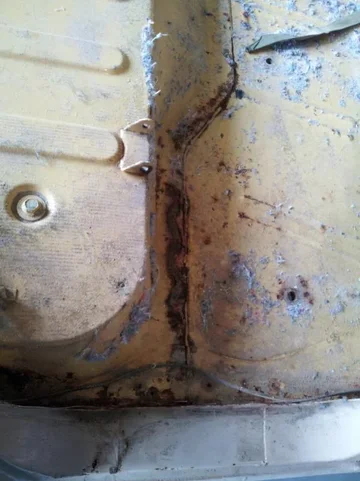
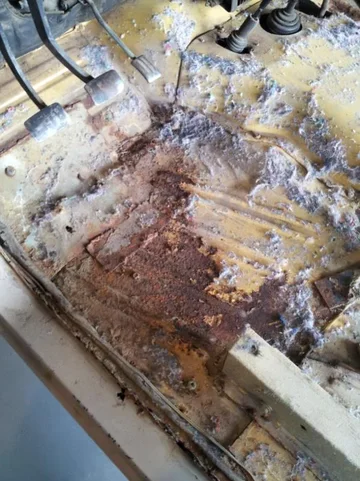
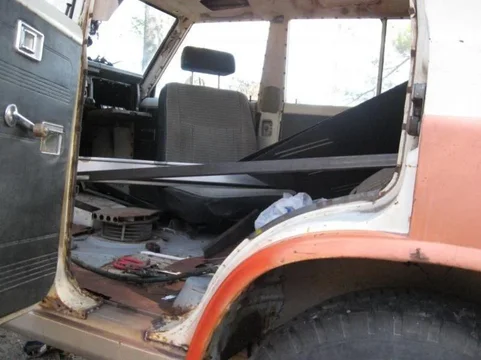
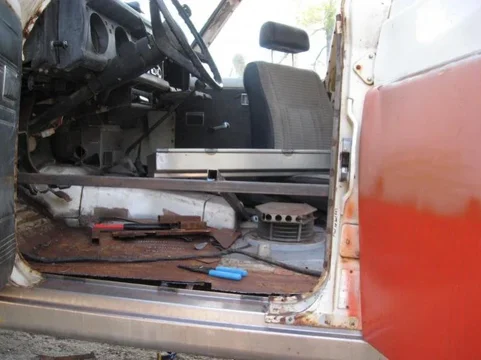
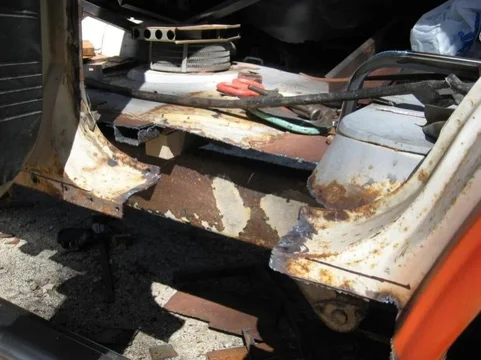
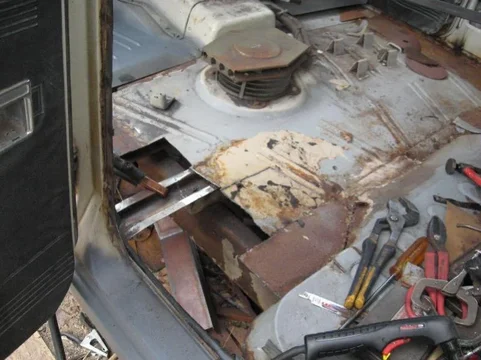
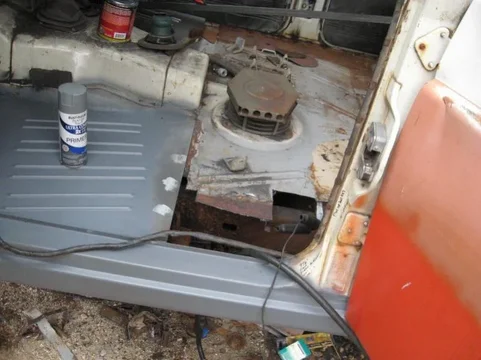
Text me a pic with verbiage of "Here's a little of what we're dealing with." which, of course, had me concerned.
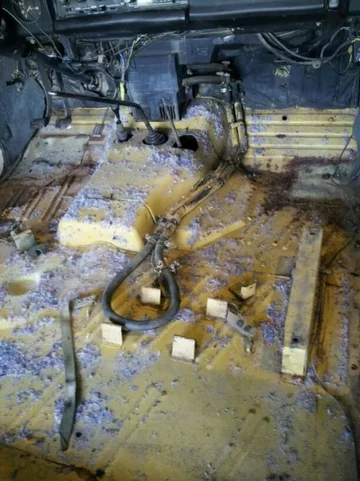
image-2075981105.jpg

My reply, verbatim (can't take pics of text string without listing his name and wouldn't do that without permission)

"Have seen worse (online) and have seen guys that aren't professionally acclaimed (**) correct with the patch panels, but that's in their leisure time.

What's your professional opinion?"

To which the following reply was given.

"Actually not as bad as I thought..."

[(**) for clarification, my purpose wasn't to slam any Mudder's, but I only know of a few of y'all who are in the resto business.

To me, the floor pans are in relatively good shape in pic, considering they're being cut out anyway, and I've seen a whole lot worse here in the Sty]

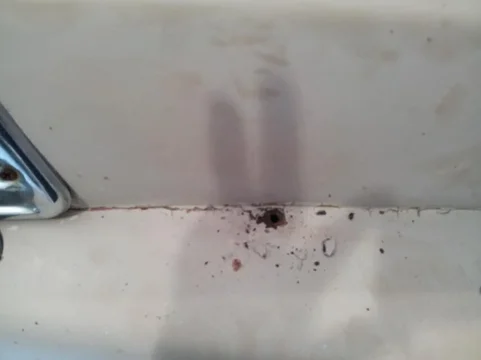
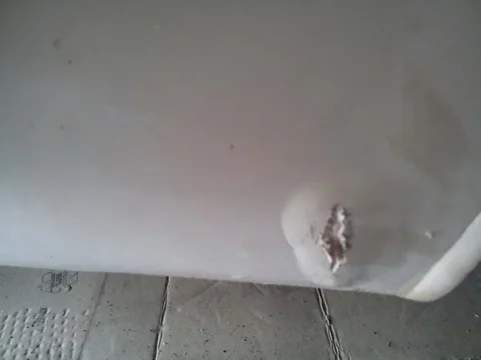
Y'all see now why I thought this must've been Mustard. Someone repainted most everything at some point in the past and anywhere I dug that's what I saw.

Get below the bondo and the green comes through and in enough spots that I believe that to be the OE color of the shell and front clip.

image-3995596185.jpg


image-1595824320.jpg

image-2075981105.jpg


image-3995596185.jpg


image-1595824320.jpg
 
i looked at a 78 with solid frame, excellent front clip, good runner, passed on it due to rust and poor repair in the past ... i hate rust, you just can't get it to go away.

Are the chemical baths capable of getting it all? Even after blasting?

i
you can also shop in Japan for a body and interior, ship the truck over then you will have a rust free body and (usually) a mint interior to work with

Talked to a vendor in CAN who I've done a lot of business with on the 80 about various Japanese options, and he couldn't turn up anything.

I'd be dangerous as heck in a RHD vehicle. Haha.
 
Delancy, dig a little further in my thread and you will see what I did for rear heater.

Thanks Bob.

Haha.

I had saved the pics and linked individual posts through your entire thread. Anytime you were cutting, patching, welding, and composed a lengthy draft on IPhone, with pics.

Lost. Not sure where it went, but have been revisiting as time allows.

Plan to patch the PTO hole, unless it's worth it to someone else that wants to swap covers.
 
Many years ago (15? 20?...I forget exactly) I had a good blacksmith shop in Sacramento (they also made leaf springs) re-arch my original rear springs. I asked for one extra leaf to be added, they said they had enough material left over to make an additional small leaf, I said yes. They pulled the springs, installed new bushings and U-bolts and put them back in. cost about as much as a pair of Alcans, but it was done in one day, no question of fitment issues 'cause they were my springs. Ride was a little harsher, but the lean was gone. Those springs and lift shackles let me run 33s on some pretty tough trails (first Nor-Cal Pig-Run on the Rubicon, 2001).
I think that the older Pig springs used better steel than the later (say, 60 series) and will hold an arch better. BTW, I'm still running those same spring packs today.

Hanley's, I'll bet...
 
Not having any luck here on the re-arching front, not that a current priority.

There's a large local producer that the one remaining small shop sources from, if it has a part number in the system.
 
somewhere between page 6 and 16 is where you'll find what Bob did with the heater:doh: forgot to get the link when I did find it:hillbilly: basically, he cut out the rear heater boss from the old floor as it was still good, yours looks to be ok as well- then went about meticulously spot welding the thing into the hole he blew through the new rear drivers side floor patch panel he meticulously reproduced, and then proceeded to meticulously grind the weld smooth for finish and paint...
I'm gunna go with over arched rear springs from a 60 for my front. It'll get me the shackle angle I want... and the lift I want...YMMV, but I'd like to think the extra ride height and nice shackle angle would be OK
 
somewhere between page 6 and 16 is where you'll find what Bob did with the heater:doh:
.

Have a bobm cheat sheet coming in next few. Spent several hours on it.....twice, so posting up. After a communal review, forwarding to White Pony.

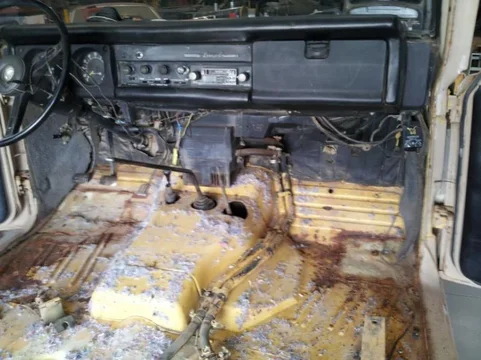
That's not a rusty pig, my '73 had a Flinstones front floor with a street sign riveted over it ;-)

Tucker

I was surprised, to be honest. I've seen and expected much worse.

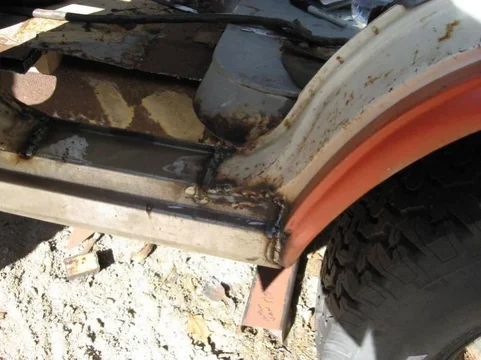
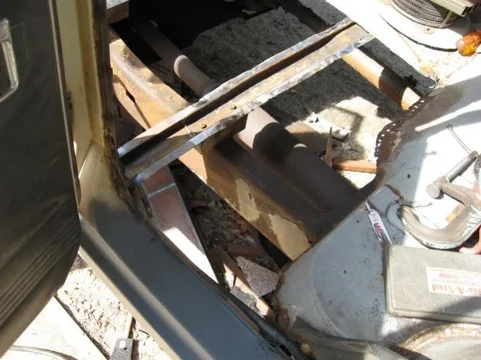
The body mounts are trash, but to be expected and with good meat around most the patch panel areas, I think it's very workable....based on what I've ascertained from reads here and NOT real experience though.
 
Last edited:
I'm gunna go with over arched rear springs from a 60 for my front. It'll get me the shackle angle I want... and the lift I want...YMMV, but I'd like to think the extra ride height and nice shackle angle would be OK

Had it in my head to keep as much of this one intact, as possible, and Pighead's idea of re-arching these sounded ideal to do so.

My goal was to level, since I can't stand rake and it will never be loaded with more than 500lbs of passenger, and lift enough to clear the 33s which, I think, is 2-2.5", but not be too stiff.

May be dreaming, I don't know, but Pighead has a plan and said to rest easy on this front, so I am.

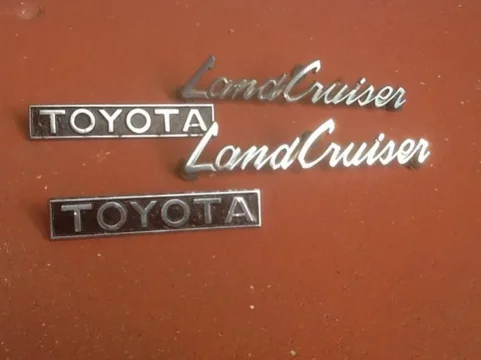
Picked up 72-73 (??) badges for $35


image-168038026.jpg

Thanks JohnB.

image-168038026.jpg
 
bobm's Replacement Panel Cheat Sheet, all taken from bobm's Original Pig Skin Thread

Compiled to make it easier to reference for mine.

O,K, Gang. If enough interest willing to produce floorpans from front to rear bench seat, all body mounts
-
image-174904504.jpg

image-3351257751.jpg

image-225557364.jpg
-
Now availabke entire floor-pan kit from kick panel to rear bench seat.
-
image-2125759786.jpg

image-3633350709.jpg
-
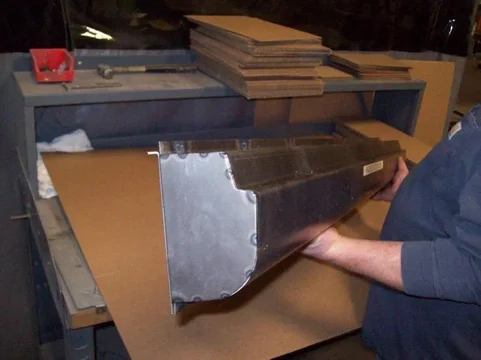
Rockers are done exact duplicate of factory dimensions. made out of .090 cold rolled steel.
-
image-1072358361.jpg

image-721777532.jpg

image-39422243.jpg
-
the inner panel runs 2" past the back of the front fender towards the front. (59" overall.) The front or external profile is 57" long like factory it runs from the front fender to rear wheell well opening. As far as the dog leg is concerned the external flange can be removed for a cleaner look. I left the front of the Rocker open ( I am supplieing an end cap) So they can be treated internally. POR 15 OR Bedliner spray. They tie into the A,B and C pillars and also the floor crossmemberand body mounts.

You do not have to remove the dog leg at the C pillar. (you can if you want.) The dog leg goes on the outside of the Rocker Profile.

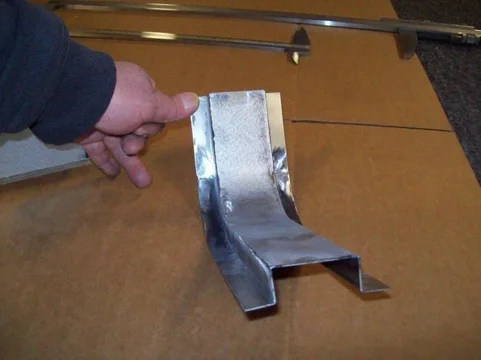
" C" pillar body mounts are done. They mount in front of rear wheel.
-
image-571046376.jpg

image-1481051806.jpg
-
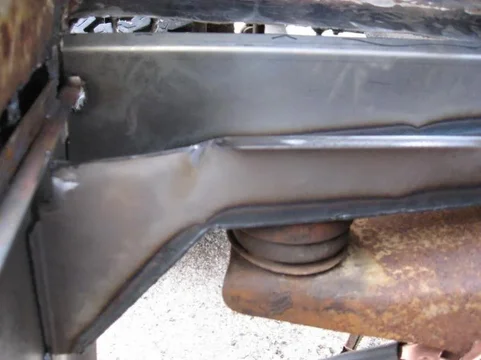
Floor support brackets are done, can also supply the whole bracket from Rocker to Rocker if needed.
-
image-4163446477.jpg

image-3625504871.jpg
-
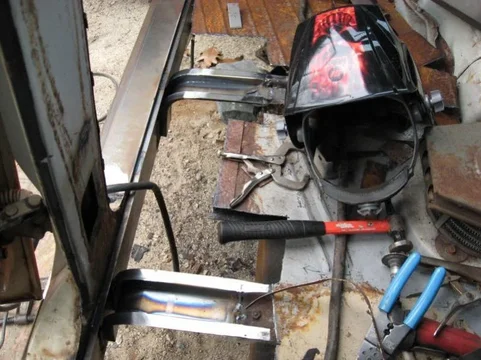
Finally got a chance and nice weather to lay in the DIRT. Instead of MUD. Although MUD is the perfect place for a PIG. To do some work. 1st 3 show croos-bracing
Here are some pics.
-
image-2271249714.jpg

image-929008432.jpg

image-2736228714.jpg
-
CUT LINES
-
image-4245799330.jpg

image-3275635056.jpg
-
-
image-125791523.jpg

image-3693779418.jpg

image-1836747052.jpg
-
Got a little bit done this weekend.First few a the floor support removal. Then the install. And finally tacked in the body-mount.
-
image-2514517034.jpg

image-1517863583.jpg

image-350932536.jpg
-
The next 3 are install.:beer:
-
image-1210989695.jpg

image-1461269988.jpg

image-1375248770.jpg
-
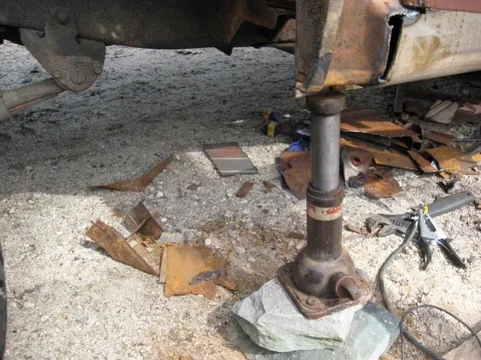
The next 3 are the front body mount removal. notice the jack supporting the body from the Rocker prior to removal.:beer:
-
image-1655902515.jpg

image-1926521940.jpg

image-3541332.jpg
-
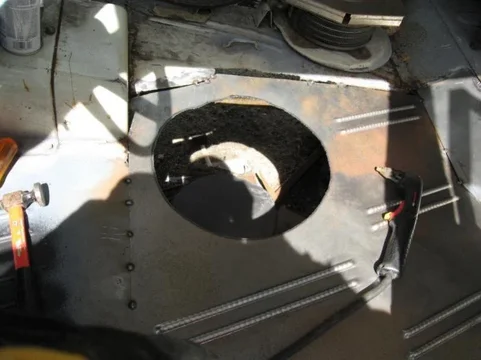
The last 3. because I am done for the day. Show the body mount tacked in place and notched for the floor-pan emboss. And the floor-pan layed in place and marked. Its always a Good day when there are no EXPLOSIONS or FIRE. Time for BEER.:beer::beer::beer::beer::beer::beer::beer::beer:
-
image-3903354754.jpg

image-2081136221.jpg

image-1133272242.jpg

image-174904504.jpg


image-3351257751.jpg


image-225557364.jpg


image-2125759786.jpg


image-3633350709.jpg


image-1072358361.jpg


image-721777532.jpg


image-39422243.jpg


image-571046376.jpg


image-1481051806.jpg


image-4163446477.jpg


image-3625504871.jpg


image-2271249714.jpg


image-929008432.jpg


image-2736228714.jpg


image-4245799330.jpg


image-3275635056.jpg


image-125791523.jpg


image-3693779418.jpg


image-1836747052.jpg


image-2514517034.jpg


image-1517863583.jpg


image-350932536.jpg


image-1210989695.jpg


image-1461269988.jpg


image-1375248770.jpg


image-1655902515.jpg


image-1926521940.jpg


image-3541332.jpg


image-3903354754.jpg


image-2081136221.jpg


image-1133272242.jpg
 
Last edited:
Part 2

Front fender Patch panels are ready.
-
-
image-2073927369.jpg

image-3780960008.jpg

image-1283450655.jpg
-
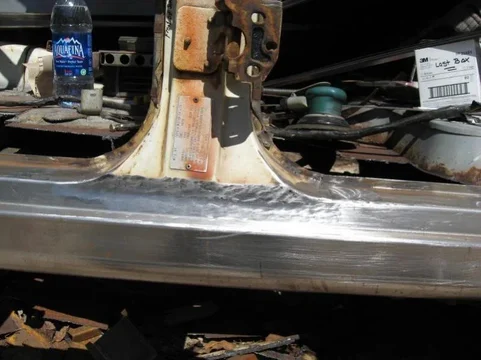
Got some work done this weekend. Finished welding the Rocker in and got it all ground down. Thanks Bob.
-
image-732537877.jpg

image-401492027.jpg

image-1505428520.jpg
-
Made some Headway today. Front mount and floor-pan complete. Also new poly mounts. Thanks Bob.
-
image-1199448885.jpg

image-3496879167.jpg

image-1522343606.jpg
-
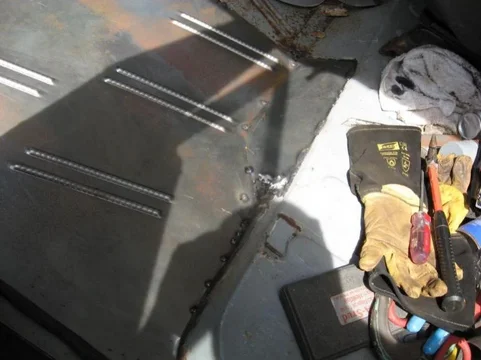
Got the rear fllor-pan in after a little cutting
-
image-2901196704.jpg

image-1971283510.jpg

image-2385899986.jpg

image-3095855745.jpg

image-3352407498.jpg

image-1528568790.jpg

image-901390374.jpg

image-3869565452.jpg

image-1690912131.jpg

image-1220778933.jpg

image-3281759623.jpg

image-3122720857.jpg

image-1939220628.jpg

image-1177827751.jpg
-
Take a guess
-
image-2377123432.jpg

image-1773191312.jpg
-
lower ape where the rocker rolled up into it. yep^^^

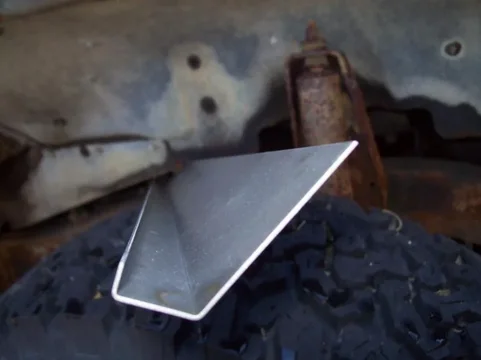
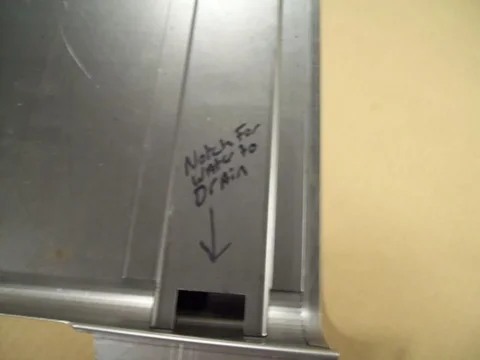
LANBCRUSHER Is correct. Water runs down your windshield and follows the "A" pillar and goes right into that opening and into your Rocker panel (which has rubber drain plugs.) thats why your ROCKERS rot out. Get some seam sealer and fill it. Thanks Bob.
-
image-476213777.jpg

image-2952142491.jpg
-
working corners. they will be sold in sets only. Also an update on front patch panel and rear quarter.


just make sure you remove enough material on the inner bracket so the water and crap flow out. If you dont they will rot again.
-
image-1502612422.jpg

image-2249026605.jpg

image-1007912372.jpg

image-880271600.jpg
-
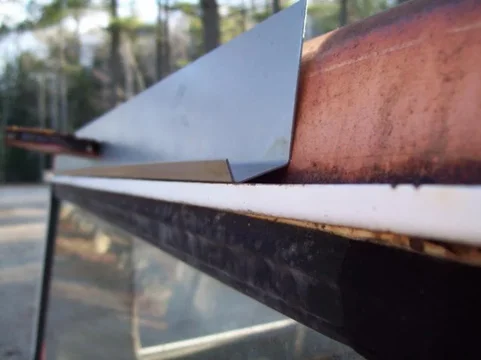
Is your PIG suffering from RRGS (Rotten roof gutter syndrome) Now we have a cure. they will be offered in 3 piece sextions per side. That way you can maintain the contour of the roof. 1 piece from the A pillar to the B pillar 1 piece from the B pillar to C pillar and one from the C to D pillar.
-
image-375230610.jpg

image-3483626120.jpg

image-3719604313.jpg
-
I am going to increase the angle a couple of degrees to match the roof line. Its not supposed to go inside you need to cut out your old gutter and roof section. They are done in 3 sections per side instead of 1 long piece so you can maintain the curve. I always leave extra metal to work with, they are 2 inches taller than roof line so they can be traced and trimmed. I leave plenty extra on the floor-pans also. When you start installing you will notice the rear pans are almost 3 inches longer than stock. The reason the extra material is left is in case someone makes a mistake they always have the extra material. And if you dont make a mistake you can use it elsewhere.

Revised fender patches, 15+ inches long, rear bracket radius so you dont have to.
-
image-56300284.jpg

image-4293201125.jpg

image-606853091.jpg

image-3842919714.jpg
-
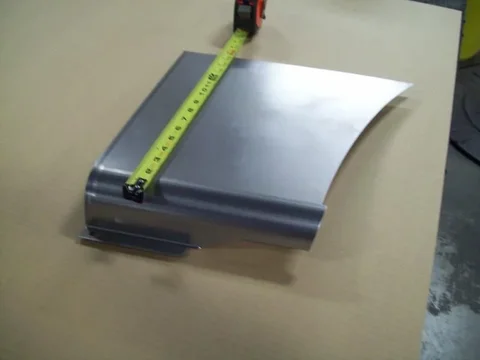
due to the multiple bends and radii on a full rear quarter this is being temporarily shevled. But I will be offering a patch panel for the rear corners which I am running this week. Pics will follow.

Quarter patch panels are done, 3 sets. 1 already spoken for. Can run more. Includes inner panel that attaches to cargo floor. Little trimming and tweaking. Thanks Bob.
-
image-1503778096.jpg

image-4046069492.jpg

image-1745417431.jpg
-
Miscellaneous Notes from Bob's thread

Rear wheel outer flares are the same as the front fender flares, except right=left and vice versa...find someone who's trimming off their front flares.

Disregard the pic below. I have tried to delete, but can't.

image-3132487782.jpg


image-2073927369.jpg


image-3780960008.jpg


image-1283450655.jpg


image-732537877.jpg


image-401492027.jpg


image-1505428520.jpg


image-1199448885.jpg


image-3496879167.jpg


image-1522343606.jpg


image-2901196704.jpg


image-1971283510.jpg


image-2385899986.jpg


image-3095855745.jpg


image-3352407498.jpg


image-1528568790.jpg


image-901390374.jpg


image-3869565452.jpg


image-1690912131.jpg


image-1220778933.jpg


image-3281759623.jpg


image-3122720857.jpg


image-1939220628.jpg


image-1177827751.jpg


image-2377123432.jpg


image-1773191312.jpg


image-476213777.jpg


image-2952142491.jpg


image-1502612422.jpg


image-2249026605.jpg


image-1007912372.jpg


image-880271600.jpg


image-375230610.jpg


image-3483626120.jpg


image-3719604313.jpg


image-56300284.jpg


image-4293201125.jpg


image-606853091.jpg


image-3842919714.jpg


image-1503778096.jpg


image-4046069492.jpg


image-1745417431.jpg
 
Last edited:
Few questions

Body Mount Bushings

I'm assuming I'm going to need during the process of panel replacement.

Any preferences?

Realize SOR and Daystar are about the only options, but is there a stiffness difference in red and black? (there is in all other poly's I'm familiar with, if that'd a dumb question).

Cargo Floor Patch

Can I cut out what's bad only and patch or should I see if Bob can fab an entire floor?

It's getting a scrapdaddy treatment, followed with the OEish rubber, but don't want to lose my fair entry for not replacing entire floor.

Have Bob do the whole shebang. at this point in the game, you'll be glad you did 20 years from now. I'm wishin I had spent my lunch money on the floor panels now and will have to do everything again one day. Heck, then the only bits of floor he hasn't done will be the rear seat shelf and the front floorboard angled panels.
 
body mount bushings....I'd prolly go with SORs stuff. If rubber were available, I'd rather do that. they'll wear faster, but they'll be quieter and softer...
 

Users who are viewing this thread

Back
Top Bottom