Valley Plate Retrospective
First off thank
jmanscotch for this incredible content, you’re a valley plate God for me. This was both inspiring and infuriating that you could instill so much confidence in my lackluster ability to accomplish this very difficult task. This would have cost me close to $2700 at the dealership, while in there, I also replace spark plugs, so another almost $1,000 saved. Thank you.
So, here is what I’ve learned from this repair…………
The bolt that shall not be named is 1,000% the hardest, most maddening and most bloodying part of this project. This is also the only part of the project that my biggest mistake was a eureka moment that will forever change the way I do this job, and save the rest of you from contemplating some serious life decisions.
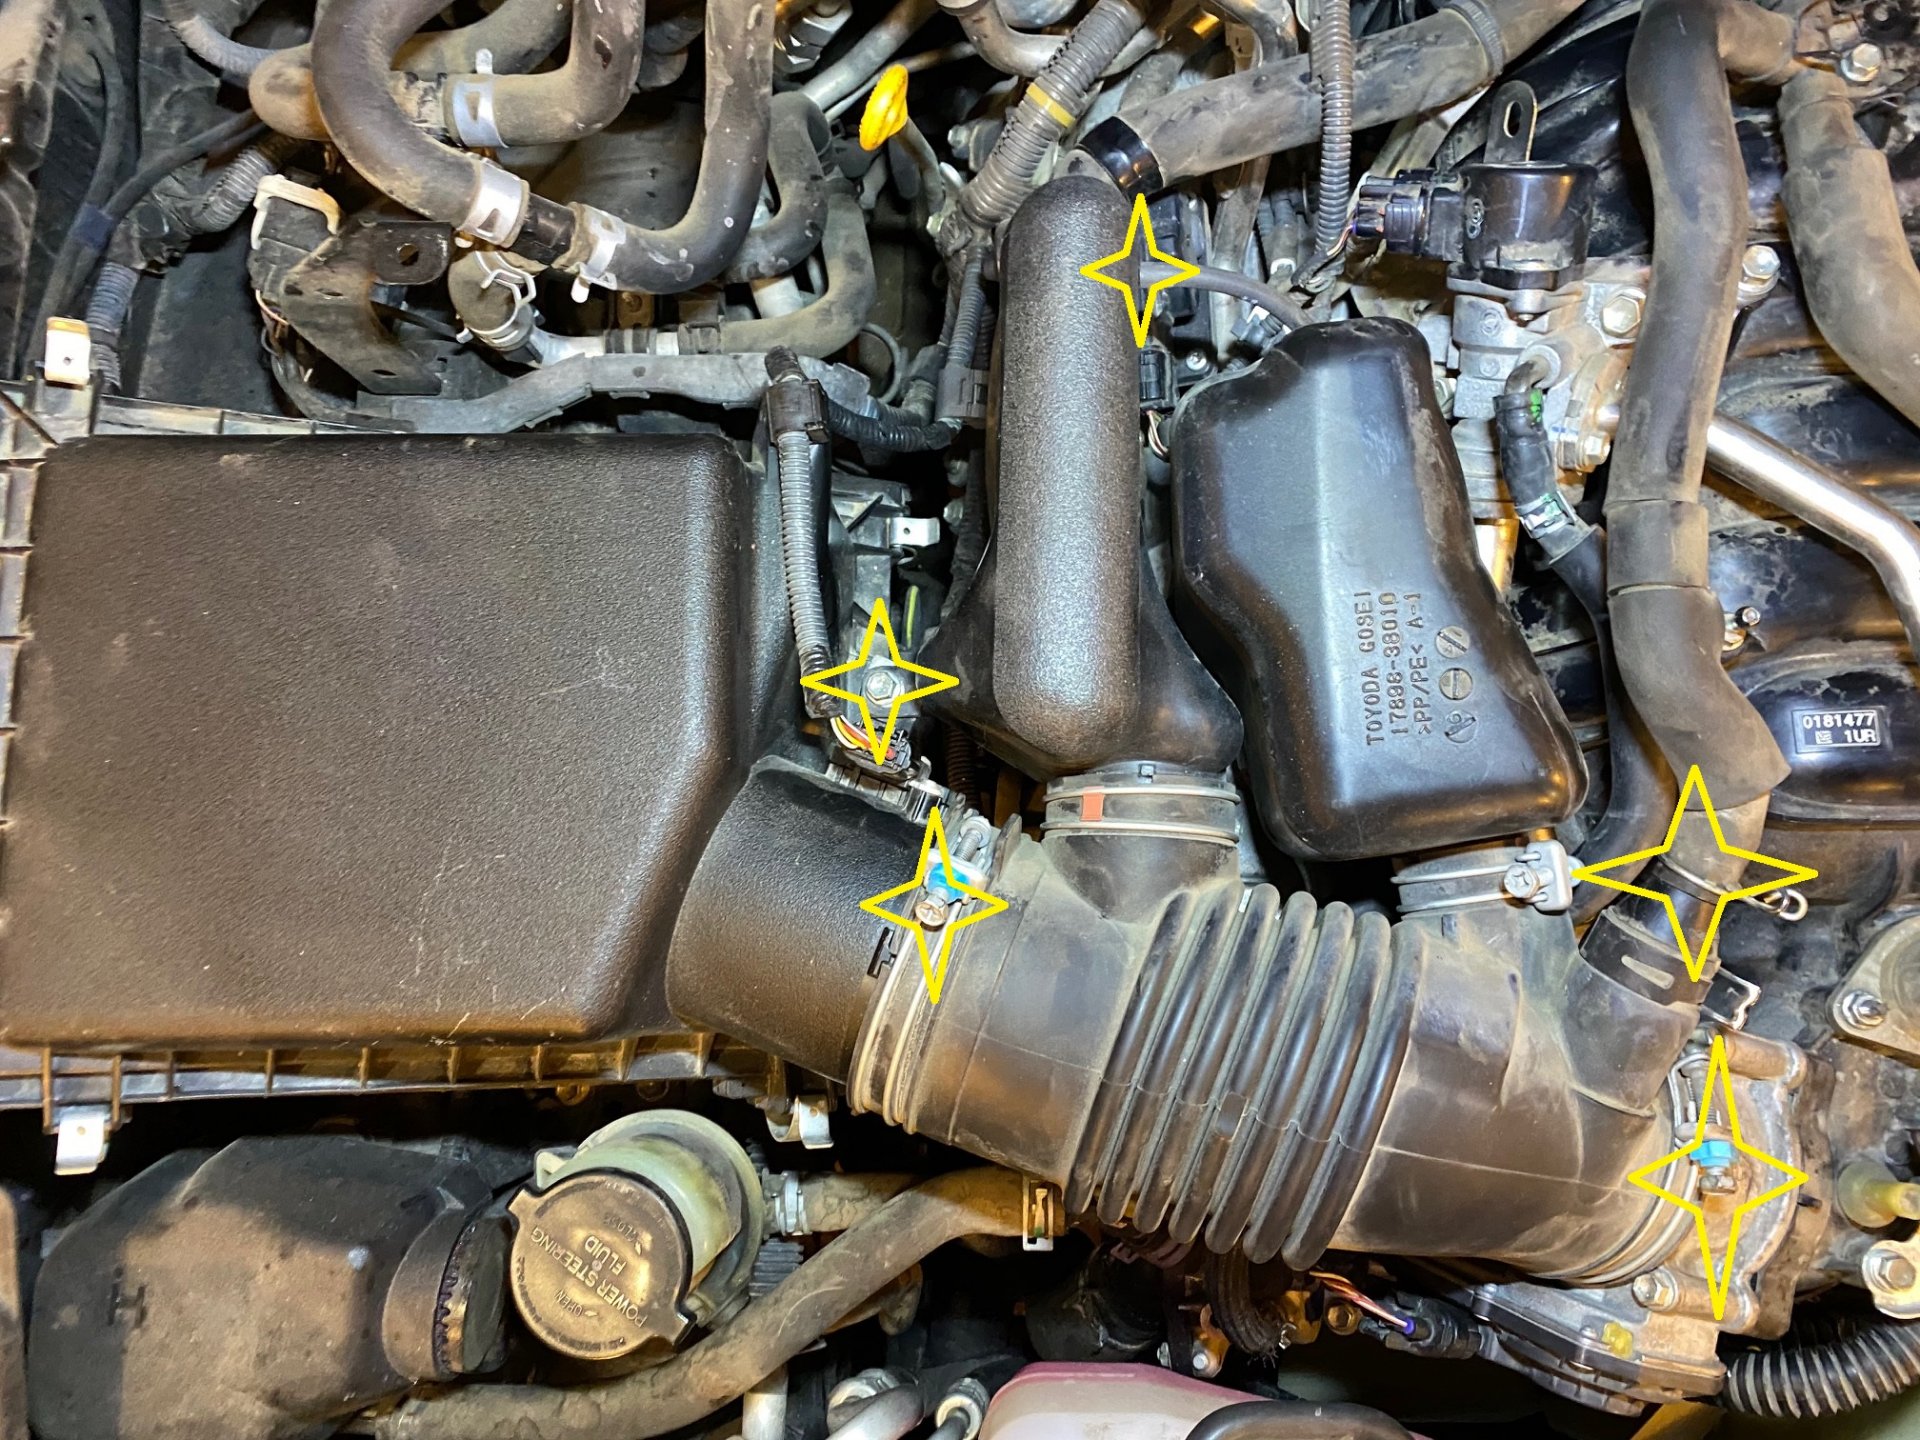
Fast forward to the moment where you’ve gotten to the “impossible” bolt in the back of the manifold. I was finally here, feeling great; so far it’s exactly like our God has foretold. Now for the hard parts.......The drivers side tab of the wiring harness was fairly easy to pop off, the passenger side not so much; carefully break it, don’t waste your time or blood, just be careful not to F up any of the actual wiring in the harness.
I struggled mightily with the passenger side clip until finally smashing it to bits, revealing the “impossible” bolt! HOLY s***, I’ve found it. I sliced my hands to hell and back, loosening this bolt and was certain at multiple points that this was truly an impossible project and that I’ve chosen poorly my path in life. But, I pulled myself up by the bootstraps and millimeter by mm I persevered until that f***ing bolt was beaten! It was one of the proudest moments of my life, I was so friggin happy I can’t even tell you, I placed the bolt on a pedestal next to the car in the garage and pledged to make a necklace out of it, I was so happy. I then went and sutured up my hands and got ready to remove the manifold, f*** yea, I’ve done it!!
I unbolted everything holding the manifold down and proceeded to remove it, but it barely budged, huh, that’s odd, it should pop right off. Well, that was not reassuring. Then I remembered reading in many many other threads and service manuals that the impossible bolt holds the fuel line in place and that the dealership recommends removing the fuel line for this repair. That’s when I realized I was able to wiggle it around just enough to get a better look on what the manifold was hung up on………
Much to my bloodied knuckles chagrin (and my rad bolt necklace’s), I had declared victory on the wrong f***ing bolt; not the “impossible” bolt, but the wiring harness bolt that had almost killed me!!! MF’er!!!!!!...............BUT, in this moment I realize there’s just enough play in the fuel line that you can pull and angle the manifold enough to get much easier access to the “impossible” bolt!!!!! BOOM, rad necklace back in the works!! That's the Eureka moment!!!!!
So, be careful not to break the fuel line at all costs, but this little extra room will shave hours off the repair, it’ll also save you bloodied knuckles and save your sanity!
Thanks to
jmanscotch who is a legend and my Valley Plate God, for all of his hard work putting this together for us. You’re a total badass. Godspeed.
 forum.ih8mud.com


 cheers
 with a hint of reality.