Builds Almost beautiful HDJ81 (2 Viewers)

This site may earn a commission from merchant affiliate
links, including eBay, Amazon, Skimlinks, and others.

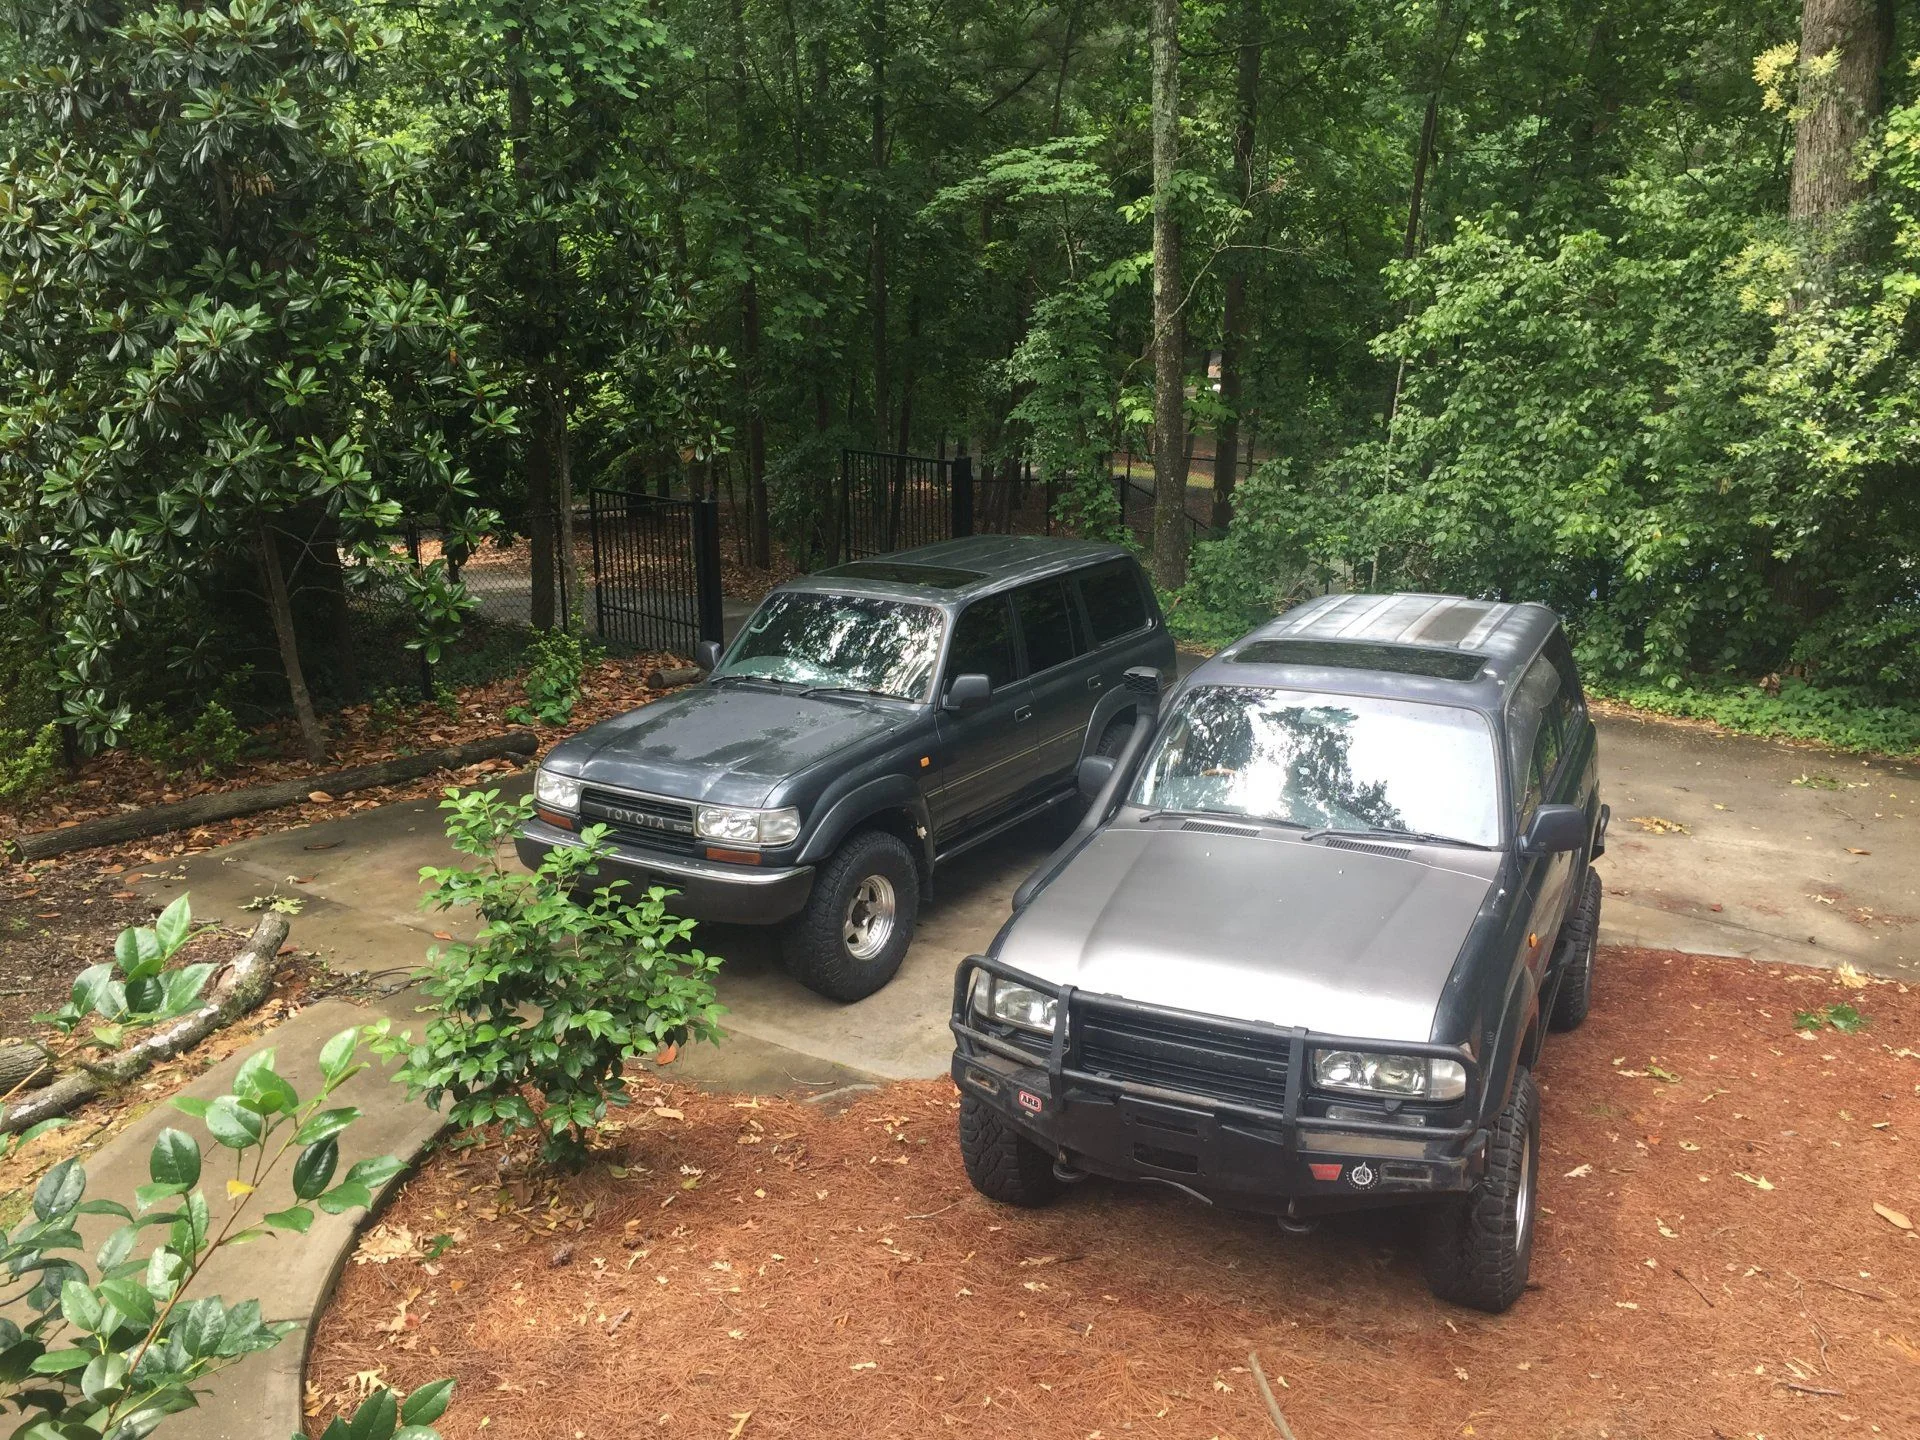
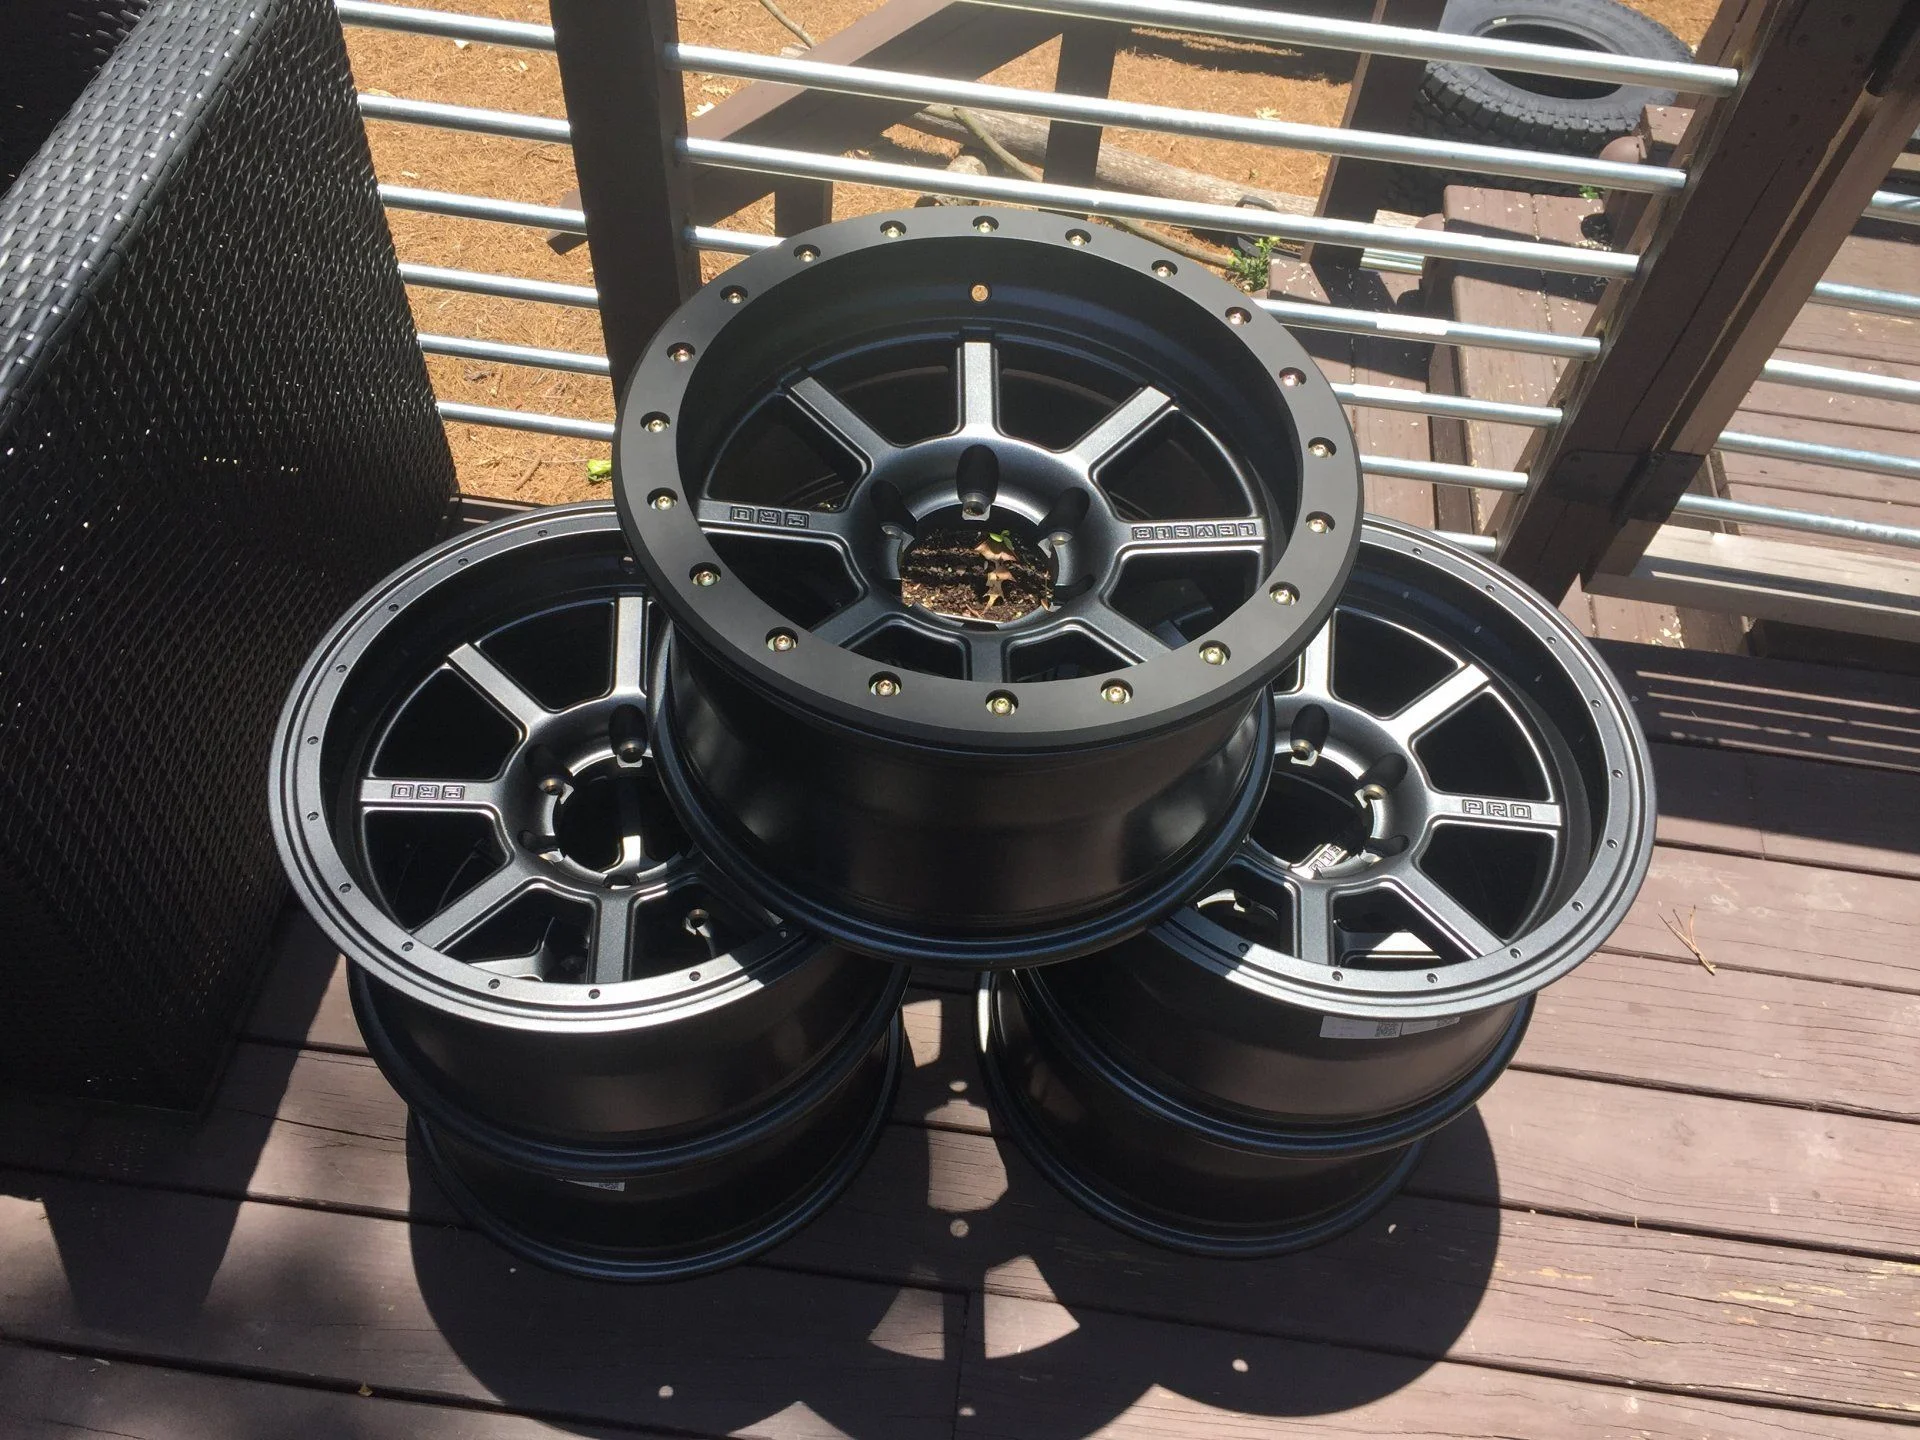
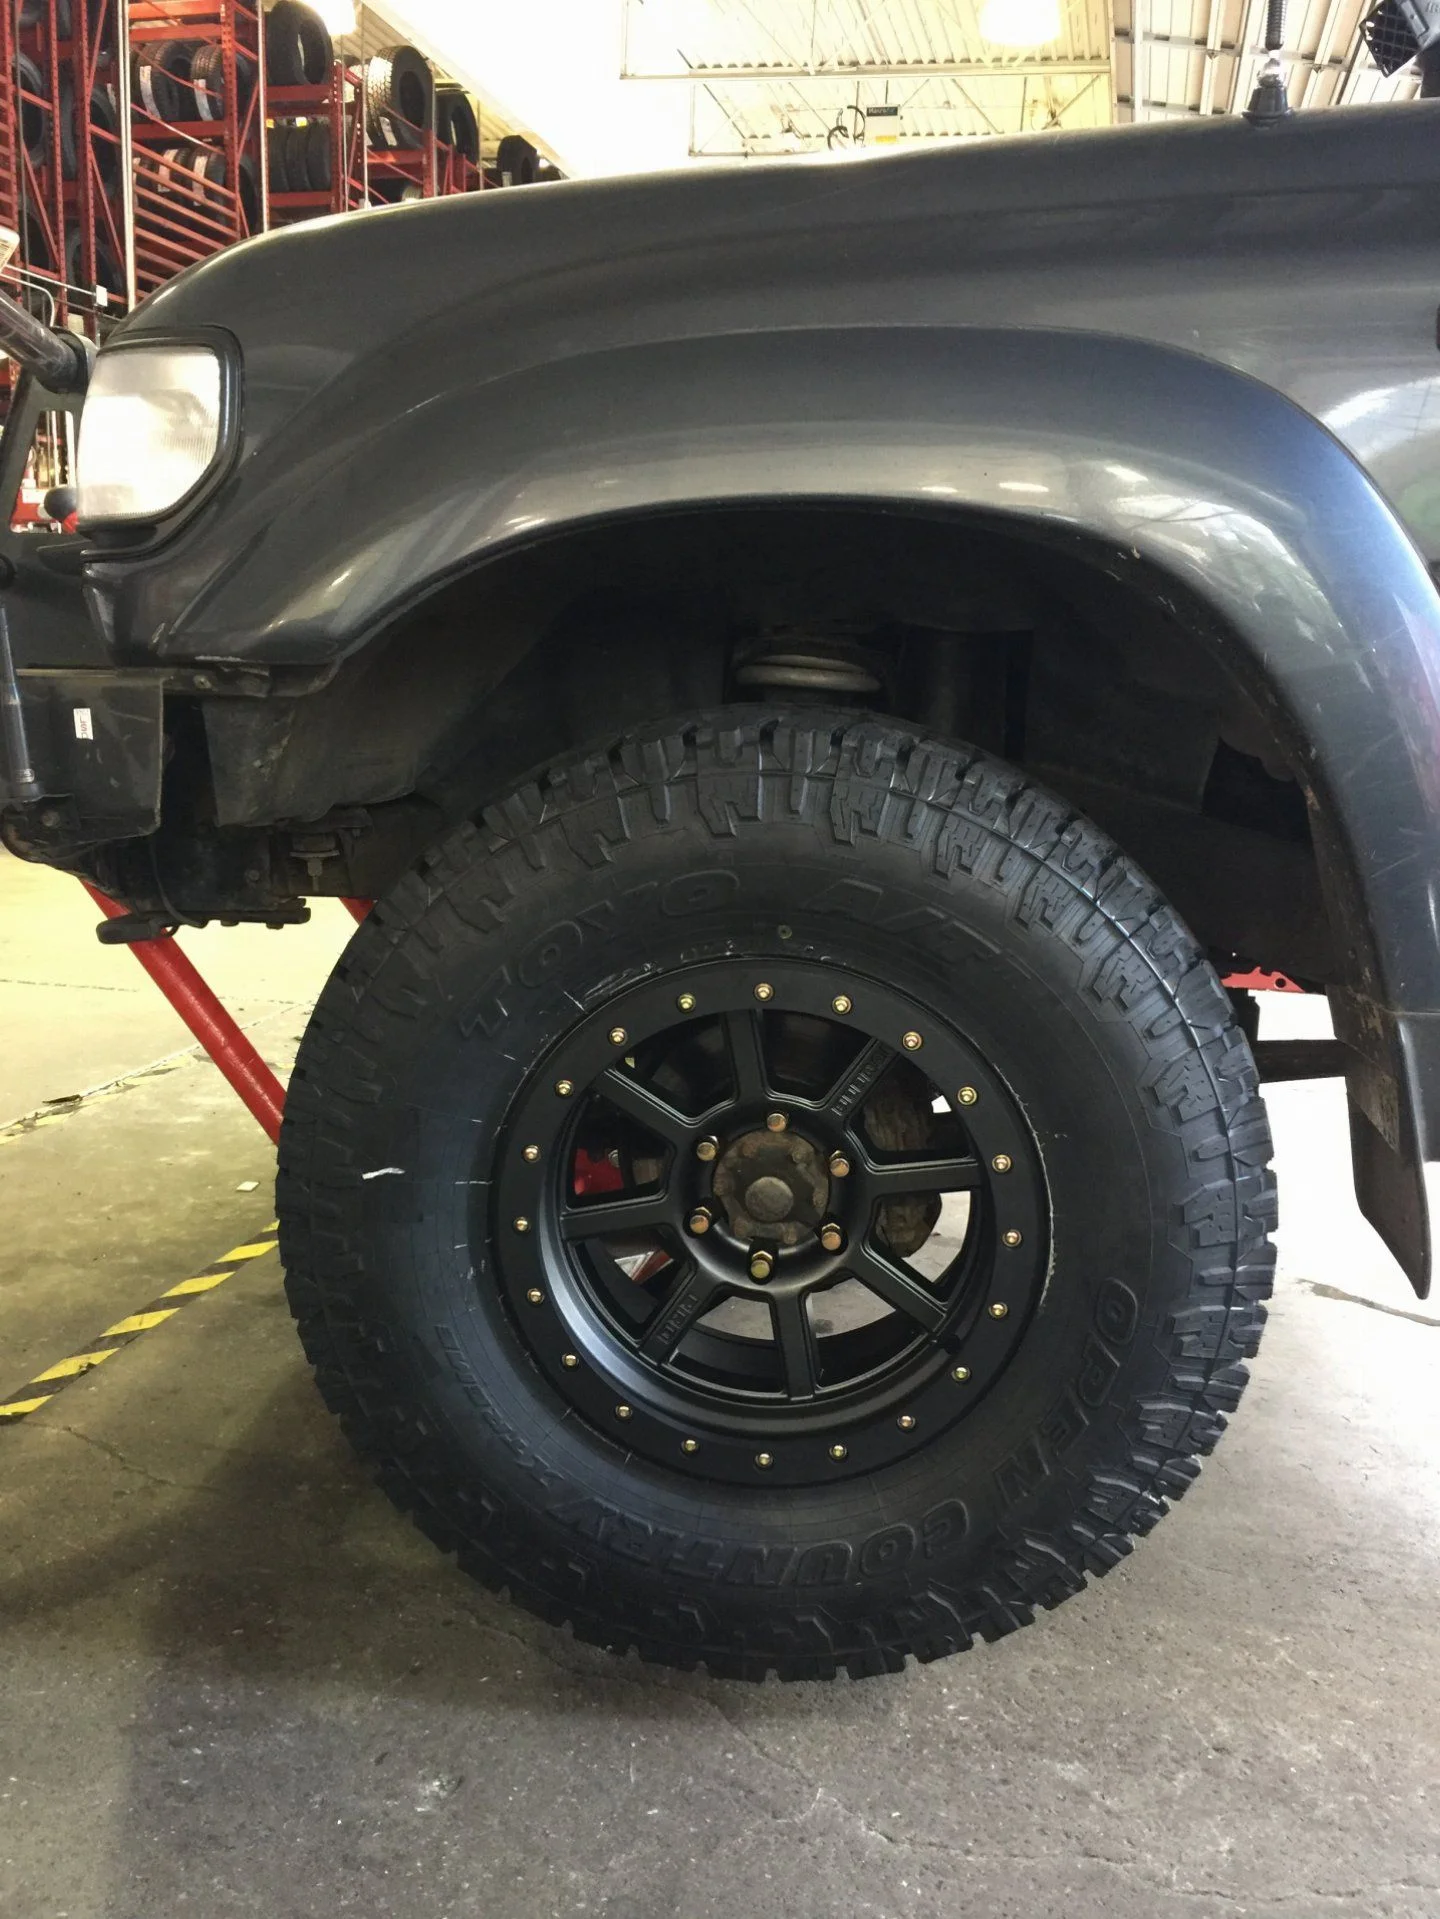
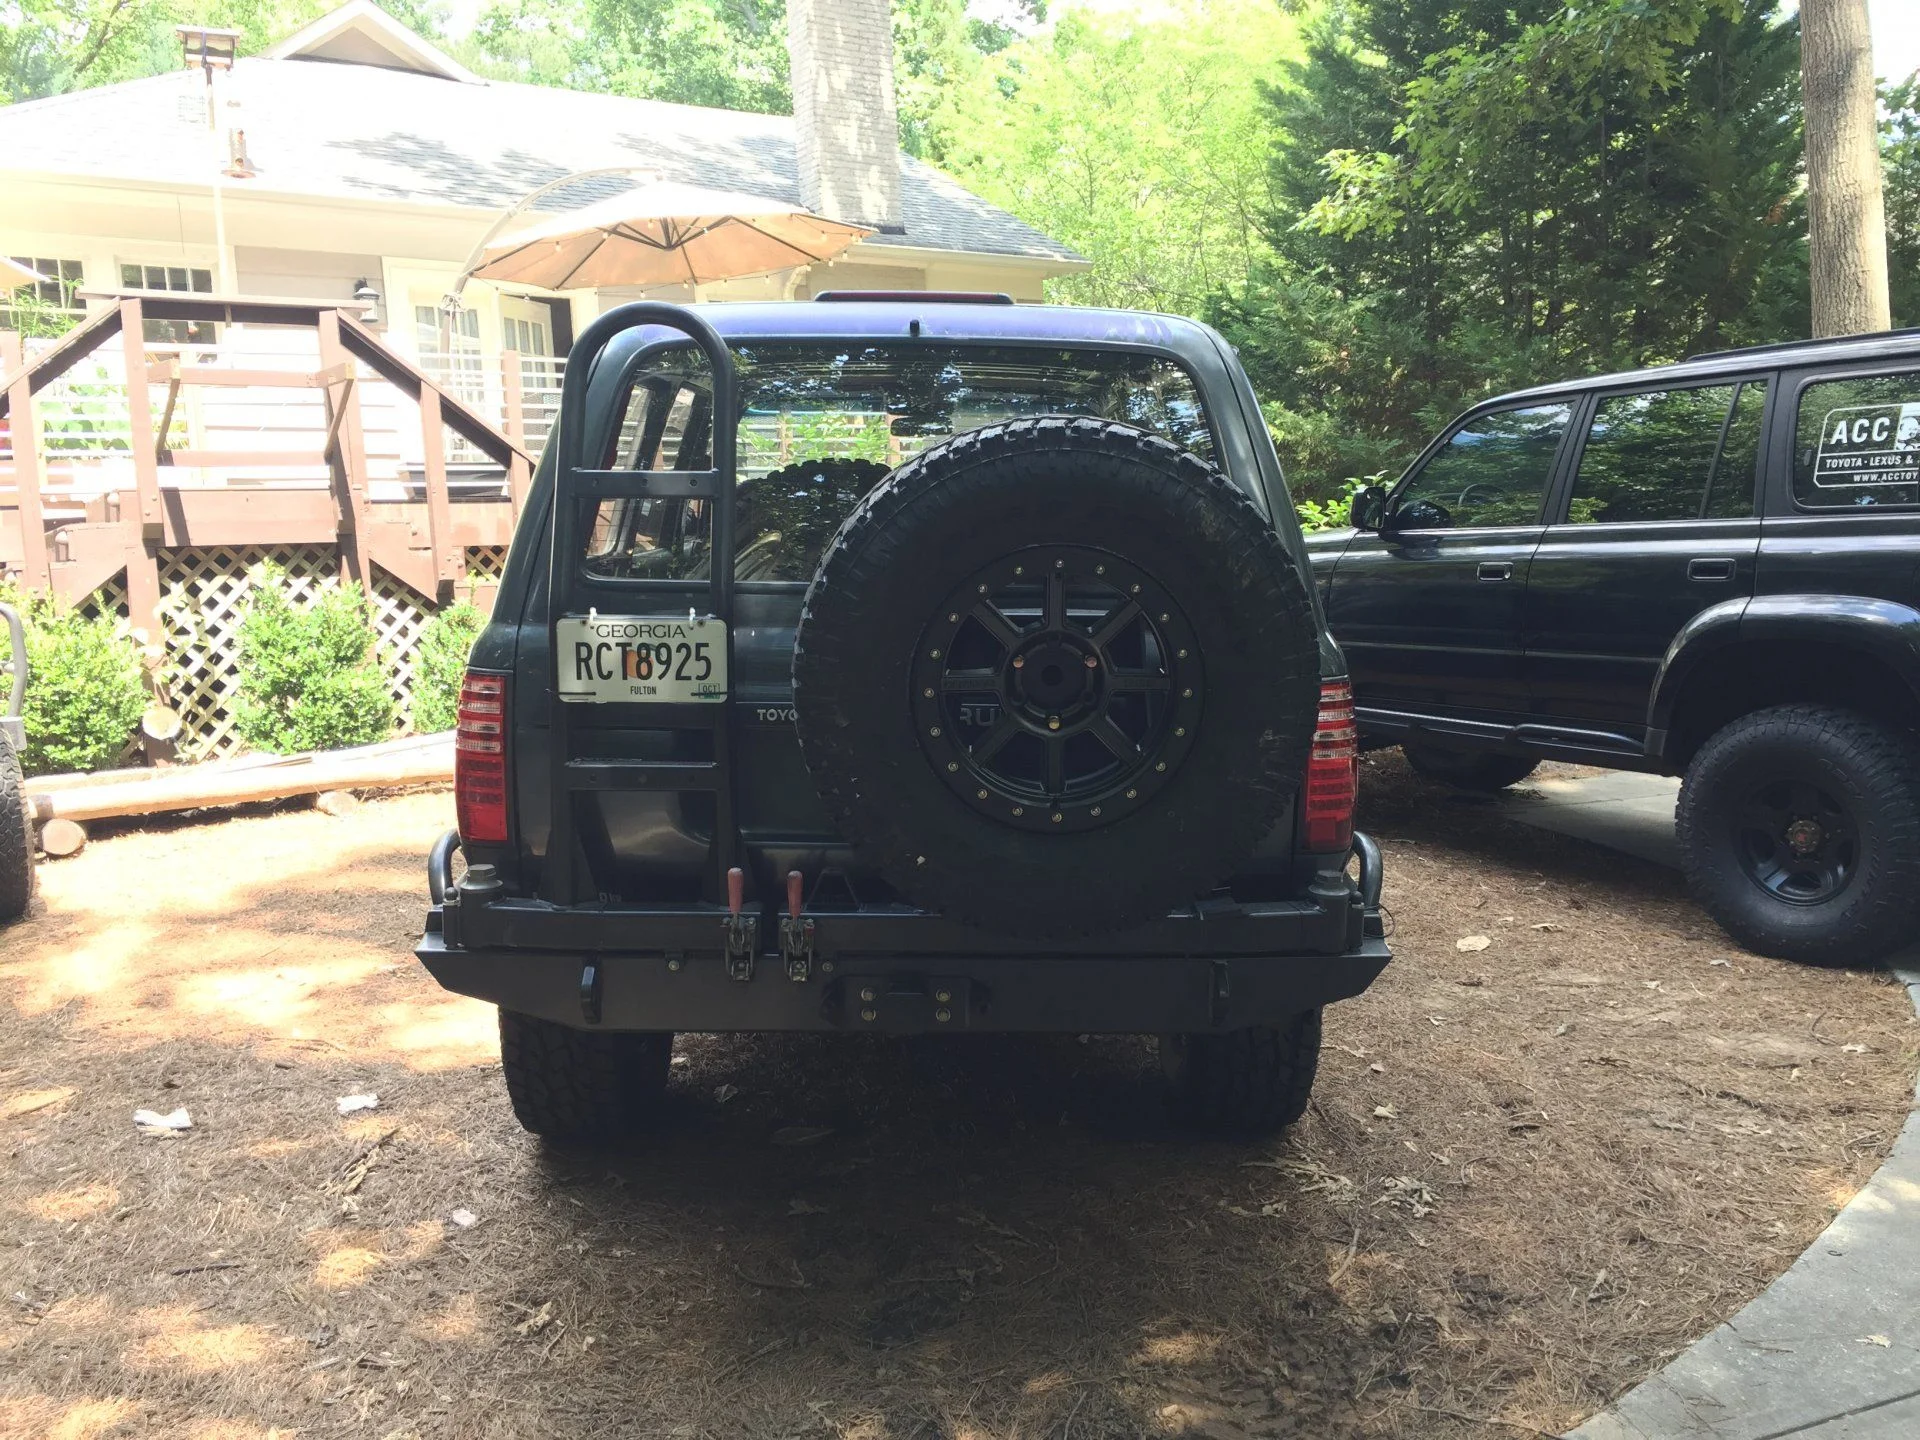
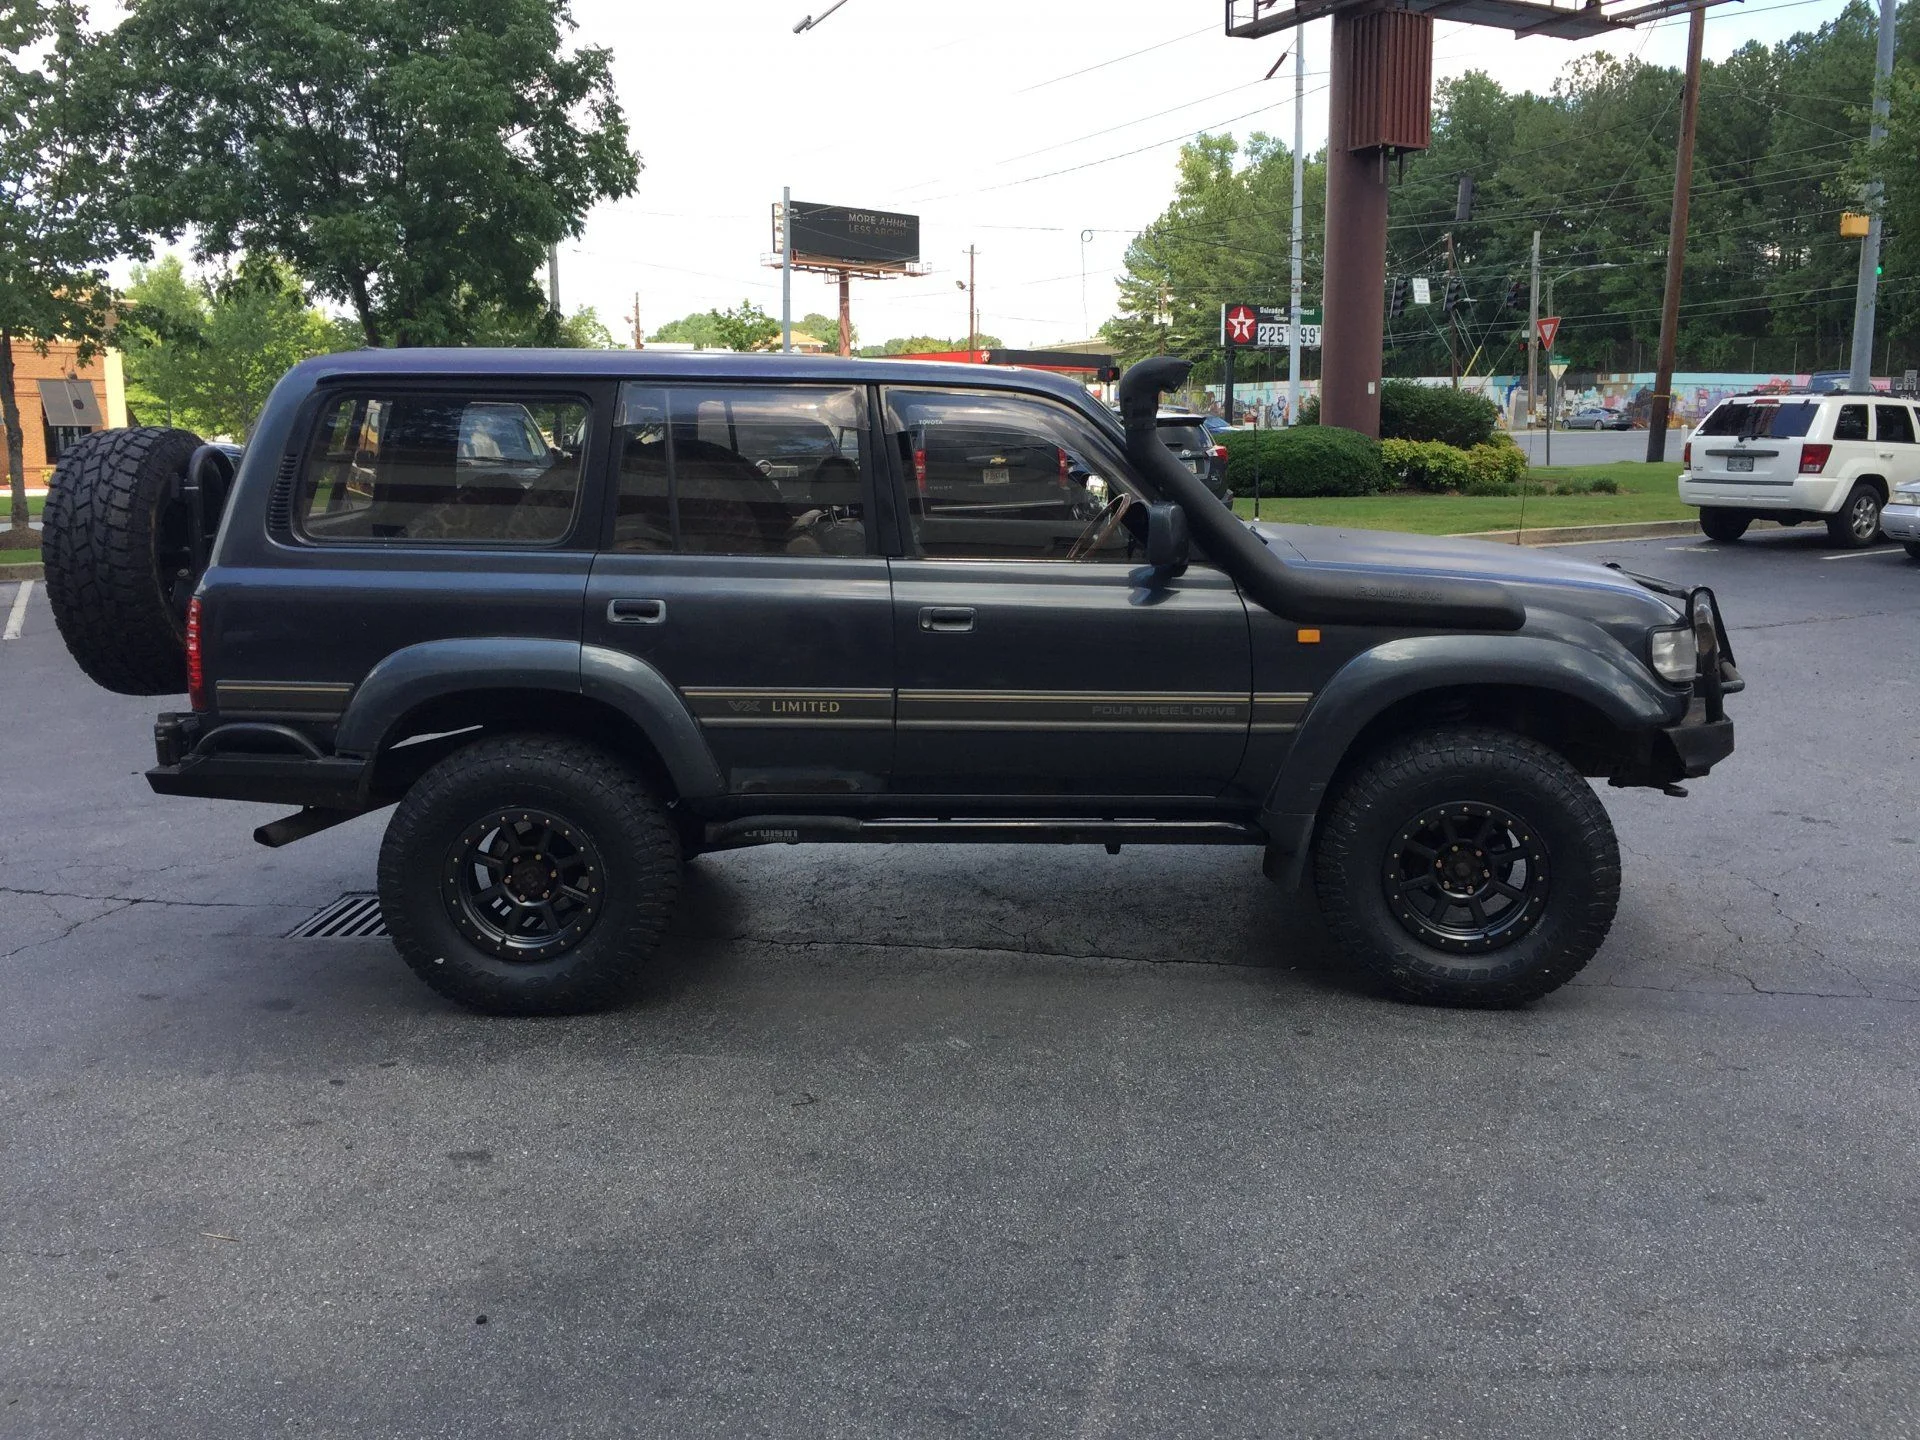
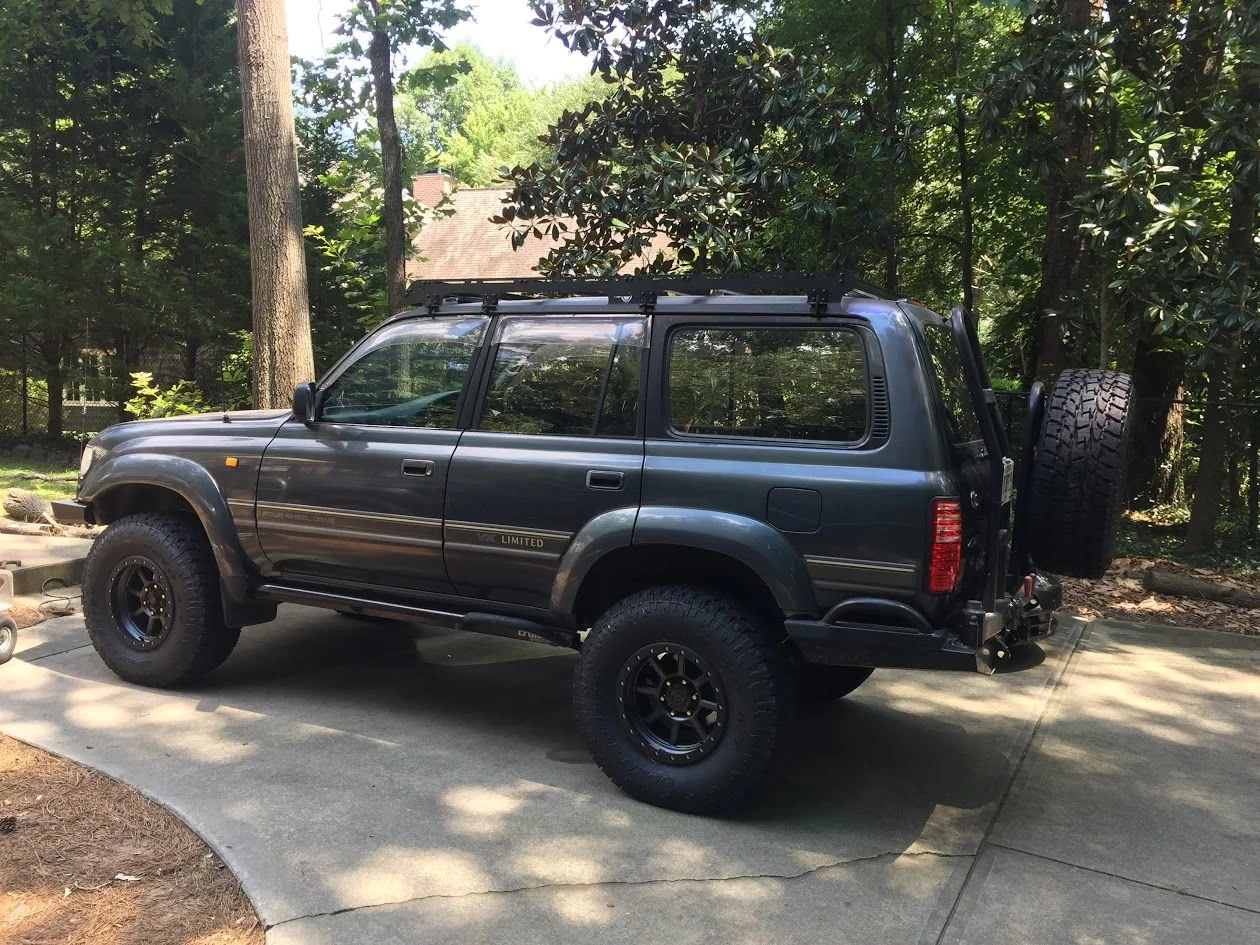
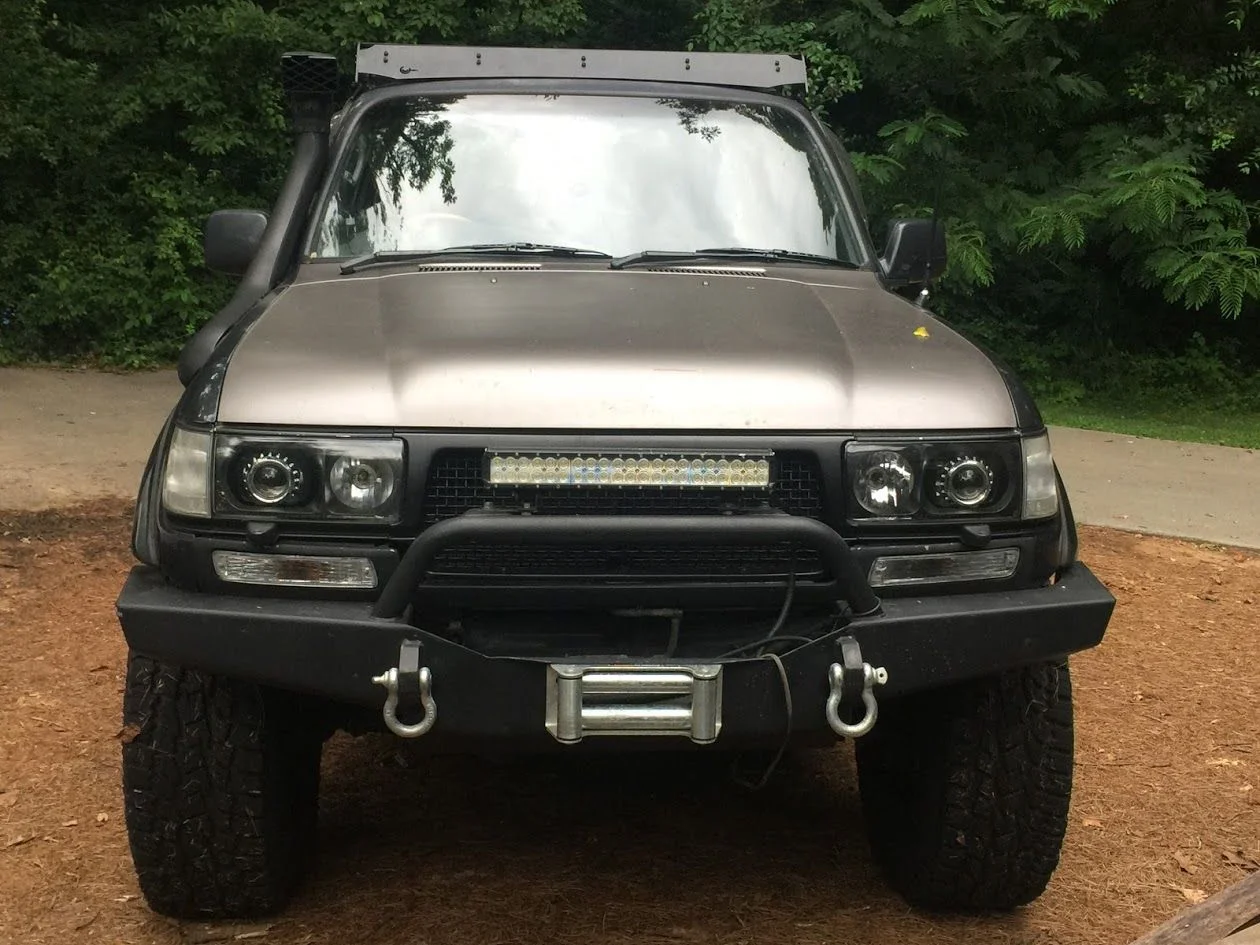
I have completed the road test and romped through some dirt. The suspension performed very well. On the road I have also developed a road superiority complex. I guess the additional 2 inches will do that to you. I wonder what the larger tires will do to my ego on the road :hillbilly: This thing is seriously becoming a big Cruiser.

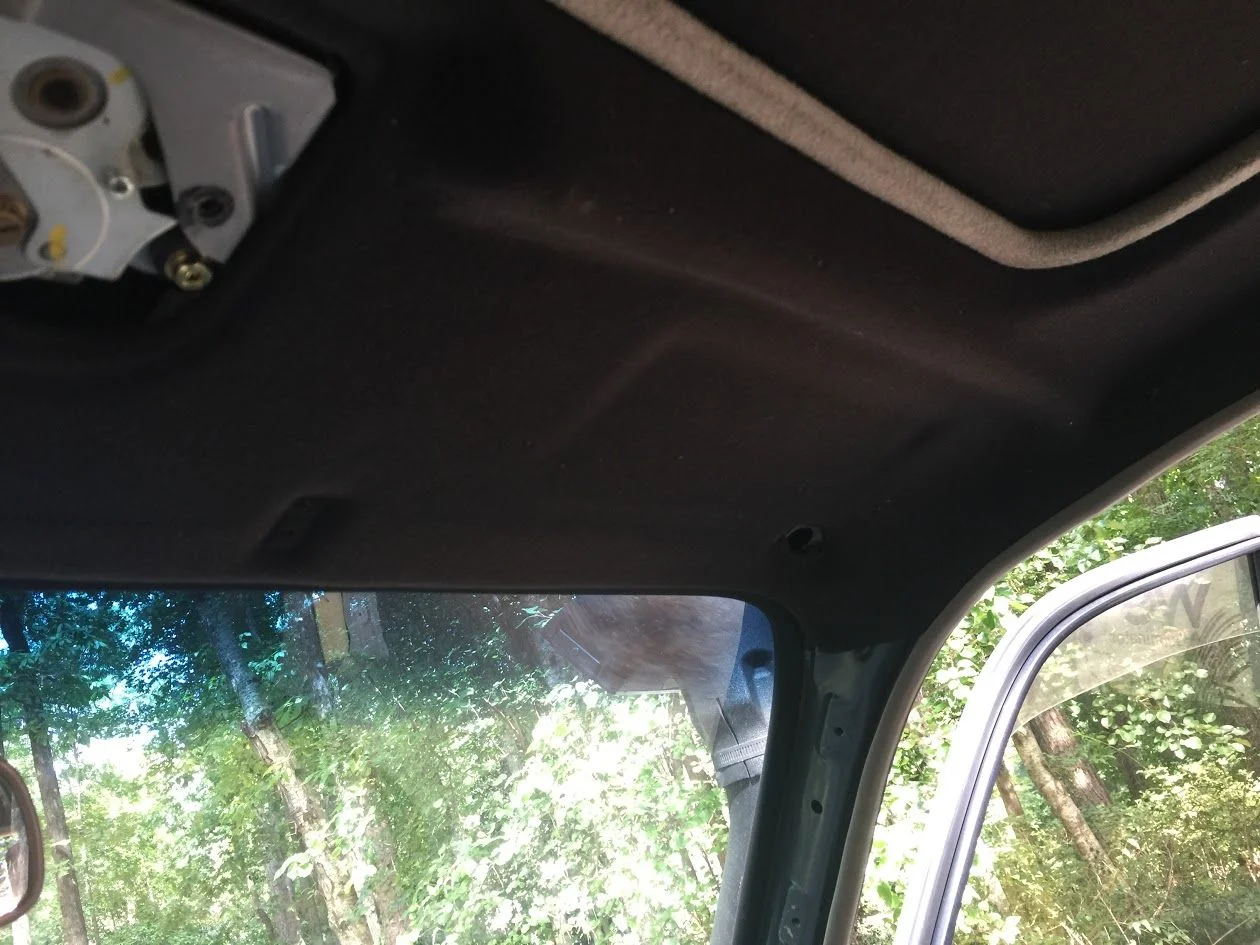
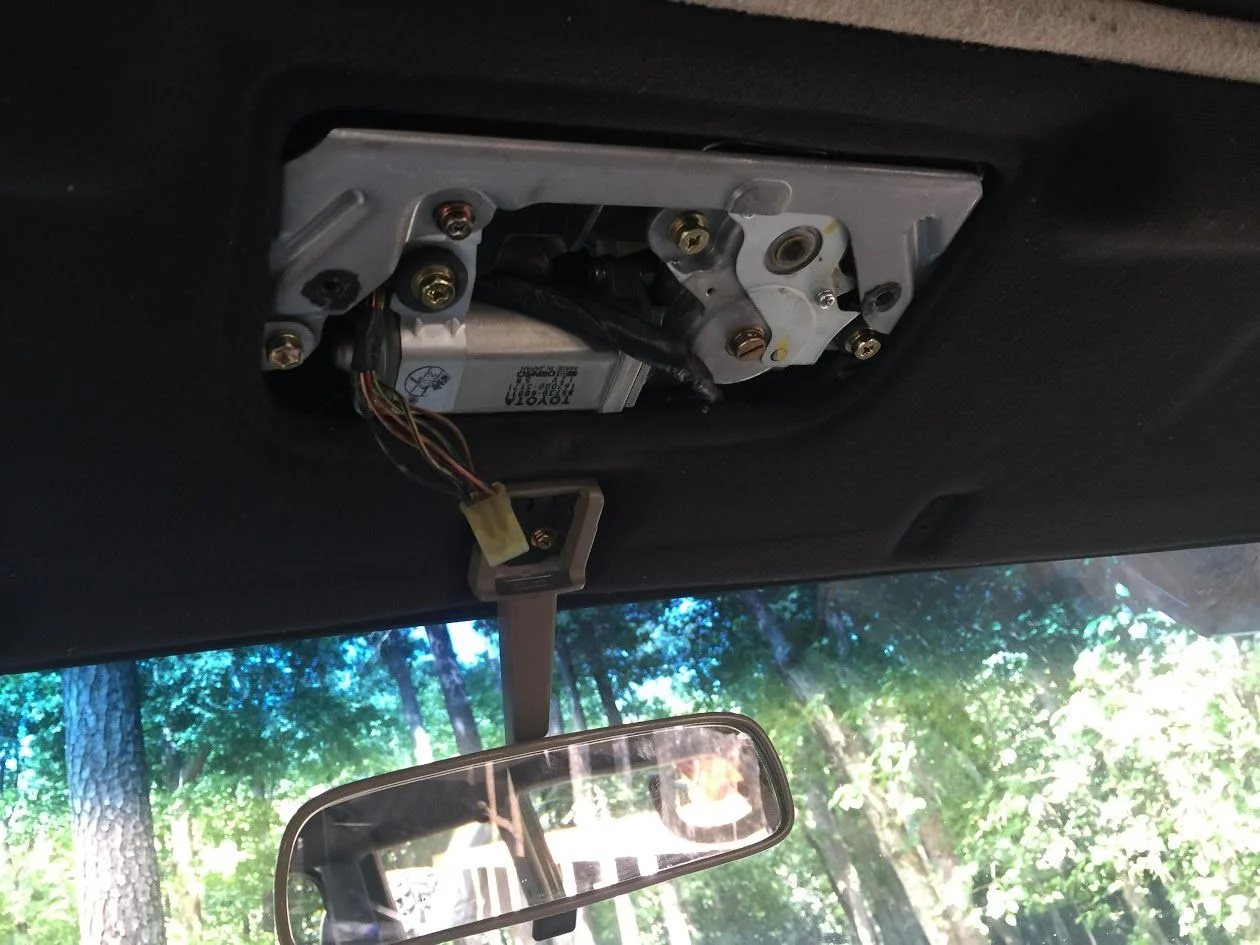
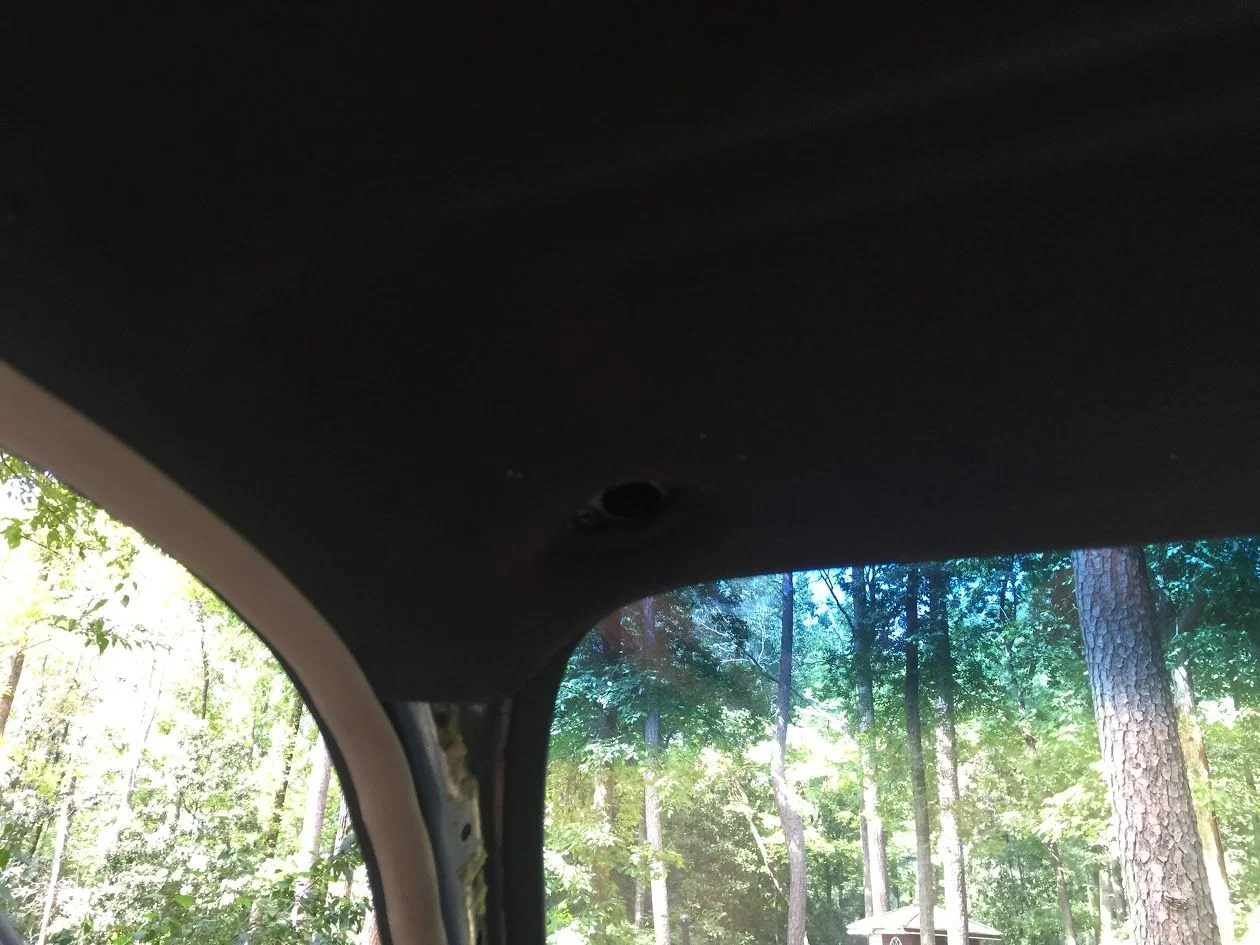
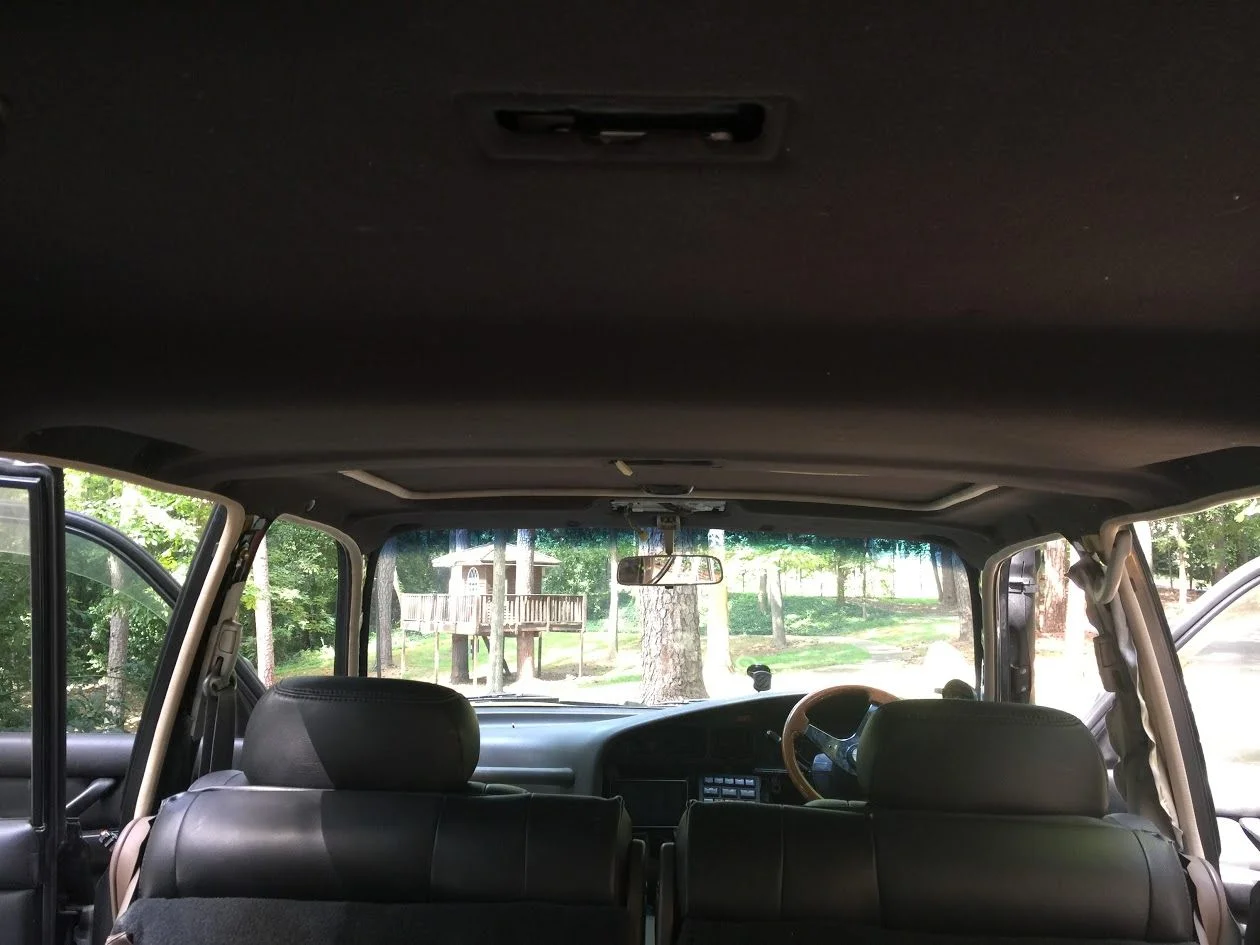
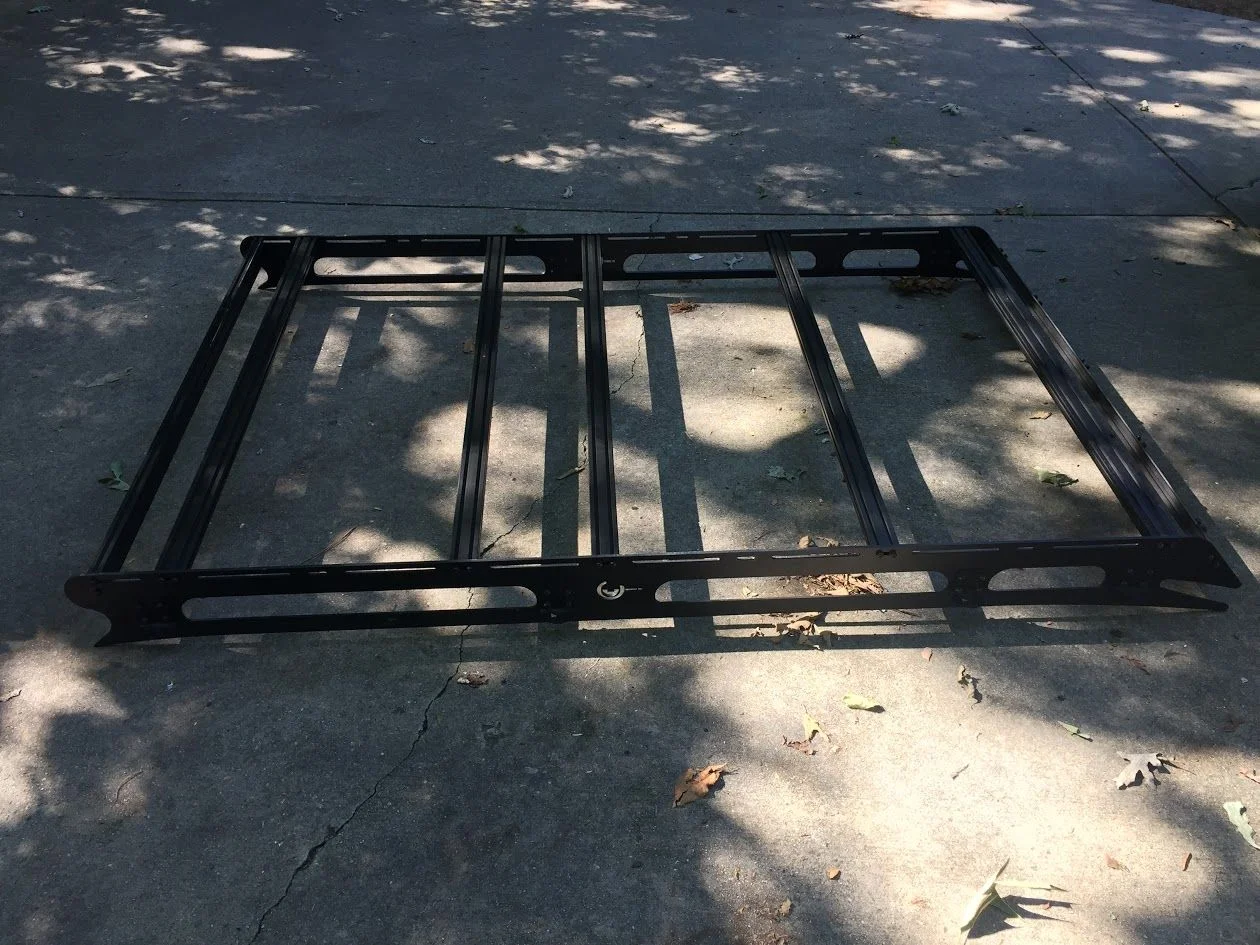
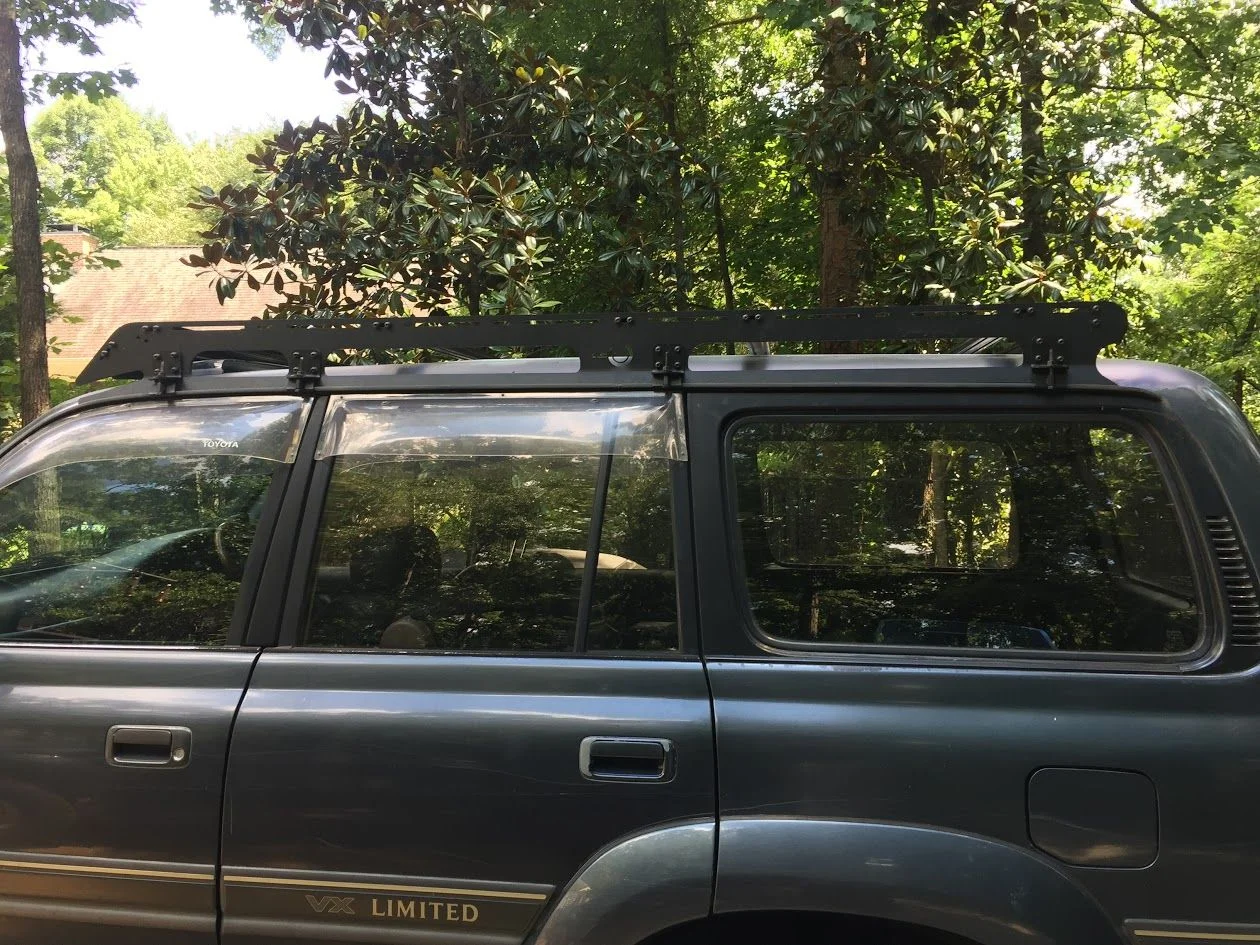
I have the new gears waiting in the shed and Im waiting for the wheels and tires, so I guess I can go and molest the cruiser some more. I have ordered a Prinsu Rack and the wait time is quite long. To prepare for the wiring I need to drill through the roof. I wanted to do it right and at this point the headliner is off again so its the perfect time to drill the hole. I don't want to be that guy with wires running up the snorkel. Im expecting a lightbar up front as well as light cubes on the remaining three sides as well as electrical and cat 5 wiring for the roof top tent. That is a lot of wires. All the wires will exit out the rear portion of the roof. Internally it will be fed through the D pillar and through the rear quarter panel. Then it will follow the factory wires and exit into the engine bay to be hooked up to an sPOD. That will keep my dash clean and I will also be able to control the lights and connected peripherals on my phone. The sPOD version I chose is the SE with touch screen and 16 circuits with bluetooth module.

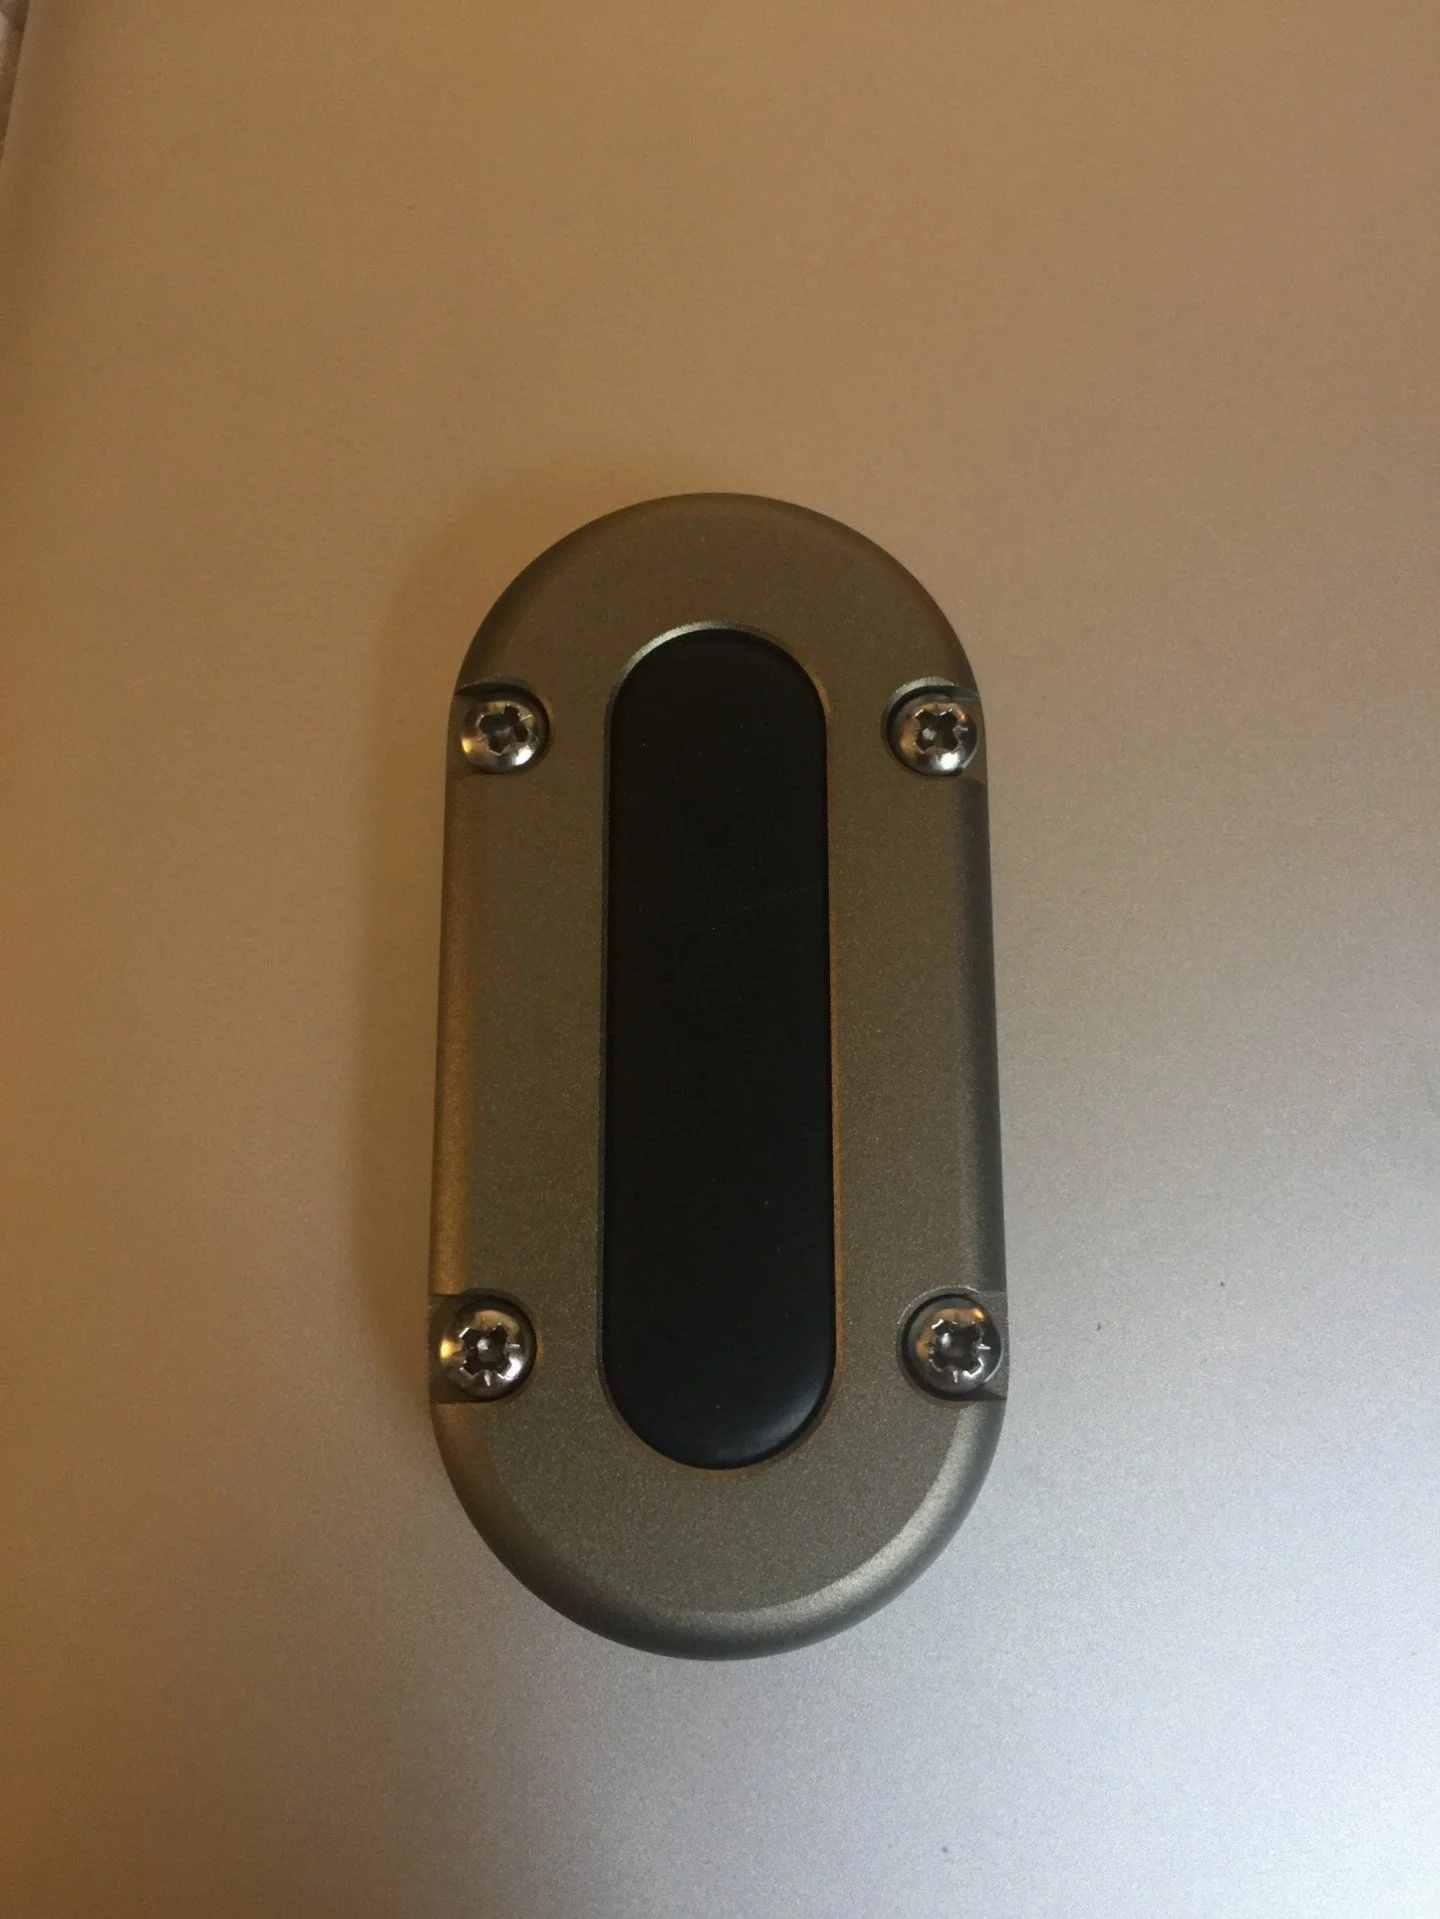
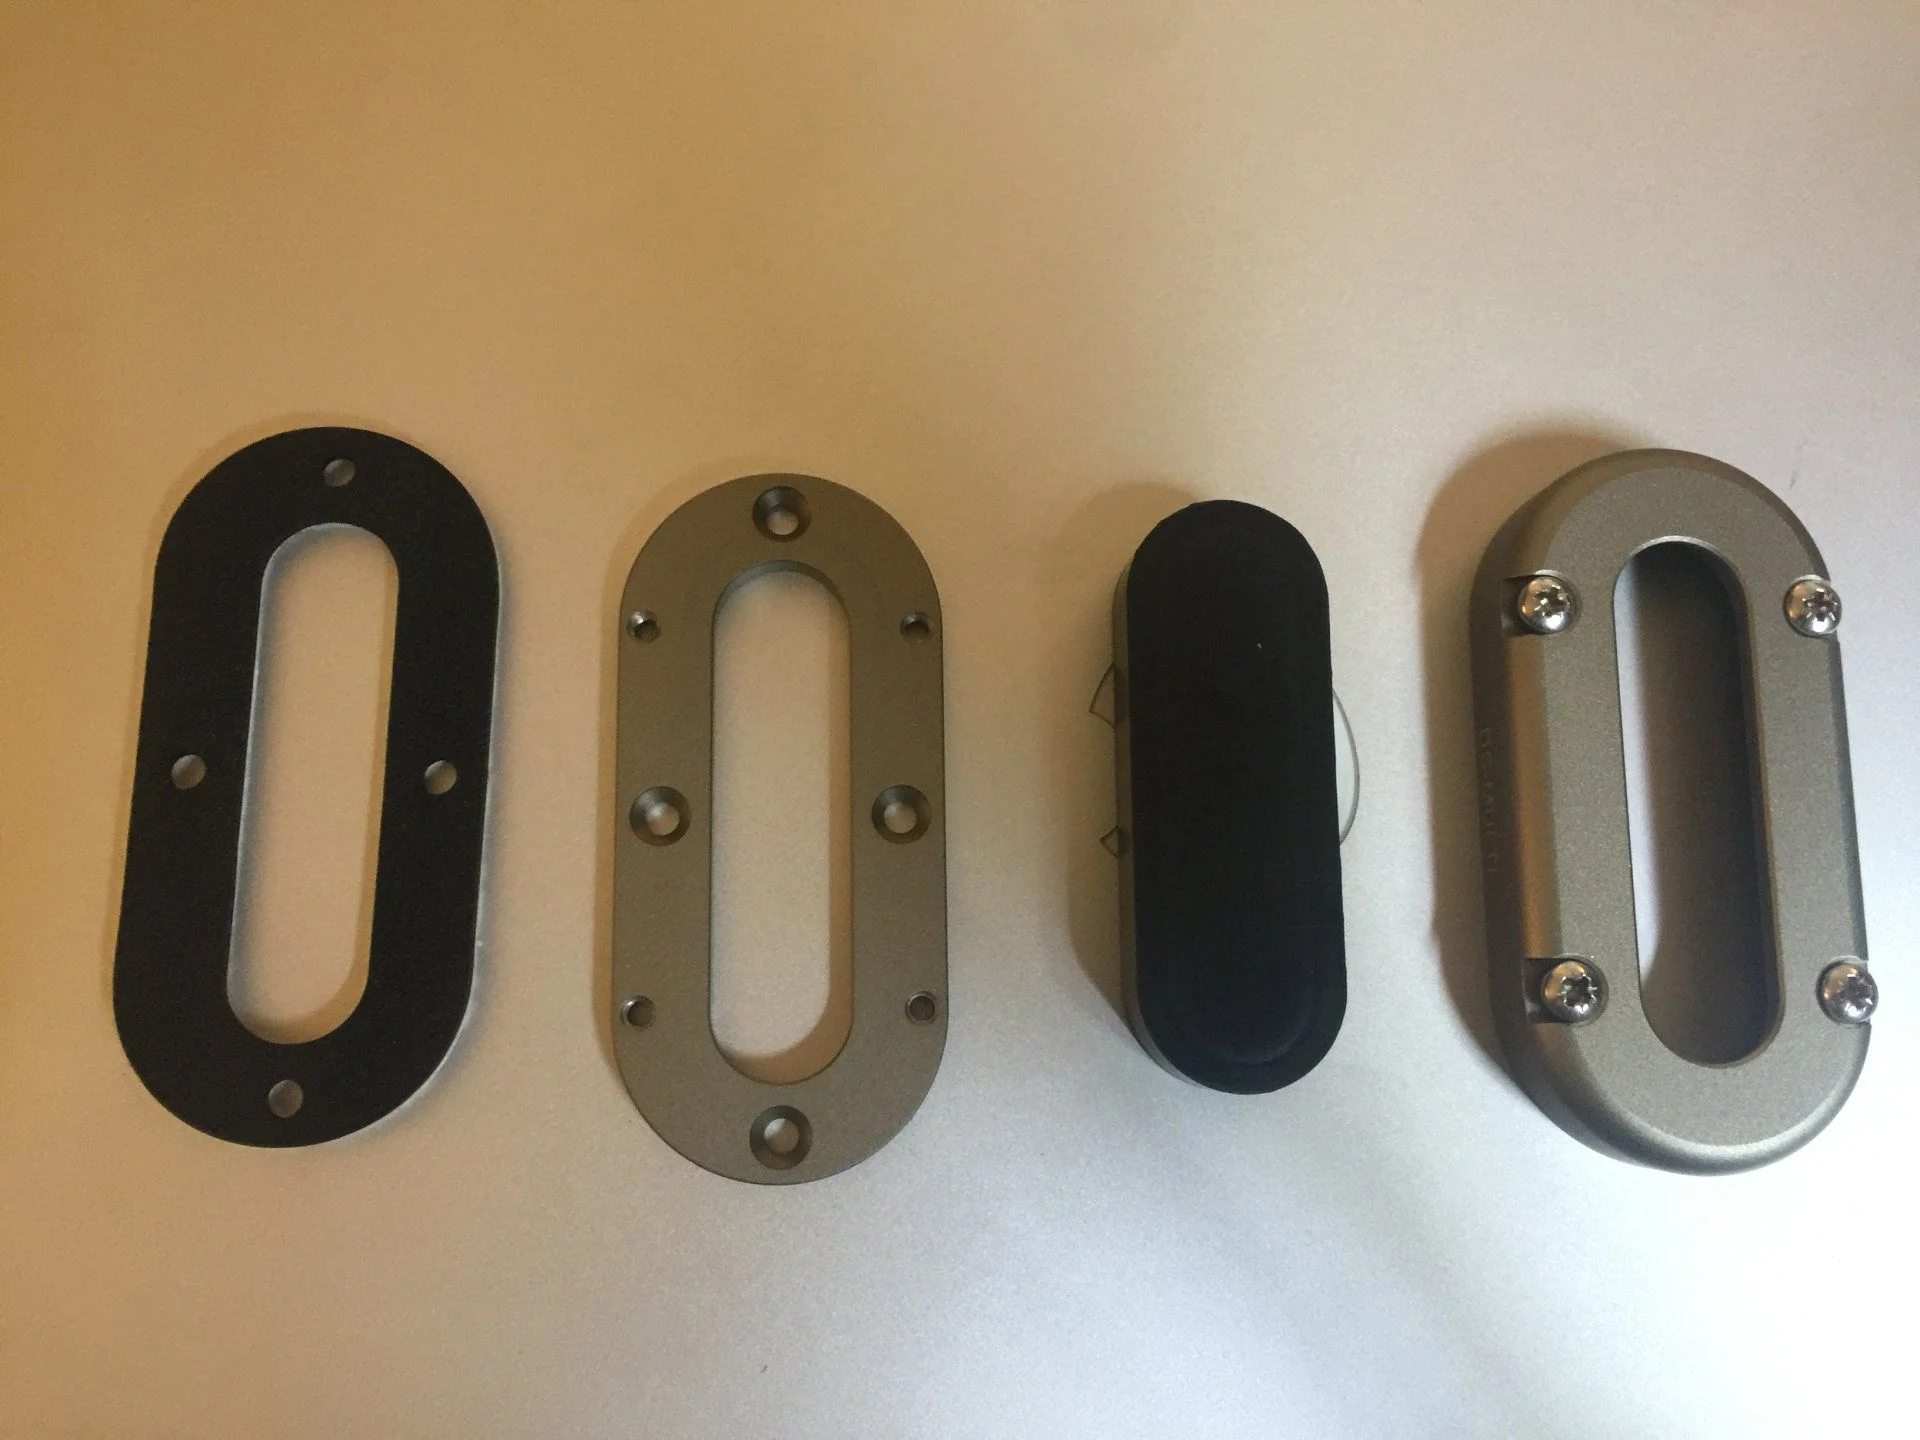
The solution I found for the wires comes from the marine industry. If its good enough for a boat then Im sure it will be fine at keeping water out of the cruiser. Basically its a machined block of aluminum. The bottom comes off and inside is a large solid rubber block. You drill a hole the size of the wire for each wire and fasten the screws. It compresses the rubber creating an airtight seal.

full


full


full
 
The marine industry is a great source. Blue Sea systems among them. Tested waterproof and corrosion resistance.. But I would still weld a plug through the roof for your wires :hillbilly:!
 
Last edited:
The brown truck arrived bringing a few parts for the cruiser. Normally its a big burly UPS driver but today it was this tiny chick driver unloading these tire and wheels :D Choosing a tire for this thing was bloody difficult man.

Tires are Toyo Open Country AT II extreme 35/12.5/17

full


full


full
 
The wheels I went with are:

Level 8 Bully Pro 6:

full


They feature 2 valve stems per wheel which is really nice. But the main reason I opted for these are because of the rock ring around the outside of the rim. They are interchangeable in case I thrash them. Zinc plated lug nuts all around. I have to say that the overall construction of these wheels are top notch. Very happy with them.
 
Wanted to grab a couple things from the retrofit source. Typed it into google maps instead of google. Turns out they are just 4 miles away from me :D Happiness ensues and I immediately head over there to get talked into doing s*** I want to do but have no skill to do and have no business doing.

Their showroom:
full


A few of their HIDs

full


So I did talk myself into doing projector retrofits as well as big f**k you lights just for those dickheads that drive with their high beams on.

The first step is of course to figure out how to crack these damn lights open. Youtube tells me to bake the damn things. 250 degrees for 7 minutes. Wife was slightly surprised and pissed when she caught me baking my headlights in the oven.

full


Then there was a buttload of grinding to get stuff to fit as well as liberal use of epoxy etc. Hopefully it works out or Im out a set of headlights. With the JDM model the low beam and high beam is on one bulb and next to it is the fog light. I will be putting other fog lights in the bumper so I have a spare space. I decided to create f**k you lights. I opted for some seriously bright leds :flipoff2:

More grinding to get the bases to fit in. Even though it was in there tight, I decided to use some more glue just in case.

full


Then came the process of resealing the headlights back up got some fresh butyl and guess what? More baking and pissing off the :princess: 
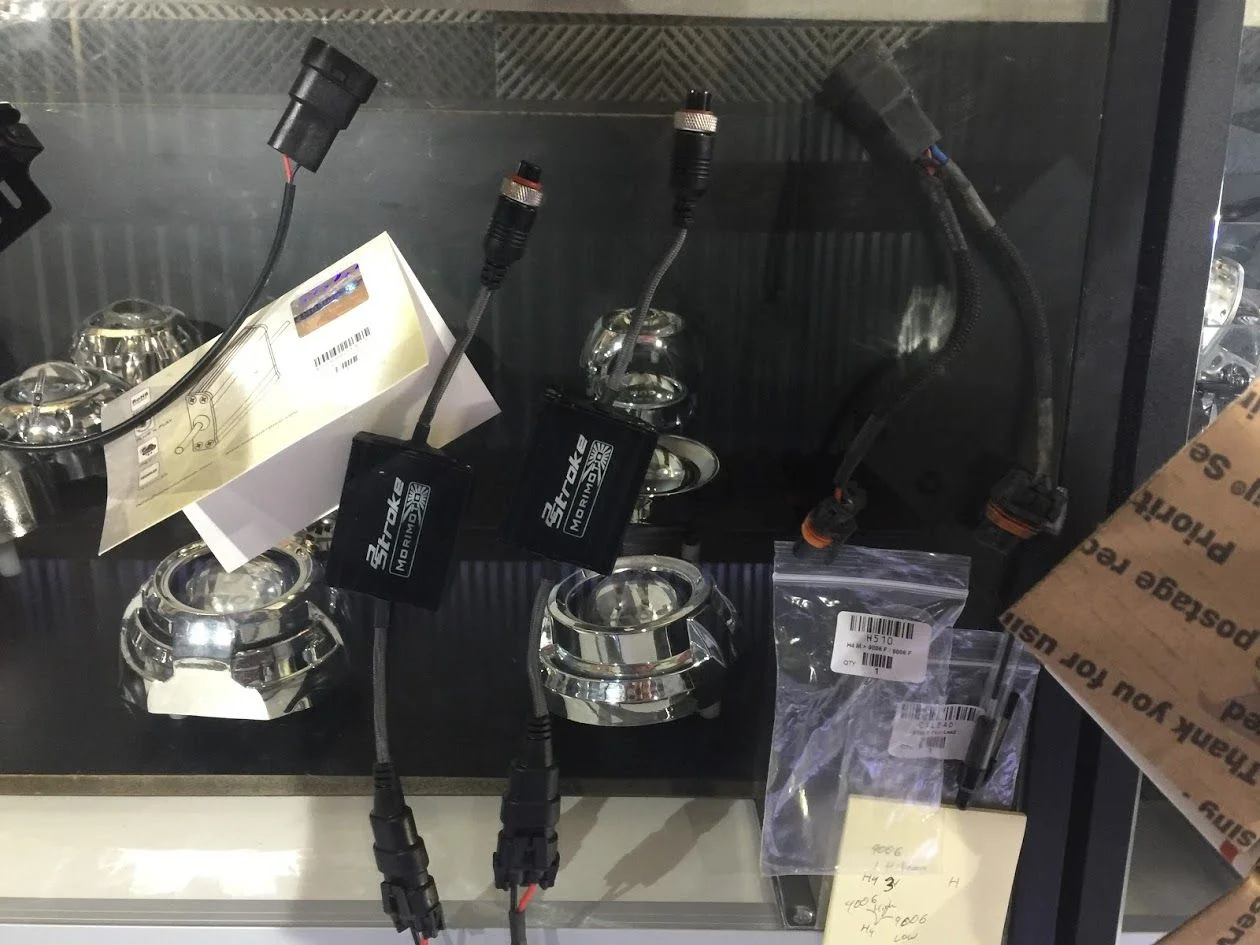
even though I told her just two hours ago that I will not bake anymore headlights. Well......

full


And here are the f**k you lights:

full


Now I have to figure out this bloody wiring harness for all this crap. Its seriously confusing with all the adapters etc. Ill figure it out tomorrow. Stay tuned for the finished product. If it does not catch fire :flipoff2:
 
I have so many unfinished little projects on the cruiser, I can't even keep track of stuff anymore, so I thought to myself, lets add another one :hillbilly: Decided to go with the Prinsu rack. Its very sleek, extremely modular and will work with just about any accessory I can think of. The main reason for choosing the Prinsu is the way it is held up. Other racks are held purely by the towers that clamp to the drip rail. That gives me 3 contacts on either side of about 2" each. That is potentially a lot of weight on such a small surface area. The Prinsu however makes contact along the entirety of the rack and is clapped down by 4 clamps on each side. That does give me peace of mind. Thanks to @Box Rocket for his writeup on the Prinsu rack that helped me in the decision making process.

full


The cruiser is coming closer and closer to what I want it to be. I still have a ton of wiring to do for all the additional crap I want on that thing. I hate wiring. Brings out the worst in me. Mainly because I have no idea what Im doing most of the time. I just follow instructions really well. Sometimes :flipoff2: I will be copying @NLXTACY stuff. He has some really detailed threads on wiring. I hope I can incorporate his OCD in my wiring as well.
 
Today was frustrating! I suck at electrical! Doing the HID Projectors and the wiring with ballasts and adapters etc was just confusing. Plus the PO made a few changes to make things even more confusing. I started cursing at the cruiser and the bitch cut me!! Lesson learnt. Treat the cruiser with respect. No slapping. I got it!!

full


full


Blood Sweat and Tears they say. I get it now :crybaby:
 
I just realized something. I am a damn masochist!! My supposedly twisted mind keeps wanting to torture myself. I keep forcing myself to do :banana::banana::banana::banana::banana:work even though I am not even qualified for :banana: work. Two PO's ago the AC in the cruiser crapped out. Instead of leaving it as is, he decided to tinker. Maybe he was a masochist also. Instead of fixing s***, he decided to just start ripping stuff out. All the refrigerant lines as well as the guts to the console fridge. But he left the seized compressor in there. So I have been slowly sourcing all the hem lines to get the AC and fridge back up and running. This is the second summer without AC in the cruiser and I am determined to make it work. I believe I have all the parts needed now to make it all work.

Ran into a snag :bang: There is the RHD/LHD thing again. Bloody hell!!!!!!! The saga continues.....

RHD fridge tray:

full


LHD fridge tray:

full


Subtle differences that mean a whole lotta cutting and modifying.

The first step was to get all the electronics of the fridge in order. Do I have all the connectors/sensors wires etc? Do they work? SUCCESS!! Part one accomplished!

Fridge guts:

full


full


Fridge guts and electronics in the tray and plugged in and working:

full


The next step is to get all the refrigerant lines hooked up, flushed and filled. Fingers crossed.
 
August update. I finally got my AC working again. I can't even begin to describe how happy I am with that. 366 days without AC. Driving through 120 degree desserts and hot n humid southern summers. Im happy to close that chapter of my life.

The fridge will be online shortly. I am getting some new lines made for it. For now, Im super stoked about just having AC.

I just rewired the dash. The PO made a bit of a mess in there. I tied everything together and loomed it so its now a clean install.

I also upgraded the head unit to a double din unit. I opted for the Pioneer SPH-DA120. Its what they call an app radio. It basically requires a phone to function. The nice thing is that its completely hands free and it reads your text messages to you and you can dictate replies.

Today I am putting the 97 headliner in the 91 for good. I can definitely confirm that it fits quite nicely. All you need is to drill a couple of holes for the tabs that go in the A,B,C,and D pillars. I also had to cut out a section in the middle for the "brains" of the compass as well as the additional light in the trunk. Other than that you just need the door moulding as the new versions have a channel that holds the edges of the headliner in place.

Here some preliminary pics:

full


full


full


full


I still have to blacken the trim pieces. Then the interior will be done.

Now I go back to putting the cruiser together again :hillbilly:
 
Lights look good. Is that a new bumper?
Thanks man! The lights make a huge difference. Its a supreme pain in the ass to get that thing together but it was worth it. I don't do too well with night driving, especially in the rain. With these HIDs its a clean and bright light without the glare my old lights created. I really like cutoff it provides also. Its important to me not to blind oncoming traffic. What was the foglight location became my fxxx you light. Extremely bright leds :grinpimp: 10k lumens each and in all directions.

Yeah decided to go different bumper. The ARB was way to beat up and bent out of shape. Plus this one has a better approach angle without looking too aggressive.
 
Good deal! But I think you misused the word Abysmal. It's all about context.
 

Users who are viewing this thread

Back
Top Bottom