About time I did a buildup thread (2 Viewers)

This site may earn a commission from merchant affiliate
links, including eBay, Amazon, Skimlinks, and others.

The silver looks great. That's my color of choice. Nice work.
 
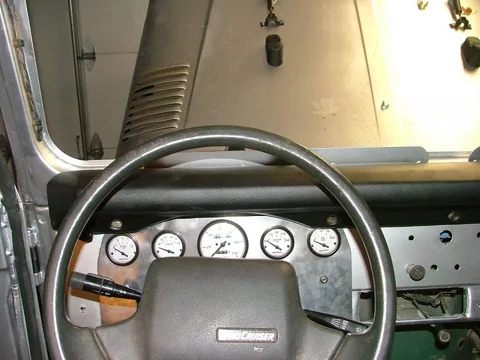
Alright, finished wiring up the gauge panel. I went to Radio shack and got a male and female 12 pin connector. The type with the crimp on pins you insert into the connector. I have a ton of wire, but only 4 colors. Red, black, yellow and green. We do alot of commercial accounts at work and they are left over harnesses. You have to do alot of remembering with only 4 colors to wire a truck. I had wires running out of the dash in sections, just had to remember what section/color was. I had soldered the pins after crimping on the gauge side but only crimped them on the truck side. Every one of them pulled out while trying to disconnect the panel. This was right after I had had made an awesome pigtail. Couldnt tell what wire was what after that. Had to pull the whole thing apart on the truck side an find the sections again. Soldered them the next time. Oh yeah, that required more parts from radio shack.:mad:

DSCF7987.jpg

This sucks. The one night I left the truck outside at night........ok, the second.....it rained. Just got done spraying some spread out parts and heard it, after a while. Ended up just having to toss a tarp over it. Not a huge deal, though. A couple days later I saw a leaf on the hood that was stuck and this was under it. I thought it'd make a cool tattoo for somebody or leave a cool mark on the hood so I left it. Something random to bring up.


DSCF7989.jpg

Also got the dash pad back on. I bought a new cover a couple years ago and finally got it installed. It'd been sitting in the box under the roll around rack I have for the roof, my daughter climbing on it every now and then. An ya know it, the only time she ever did that was in good clothes. The pad fit pretty well for what it is and how bad the dash was.


DSCF7994.jpg
DSCF7987.jpg
DSCF7989.jpg
DSCF7994.jpg
 
I hadn't even really stood back and noticed how the motor fit with the front end on. Came out pretty decient for 2 minutes with a tape measure.


DSCF7997.jpg

DSCF8000.jpg

DSCF8001.jpg


I still have to decide where I want to mount the battery and figure up a ground. Thats why the wirings a bit of a mess on the passenger side. I think I might mount it on the firewall right behind the motor. That'll leave the ps inner fender for an air compressor. I was also going to paint the underside of the hood but it's the only part left with the original color. Paying respects, ya know. Or maybe just too lazy?
DSCF7997.jpg
DSCF8000.jpg
DSCF8001.jpg
 
Last edited:
The leaf adds character!
 
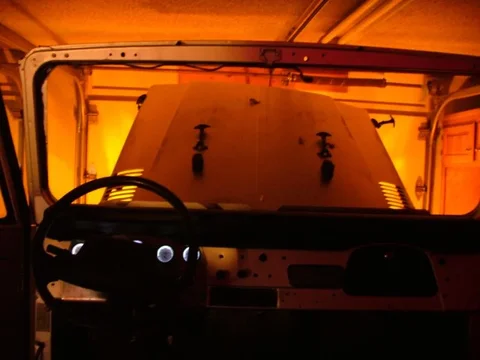
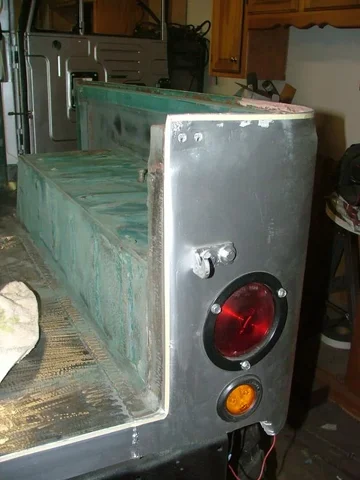
I have lights, too. Everyting works like it should. The 60 column light switch actually fires relays for the park lamps and the headlights. I robbed the fuel pump relays from the chevy harness and used those. The 60 column actually sends a ground from those relays to the headlights which are constant hot. Either that or the ridalin is wearing off. I had to reverse the polarity on all of it to work with this truck. That meant checking continuity with every wire and the column itself. Shorts are bad. The lights wont pull enough to trigger the factory flasher so I bought an electronic flasher. The lights flash fast but they work. Later model front parks were put on because the original plan was a quick re-do of the truck. I just knew I could rebuild this for under $2 grand. They have 3 bulbs instead of the original 2 element bulb (I assume, never actually saw one). The lower amber is my park and the upper and side are now turn. Not really to sure how "correct" that is but it works for me, i guess.


DSCF8011.jpg

DSCF8026.jpg

Started prepping for a liner. Cleaned it, spent a couple hours with a grinder scuffing it. It took alot longer than normal because all the new metal doesnt scuff with the same tools as a painted surface. Hence the couple hours and grinder. I can scuff a truck bed in about 4 minutes and a tub in 15. Not this time.


DSCF8032.jpg
DSCF8011.jpg
DSCF8026.jpg
DSCF8032.jpg
 
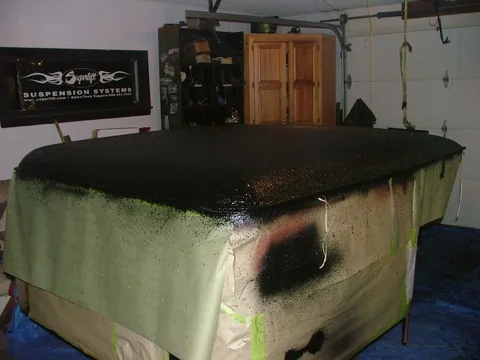
I taped everything off starting with line tape. It is a very narow tape, pinstripe like. There is a string glued to the edge that cuts a clean liner edge. Got everything masked and ready to shoot. The liner I bought was a "mix it in a pail" DIY stuff from ebay. Not fun. You mix the base, activator (which is the consistency of candy when its being made, kneaded) and a reducer. After that dump a pound of rubber shavings in for texture. It wouldn't have been that bad with a decient gun but the one sent was as bad as I've seen. Material came out way too slow. I spent a total of maybe 3 hours spraying. Just spraying. Got goop everywhere. The floor, the garage door handle (both sides) and the living room remote (spongebob, mommy was in the shower) and me. Like I said, not fun. Came out alright, though.


DSCF8057.jpg

DSCF8064.jpg

DSCF8065.jpg
DSCF8057.jpg
DSCF8064.jpg
DSCF8065.jpg
 
I waited all day at work to come home and de-prep it. Pulled all the lines, got the paper, plastic and tape off and this is what was left.

DSCF8066.jpg

I Could finally install the tranny hump for the last time, which now that I think of it.......it's going to be a PITA to do the few things I need to do with the t-case and shift linkage. Got excited, I guess. Hmm...... Oh well, I got the seats in and tailgate on. Sprayed the gate too, that's why I wasn't too worried about metal finishing it. Liner hides welds well.

DSCF8073.jpg

DSCF8076.jpg
DSCF8066.jpg
DSCF8073.jpg
DSCF8076.jpg
 
DSCF8072.jpg

DSCF8075.jpg

DSCF8080.jpg

Theres the inside of the top and the roll around. I had to crawl through that to spray it. Airhose and light cord getting tangled kept it interesting. I still have to put a headliner in it, not really priority right now.
DSCF8072.jpg
DSCF8075.jpg
DSCF8080.jpg
 
DUDE! thank you for putting this up!
i was trying my BEST to sell my FJ.. but seeing what you started w/and what amazing job you did has made me change my mind!
the whole things looks great! i cant wait to see it completed!
 
DUDE! thank you for putting this up!
i was trying my BEST to sell my FJ.. but seeing what you started w/and what amazing job you did has made me change my mind!
the whole things looks great! i cant wait to see it completed!

Blasphemy!!! Ya know, this is the first time I've done any type of bodywork (besides just cutting stuff off) and it's not too bad. I mean there could definitely be improvements but this truck is built to be used. Besided, imperfection adds character. :p

I've still got a bit to do, but in the scheme of things it won't be too bad.
To do list:
High steer kit possibly MAF
Tear into the disk brake swap (need hi steer parts first)
Probably repaint the axles
Wire fan/mount battery/finish wiring
run the fuel filler hose/radiator/heater hoses
driveshafts
new 3rd in rear, maybe installing the Detroit
Build front shock mounts (steering box is in the way)
Install shocks
Shifter linkage :censor:
Swap wiper motor, already rebuilt linkage
SEAT BELTS!!!!
Windshield
Build exhaust from scratch. I know how I want it run and an exhaust shop won't be able to do it, I'm sure. It'll be a good excuse to go to my uncle-in-laws to learn to tig. I guess I'll just get a bunch of 180* mandrel bends and cut and paste. We'll see how that comes out.
A few other misc. things besides those but hopefully I'll be driving it soon. I just hope the tranny works. I have the TH350 that came with the 205 still just in case. We'll see. Until next time thanks for the compliments.
 
my biggest thing is the rear quarter panel (mind are pretty beat to hell) how did you bend yrs?? im no expert so from what i can tell it looks every bit as good as bought rear quarter panels
 
my biggest thing is the rear quarter panel (mind are pretty beat to hell) how did you bend yrs?? im no expert so from what i can tell it looks every bit as good as bought rear quarter panels

I cut out the old quarters following the seam edge inside with a 4" grinder with a cutoff wheel. Cut out a rectangle of 16ga sheetmetal from the corner of the sheet (so I had 2 straight edges @ 90*) and used little welding clamps from Harbor Freight. Clamped it in along the top and front and tacked it here and there. As for the radius bend around the back I just pushed on it with my hip as I tacked the metal around the bend. That would have been easier if I had an extra set of hands. The bottom edge I cut about an inch long around the wheelwell and just folded it up with a modified pair of vice-grips (flat steel welded to the jaws to make a wider mouth with straight edges) and alot of patience. The areas around the curves were done with a smaller pair of vice-grips. I had to make relief cuts from the edge to the line I wanted so it would fold in right. It is by no means as nice as a production panel but unless you look for it, it doesn't stand out.

I've actually got an idea in my head for a tool that will fold the edge over very cleanly and even around curves. Think oversized can opener. Maybe I'll get to that after I get my engineering degree. :beer:
 
that looks great! YOu must have a s*** ton of tools.

When I started I only had basic hand tools, a welder, and a few saws. You really don't need much more than that for these old trucks. But yeah, now I have quite a few tools. The wifey is wanting me to sell alot of them since we are moving to Colorado. She says they wont all fit in the moving truck. I had to explain to her it would be cheaper to re-buy the furniture, TV, and beds than the tools. I'll rent a second truck if I have to. :cool:
 
Man I thought I was going to have alot of time into my build, Congrats on the job. Like you I've never rode in a 40 hopefully mine will be the first.
I'm shooting for summer but it could be a little later. let me know how the 4.3 does.

Outstanding Job!!!!!:clap:
 
I'm running the stock manifolds. I've got my engine so far foward the firewall is the least of my worries. I don't think they would be a problem even with the motor further back. I hear monte carlo manifolds are a bit easier to work with. Have you seen Texicans thread about the 4.3 in a 40? https://forum.ih8mud.com/40-55-series-tech/43710-4-3-tbi-40-a.html

He uses the monte manifolds.

:beer:
 

Users who are viewing this thread

Back
Top Bottom