Navigation
Install the app
How to install the app on iOS
Follow along with the video below to see how to install our site as a web app on your home screen.
Note: This feature may not be available in some browsers.
More options
Style variation
You are using an out of date browser. It may not display this or other websites correctly.
You should upgrade or use an alternative browser.
You should upgrade or use an alternative browser.
A Cheap Ass Rescues a 62
- Thread starter Prairie Swamp
- Start date
This site may earn a commission from merchant affiliate
links, including eBay, Amazon, Skimlinks, and others.
More options
Who Replied?
Good eye for detail. Drooling over pictures of the shop. Keep up the good work.
- Thread starter
- #63

NeverGiveUpYota
Dare me.
@Prairie Swamp, smiling. Thanks. Your making me feel better about my financial choices.
- Thread starter
- #65
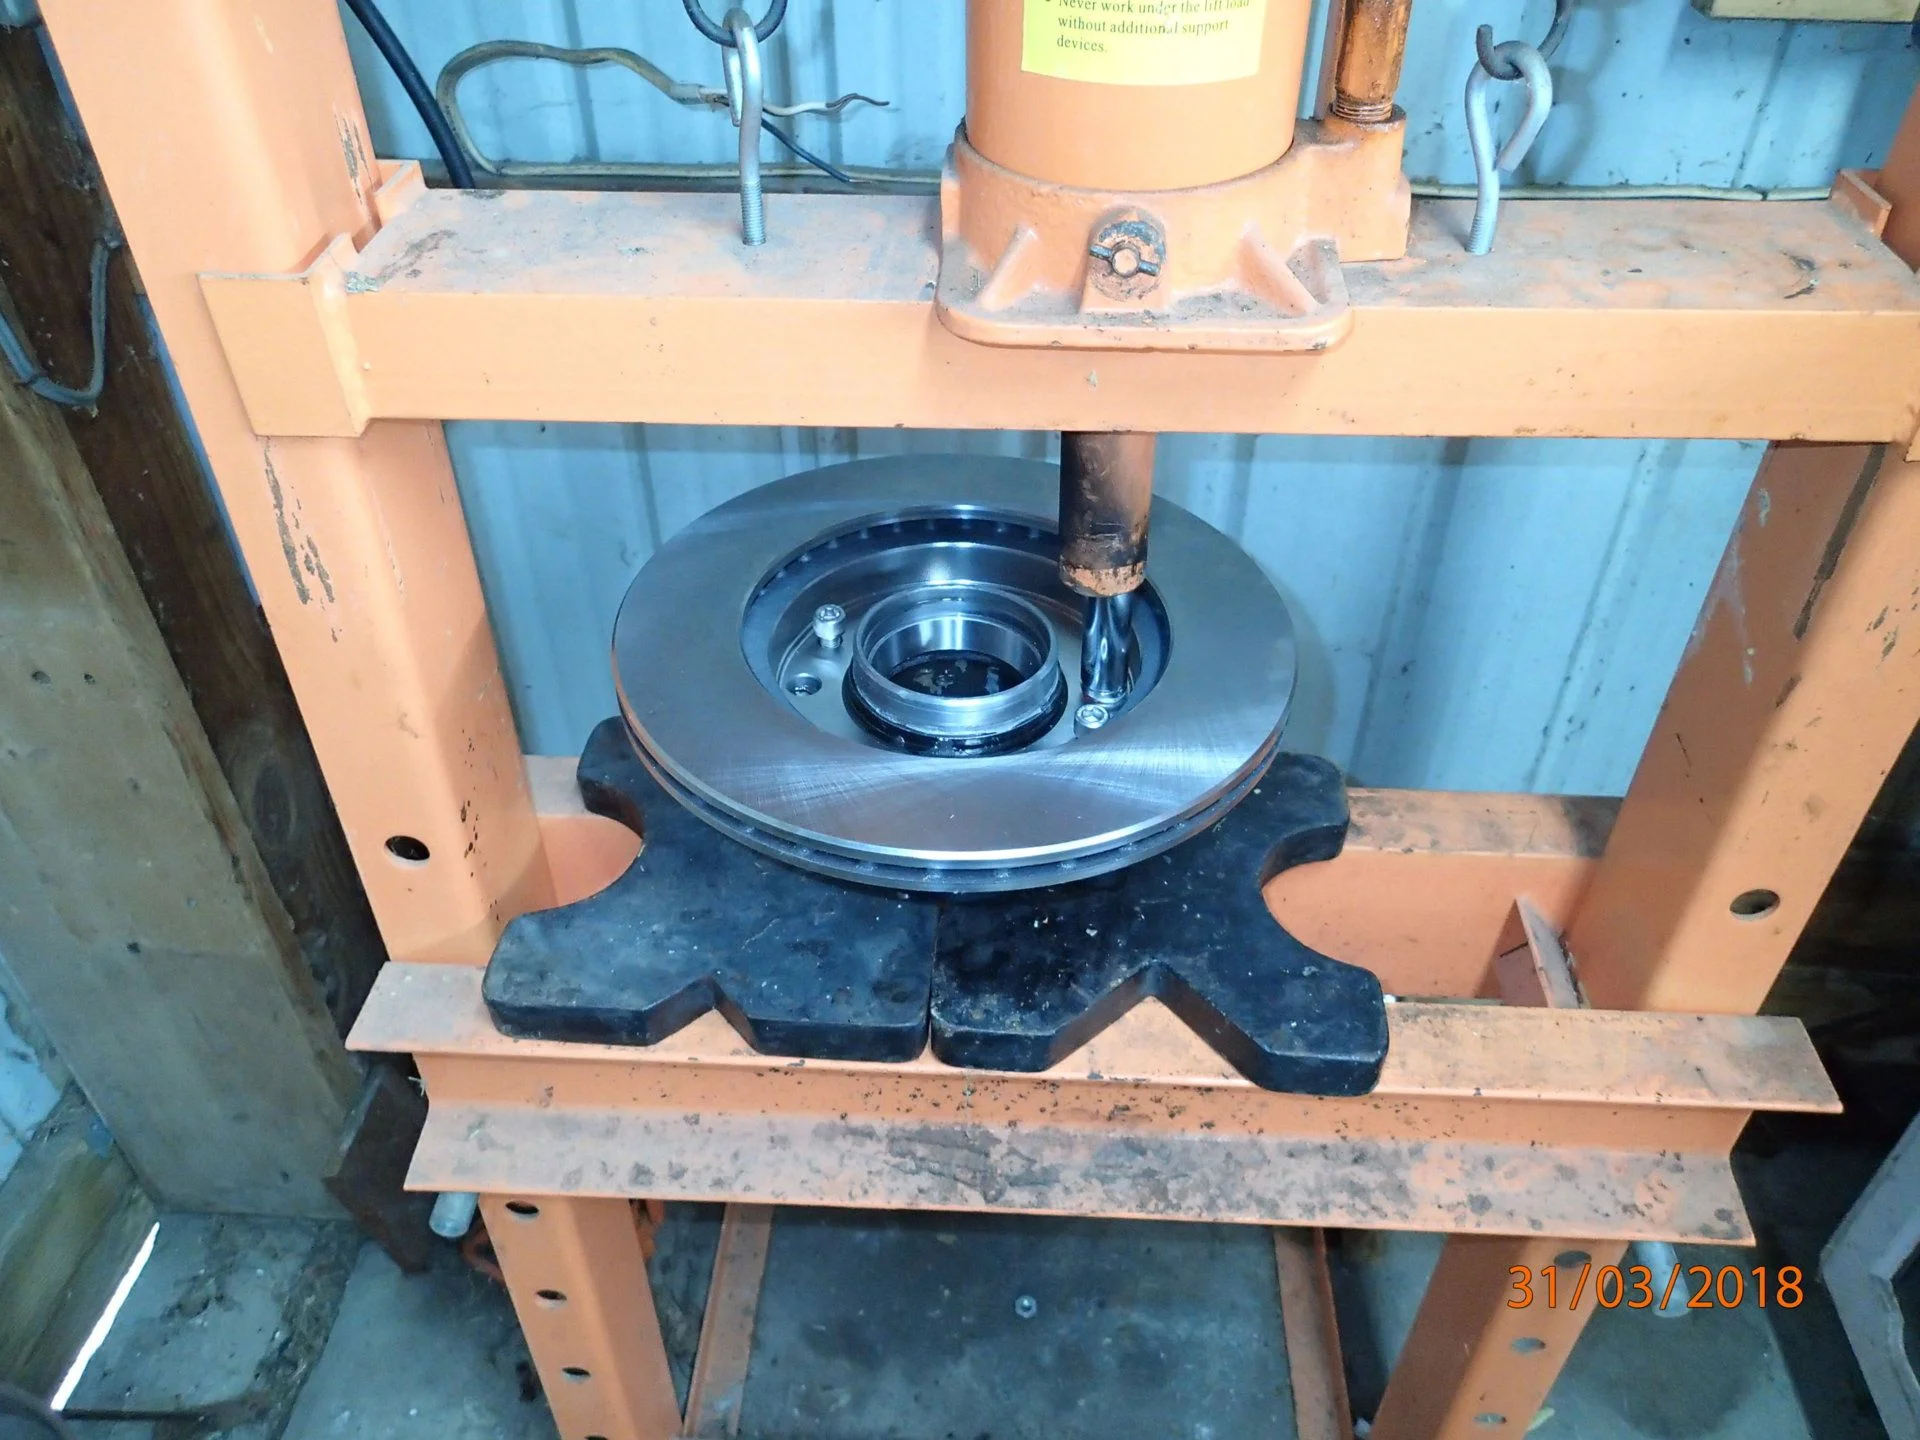
Another member started a thread recently that he couldn't achieve torque spec on a caliper mount bolt. I have the same issue. Incidentally this is the one hole that didn't have an OEM bolt. Another vote for OEM hardware.
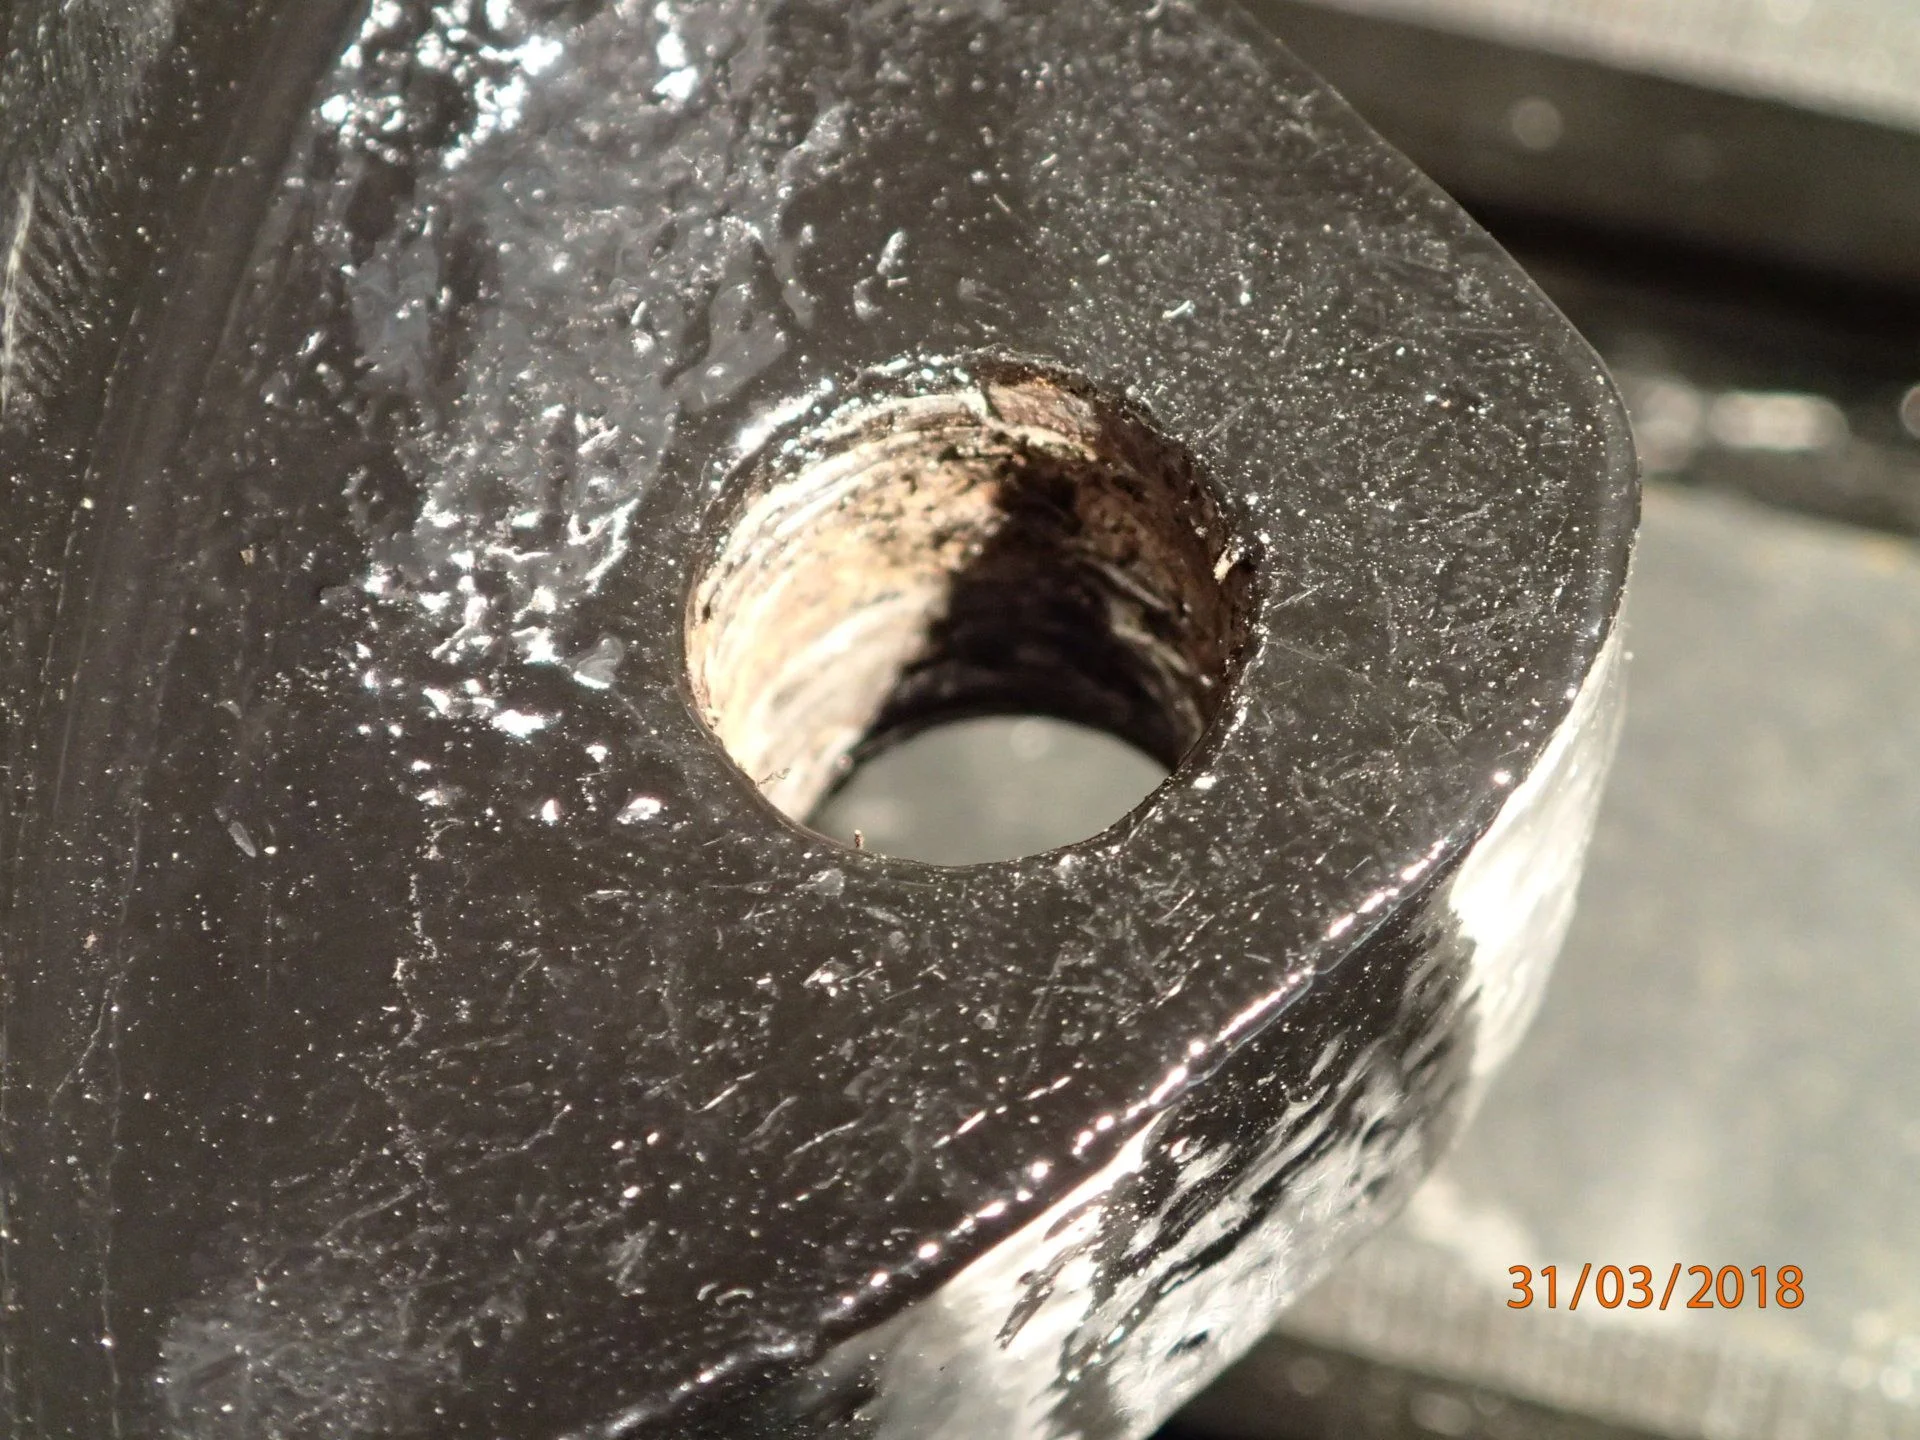
I used HeliCoil brand as that is what I have on hand. I believe the other guy used a TimeSert or similar which is solid steel with actual internal and external threads. I believe the TimeSert is superior, but either kit is super expensive and Helicoil is what I had on hand.
Done.

Still waiting on my replacement order of 0.95 cent hardware to put my Birfs and everything else back together. Stupid USPS.
I used HeliCoil brand as that is what I have on hand. I believe the other guy used a TimeSert or similar which is solid steel with actual internal and external threads. I believe the TimeSert is superior, but either kit is super expensive and Helicoil is what I had on hand.
Done.
Still waiting on my replacement order of 0.95 cent hardware to put my Birfs and everything else back together. Stupid USPS.
- Thread starter
- #66
OK the grass isn't growing an inch a day right now so back at it.
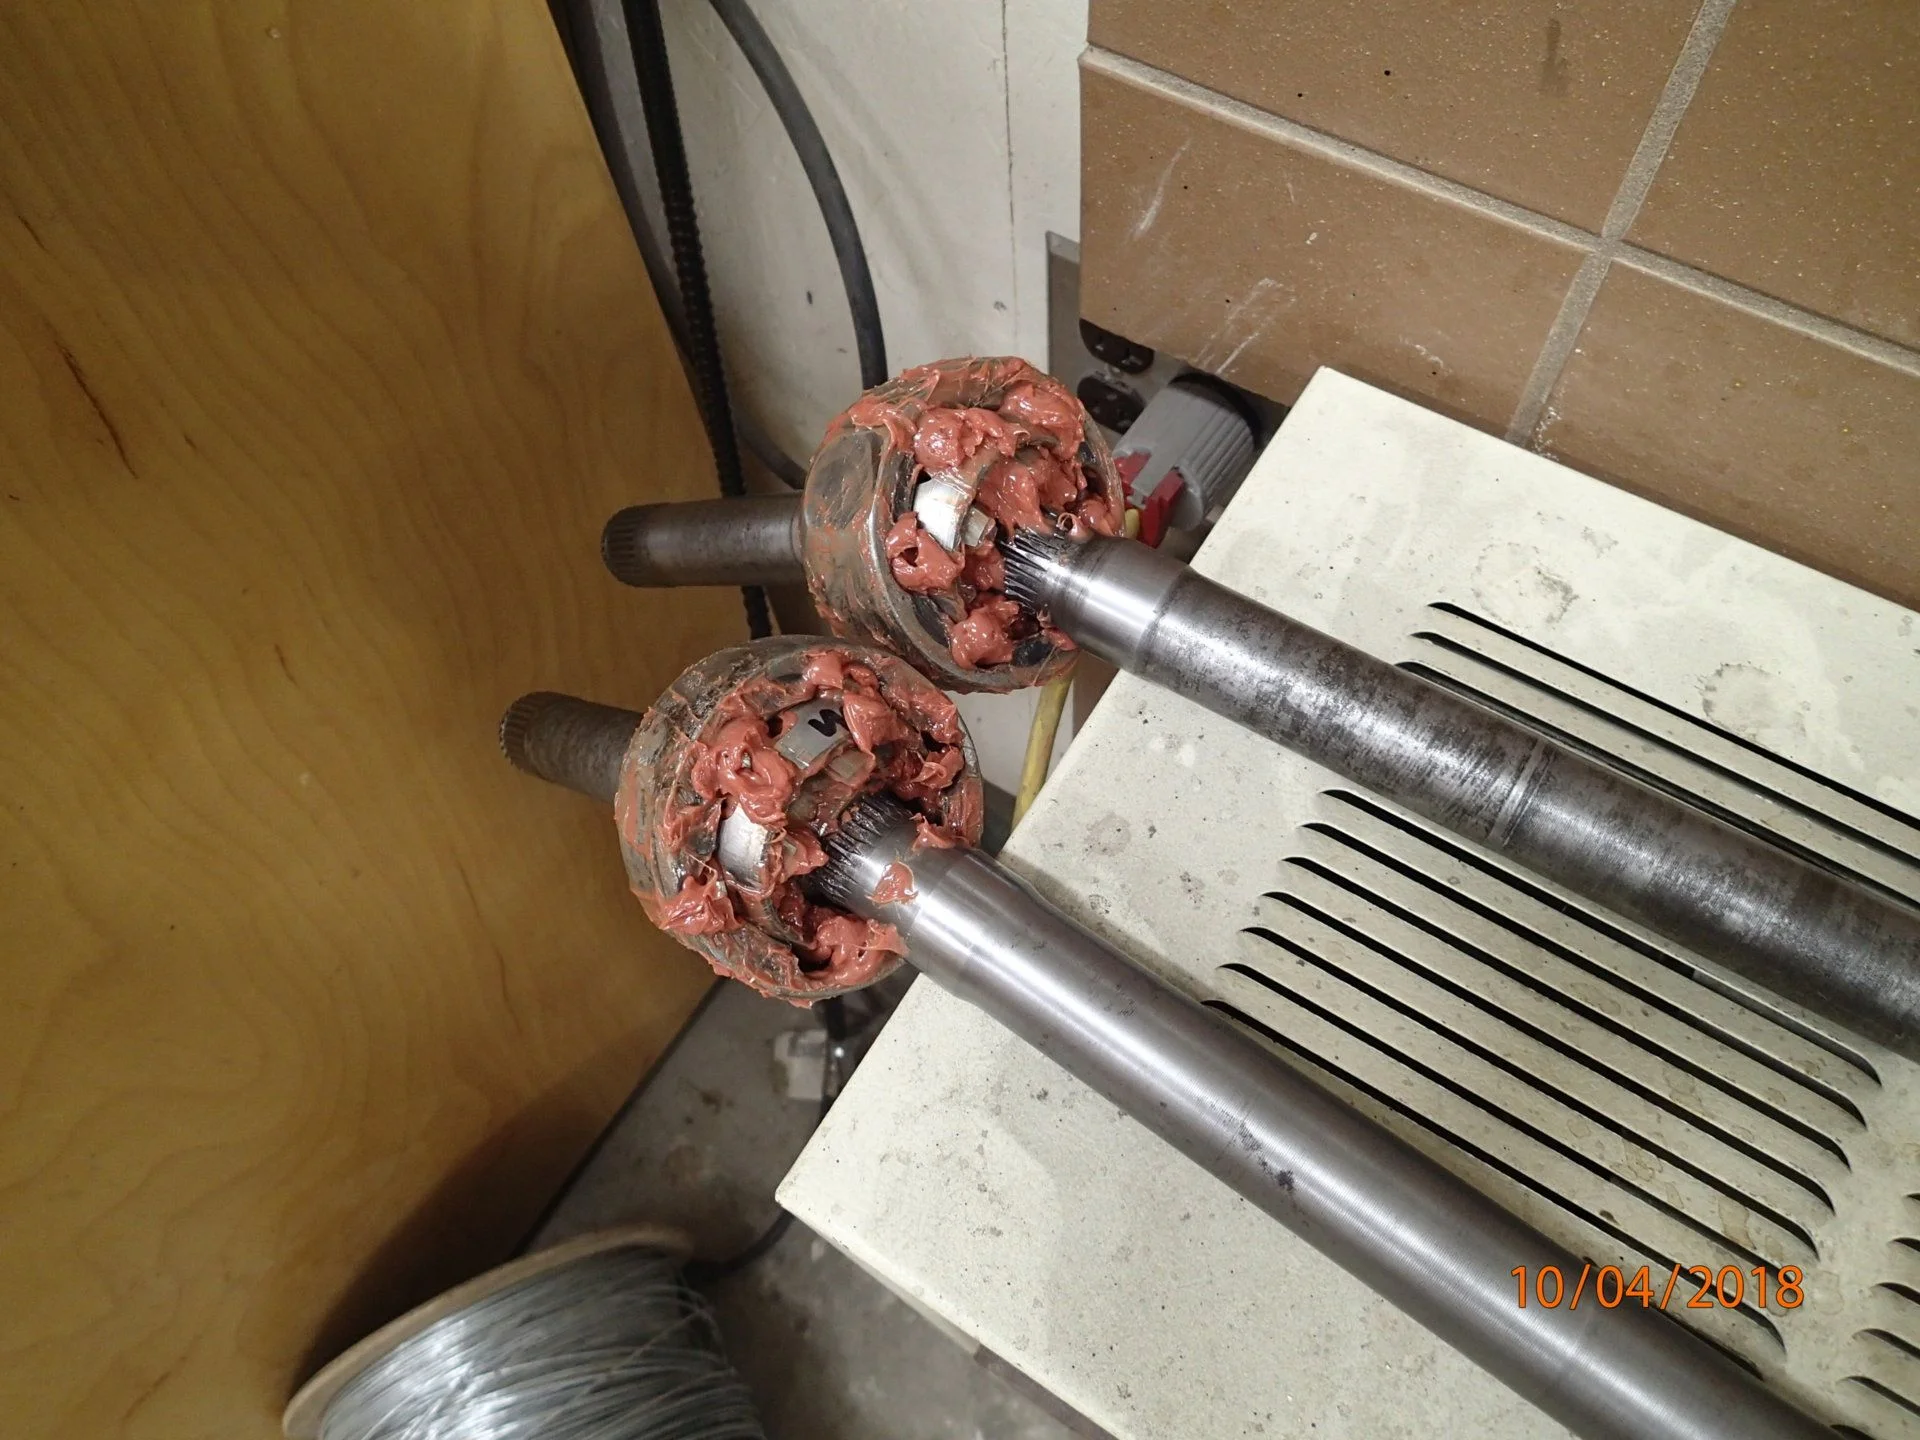
I have no point of reference but this is the wear on what I assume are 360K mile Birfs. I think this thing spent most of it's life hubs unlocked.

I'm going to try the RedLine CV2 grease in here based on internet recommendations. It's pinkish. I've been happy with Redline gear oils.
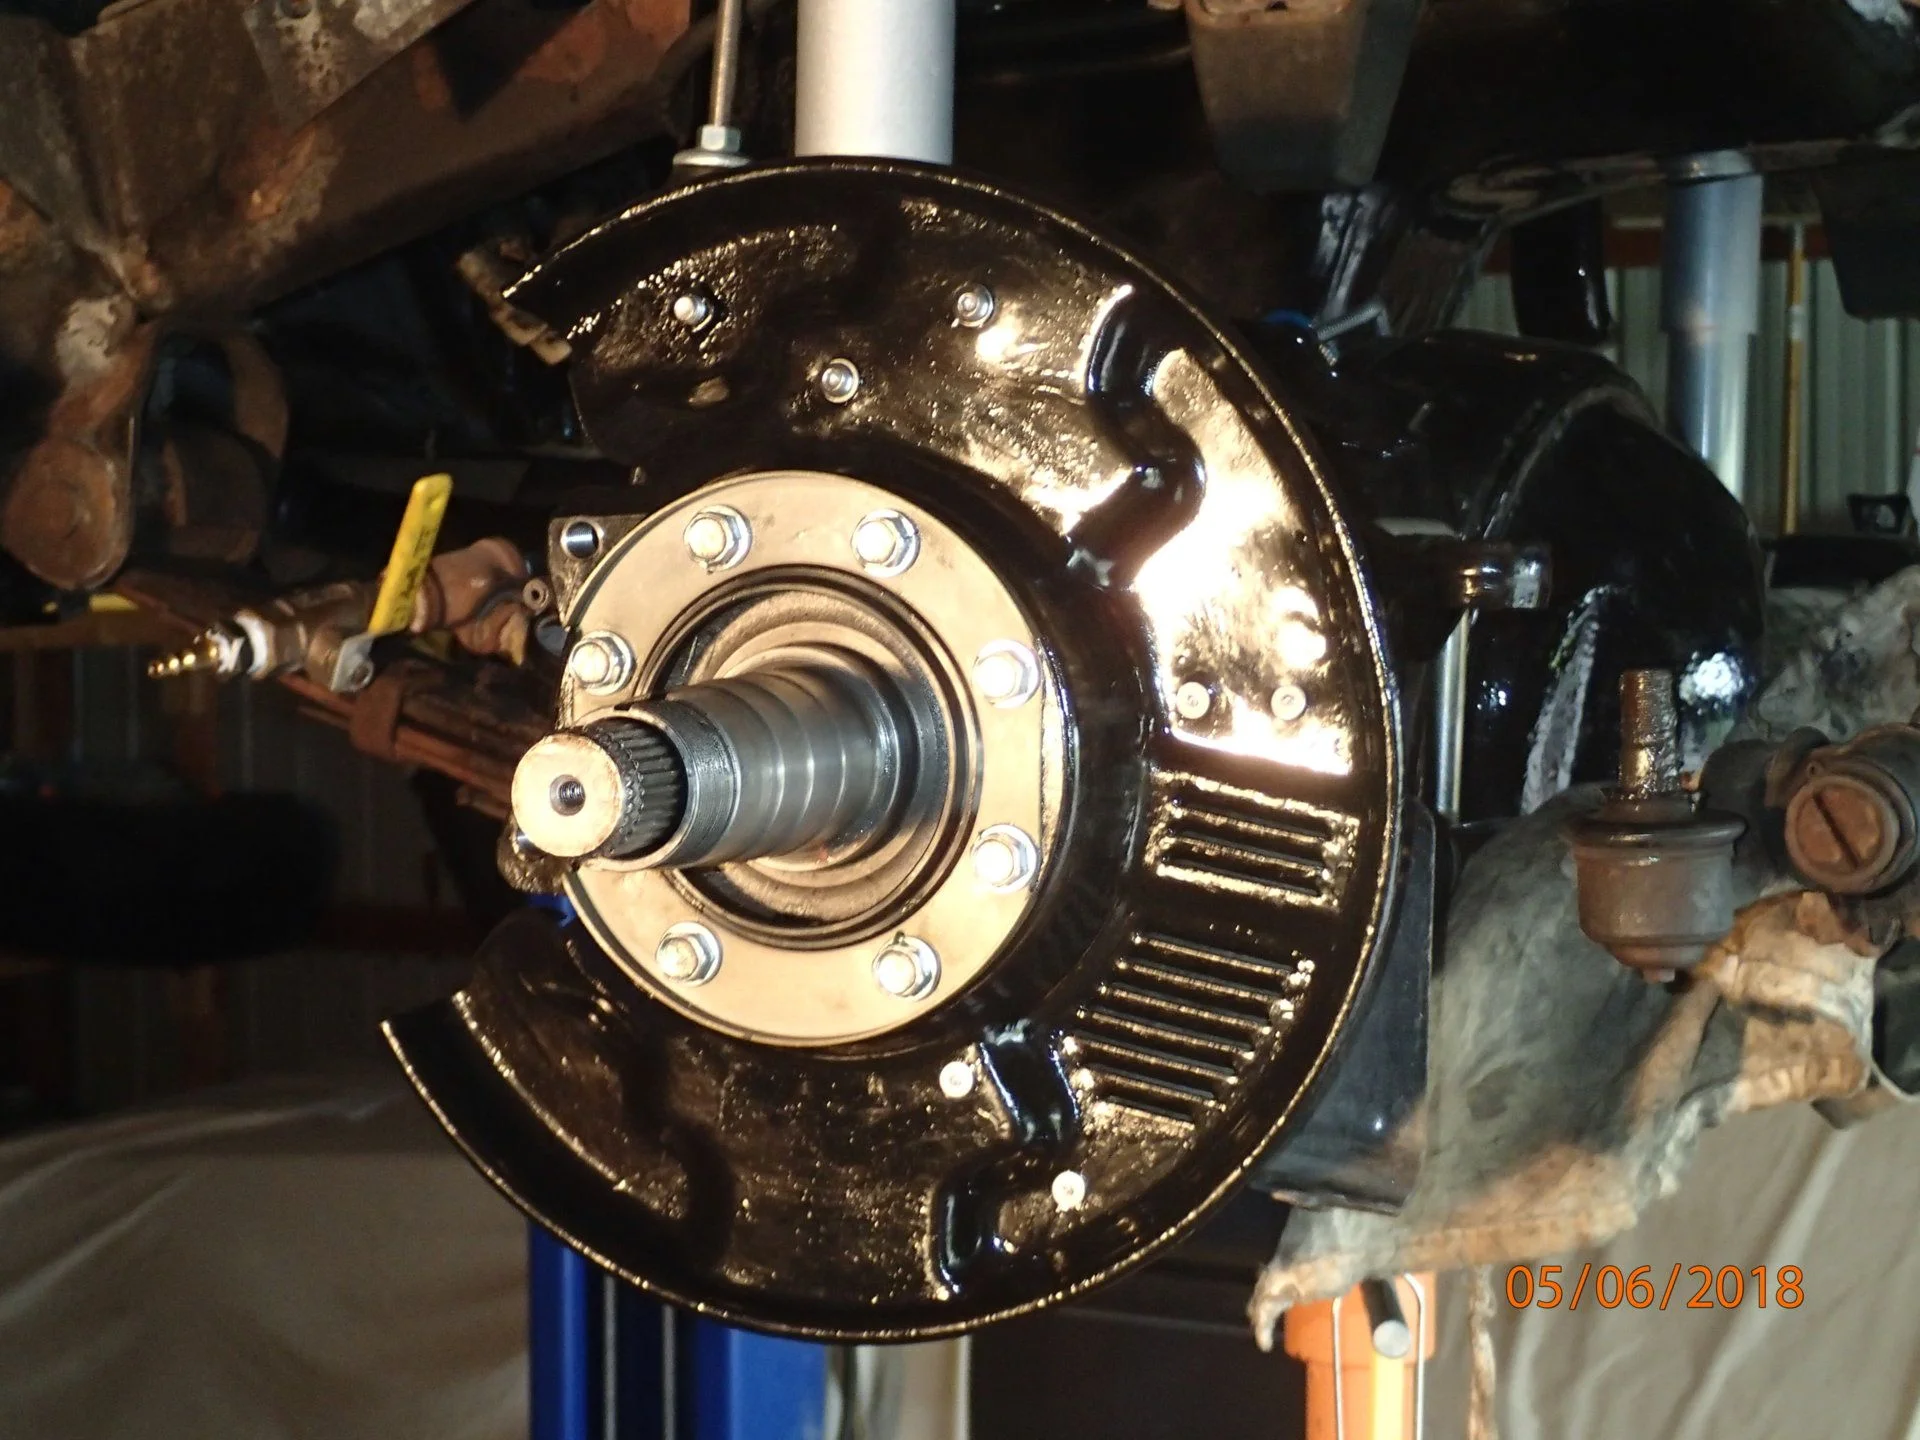
I'm putting a lot of new hardware in here. The old stuff wasn't anywhere near failing but after 30 years the sacrificial zinc coating is pretty much gone and the real corrosion sets in. Most of the hardware is low cost from Toyota and in reality the next time I get this far in the hardware may be NLA. They changed the head on these studs and I don't have the reverse Torx tool so double nuts it is.
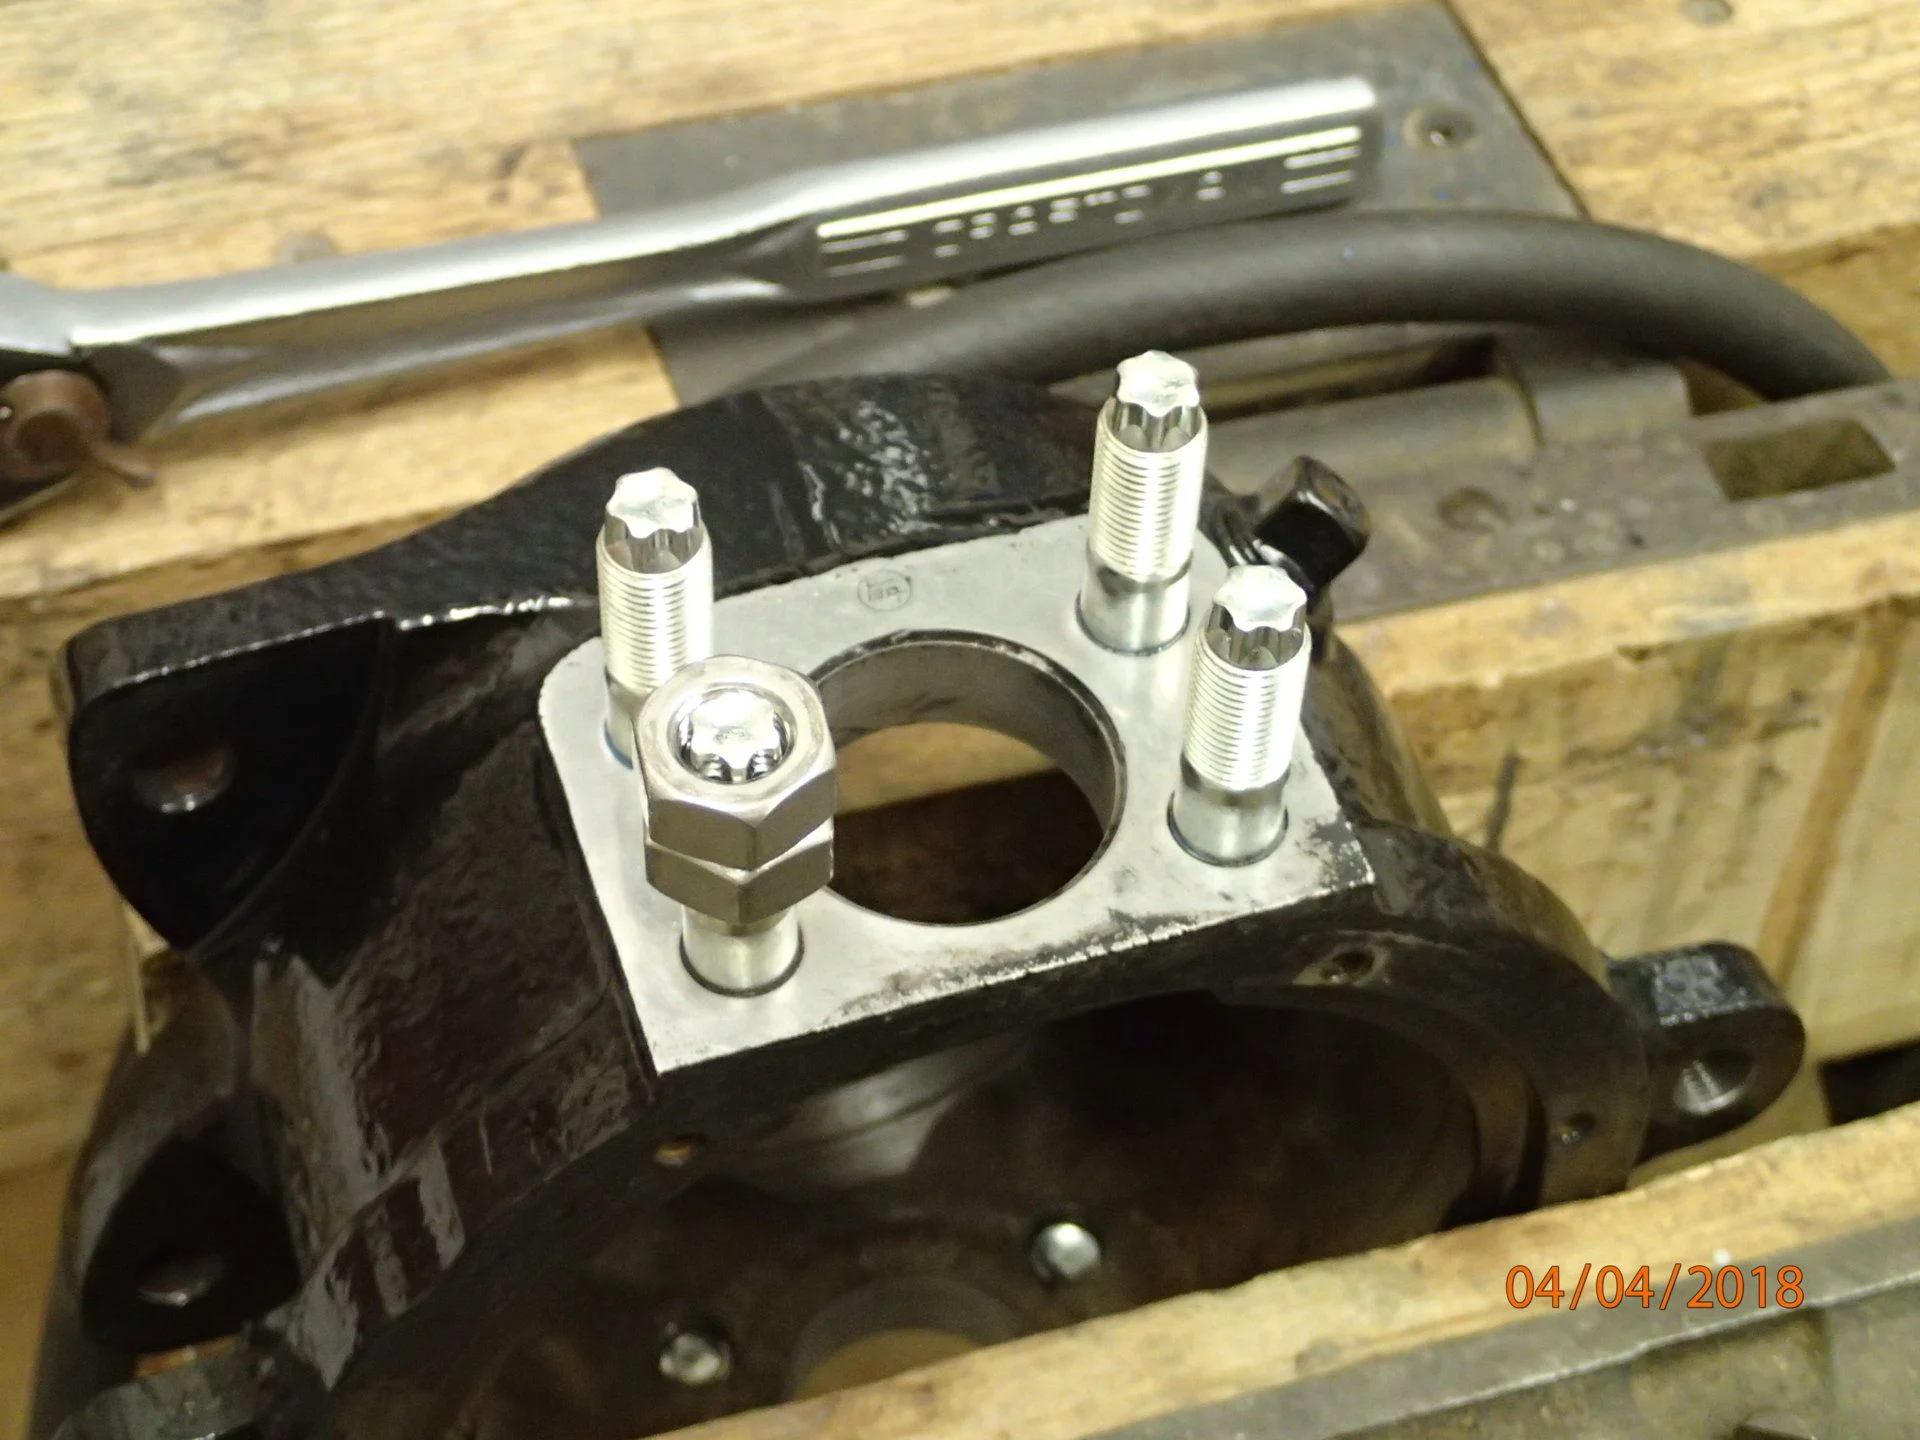
The weather was crap all spring and that had it's challenges but at the same time I had opportunity to do some rainy day electroplating. Fresh zinc.

Yellow chromate.

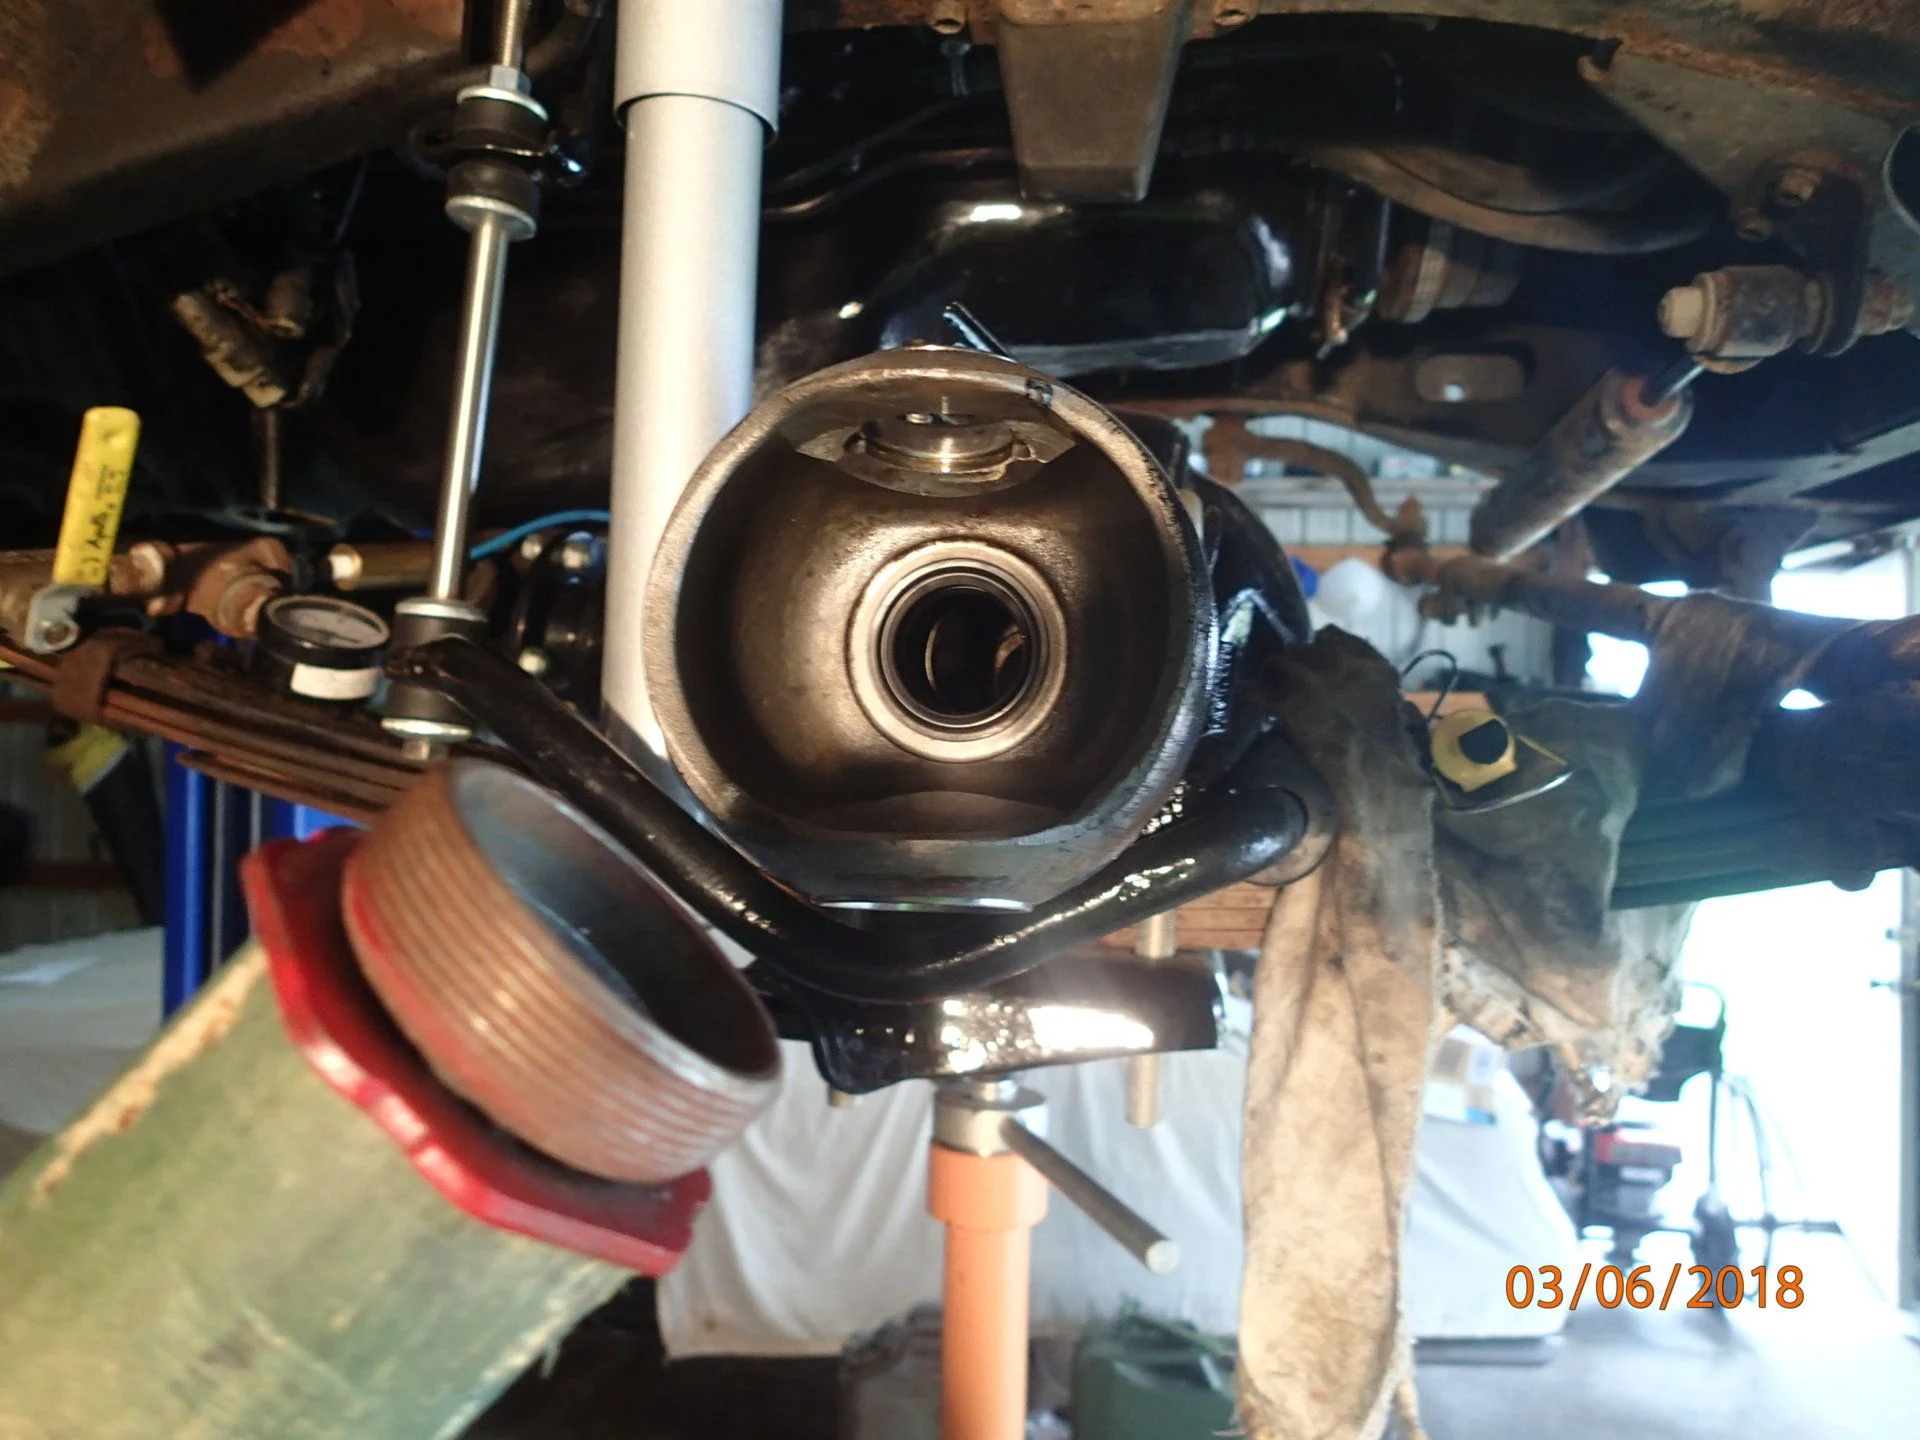
Finally getting around to using the awesome knuckle centering tool reproduced by Jason @reevesci . Also a shout out to @mwebfj60 for tips on using the tool.
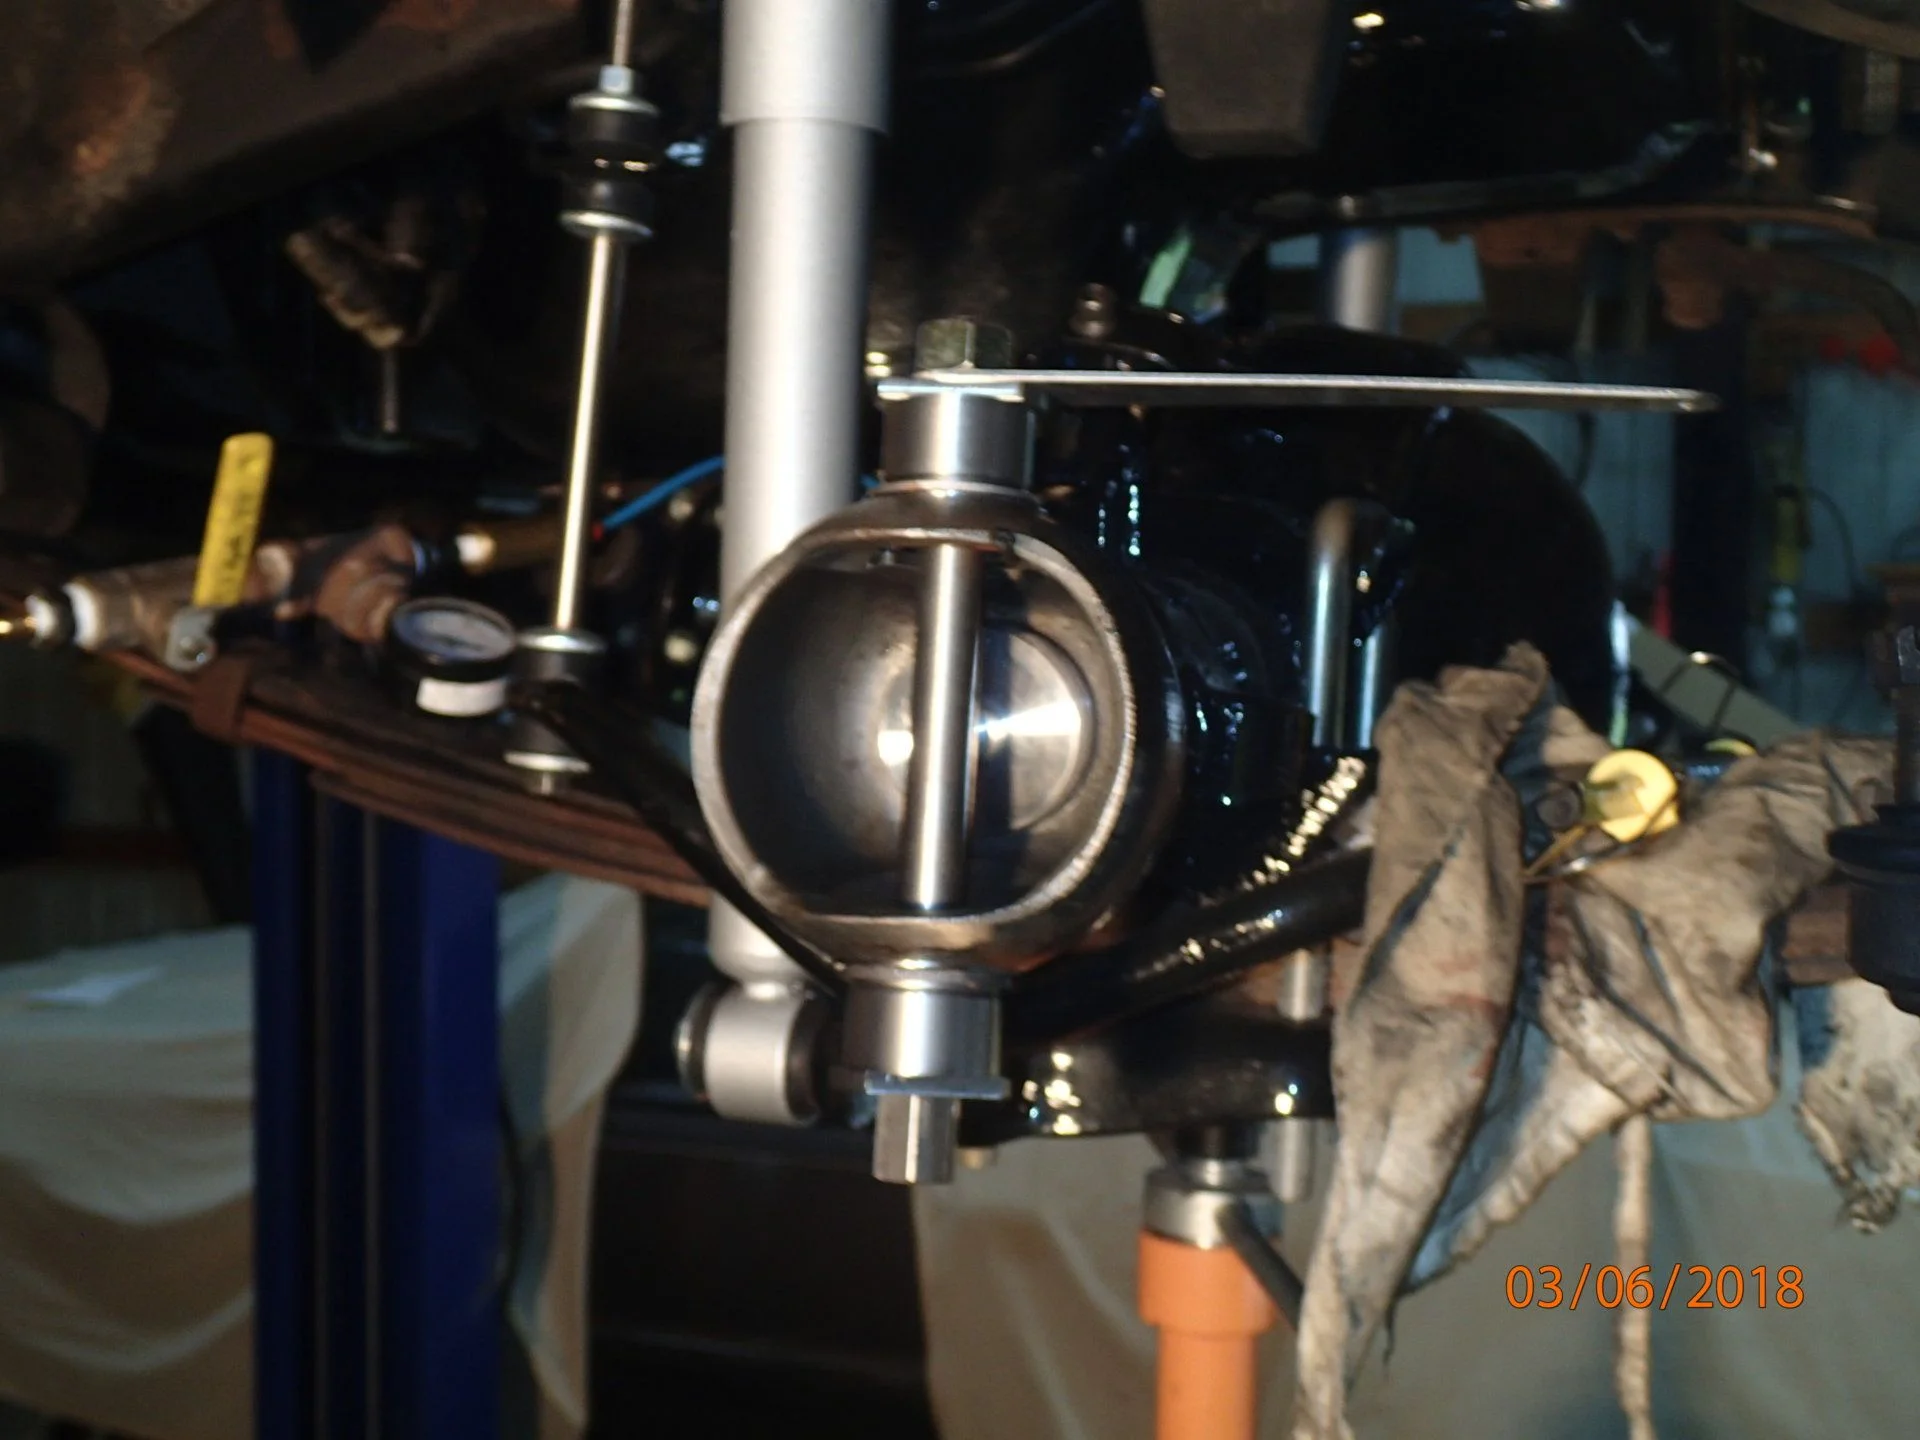
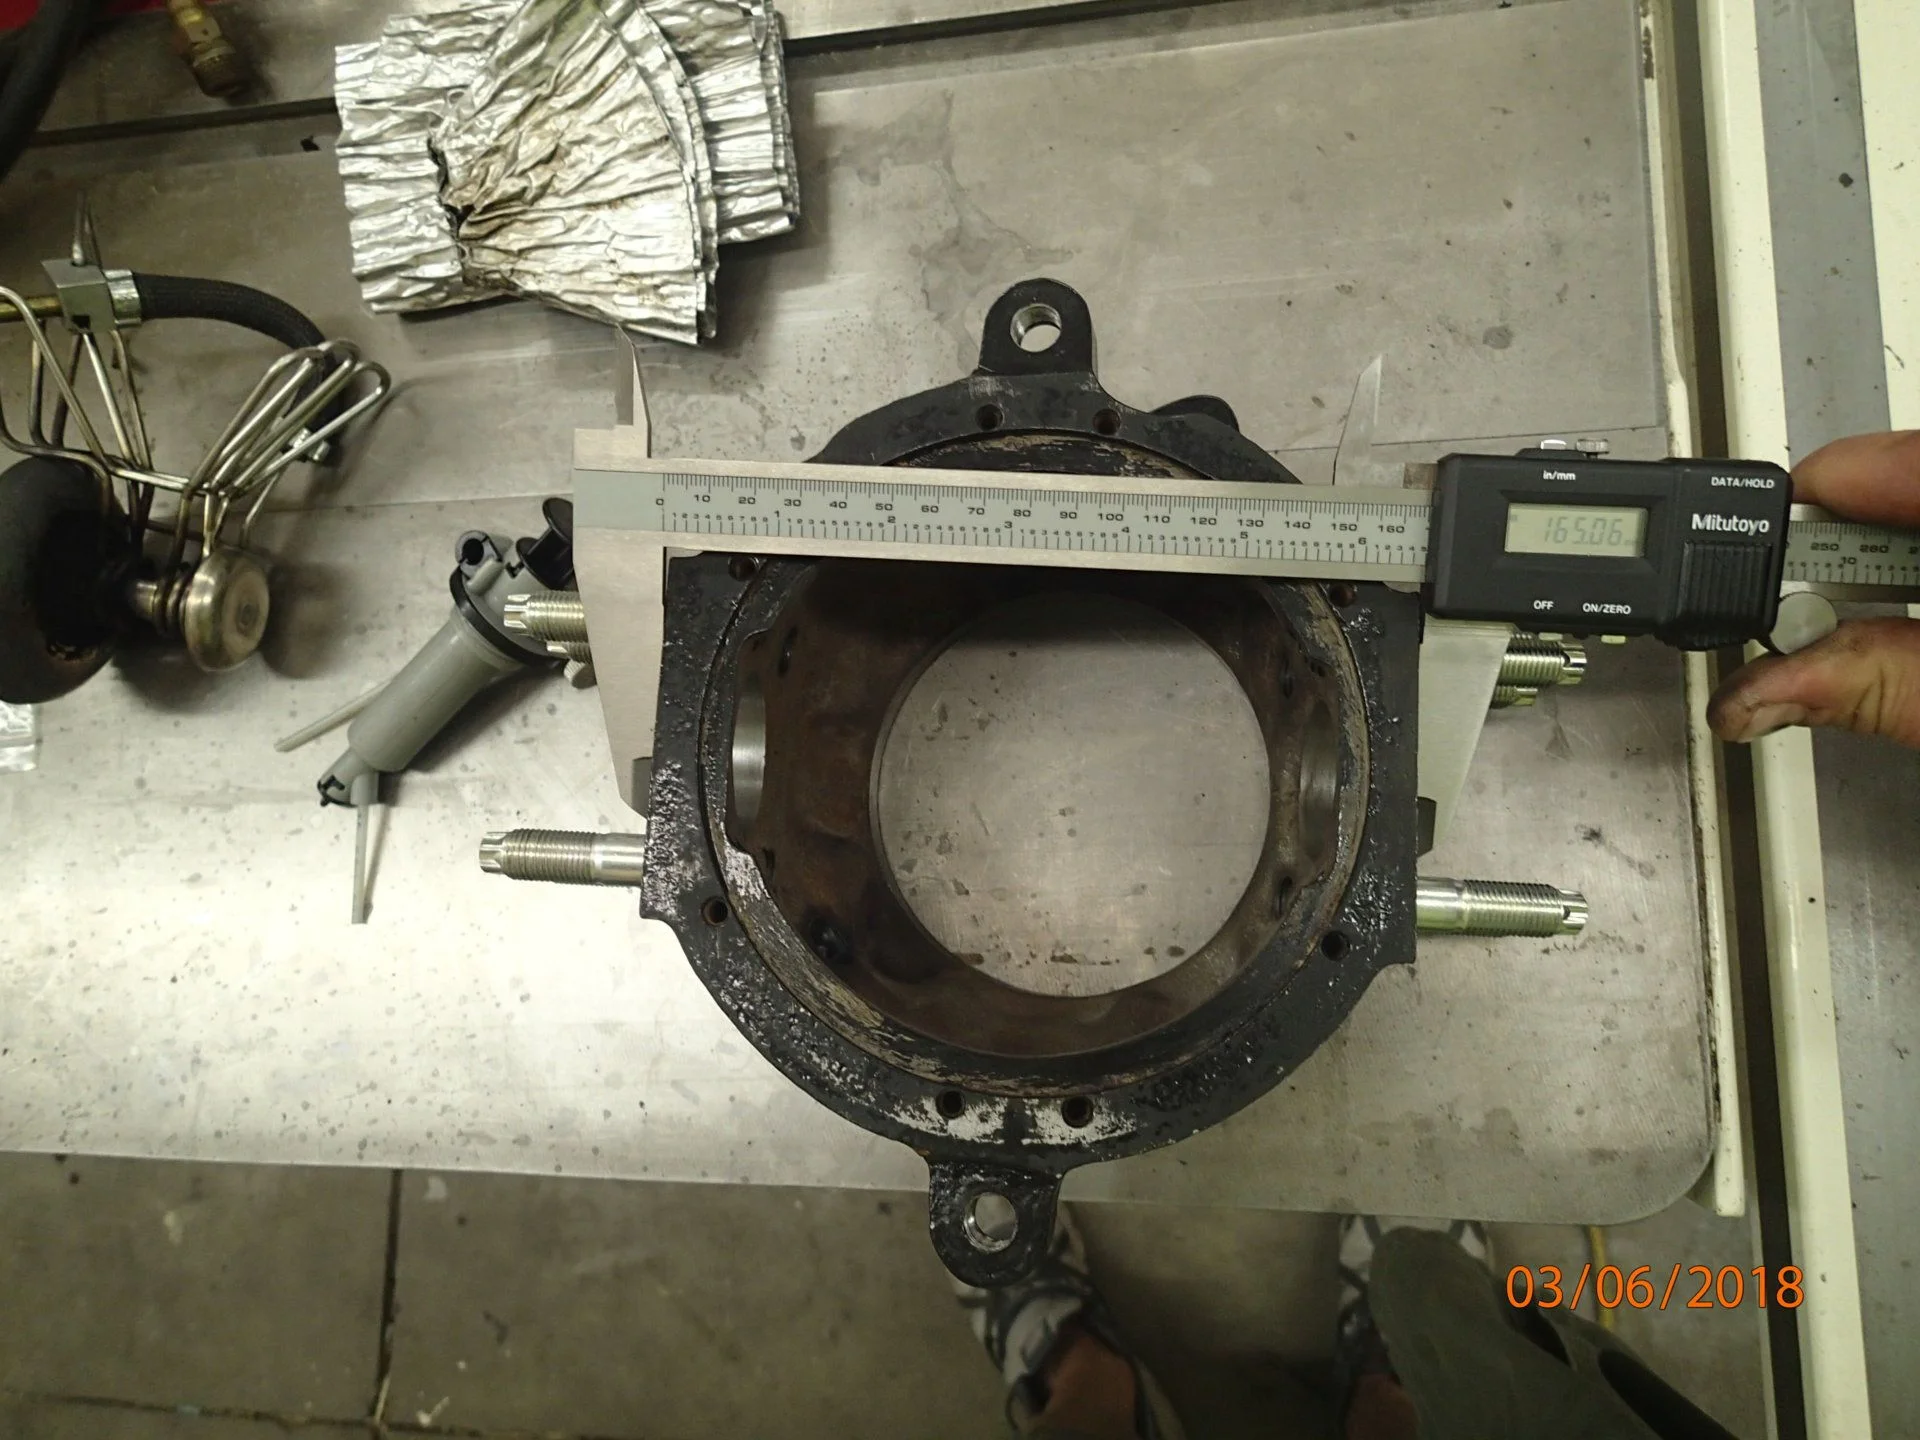
Tool goes in the axle housing first and a line is scribed on the rod by spinning it. You also measure between the flats on the top and bottom pieces that rest on the knuckle bearings.
Knuckle height is measured. You do a little math based on these two measurements and you then know how thick your total shim pack has to be to achieve proper knuckle bearing pre-load. The shims will be distributed top and bottom to properly center the axle in the knuckle AND provide proper bearing pre-load.
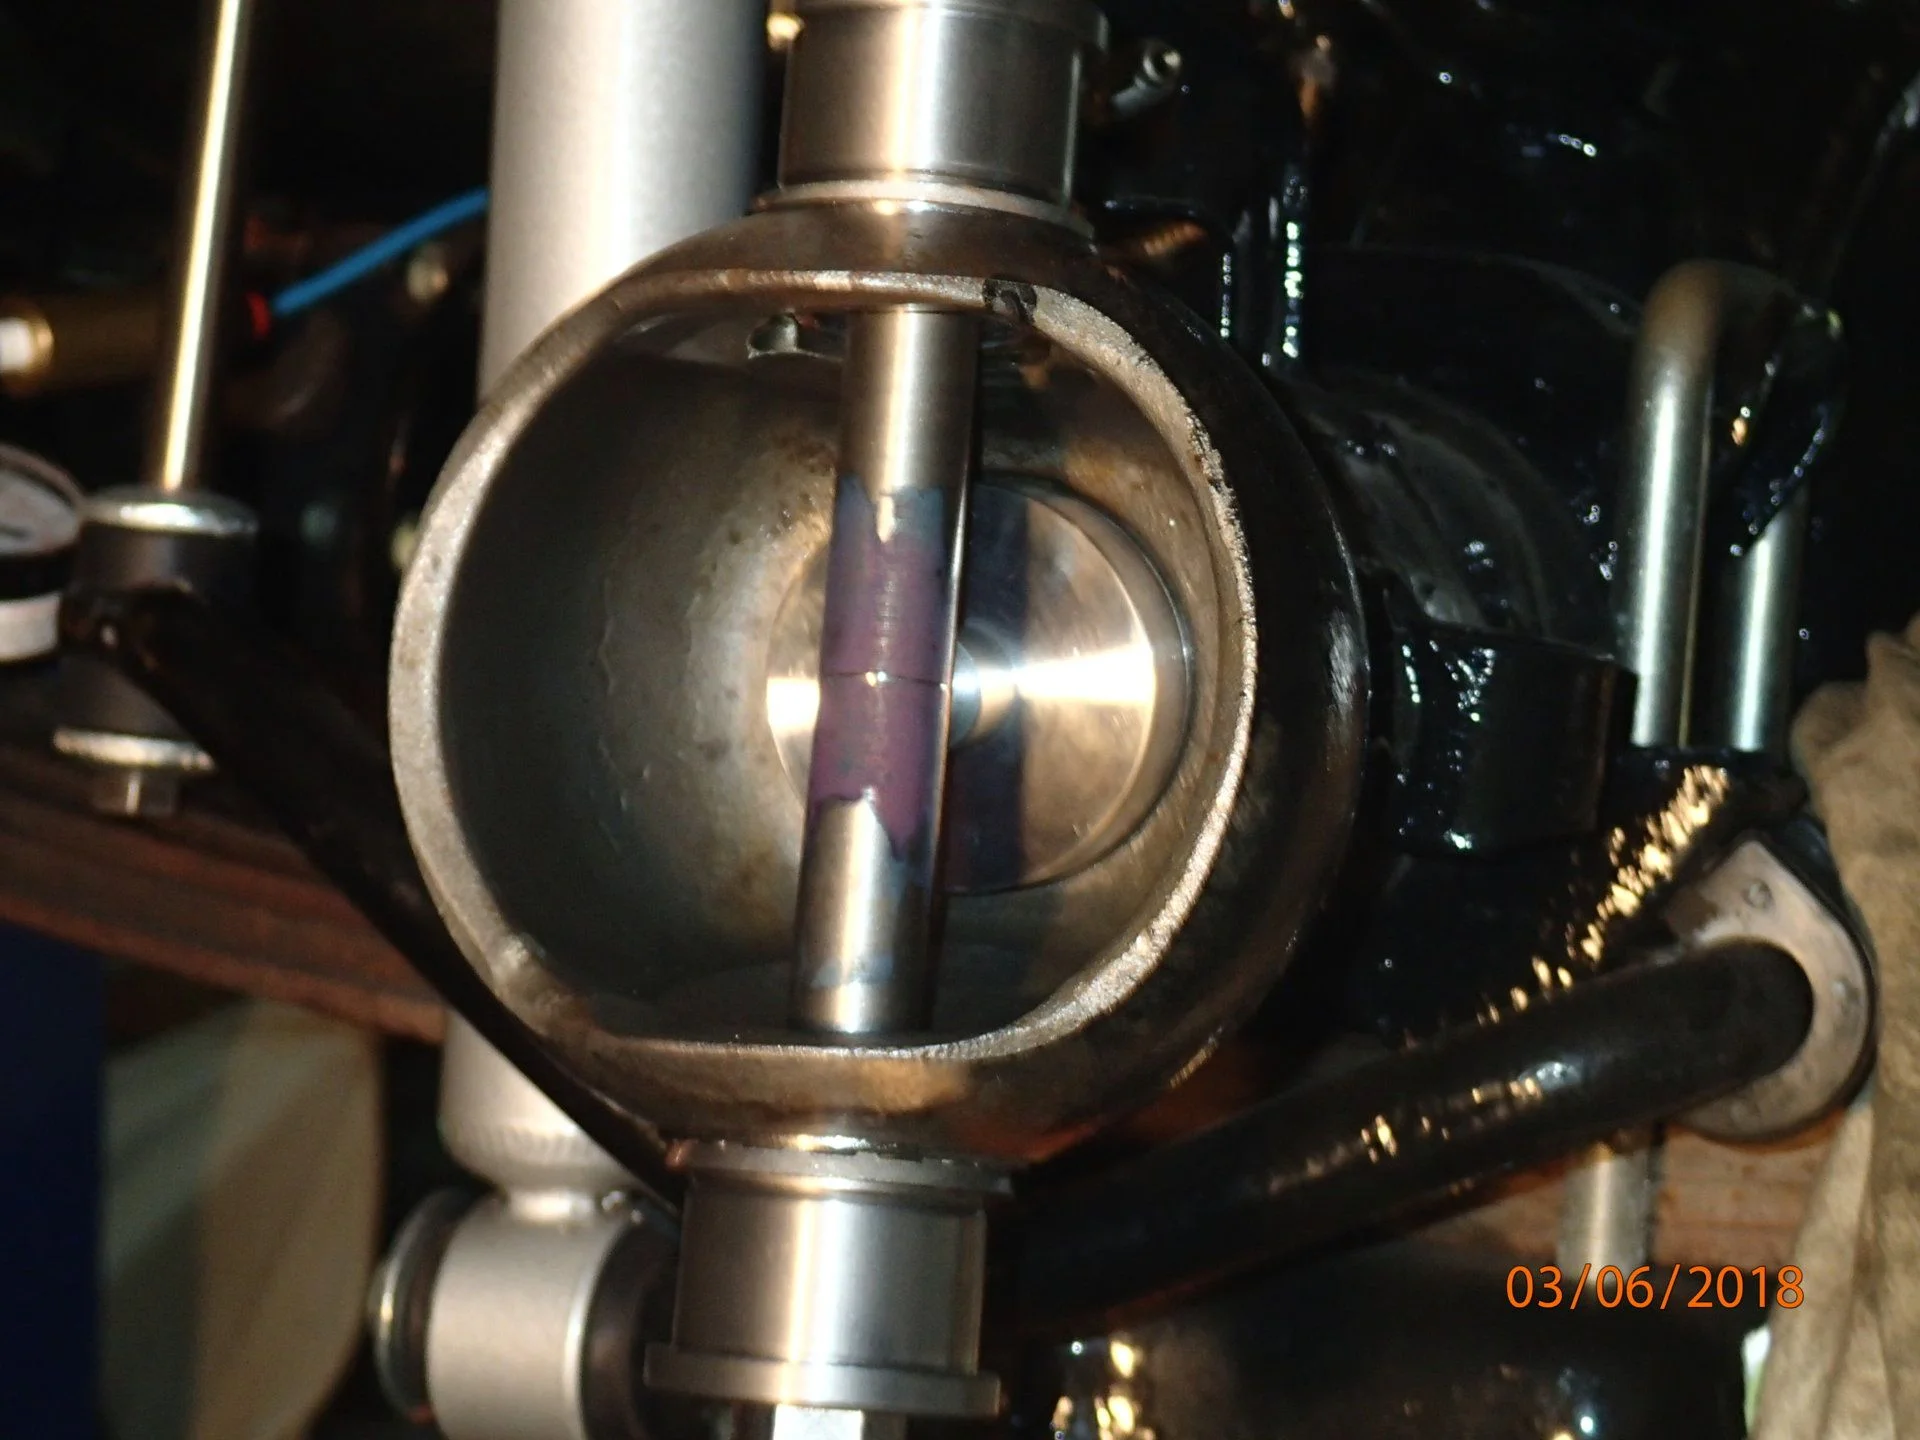
Then the tool goes in the spindle and a second line is scribed by spinning.
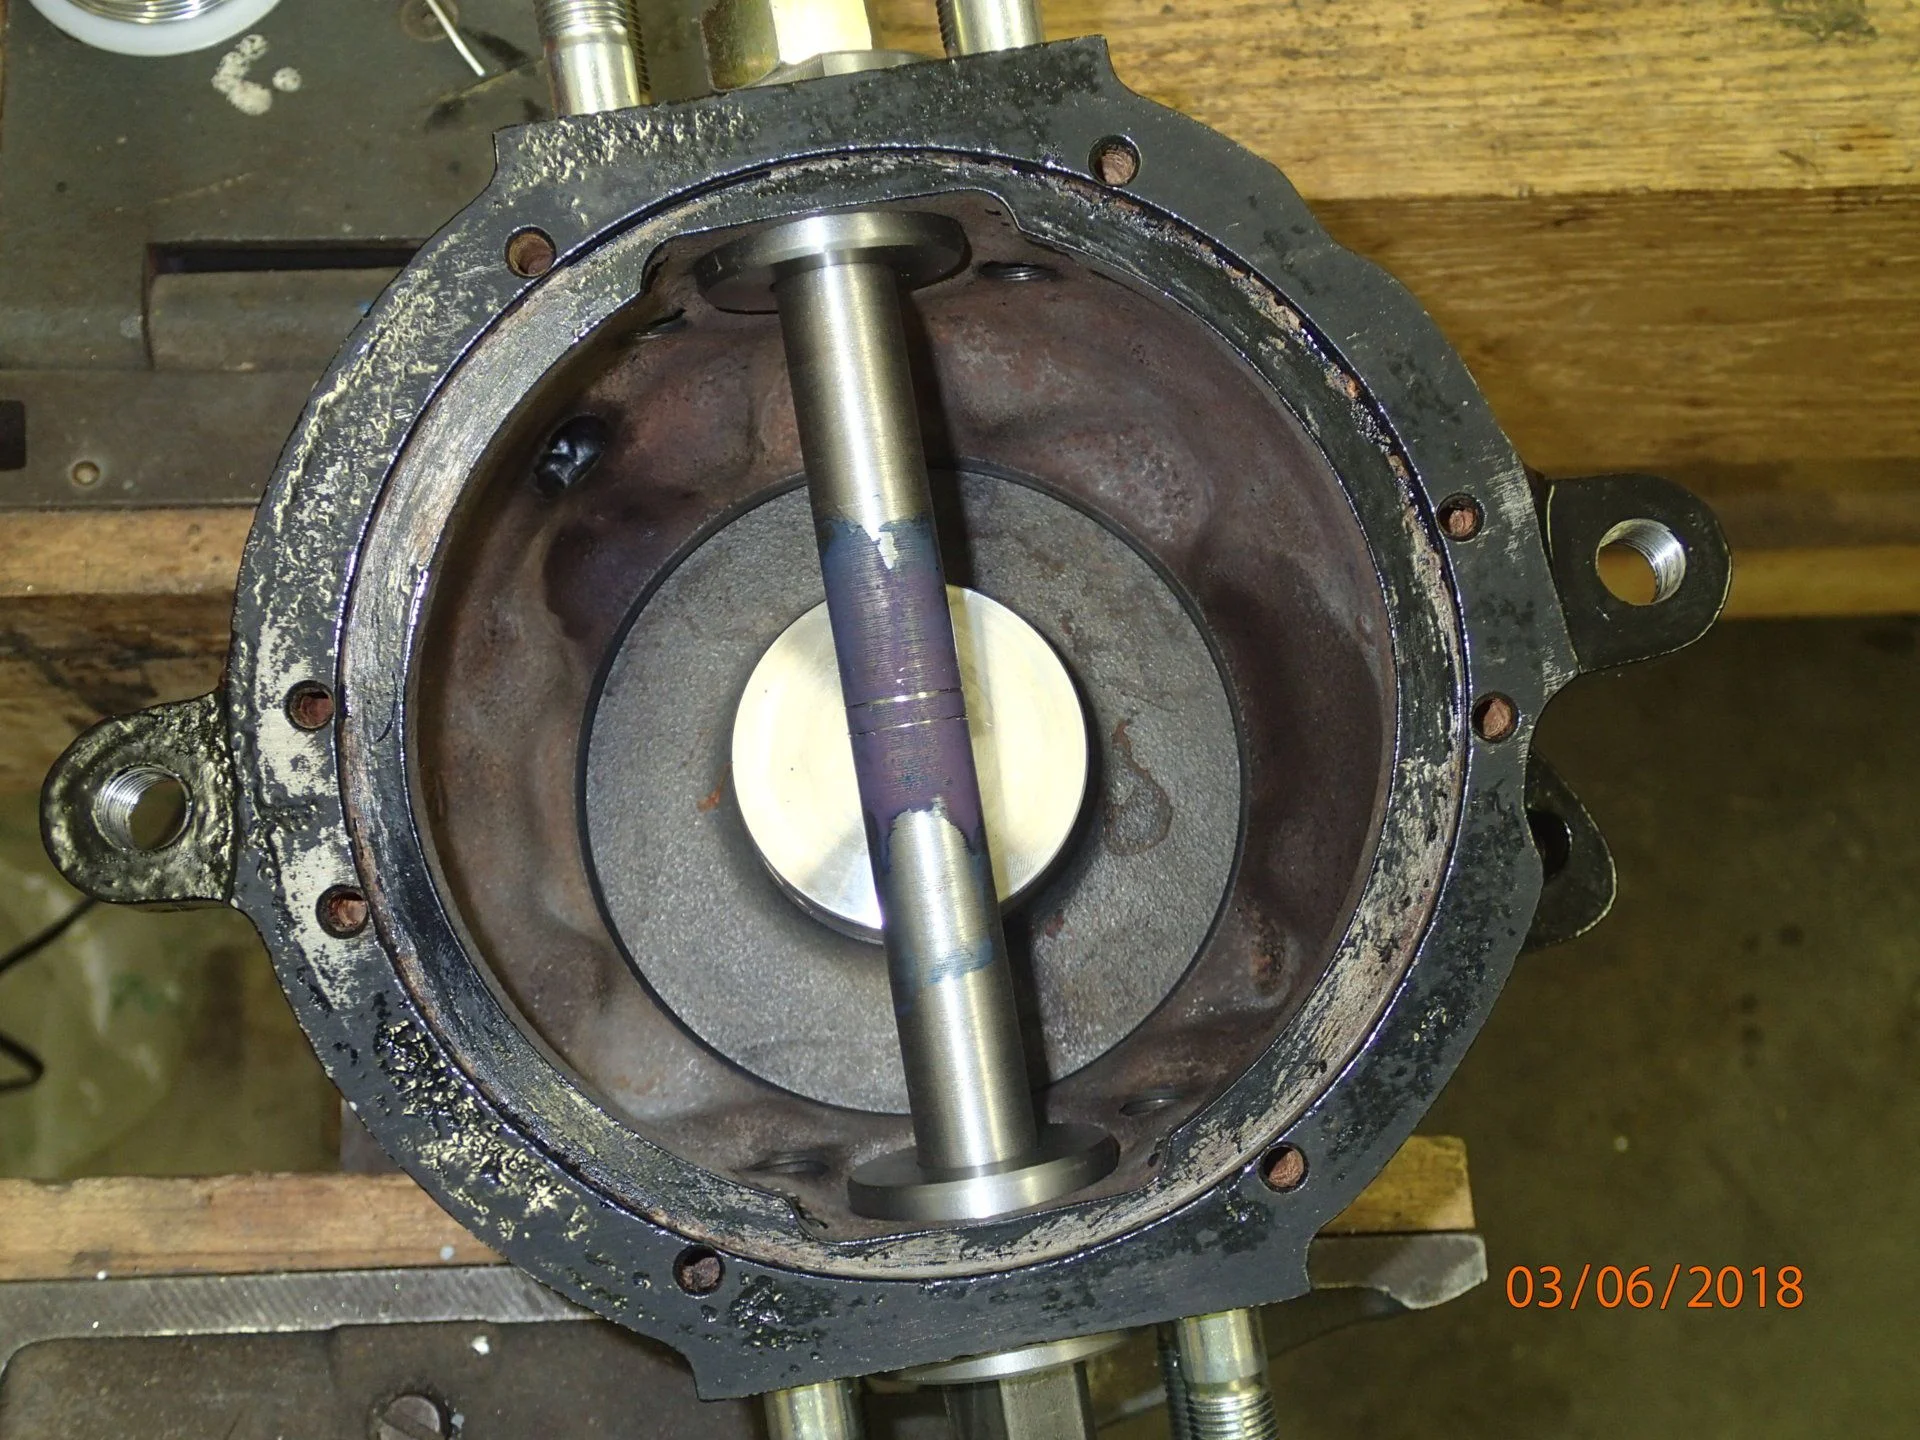
You measure (as best you can) between the two scribed lines, do some more math and then you know how much of your total shim to put on the bottom. This puts the axle at the right height. You then put the rest of your calculated total shim thickness on top to achieve proper pre-load.
Incidentally my "measured" necessary shim stack was only .017mm different from the total shim that was in there. Also the calculated lower shim to set axle height was pretty close too. So the advice "Put it back like you found it." would have worked just fine for my right side anyway.

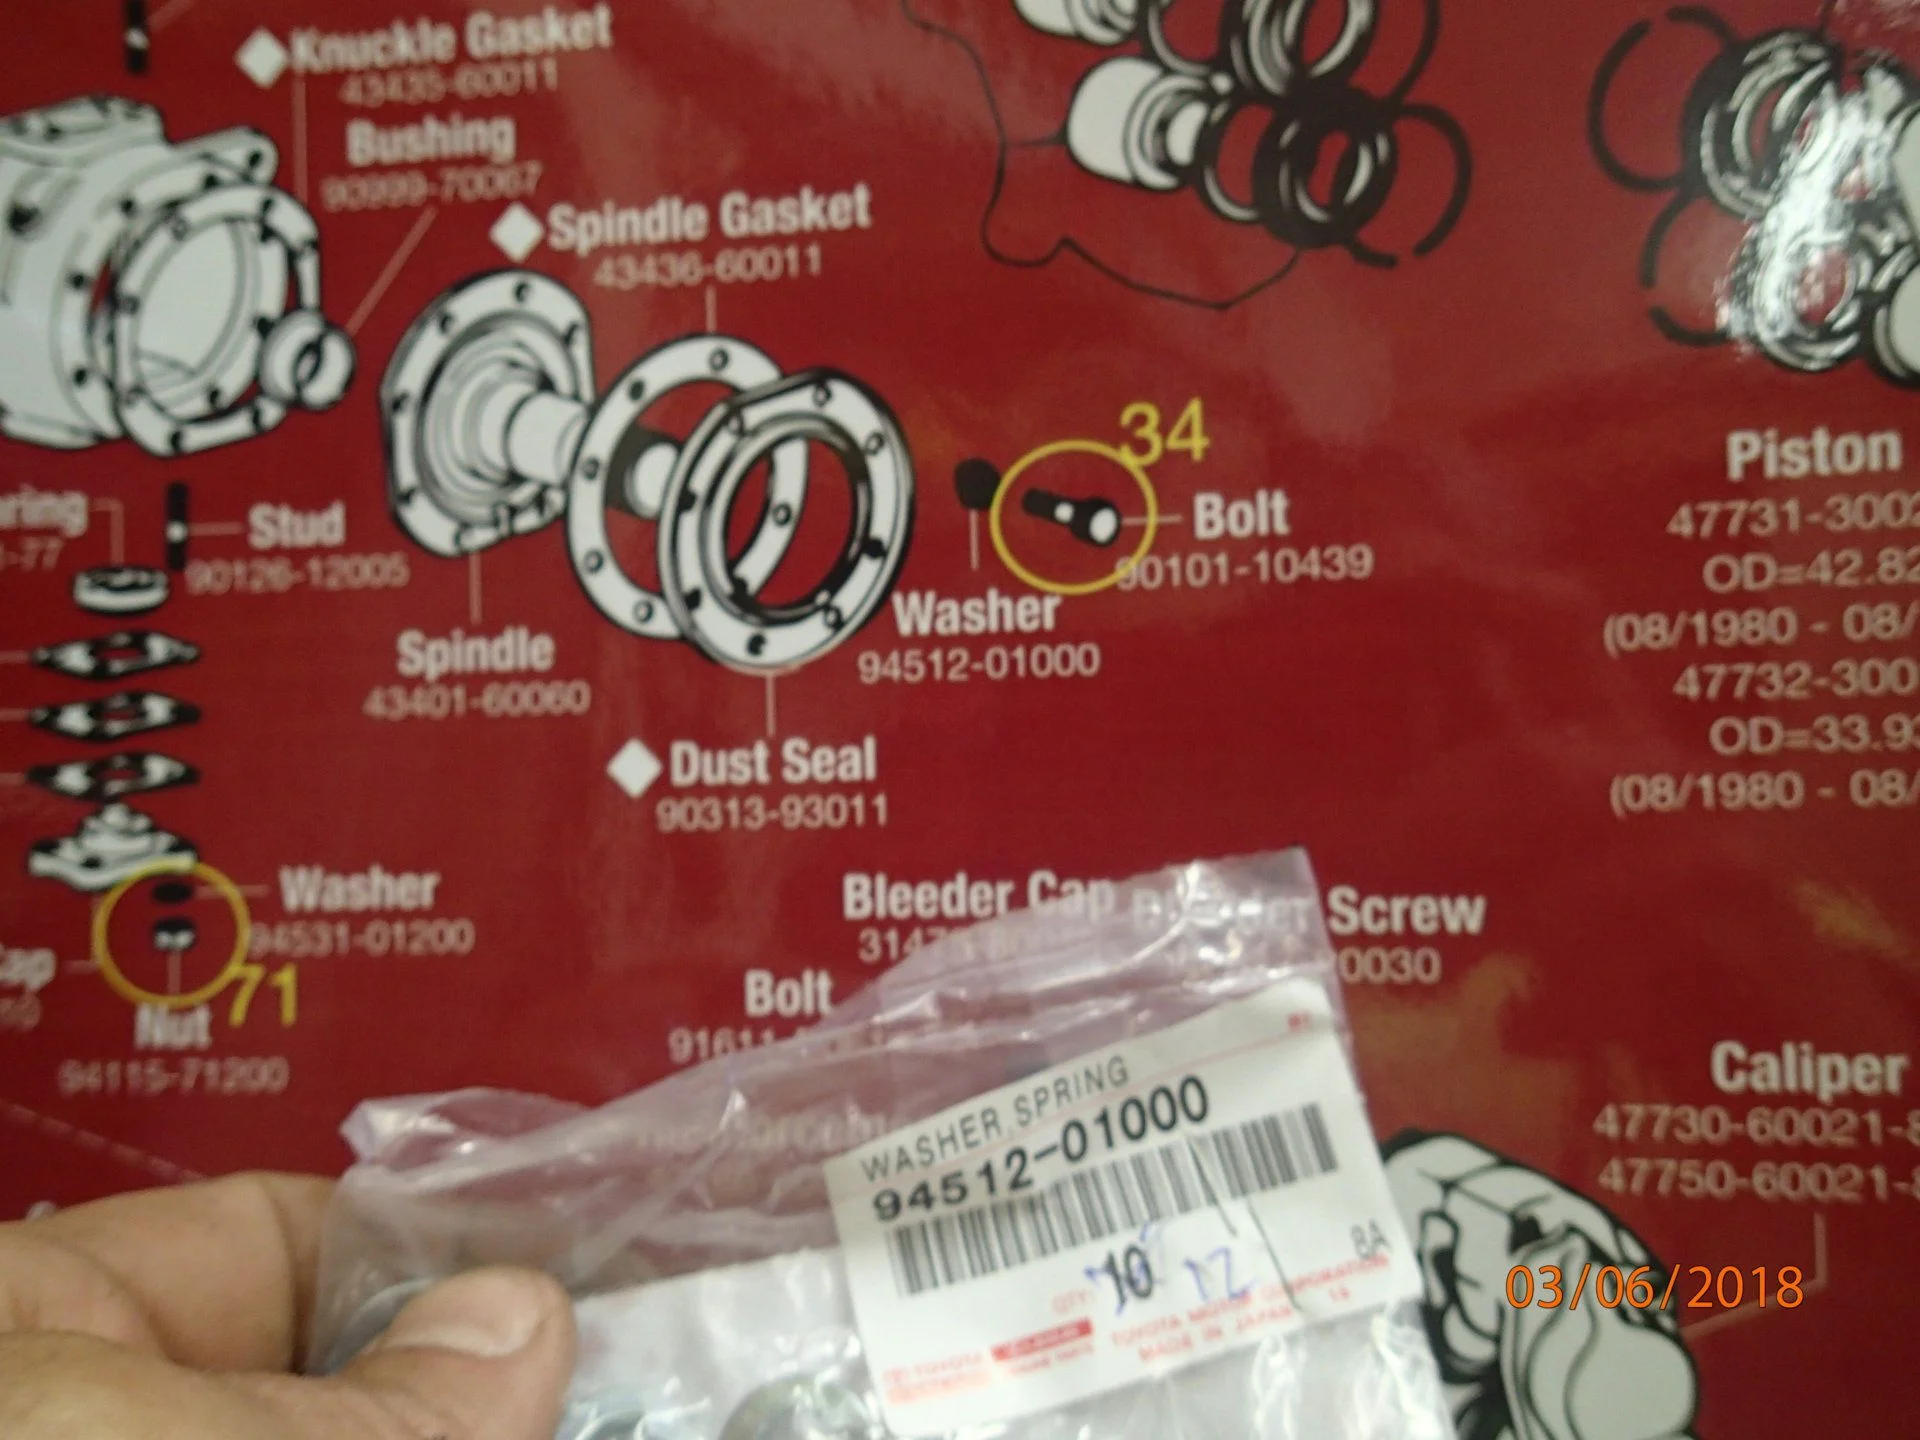
I've been using my Wit's End poster as a reference pretty often. It's cool to look at but also very functional for ID'ing various bags of parts.
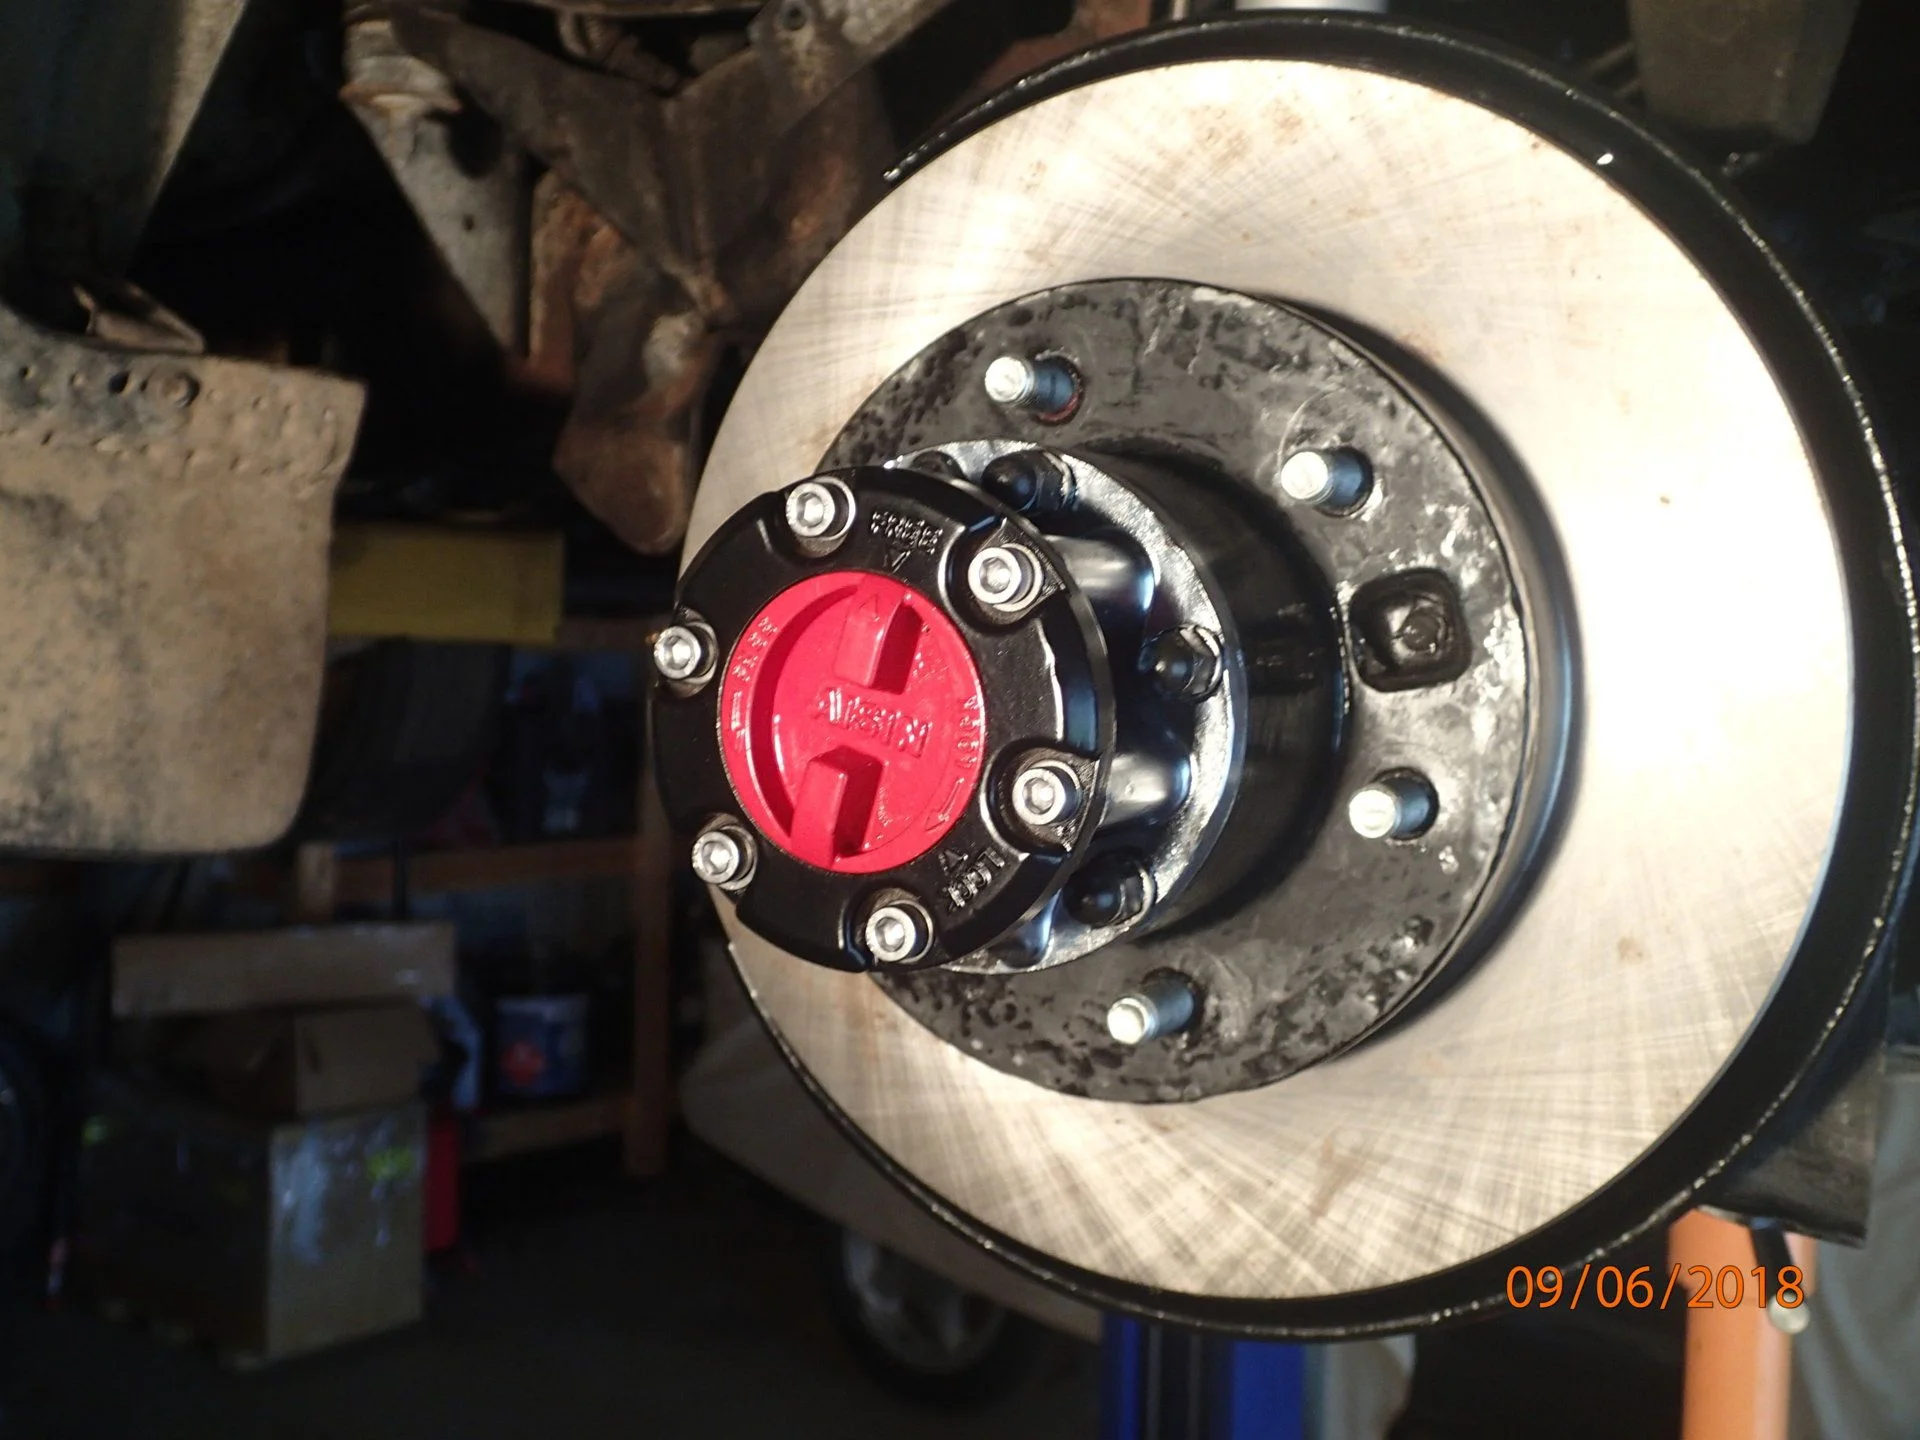
That's it for now. All the refinishing work is done for the axle so now it's just putting it together. Things are lining up and this heap will be on the ground driving around (without exhaust) by the end of the weekend.
Thanks for looking.
I have no point of reference but this is the wear on what I assume are 360K mile Birfs. I think this thing spent most of it's life hubs unlocked.
I'm going to try the RedLine CV2 grease in here based on internet recommendations. It's pinkish. I've been happy with Redline gear oils.
I'm putting a lot of new hardware in here. The old stuff wasn't anywhere near failing but after 30 years the sacrificial zinc coating is pretty much gone and the real corrosion sets in. Most of the hardware is low cost from Toyota and in reality the next time I get this far in the hardware may be NLA. They changed the head on these studs and I don't have the reverse Torx tool so double nuts it is.
The weather was crap all spring and that had it's challenges but at the same time I had opportunity to do some rainy day electroplating. Fresh zinc.
Yellow chromate.
Finally getting around to using the awesome knuckle centering tool reproduced by Jason @reevesci . Also a shout out to @mwebfj60 for tips on using the tool.
Tool goes in the axle housing first and a line is scribed on the rod by spinning it. You also measure between the flats on the top and bottom pieces that rest on the knuckle bearings.
Knuckle height is measured. You do a little math based on these two measurements and you then know how thick your total shim pack has to be to achieve proper knuckle bearing pre-load. The shims will be distributed top and bottom to properly center the axle in the knuckle AND provide proper bearing pre-load.
Then the tool goes in the spindle and a second line is scribed by spinning.
You measure (as best you can) between the two scribed lines, do some more math and then you know how much of your total shim to put on the bottom. This puts the axle at the right height. You then put the rest of your calculated total shim thickness on top to achieve proper pre-load.
Incidentally my "measured" necessary shim stack was only .017mm different from the total shim that was in there. Also the calculated lower shim to set axle height was pretty close too. So the advice "Put it back like you found it." would have worked just fine for my right side anyway.
I've been using my Wit's End poster as a reference pretty often. It's cool to look at but also very functional for ID'ing various bags of parts.
That's it for now. All the refinishing work is done for the axle so now it's just putting it together. Things are lining up and this heap will be on the ground driving around (without exhaust) by the end of the weekend.
Thanks for looking.
NeverGiveUpYota
Dare me.
Great write up on the Knuckle Centerung tool. Far better than I could have done. Its not as hard as it seemed initially.
Wow to the Chromate plating. Damn impressive.
Wow to the Chromate plating. Damn impressive.
OK the grass isn't growing an inch a day right now so back at it.
I have no point of reference but this is the wear on what I assume are 360K mile Birfs. I think this thing spent most of it's life hubs unlocked.
I'm going to try the RedLine CV2 grease in here based on internet recommendations. It's pinkish. I've been happy with Redline gear oils.
I'm putting a lot of new hardware in here. The old stuff wasn't anywhere near failing but after 30 years the sacrificial zinc coating is pretty much gone and the real corrosion sets in. Most of the hardware is low cost from Toyota and in reality the next time I get this far in the hardware may be NLA. They changed the head on these studs and I don't have the reverse Torx tool so double nuts it is.
The weather was crap all spring and that had it's challenges but at the same time I had opportunity to do some rainy day electroplating. Fresh zinc.
Yellow chromate.
Finally getting around to using the awesome knuckle centering tool reproduced by Jason @reevesci . Also a shout out to @mwebfj60 for tips on using the tool.
Tool goes in the axle housing first and a line is scribed on the rod by spinning it. You also measure between the flats on the top and bottom pieces that rest on the knuckle bearings.
Knuckle height is measured. You do a little math based on these two measurements and you then know how thick your total shim pack has to be to achieve proper knuckle bearing pre-load. The shims will be distributed top and bottom to properly center the axle in the knuckle AND provide proper bearing pre-load.
Then the tool goes in the spindle and a second line is scribed by spinning.
You measure (as best you can) between the two scribed lines, do some more math and then you know how much of your total shim to put on the bottom. This puts the axle at the right height. You then put the rest of your calculated total shim thickness on top to achieve proper pre-load.
Incidentally my "measured" necessary shim stack was only .017mm different from the total shim that was in there. Also the calculated lower shim to set axle height was pretty close too. So the advice "Put it back like you found it." would have worked just fine for my right side anyway.
I've been using my Wit's End poster as a reference pretty often. It's cool to look at but also very functional for ID'ing various bags of parts.
That's it for now. All the refinishing work is done for the axle so now it's just putting it together. Things are lining up and this heap will be on the ground driving around (without exhaust) by the end of the weekend.
Thanks for looking.
THIS is awesome!
(Also why I ordered one of these posters from @NLXTACY! He’s sneaky though, and sent me one for the 80 series by accident...or not...he’s trying to seduce me to the 80’s side!).

- Thread starter
- #70
THIS is awesome!
(Also why I ordered one of these posters from @NLXTACY! He’s sneaky though, and sent me one for the 80 series by accident...or not...he’s trying to seduce me to the 80’s side!).
Don't do it! Ha ha yeah it's actually a very cool resource at least on my first axle build.
NeverGiveUpYota
Dare me.
Jim, @CenTXFJ60 sent me a photo of his when I was on my first side. I did refer to it a few times as well. Definitely a great resource.
- Thread starter
- #72
Ok so my WiFi endoscope showed up today. I can't resist playing with a new toy.
Looks as if the original galley plug is still in place:

I'll fix that when I go through the cooling system here in a bit.
Inside #1 cylinder which had my lowest compression at 130.

Some scoring. I got a look at the valves and they're disgusting. This thing is really going to benefit from numerous Italian tuneups and being thrashed in general. And frequent oil changes of course.
I bought the scope for a home project but the uses are about endless.
Looks as if the original galley plug is still in place:
I'll fix that when I go through the cooling system here in a bit.
Inside #1 cylinder which had my lowest compression at 130.
Some scoring. I got a look at the valves and they're disgusting. This thing is really going to benefit from numerous Italian tuneups and being thrashed in general. And frequent oil changes of course.
I bought the scope for a home project but the uses are about endless.
- Thread starter
- #73
Ok time to get this thing off my hoist.
I can't recall what that red threaded cap came off of but it makes a great Marlin Eco Seal Installer:
So awesome to be getting this stuff off my benches:
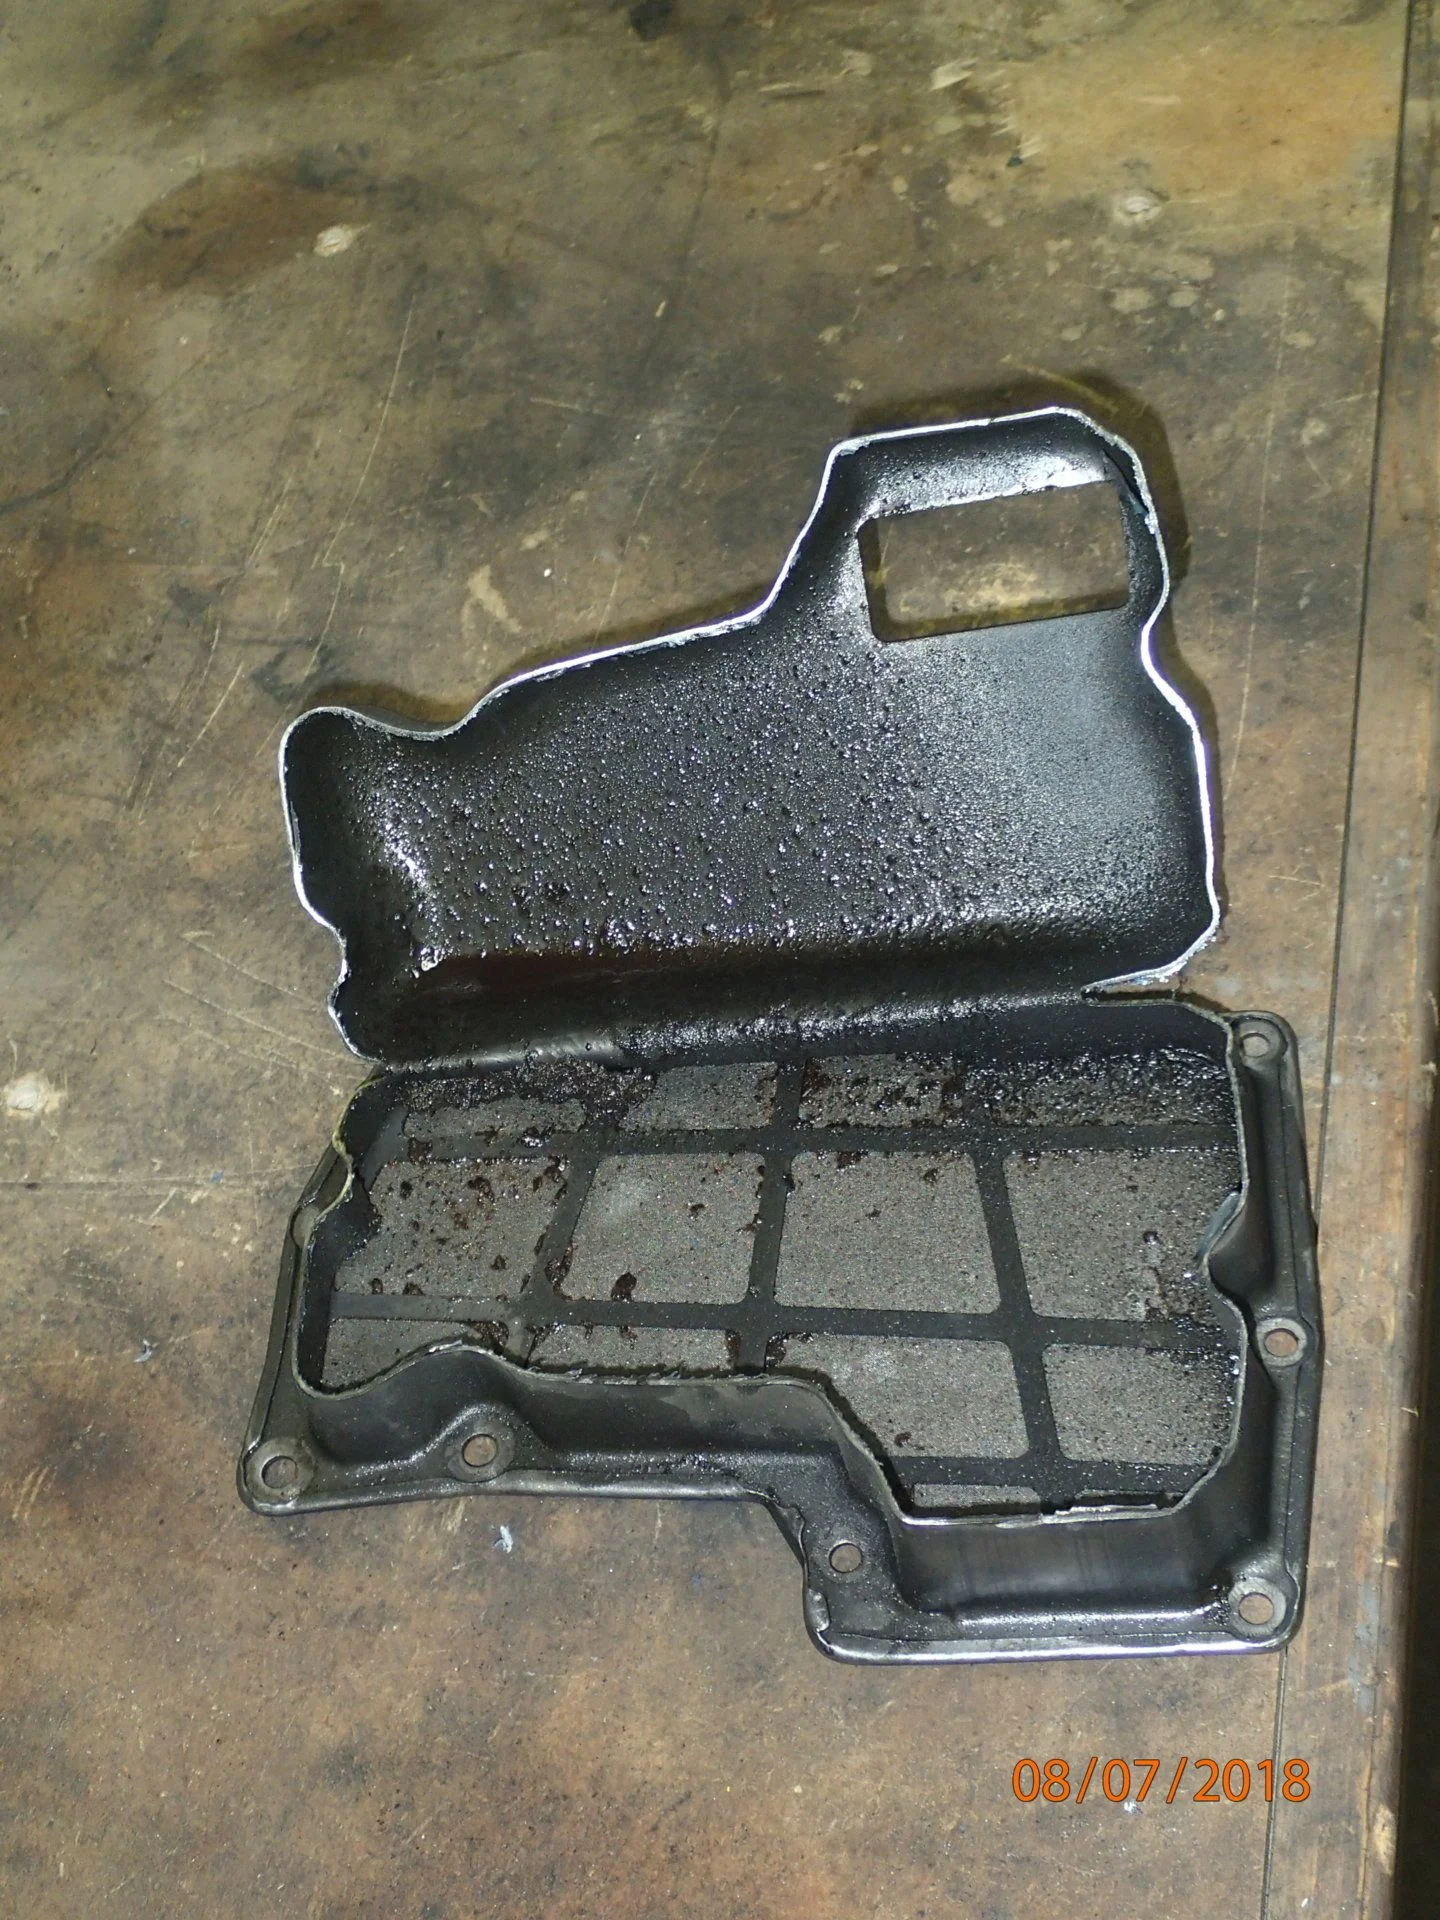
I'm guessing the trans pan is leaking but it's hard to tell. Easy enough at this stage to take 'er apart.

Trans pan was surprisingly clean. There is plenty of swarf on the magnets but zero chunks of metal.

Good thing I took it apart. That's not metal in there - maybe clutch material? This slushbox may not be long for this world but it seems to shift and operate just fine.
All done. I'm afraid I'm going to run out of leaks to fix.
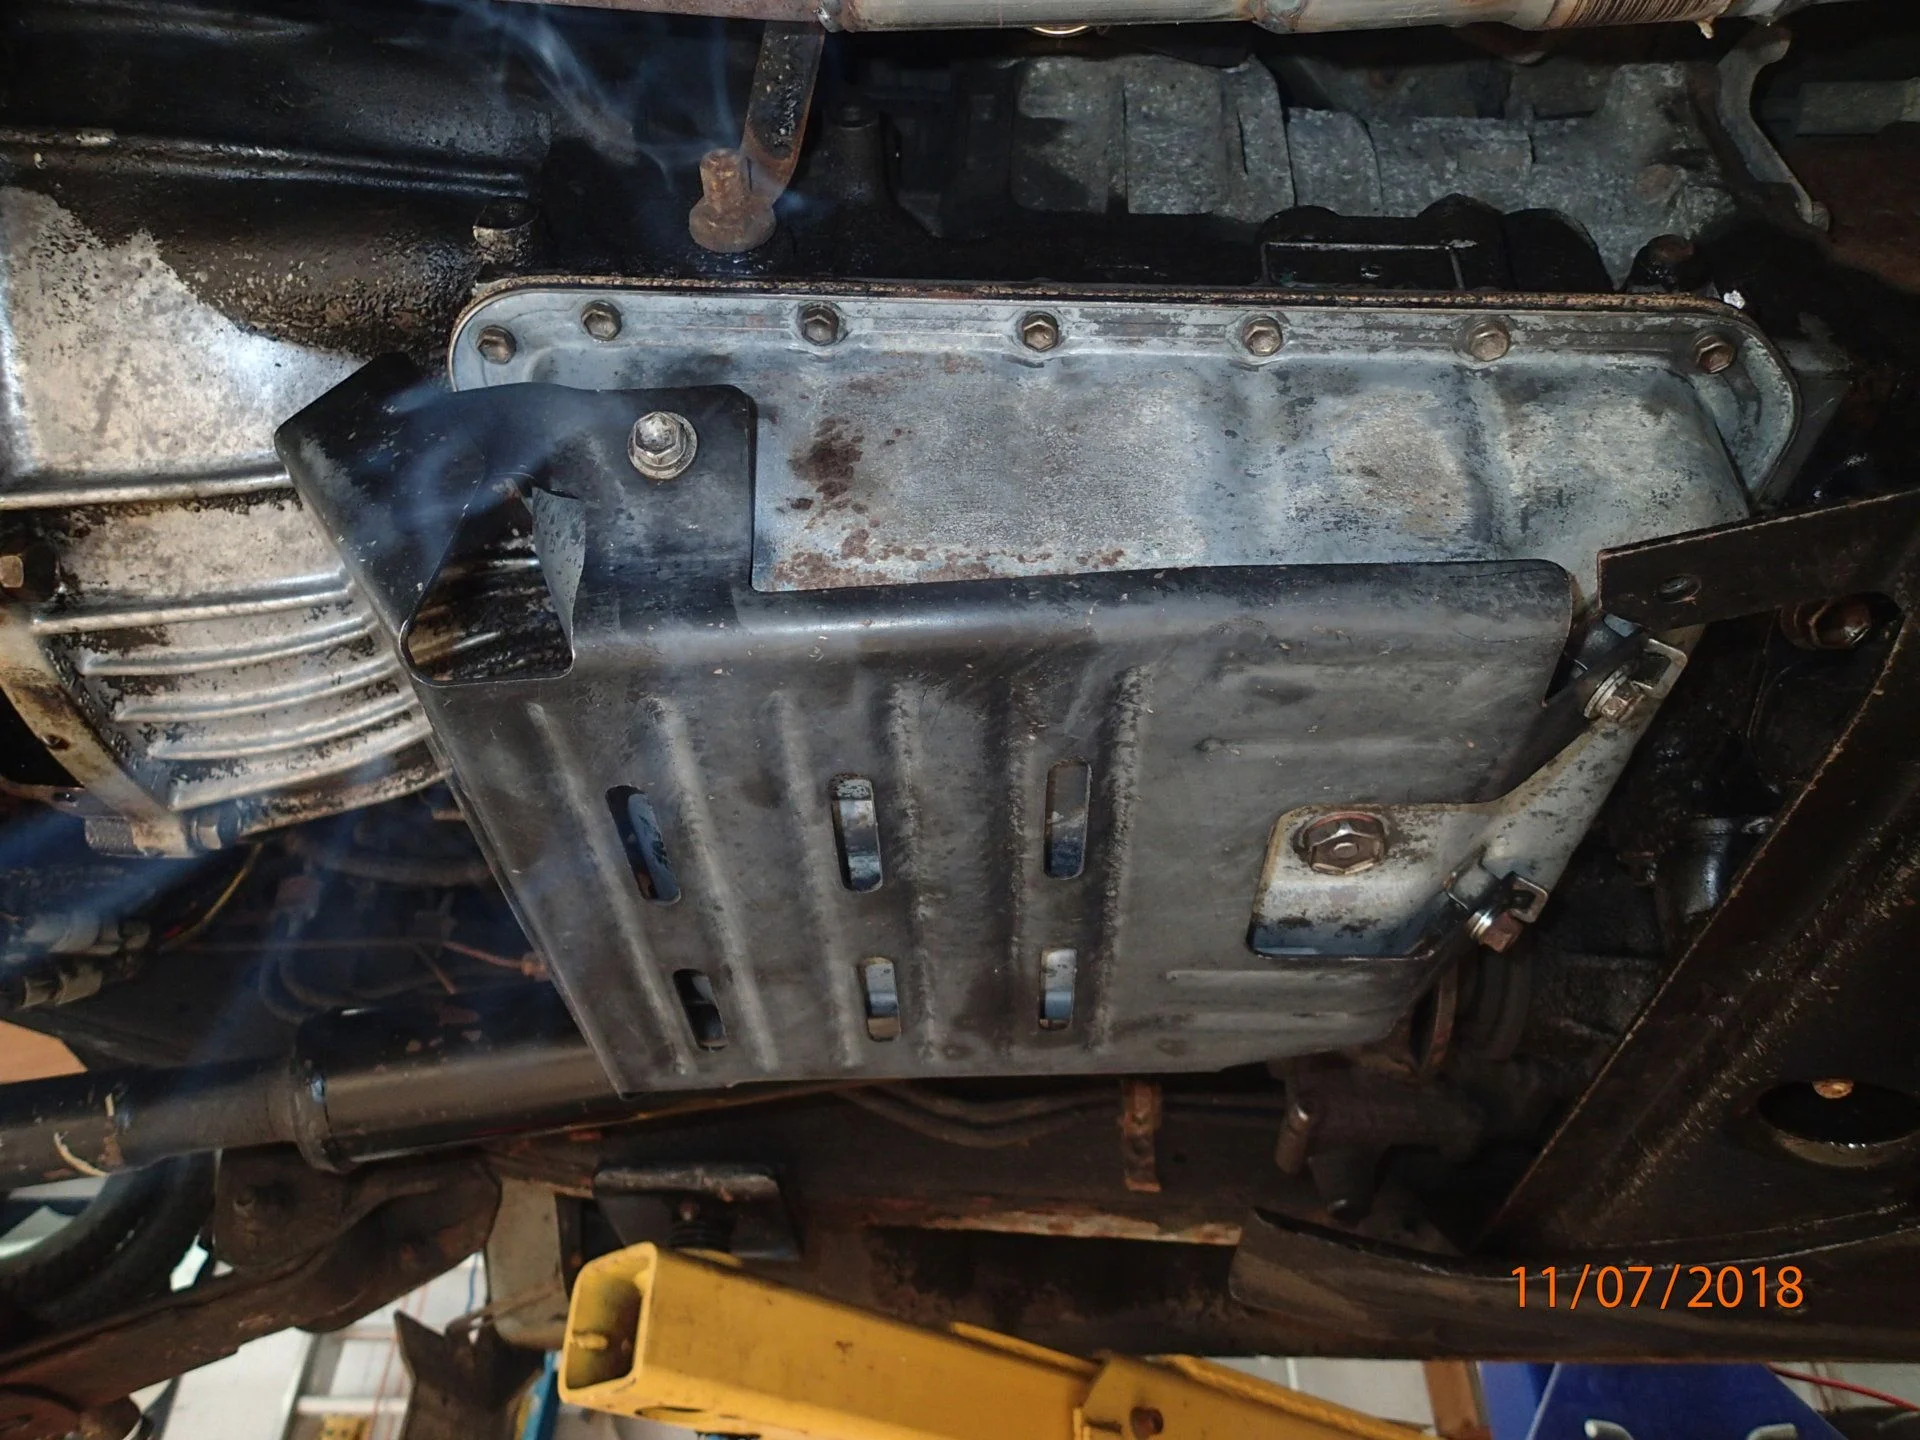
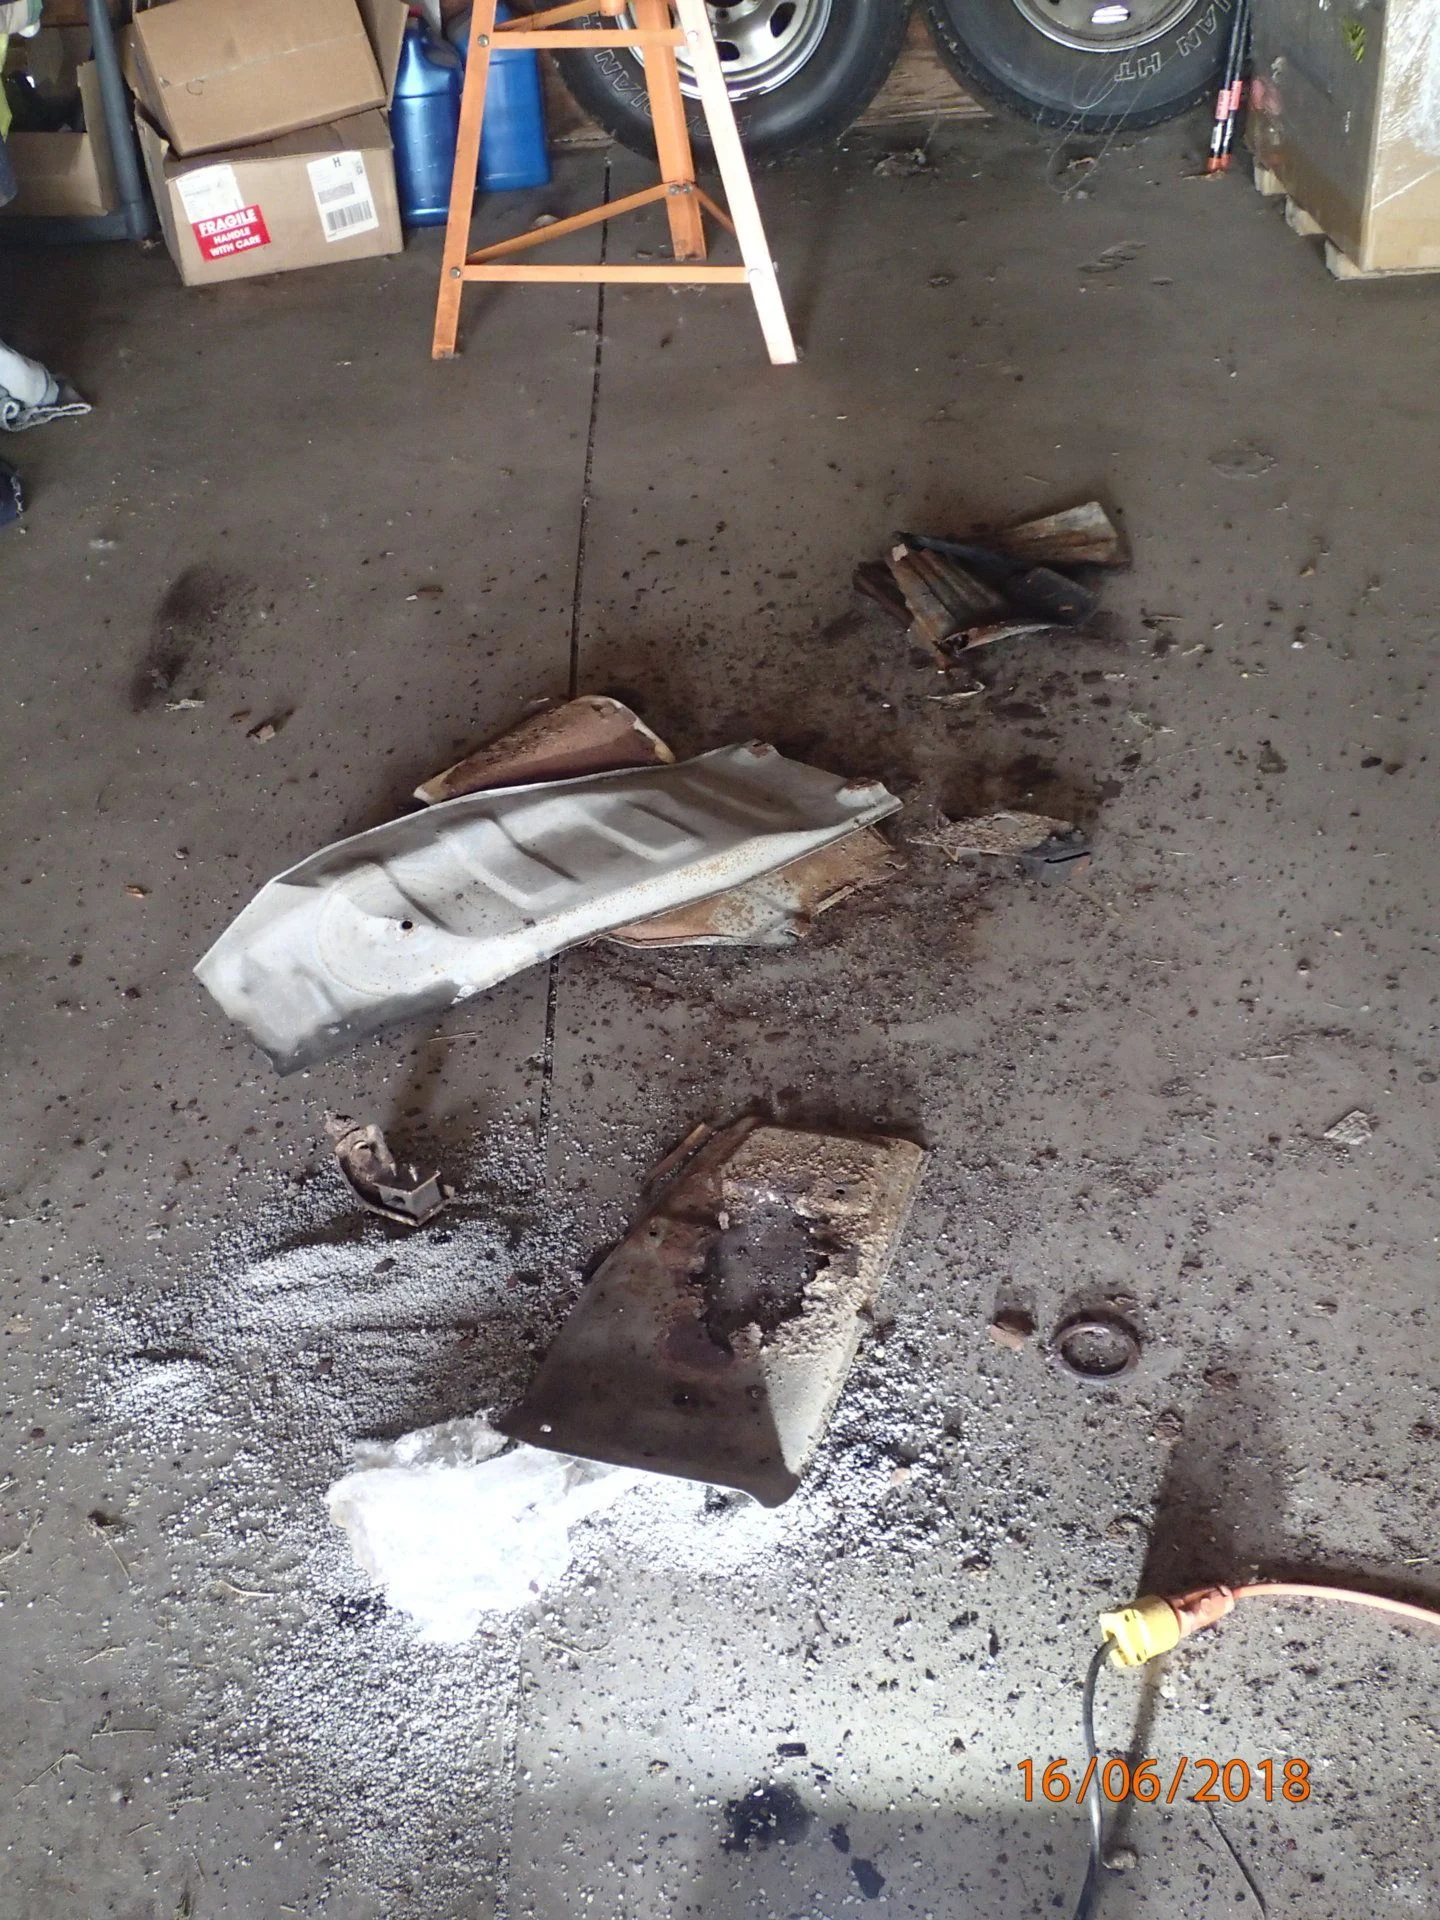
Alright time for a functioning exhaust. I mean...just....WTF?
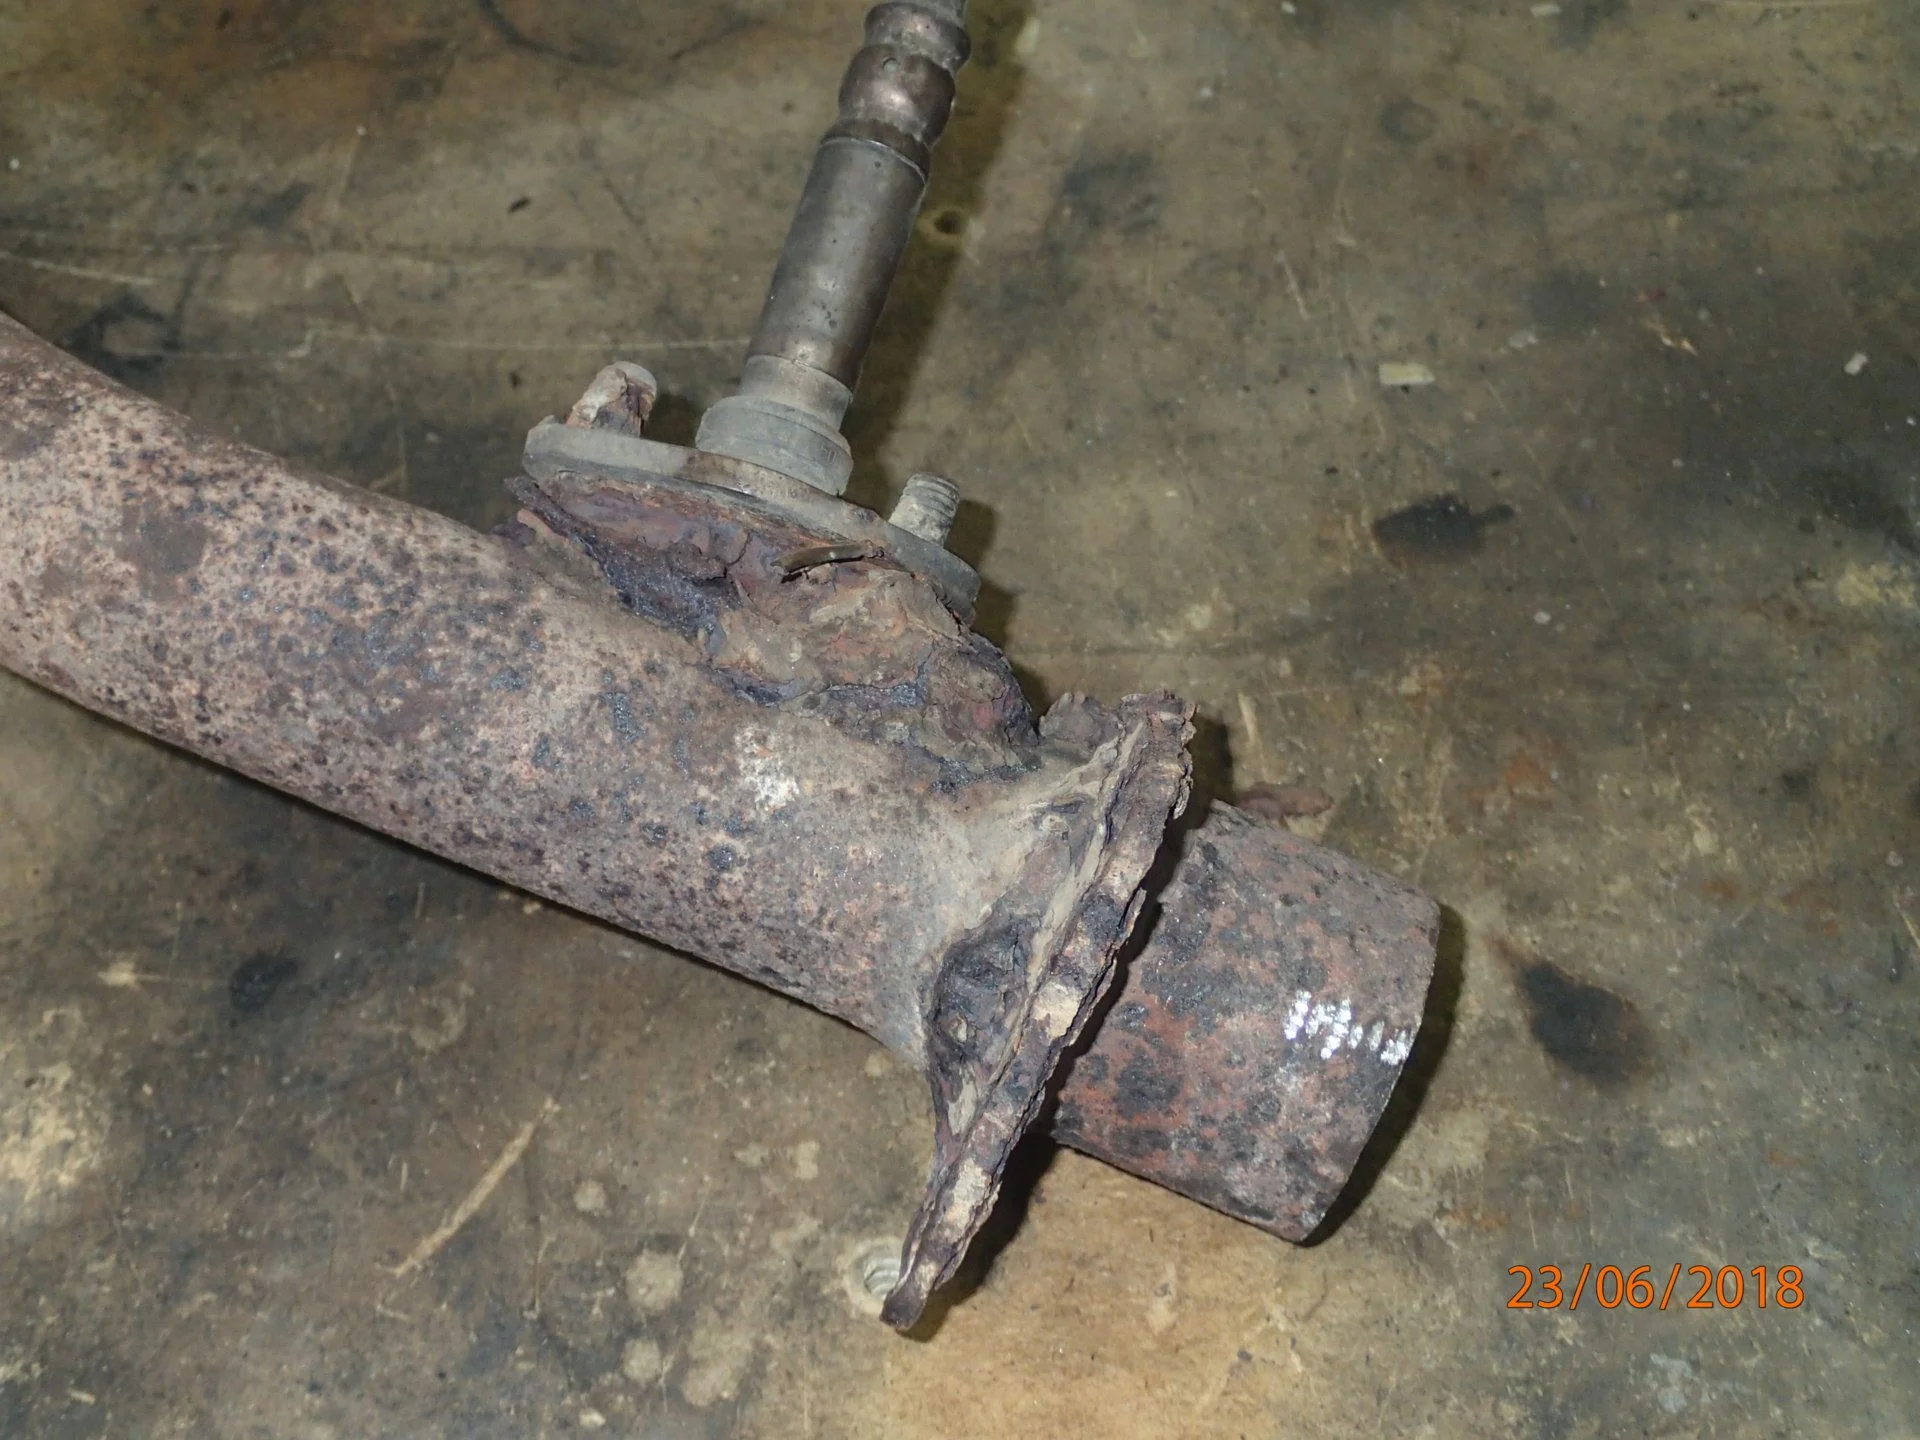
Part of my ongoing weight reduction program.
By sheer luck I happened to grab one of the last FJ62 Y pipes in existence.

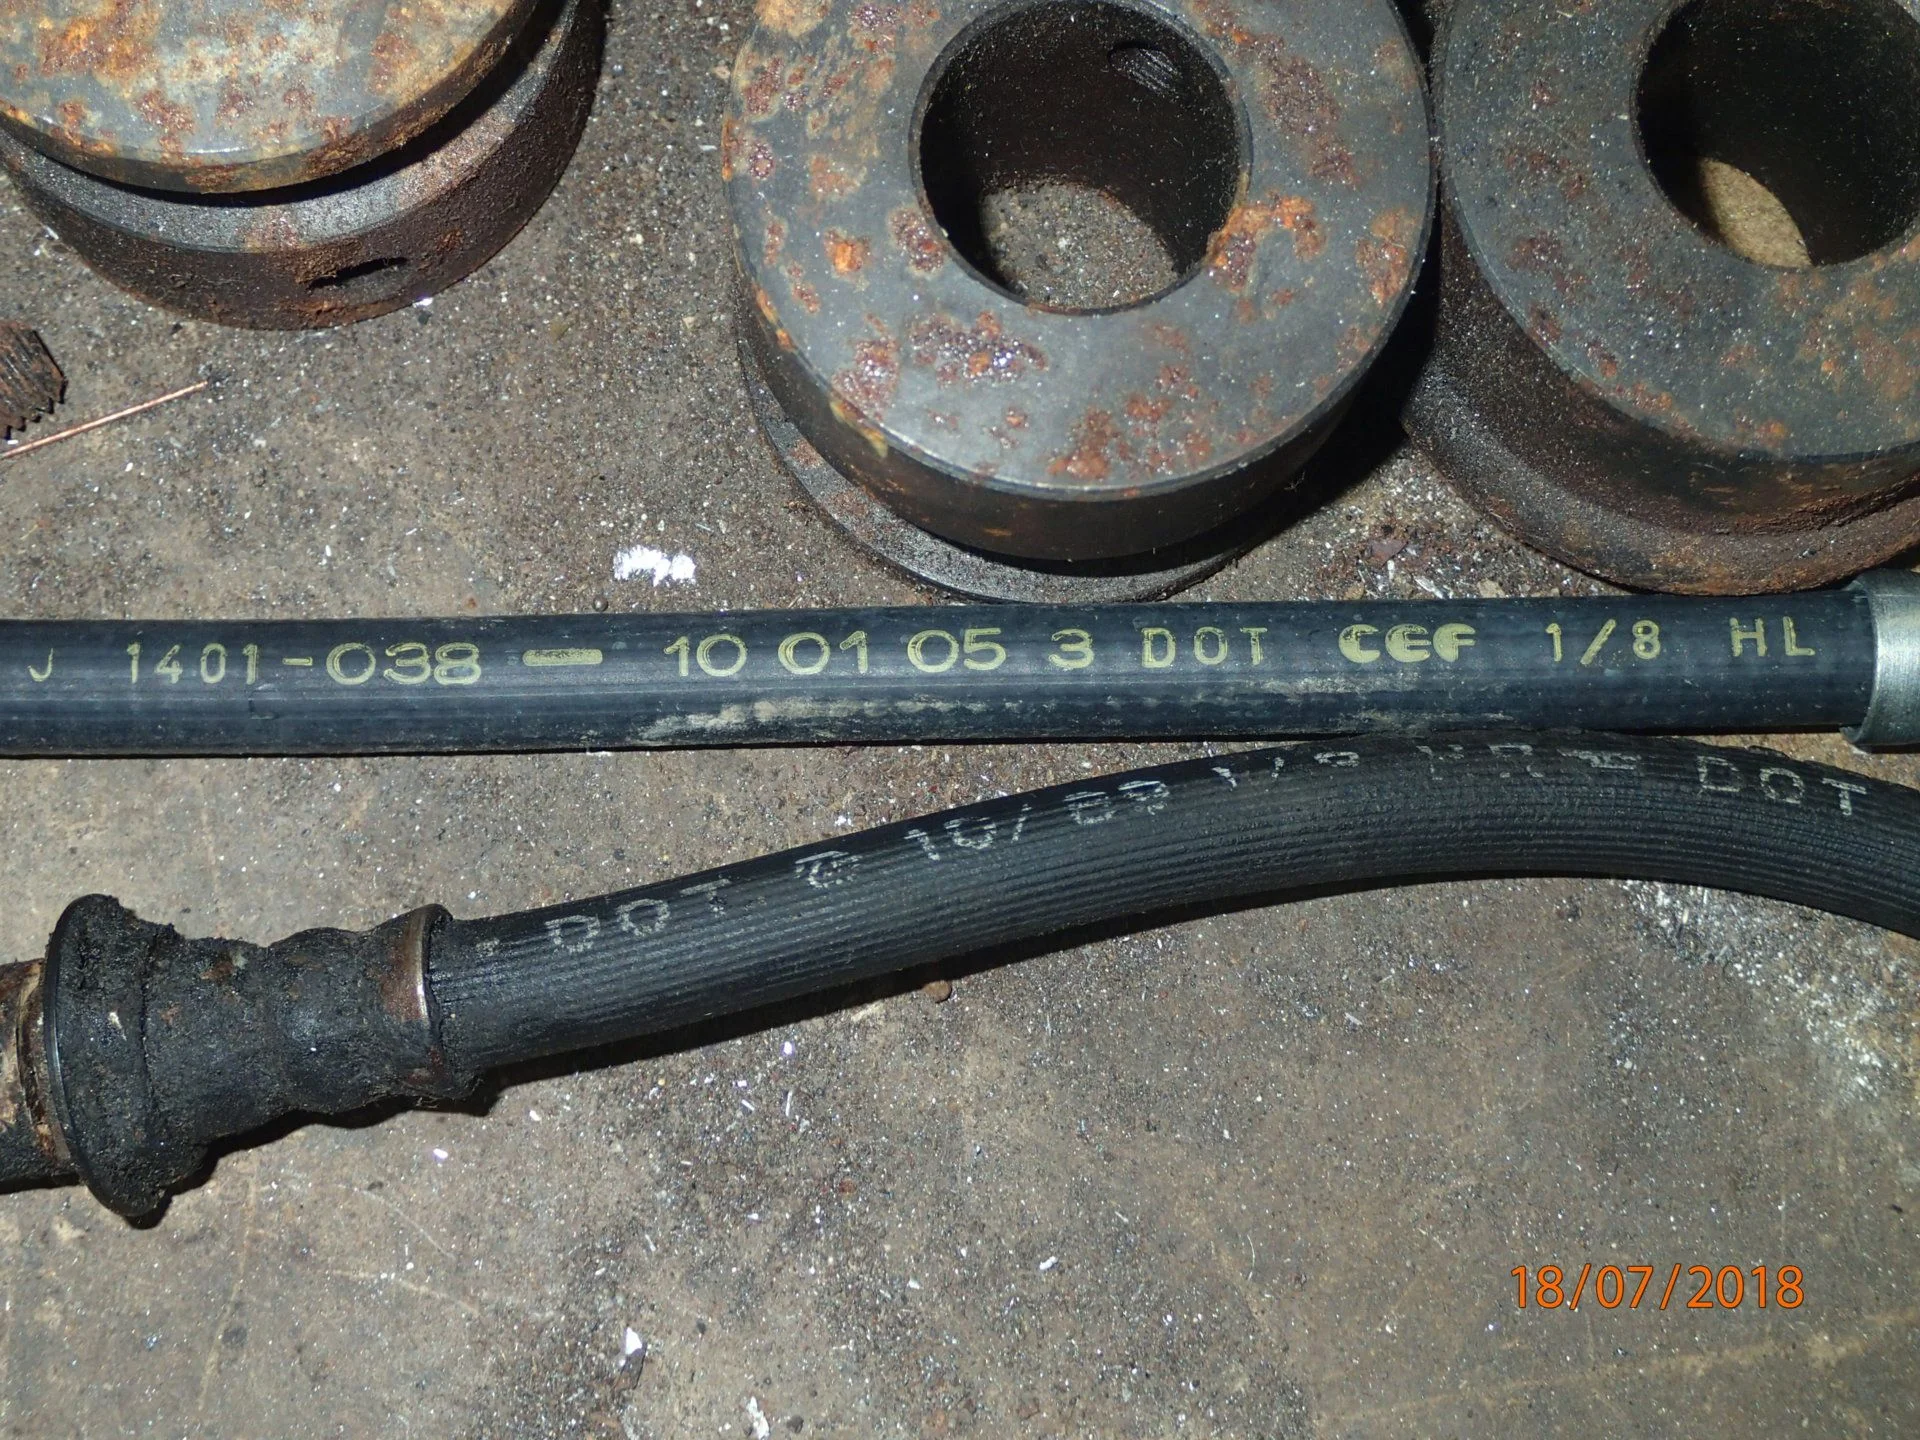
Can you believe RockAuto sold me a 13 year old flex brake line? They also sold me the same part in 1993 vintage but I know you guys would have lost your minds if I used that one.
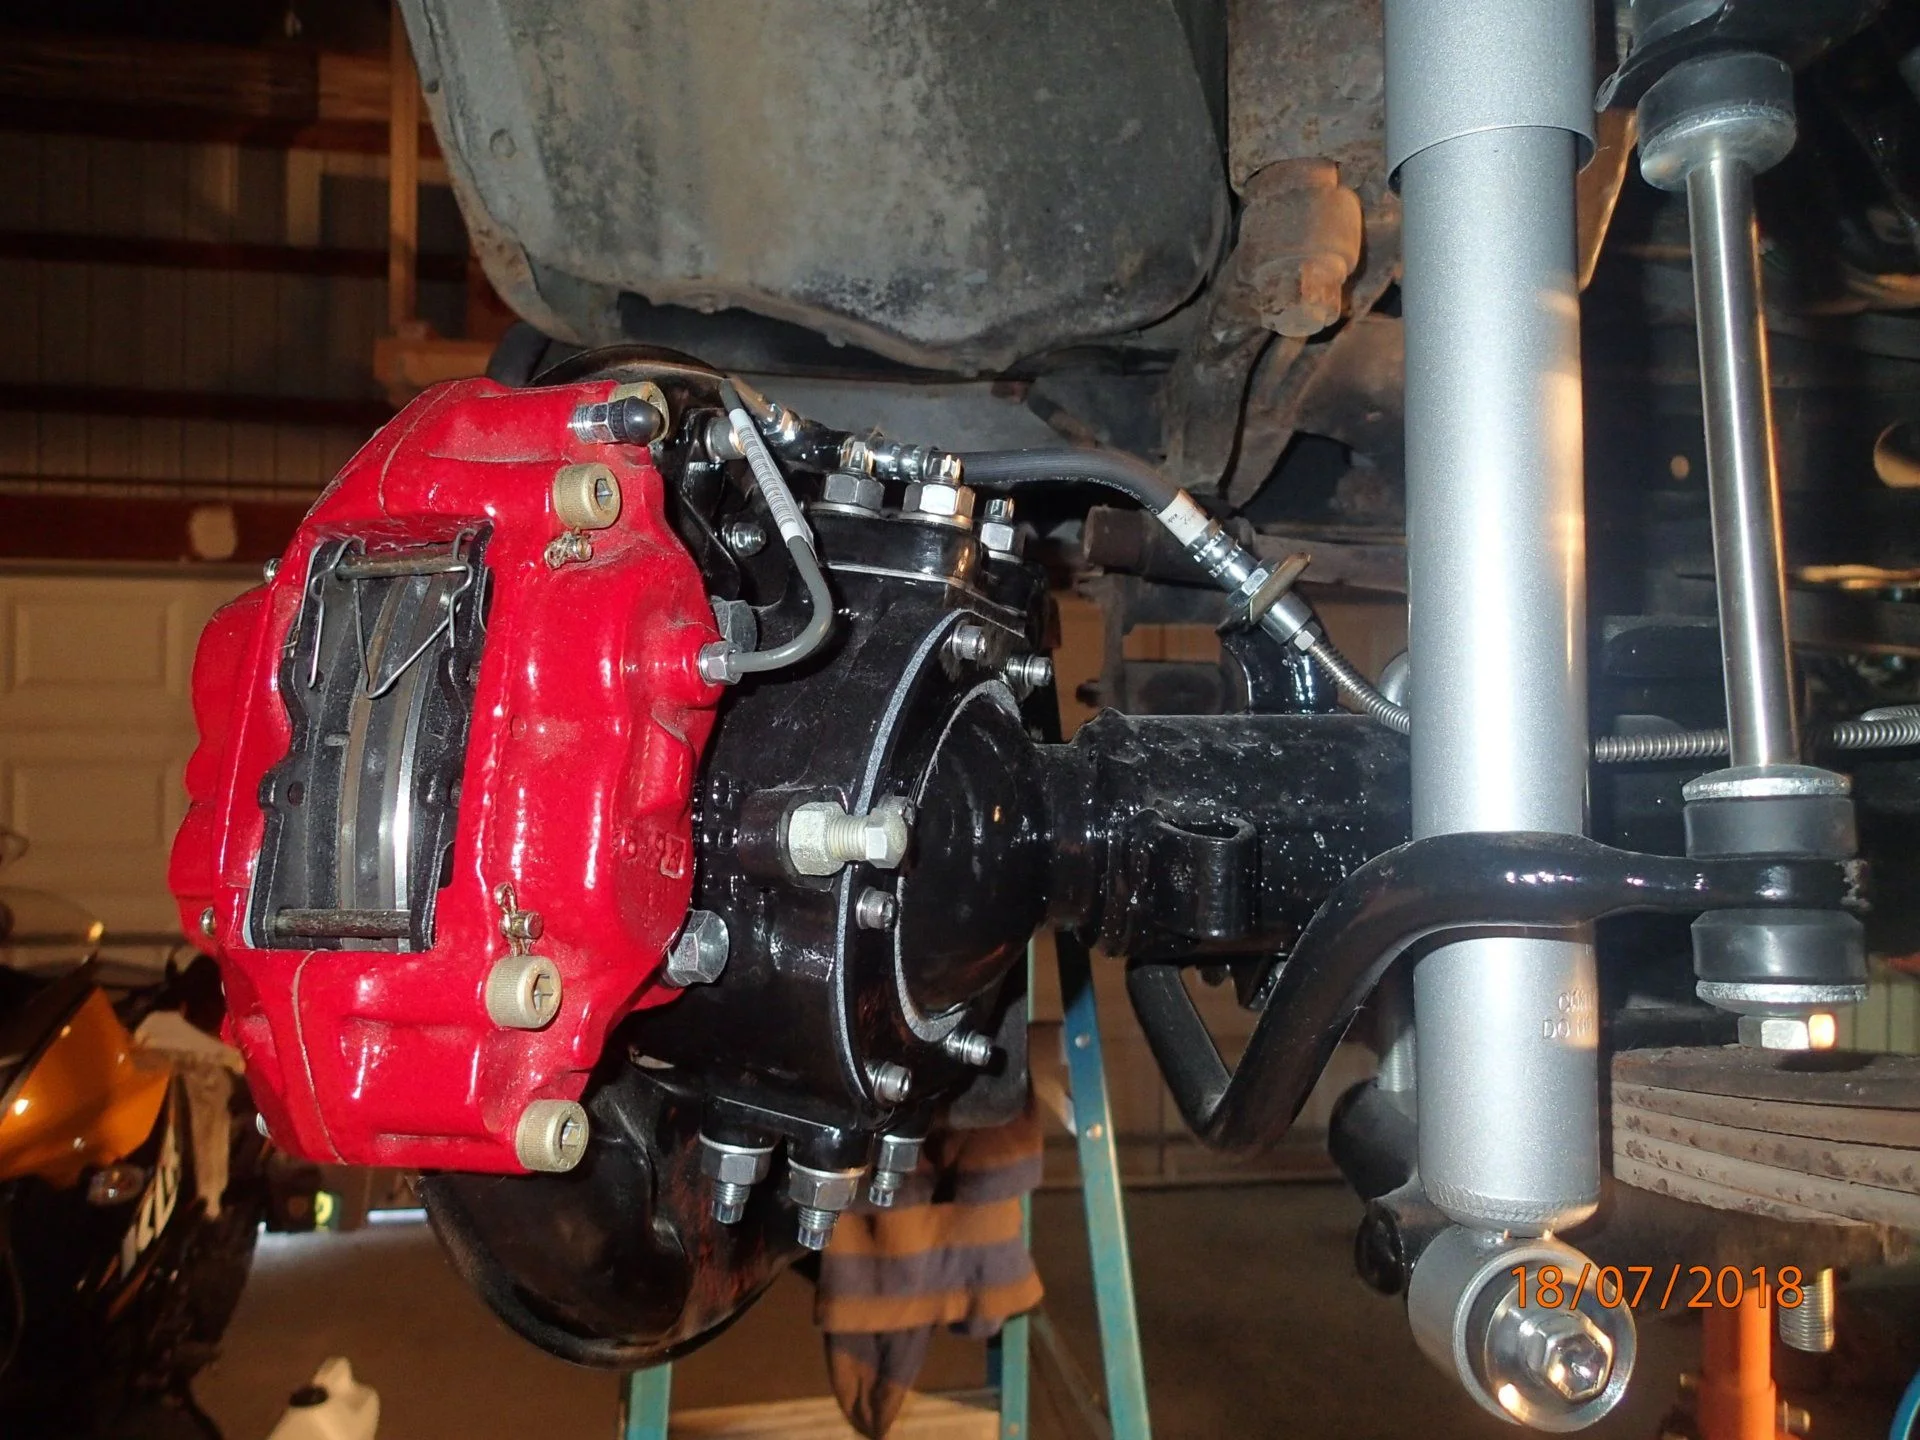
Looking a lot better than the "Before" picture.
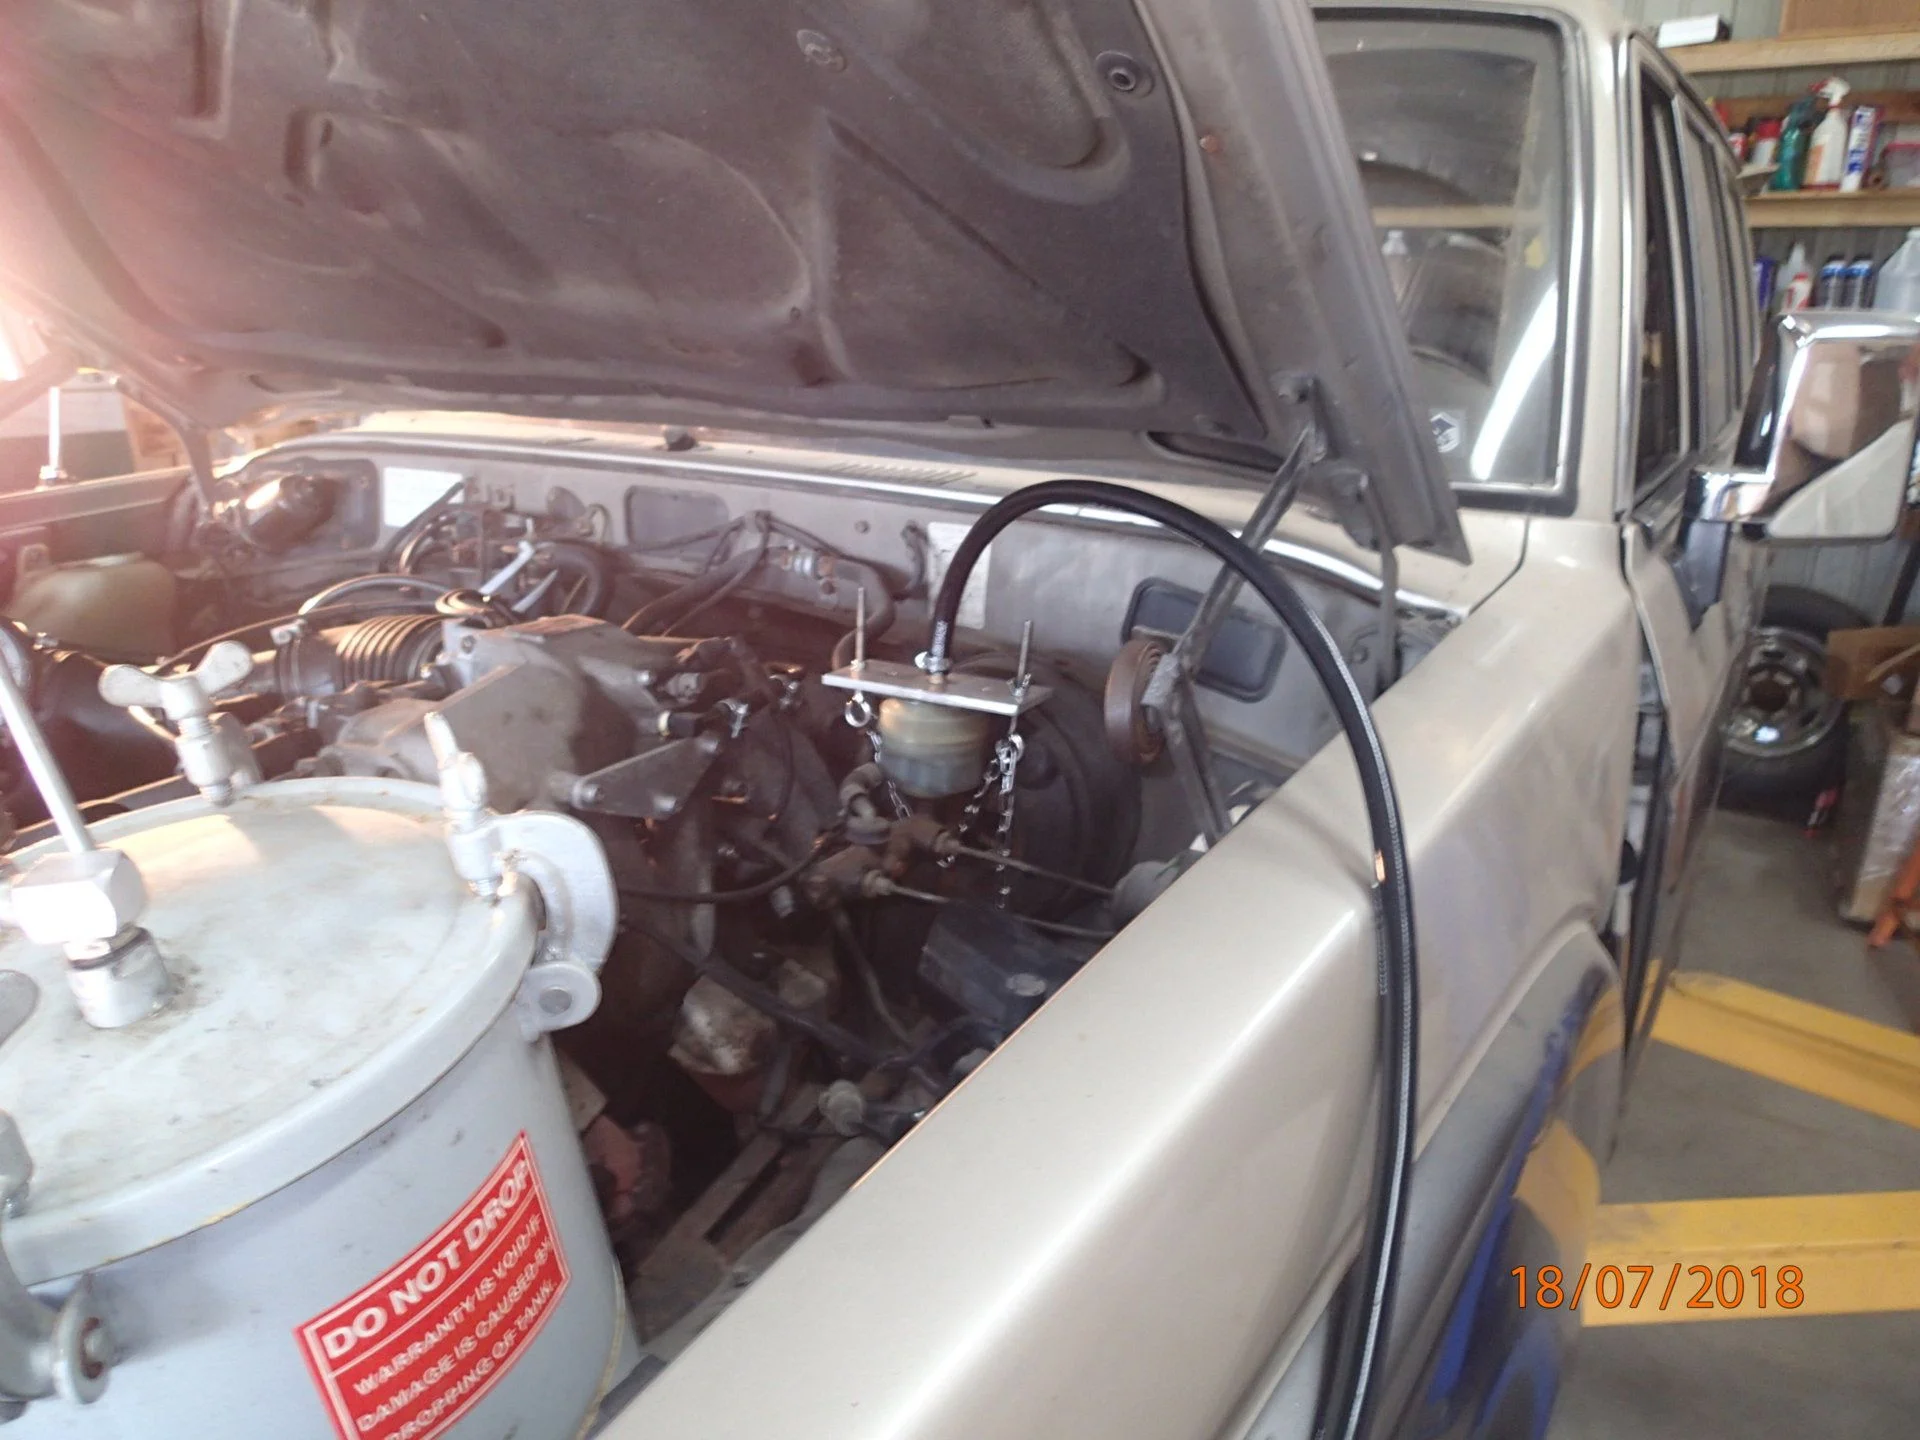
Hillbilly home made pressure brake bleeder.
So after a very long time on the lift it was ready for the first of many rides to the back 40.

And that called for a special celebratory beer - Clown Shoes The Train I Ride

So now that it's on the ground and mobile I have literally a thousand little things to do. But many of them are jobs that can be done in 15 minutes or 3 hours. So I'll accomplish what I can by mid-Fall then it's time to pull the rear axle for re-build and ARB. I have to do that before freeze up so I can run the sandblaster in the driveway.
Thanks for looking.
I can't recall what that red threaded cap came off of but it makes a great Marlin Eco Seal Installer:
So awesome to be getting this stuff off my benches:
I'm guessing the trans pan is leaking but it's hard to tell. Easy enough at this stage to take 'er apart.
Trans pan was surprisingly clean. There is plenty of swarf on the magnets but zero chunks of metal.
Good thing I took it apart. That's not metal in there - maybe clutch material? This slushbox may not be long for this world but it seems to shift and operate just fine.
All done. I'm afraid I'm going to run out of leaks to fix.
Alright time for a functioning exhaust. I mean...just....WTF?
Part of my ongoing weight reduction program.
By sheer luck I happened to grab one of the last FJ62 Y pipes in existence.
Can you believe RockAuto sold me a 13 year old flex brake line? They also sold me the same part in 1993 vintage but I know you guys would have lost your minds if I used that one.
Looking a lot better than the "Before" picture.
Hillbilly home made pressure brake bleeder.
So after a very long time on the lift it was ready for the first of many rides to the back 40.
And that called for a special celebratory beer - Clown Shoes The Train I Ride
So now that it's on the ground and mobile I have literally a thousand little things to do. But many of them are jobs that can be done in 15 minutes or 3 hours. So I'll accomplish what I can by mid-Fall then it's time to pull the rear axle for re-build and ARB. I have to do that before freeze up so I can run the sandblaster in the driveway.
Thanks for looking.

this is a great build/ restoration. Keep it up.
- Thread starter
- #76
Thanks! Fortunately I have patience and persistence or so I'm told. But truth be told that was a slog. Things will go a lot faster from here out.
World-class pix and story. I feel for anyone in the rust-belt trying to keep a cruiser together.
This thing is really going to benefit from numerous Italian tuneups and being thrashed in general. And frequent oil changes of course.
My valve train was a little crusty but not near as bad as yours. I am running Delo 15w-40 (cheap, thick, lots of good metals in it) and it turns black pretty quickly, so frequent oil changes would be a good idea for you, too, I think.
- Thread starter
- #79
My valve train was a little crusty but not near as bad as yours. I am running Delo 15w-40 (cheap, thick, lots of good metals in it) and it turns black pretty quickly, so frequent oil changes would be a good idea for you, too, I think.
Thanks for the tip. I've heard similar things about it and that it still might have the zinc additive ZDDP? Or was that Rotella? Yeah for the immediate future it's not going to see many miles so the oil changes will definitely be frequent.
Traditionally, diesel vehicles didn't have catalytic converters, so the oils could still contain anti-wear metals things that poison a cat. converter.
The newest diesel oils (CK-4 rated) have less of the 'good stuff', but still have more than many car engine oils. Excellent info here on what's in each oil they test: http://www.pqiamerica.com/ At this point, you just need to run 'something' in there a few times until some sludge gets rinsed off.
The newest diesel oils (CK-4 rated) have less of the 'good stuff', but still have more than many car engine oils. Excellent info here on what's in each oil they test: http://www.pqiamerica.com/ At this point, you just need to run 'something' in there a few times until some sludge gets rinsed off.
Similar threads
Users who are viewing this thread
Total: 1 (members: 0, guests: 1)