78 FJ 40 project Frank

This site may earn a commission from merchant affiliate
links, including eBay, Amazon, Skimlinks, and others.

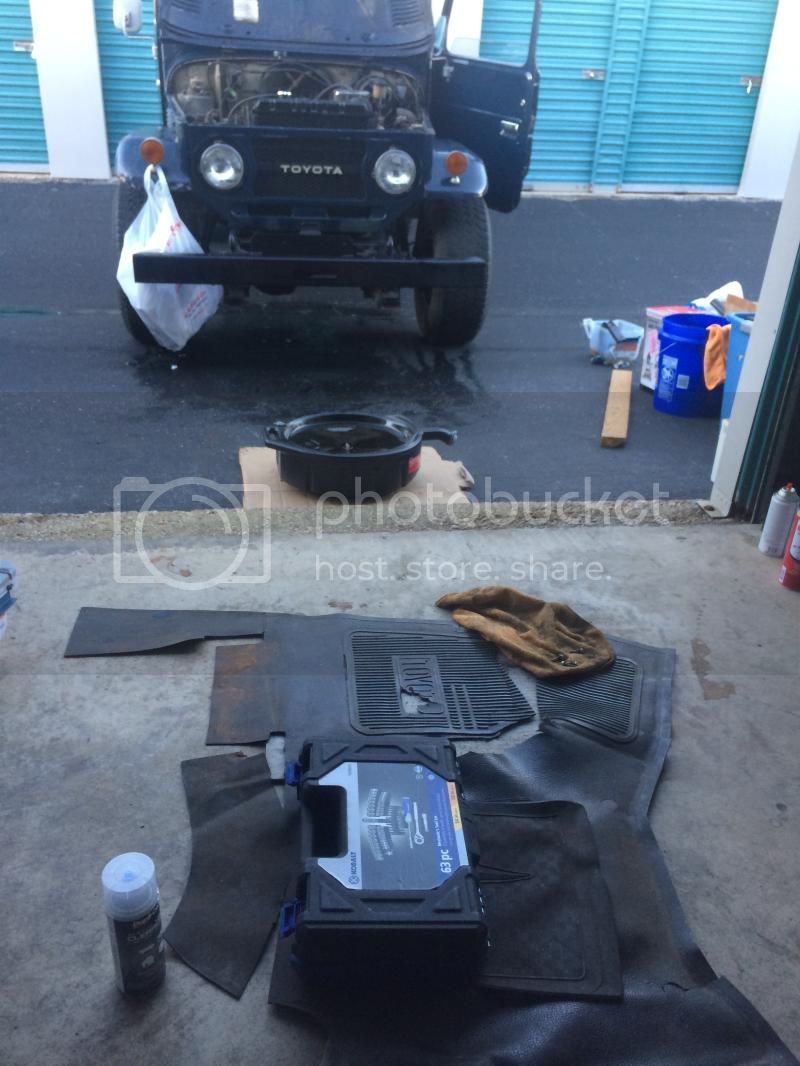
I was able to spend some time today away from work and mess around alittle. I changed the pcv valve and grommet I was kinda surprised the old one was made in USA, it didn't seem to be functioning and I couldn't hear anything move when I shook it. The old rubber seal was like a hard plastic glued in place after all the years it had been on there. I had to spend thirty minutes taking it off slowly so I wouldn't drop pieces that broke off back in the engine.
I also changed the oil and put in an STP oil treatment that says adds zddp, I found at a Walmart so I hope it's good. Used the available toyota filter and a new oil plug and gasket from Beno.


I sprayed more penetrant oil to hopefully make things easier next time I go. Im still concerned the thermostat housing will be a major pain with one bolt already broken. I think that may be put off until the summer, I don't want to try and unbolt everything from the block and break a bolt and have no way to move the cruiser back inside the storage unit. It will give me time to find a heat source to give the bolts some help unseizing.

ImageUploadedByIH8MUD Forum1421626528.856954.webp

Being new to working on vehicles I couldn't find a way for the little gasket that comes with the filter to go on, is that a bad thing?


The motor oddly seemed to idle alittle rougher after the stuff I did today but as soon as the gas is touched even alittle it is very smooth so I'm thinking if any problem exists it could be fuel with the little sputters at times. What's odd is if I cut the motor off and started again the idle wouldn't be as rough.

I hope the storage unit doesn't notice I spilt some oil. I cleaned with simple green and brake parts cleaner to get rid of the spills.


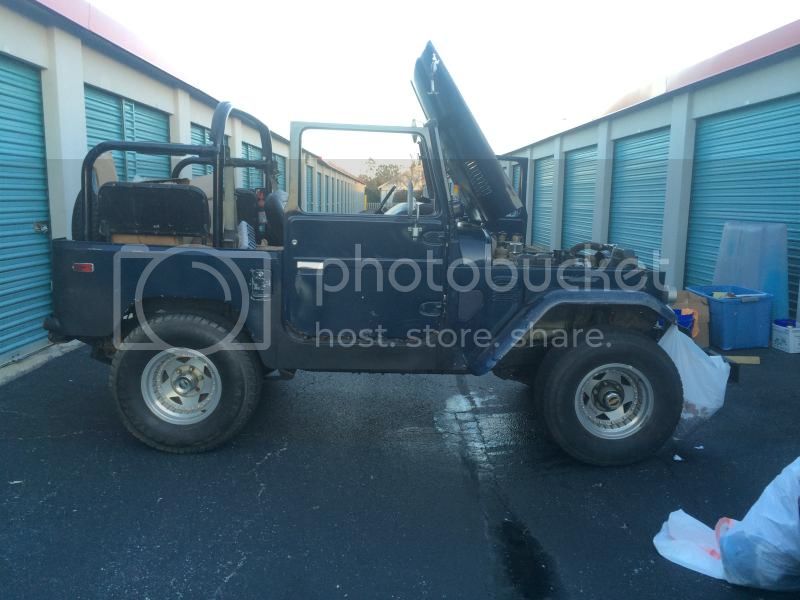
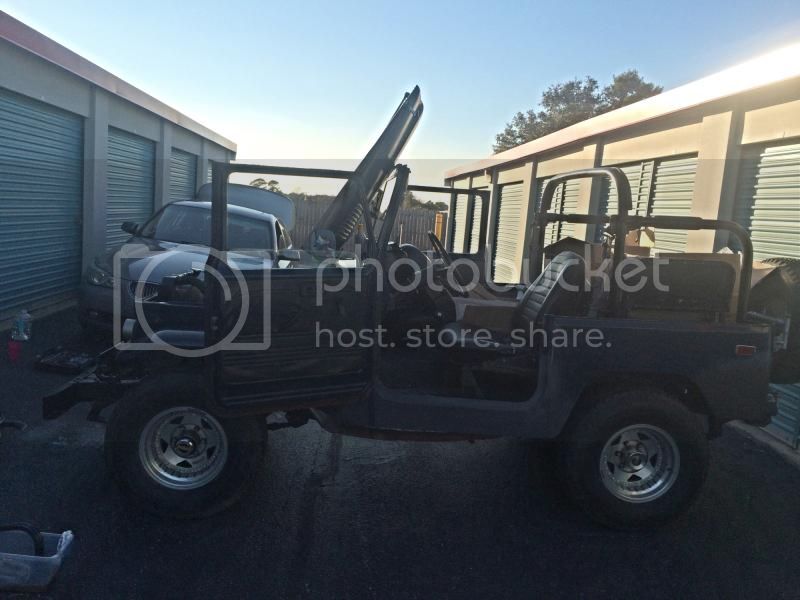
Since I have always wanted a project Toyota 4x4 as long as I could remember I somewhat put the cart before the horse or in this case the cruiser before the garage.
I have to keep it at the storage unit for the time being as the house it would normally be parked at is being remodeled and I don't want to show people where a my 40 is parked. But once the spring gets here I should have the driveway back and can do bigger things like the tie rods, coolant flush, axle service and the brakes. I'm eyeing those nice brake lines a member makes but I gotta slow down on the cruiser spending for a long while. Maybe Xmas present haha


I always like looking back at old pictures and what's changed.


BOLT KITS
link for later
https://forum.ih8mud.com/threads/new-bolts-yellow-zinc-jis.278076/
 
Last edited:
That's your other horn in the photo with the connectors still attached. The two wires that go to those connectors are probably the ones in the photo. I don't see why you'd have to remove a horn to put a coolant bottle on, the factory one went on the fender, you could probably attach one to the radiator support as well I guess, that's where many after market condensers attach.

I'd concentrate on the two bolts holding the housing to the block (it will drain when you remove them) use more penetrating oil and go slow, maybe tap on the head of the bolt with a punch some to loosen it up. Once the housing is removed it will be easier to remove the broken bolt using vice grip, drill, easy out or whatever by holding it in a vice or something. I had a bolt of mine break there too, try to break it free rather than slowly shear it if that makes sense. Use anti- seize on the new ones and make sure you have all of your gaskets etc. when you reinstall. You should be able to save the housing no problem.

Don't know if that helps or not. I've thoroughly enjoyed working on my 78 (most of the time ;))

Tub
 
Don't know if that helps or not. I've thoroughly enjoyed working on my 78 (most of the time ;))
Tub

Thanks for the tips, next time I get by there I think I might spray and tap them just to try and get the oil to find it's way in all the places I can to prep it for when I can commit some time to the project.

These 40s are great hobbies, well not on the pocket book. I enjoy messing around with mine and researching them on here. Mines got enough to do on it to keep me busy for years, but I'm ok with that. I'm learning more about it and how it works almost everyday.
 
Look into a recipe called Ed's Red , it was made for cleaning gun bores and mechanisms but is about the best type of penetrating oil out there , period . Basically , just ATF and acetone in a sealed spray bottle , but be careful as some plastics don't get along with acetone . Be careful around paint and heat - it can dissolve paint and will burn like mad if ignited but will break loose almost anything . If that doesn't work then removing the housing will help make it easier ..
Sarge

thanks for the tip. I want to try all the options i can before messing with it attached to the block if i can. I figure worst case doing it that way i might have to replace the top part of the thermo housing
It might even be useful for firearms it looks like
its fun learning about these motors and motors in general. A year ago I had never heard of a thermo housing or some of the other stuff I have read about. Now when working with it after reading on this site I have picked up alot of things and surprise myself sometimes.
 
If you can get a small butane micro torch , focus the heat on that broken bolt for awhile - the paraffin trick works excellent and I use that one first most of the time around here . I've had to deal a lot with aluminum , including billet machined parts , sand cast and die cast as well . Die cast is the worst for broken steel parts as they really weld themselves into the aluminum due to incompatible metals . That canning wax when heated to very high temperatures will penetrate far better than any oil out there , including Ed's Red despite using acetone as a wetting agent . I've been able to remove stuck and broken off water jacket square head plugs from engines that are over 60yrs old with only a pair of pliers ....
Sarge
 
I had a free hour sunday afternoon to swing by and start the 40. I like to check on it even if I can't stay long. It starts up great after sitting but does smoke alittle and idle rough at times but is smooth at the touch of the throttle. I think as I get more time to drive it will get better.
I was going through my routine of spraying penetrant oil and tapping bolts to work it in to help myself down the road when I can get some time to turn a wrench.
I now have a leak either at the water pump or thermostat housing. I originally first thought it was the water pump but during the drive home I started thinking maybe when I was taping the bolt on the top of the thermo housing I loosened something, maybe where the housing meets the block.

I'll have more time to inspect in a week or so. It was dark outside and my time didn't allow me to trouble shoot more.
Some of the wet spots above are from me spraying pb oil on the hood hooks and dripping down and spraying it on the thermo housing bolts to let it soak in the last few months.
ImageUploadedByIH8MUD Forum1423488916.726083.webp


Should the top of the water pump be flush on the top of the motor? In the picture it has alittle more space. This also is my guess for where the leak is from.
ImageUploadedByIH8MUD Forum1423488937.274972.webp

ImageUploadedByIH8MUD Forum1423488965.014865.webp


The water pump was done at a shop in New Orleans by a previous owner in 2010. So it's been about 5 years. It's always been in the back of mind to replace it with oem but I'm trying to not go broke buying parts so I waited. I'm thinking a new water pump was just added to my spring/summer Maintaince list.
 
Last edited:
Had time to spend a few hours with it today.
I started it up and ran it just long enough to back it in and out. It seems to only leak antifreeze when it's running or the motors hot. I originally thought it was the top of the water pump leaking but after today it looks like it could also be coming from where the thermostat housing bolts to the block. I'm going to clean the area up very good and then try and figure out where the leak is coming from.

I started putting the interior back together. Had some trouble with the gas tank cover but finally got it in correctly. I think where the passenger seat mounts to the floorboard in front of the gas tank cover was left off when patching some rust so I'll have to figure that out soon. I'm thinking I can just drill a hole in the floorboard and use a nut from underneath and add welding the nut to projects.

ImageUploadedByIH8MUD Forum1425272543.622657.webp

ImageUploadedByIH8MUD Forum1425272597.893194.webp


I was able to get the rust free hood I bought from a member on here on. The original hood had rust holes in a couple places around the passenger side hood hook was very bad. All of the hood hinge bolts came off ok except the very last one took about 30 minutes to get off.

Are the nuts for the hood hinges usually welded to the hood? My old hood has them up under but the new one does not.

Hopefully I'll have a garage soon to work on it in. Working out of a storage unit I spend most of my time setting up and packing up and driving the hour to get there.
 
Last edited:
Haven't done much lately, just crank it up and move it around the storage unit. This will do until I can get it to a place I can replace the tres, work on the brakes and rebuild the knuckles, house shopping is not fun in my area(I miss places that have basements).

I have been looking for a while for a set of good doors and a couple of times I thought I had them it didn't work out. I finally found some near me that weren't really forsale but we're a second set that came with his 40 so the owner let them go after I asked him a couple times over the last couple months. Just by chance they are the same color my 40 is. I'm not to concerned because I don't plan on keeping it this color once I get the body in good shape.

I brought them inside for now since I don't have a garage. I think I'll tear them down tomorrow night and get all the insides taken out and cleaned. There's probably 5 pounds of dirt from a previous owner going off-road about 15 years ago caked inside them and they have some rust through but I'm hoping that I can clean them out and have my body welder guy do some small patches.

ImageUploadedByIH8MUD Forum1428986564.427069.webp

ImageUploadedByIH8MUD Forum1428986618.781590.webp

ImageUploadedByIH8MUD Forum1428986643.266626.webp

ImageUploadedByIH8MUD Forum1428986653.567429.webp

ImageUploadedByIH8MUD Forum1428986588.945078.webp

ImageUploadedByIH8MUD Forum1428986599.431818.webp

ImageUploadedByIH8MUD Forum1428986608.830137.webp


All of the rust and holes in the pictures are after I dug into them with a screwdriver to see what was behind the bubbling paint.

They had some home improvement store weather stripping put on by a previous previous owner years ago and some touch up paint done.

If anyone's got any tips or the way they would tackle these doors please share. I'm thinking I'll strip them down and clean the insides then sand off paint to expose the problem areas. I'll clean with naval jelly and then a good primer and then see if I can get them patched up in a few spots.

The passenger door has a dent on the curve under the window I'm thinking it can be pushed/worked out from inside the door once I get them torn down.
ImageUploadedByIH8MUD Forum1428986882.584051.webp


It's nerve racking spending a chunk of change on something that needs lots of work but I'm thinking I can do this right and have a set of doors that are very nice. The ones on there currently look like they were chewed up by and animal.
ImageUploadedByIH8MUD Forum1428986973.757002.webp
these are the ones they are replacing.


I also feel like it's to a point I need good insurance on it since I have so much in it I would not be smiling if something happened. I went through hagerty and got better insurance through them so I have a little piece of mind compared to the liability I had. The price was not really any more that the liability so I'm happy about that, I think they have to approve me but I'm happy to get better coverage.

Since a lot of text in the post I figured I'd post my question down here to.
If any tips or links to rebuilding doors post them up. I'm on my phone unless at work this week and the search function isn't the best on the phone but I want to dig into these doors and get some momentum and get them finished soon.
 
Last edited:
Got by the storage unit for about an hour to pick up some of my tools and practiced taking apart the torn up passenger side door insides before I attempt on the set I just got tonight.
ImageUploadedByIH8MUD Forum1429038296.254706.webp


I think I can get apart the good doors without causing any damage. I figure I'll get them apart tonight and clean out all the dried up dirt and mud and see what next. I'm thinking kill the rust and get the small holes patched.


DOOR REPAIR LINK
for reference. Good write up and info here
https://forum.ih8mud.com/threads/tackling-the-doors.370889/

little notes here
https://forum.ih8mud.com/threads/replacing-window-felt-weather-stripping.453778/
 
Last edited:
Real steel makes a bottom patch for the doors. The same patch could have been used on the old doors and saved you some money because your new ones look like they need the same patch. I have bought several other body patches from real steel and have been happy with the results. Cool Cruisers if Texas may also make the same door patch. Good luck.
 
Real steel makes a bottom patch for the doors. The same patch could have been used on the old doors and saved you some money because your new ones look like they need the same patch. I have bought several other body patches from real steel and have been happy with the results. Cool Cruisers if Texas may also make the same door patch. Good luck.

I'm hoping the newer ones can be patched with some homemade and shaped patches since the rust through is a lot smaller. I was thinking I might try and save the worse off doors for later down the road and patch them myself when I learn to weld. Or sell them once I swap locks and parts to the better doors. Not sure on that yet.

I got the rocker panels from real steal after hearing they were one of the better places to get panels from. I'm very happy with those.

Or if I have to buy a patch panel I might be able to buy one and cut it in half and use on both doors. The rust through on the new doors is only on the back curve on both doors.
 
Last edited:
I was hoping to clean out the insides of both doors while I had some time this week but like everything cruiser related it took longer than planned so I was only able to tear down one door. I figured I would clean out the insides and it would give me a good indication of where to go with the newer set of doors which are actually older 76 I was told but they weren't sure.

I got probably 4 and a half pounds of dried dirt and about half a pound of what Im hoping is dog hair out of the doors. Once I get them cleaned up alittle more Im going to decide where to go with them. The better set might be able to be patched by the welder with some home made patches since the holes are not horribly big, and then maybe a good coat of por 15 inside and out would give me a nice set of doors that will last a long time.


I wonder if the doors used to be red or that was a primer color for that year?


Works busy for the next few weeks so unless Im lucky the cruiser stuff is packed up for a couple weeks
 
Last edited:
Used to be red.
 
Sadly I won't get to get by the storage unit it's at longer than 5 minutes for a month or so until work calms down. But once I'm back I plan on spending a few days addressing issues.
I'm somewhat afraid of trying to take the thermostat housing off the motor I'm sure the bolts will be seized and I don't want to mess up something I'll have to end up at a machine shop to fix. Since I'm working out of a storage unit I might look at cheap heat sources to heat the bolt like a mini propane but I think I read that might not do any good as it's not strong enough.

I don't have much time tonight to be on here but I uploaded a video to YouTube of the 40 running. It has a slight sputter at times at the exhaust and every once and a while some smoke comes out of the exhaust but it is also rarely run the last year so I'm hoping even just idling it a couple times a month and running only non-ethanol might help if it's a fuel issue, until I can really work on it this spring should shake some cobwebs off.


Don't see a whole lot of probs with the running engine---except--the fan belt is loose--the fuel tank gauge shows empty,(is it?) and the oil pressure gauge seems to be reading very high(based on what my 77 shows). The engine does not seem to have any missing or rough idle probs
 
Look into a recipe called Ed's Red , it was made for cleaning gun bores and mechanisms but is about the best type of penetrating oil out there , period . Basically , just ATF and acetone in a sealed spray bottle , but be careful as some plastics don't get along with acetone . Be careful around paint and heat - it can dissolve paint and will burn like mad if ignited but will break loose almost anything . If that doesn't work then removing the housing will help make it easier ..
Sarge
If you add alittle(say 20%) of Kroil to this mix, it makes it even more powerful.
 
Don't see a whole lot of probs with the running engine---except--the fan belt is loose--the fuel tank gauge shows empty,(is it?) and the oil pressure gauge seems to be reading very high(based on what my 77 shows). The engine does not seem to have any missing or rough idle probs

I have a new oem belt from beno i havent put on yet, the one on there is from napa and a previous owner, I figure it can be a spare to leave in the 40 for a back up. The new belt should help, if not I guess Ill adjust some things to tighten it up. Any tips for a beginner? Im new to motors but what are some down sides of higher oil pressure, or what causes it, any tips on helping it, anything I should watch? The temp gauge never moves except the one time I drove it for about an hour and doing 45-55 mph. I was told it could be the thermostat not working properly. Ive got a new oem one from beno I just need to get the thermohousing bolts and a few hours and do the job.
Some days the fuel gauge works others it doesnt and sometimes after the 40 is warmed up the gauge will show I got some petrol in the tank, I am low Ive got to get some more non-enthanol to fill it up.
 
I found a good deal on some new oem windshield wipers on eBay so when I made my weekly visit to start and let the motor run I began the quick task of swapping out wipers. 3 hours and a little drive around town and my old wipers are still on there but I got some seat time in.... And a bad sunburn on the back of my neck... And a ruined pair of new shorts with some oil and grease all over them. But life is good

I noticed I had a puddle under where I parked it after driving. I thought it was the drain plug not tightened all the way but after getting under its dripping off the parking brake. I've read on here that's common, so I'll look into what can be done more.
I have a contract on a home with a small two car garage. In about a month I'll be able to tinker a couple nights a week. My plan is to just make a check list and go from that to get the cruiser in good shape and stay on task. Bad thing is the cruiser fund will have to take a break for a while.
I've got to get a new ground rod put in so I'm thinking while the electrician is there already I'll get them to add a hookup for my compressor and an extra for a welder down the road.
ImageUploadedByIH8MUD Forum1436071882.161577.webp

Ready to be out of storage!
 
I moved into a house at the beginning of September and after getting the home rewired(was aluminum) and some time to get moved in. I finally had time to get the 40 out of the storage unit that's about 50 miles away.

ImageUploadedByIH8MUD Forum1443328342.570876.webp
ImageUploadedByIH8MUD Forum1443328365.615432.webp


It will be nice to have close and be able to work on let alone see more than once every few weeks.
The welder that fixed up the body is going to start on the doors Monday so hopefully I can get back in gear with this.

It drove great besides needing a lot of work. Tres and brakes are first up then axle rebuild and list goes on. I cruised about about 50 the whole way home and I'm happy with how it acted.
 

Users who are viewing this thread

Back
Top Bottom