'72 FJ40 Door Refresh Pics - Weatherstripping and Stuff (1 Viewer)

This site may earn a commission from merchant affiliate
links, including eBay, Amazon, Skimlinks, and others.

Did you order just the handles or the whole latch assembly? I'm debating if it worth repairing the loose inside mechanism. for my door project (Which is 5 weekends on just the hinges right now)
Mine had floppy paddles. I thought about putting a c-clip on the inside of the shaft as a spacer/centering device, but I couldn't guarantee a good fix and the price of new parts was right for me. I got a set of 2 whole assemblies from Cruiser Corps for $60. I'm glad I got the new ones instead of fussing with the old ones.

Thanks for all the pictures and tips. I will be doing this to mine in the near future so this is great.
My pleasure. Sorry it's taking so long to get to the weatherstripping....;p
 
Now that the cracks and rust are fixed, doors painted, and all hardware obtained, it's time to install the upper door frames into the lower doors.

Greased up and ready to go.
CruiserDSdoor001.jpg


Had some trouble getting the wing vent hardware through the opening in the top of the door. PO had caulked the vents shut and I decided not to mess with them right now.
CruiserDSdoor002.jpg


A little persuasion with a pry bar and rubber mallet worked, but I screwed up my beautiful paint job. :hillbilly:
CruiserDSdoor003.jpg


Once the upper door/frame assemblies were in place, I layed them flat and positioned the window in the opening so I could hook up the crank. I had the crank in the full down poisition so I could get maximum manuverability while putting the plastic roller in the track on the bottom of the window frame.
CruiserDSdoor004.jpg


Then I slowly rotated the crank CW (window up) while making sure the little plastic wheel stayed in the track until the screw holes lined up. The window didn't move much.
CruiserDSdoor005.jpg
 
For some reason, I decided to put in the rest of the window brushes and wipers after the door halves were together with the windows in place - on one side. Then I got smart on the other door and put them in before fitting the upper and lower doors. The end result was the same, but the first one took a lot longer...
DSCN2470.jpg
DSCN2471.jpg
DSCN2472.jpg
 
Finally ready for the weatherstripping!

First I hung the weatherstripping over some nails to straighten it out and make for an easy install.
DSCN2475.jpg


Fit the weatherstripping to the door and make sure the corners line up.
DSCN2474.jpg


Start at the top and apply a nice even bead of adhesive in the corners. Work in sections - top, halfway down one side, halfway down the other side, etc. I found that a medium bead works the best for good adhesion and less slop, but always use the manufacturer's instructions. The CCOT weatherstripping comes with a tube of 3M adhesive, and this stuff sticks to everything. Make sure you have towels handy to IMMEDIATELY wipe up any spills.
DSCN2476.jpg


Once the weatherstripping is in place, use your fingers to move up and down the new section, pressing to remove bubbles and form a watertight bond.
DSCN2478.jpg


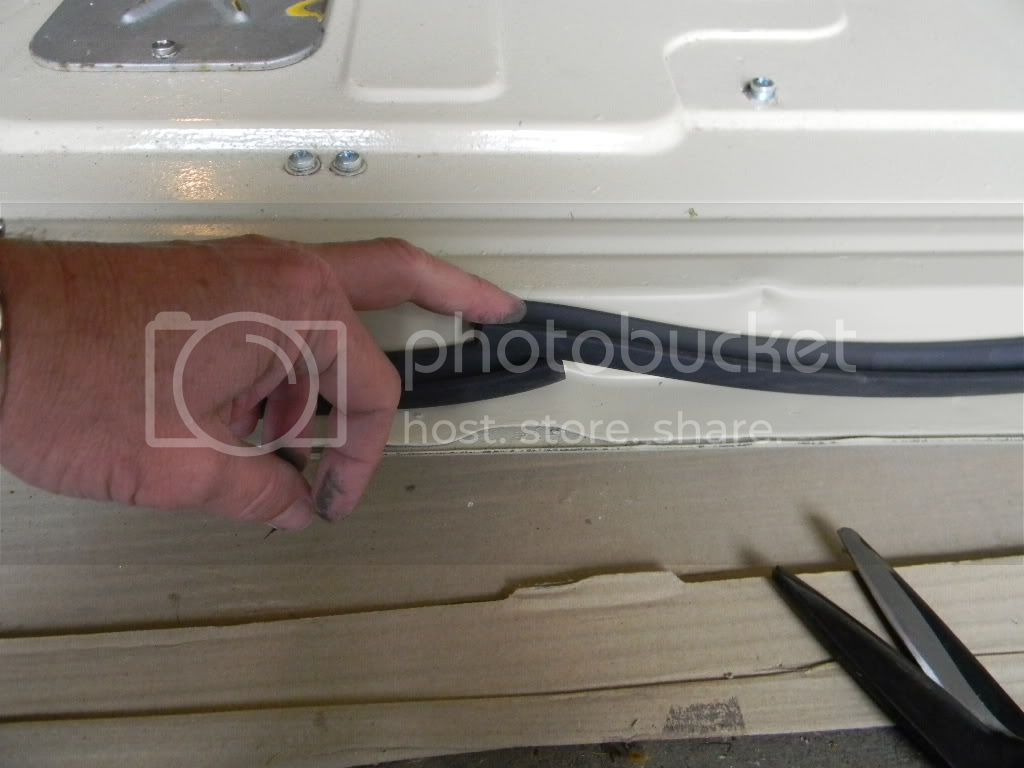
When you get to the bottom of the door, you'll notice that the weatherstripping overlaps an inch or so at the bottom center of the door. Leave 6" of the each end loose (no adhesive yet) so you can trim them for a good joint. Cut off the excess from both sides to make a nice clean 90 deg butt joint.
DSCN2480.jpg

DSCN2481.jpg


Apply a light coating of adhesive to both free ends, finish the line bead to hold them down, and press the ends together for a couple of minutes.
DSCN2484.jpg


Let the adhesive cure for an hour or so, hang the doors and you're done!
DSCN2487.jpg

DSCN2486.jpg

DSCN2485.jpg
 
Well done! :)
*Subscribed*
I shall be doing this in the distant future as well.
 
I forgot to mention that the whole project cost less than $250 - just a lot of work because of the rust and crack repair/painting and gathering hardware. By the way...the CruiserCorps bolt sets have the wrong size bolts for the window cranks and paddle handles.
 
That CCOT weatherstripping seems a lot thinner then the weatherstripping I used on my FJ40 1970 doors. I bought mine direct from CDAN. I'm wondering if yours were OEM weatherstripping or aftermarket? Perhaps the weatherstripping is a different thickness for different year doors? The main difference for me, is that the new weatherstripping was so thick, that I had to cut a little away around the door lock in order to make my door striker functional. I'm happy with the thickness, and figure it will shrink down with time and heat, but it was the only real issue I ran into when rebuilding my doors.
 
Nice. I am in the process of doing this myself.
I took the vent windows apart because the frames were rusty, needed painting and the glazing channels were so bad and am now having a heck of a time finding any glazing channel to replace it. The part that SOR sells is nothing more than a "kit" worth about $1 and they charge $28. (It is storm window glazing cut off a roll.)
I also had to cut a considerable amount off the bottom of on of the doors due to rust. I used what was left of an old rusty rear barn door to fix the bottom of the door. (The curves are the same.)

I counted 5 coats of paint on one while I was stripping it.

Mine also had the cracks inside at the top. I was able to replace some of the missing metal by cutting some 1" square tubing I had in half lengthwise. It fit inside very well and I welded it in to no obstruct the top half of the door.

>Here< is where I am posting mine.
 
I forgot to mention that the whole project cost less than $250 - just a lot of work because of the rust and crack repair/painting and gathering hardware. By the way...the CruiserCorps bolt sets have the wrong size bolts for the window cranks and paddle handles.

Its been raining continually all night and day today here... So i think this will be one of the first things i will tackle on my FJ45.
When i pick up the car in an hours time from the guy im buying it from, ill look at the door rubbers. I already know it needs new weather stripping around where the roof comes off. I hope the doors are in good shape though.

One thing is ill be able to see EXACTLY where it leaks water with all this rain. It will be a good show of whats good and whats bad on it (keeping the rain out).

I really like your work and pics here. Great thread. :cheers:
 
That CCOT weatherstripping seems a lot thinner then the weatherstripping I used on my FJ40 1970 doors. I bought mine direct from CDAN. I'm wondering if yours were OEM weatherstripping or aftermarket? Perhaps the weatherstripping is a different thickness for different year doors? The main difference for me, is that the new weatherstripping was so thick, that I had to cut a little away around the door lock in order to make my door striker functional. I'm happy with the thickness, and figure it will shrink down with time and heat, but it was the only real issue I ran into when rebuilding my doors.
It probably is thinner than OEM. I still have a couple of gaps, and I'll deal with them as I need to. It almost seems as if the top is slightly larger than it should be. I know the doors are not original, since the bottom layer is red, but the lower part of the doors fit just fine, but the upper part is where the gaps are.

Did the hardtop door openings change over the years?
 
Funny...small world...I also live in Clear Lake, recently purchased a 1970 FJ40 on the internet without personally inspecting it, and installed a weatherstrip kit on the passenger side a couple of weekends ago. Two SOR kits were included with the vehicle and I'll get around to doing the driver side soon I hope. The adhesive I used was the yellow snot looking kind and it too wants to get all over everything. I'd guess the door wetherstiping from SOR looks to be about twice the size as yours from CCOT. I'm hoping it mushes down some so I don't have to slam the door so hard to close it.
 
Hey Pancho, congrats on your rig. We should get together sometime and compare notes. I'm planning on hitting the beach this weekend if you'd like to come.
 
Bolts and Screws

We were not aware of this. We just restored a '63 FJ45 (old style doors) and our window crank and paddle handles work just fine. Nice and tight.

The only issue that we're aware of is that if the threads in the door get stripped out, the OEM-style screws won't work, and you would need larger bolts with nuts instead. Which we do not carry at this time.

Is there something else going on? We SURE want to get this right.

Thanks!

scott/GM

I forgot to mention that the whole project cost less than $250 - just a lot of work because of the rust and crack repair/painting and gathering hardware. By the way...the CruiserCorps bolt sets have the wrong size bolts for the window cranks and paddle handles.
 
It probably is thinner than OEM. I still have a couple of gaps, and I'll deal with them as I need to. It almost seems as if the top is slightly larger than it should be. I know the doors are not original, since the bottom layer is red, but the lower part of the doors fit just fine, but the upper part is where the gaps are.

Did the hardtop door openings change over the years?

I added some notes to your picture to better illustrate the points where I ran into issues. I can also get you some pictures of my door if you'd like to compare the thickness of the OEM weatherstripping versus the CCOT.
mockup.jpg
 
Thanks for taking the time to identify your issues like that. I have significant gaps (~3/8") in the upper corners like you have. The passenger door front edge/windshield also has a fairly large gap. I suspect that is due to the windshield not being tightened down very well due to the PO breaking the welded hold-down knob. Also, I have yet to install all of my hardtop bolts. I hope that fixes it, but I may still have some wind and rain coming in. I did not have to cut the material to clear the striker, but I did have to tuck the weatherstripping under it. As for the rear bend location, I chose to keep the weatherstripping closer to the door inner edge, but I can see now where it would have been better to align it closer to the outer moldline of the door.

Thanks for your input. It's too late for mee too, but hopefully between the two of us we can help others when they tackle this project.

:cheers:
 
I was at lunch and decided to snap some cell phone shots of what I did. Figured it'd make more sense with some pictures.

IMG_2288.jpg


IMG_2290.jpg


I used a spray glue which turned out pretty messy. I would recommend your 3M glue just based off your results compared to mine.
 
We were not aware of this. We just restored a '63 FJ45 (old style doors) and our window crank and paddle handles work just fine. Nice and tight.

The only issue that we're aware of is that if the threads in the door get stripped out, the OEM-style screws won't work, and you would need larger bolts with nuts instead. Which we do not carry at this time.

Is there something else going on? We SURE want to get this right.

Thanks!

scott/GM
Thanks Scott. With all due respect, you did know about it because I sent you an email as soon as I got the parts and attempted to install them. You personally replied that my doors have obviously been drilled out and and required a larger bolt/nut combination, and that a you would not compensate me for a modification to my door.

I'm here to tell you that I checked my old bolts (M6-1.00 threads) against another (award-winning, very stock) '74 model, and the bolts were the same. In fact, every bolt and screw on both my doors is M6-1.00, and I cannot imagine someone going through the trouble to drill and tap every one of the holes if they buggered one or two of them up.

Therefore, I came to the conclusion that the bolts (screws actually) that I got from you were incorrect. The two attachments show the packages I received from Cruiser Corps and a side-by-side comparison of the old vs. new screws. I ended up going to the local hardware store and getting countersunk flathead M6-1.00 screws for the handles and cranks.

Sean Van Andel - order #16099. Tell me how you want to make it right. I'm all ears.
DSCN2489.jpg
DSCN2492.jpg
 
I was at lunch and decided to snap some cell phone shots of what I did. Figured it'd make more sense with some pictures.

IMG_2288.jpg


IMG_2290.jpg


I used a spray glue which turned out pretty messy. I would recommend your 3M glue just based off your results compared to mine.
Interesting.....your weather stripping is a different material and different mold than mine. Mine has a U-shaped cross section. The open part of the U is towards the body. I have no idea which is better for sealing. Yours is OEM?
 
Interesting.....your weather stripping is a different material and different mold than mine. Mine has a U-shaped cross section. The open part of the U is towards the body. I have no idea which is better for sealing. Yours is OEM?

My weather stripping was ordered directly from CDAN. I can look up the part number when I get home as I still need to do the Passenger side so it's in the bag if you want the part number.

Based on your pictures, I'd say your weather stripping fits better around the door handle area then mine (since I had to cut it), but the added thickness probably makes a much better seal at the upper channel area (where most of the wind noise is). It's possible the toyota rubber is for the later model doors, and it's definitely much harder to close my door now with the thicker rubber. But all in all I'm pretty happy with the OEM rubber.
 
Yeah, it sounds like yours is an overall better choice - albeit more expensive. I may see if I can fatten mine up somehow. Maybe some cheap round weatherstripping or something to fit in the U groove. Maybe buy another length and glue it on the hardtop.
 

Users who are viewing this thread

Back
Top Bottom