FJ40 Headliner Installation (1 Viewer)

This site may earn a commission from merchant affiliate
links, including eBay, Amazon, Skimlinks, and others.

overton

SILVER Star
Joined
Oct 25, 2004
Threads
351
Messages
2,176
Location
Iowa
Website
www.myfj40.com
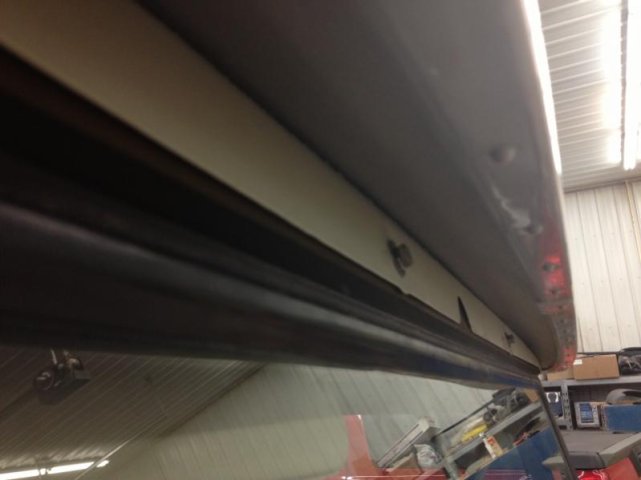
Today I installed my 5th or 6th Headliner, I'm losing track. I took a few photos and looked for a Thread on this topic but didn't really see much. So I will pass on what I have learned and the rest of the Headliner installers can chime in with tips. First I'm going to assume you have the fiberglass cap off (I know there is a thread for this as I wrote part of it) I had my fiberglass cap freshly refurbished but as you can see there is still plenty of old foam to get off.
IMG_2689.jpg
IMG_2691.jpg
IMG_2692.jpg
 
Last edited:
Part 2

When it comes to TOOLS and getting this old foam residue out, I found this tool below to be the best choice. I've tried Acetone and wire wheels and heat guns and this was the best by far. My body shop friend Michael set me up with this thing and I don't know what they call it but I'm buying one to put on my air tools. PS. Thank god for air tools! I spent about 45 min. to get the cap cleaned up and vacuumed out the debris. A respirator might be a good choice but but I didn't use one.
IMG_2696.jpg
IMG_2695.jpg
 
Last edited:
Part 3

Once your surface is ready, get the headliner. This one came from Cruiser Corps and I was very happy with it. Lay it out and MAKE SURE you have plenty of material at the back corners. You DON'T what to come up short here. Once it's laid out and you think it's in the right place, fold the front half back and spray the adhesive on the flat portions on the front half. Leave about 6" to 8" of the outer edges clean and free of adhesive. I used a standard Headliner Adhesive that works on foam. 3M makes it as do other companies.

Once you have good coverage fold the front half back over the start smoothing it toward the front of the cap. Just use the palms of your hands and smooth it out. I use scissors to trim it down a little as the front begins to get narrower, you end up with a couple long triangular strips.
IMG_2697.jpg
 
Last edited:
Part 4

After 10 min or so that should be set. Now it's time to repeat the process in the rear. Again, spray only the flatter surface and leave 6" to 8" on the curves with no adhesive. Once you have good coverage in back, fold the headliner back, working it from the center toward the back of the top.
IMG_2698.jpg
 
Part 5

Now you have majority of the headliner down and it's time to start working the edges. I started in the front and sprayed the front lip and folded the headliner over it. Make sure you don't make the mistake of cutting it short here. The headliner goes under the windshield frame. It may take a little time to get the headliner to stick on this portion of the top as it curves up at you and then over to meet the edge that bolts to the windshield frame.

Once the front it stuck you can begin the sides - Pull back the headliner to expose that 6" to 8" strip and spray your adhesive in and work that side. LEAVE THE REAR CORNERS DRY FOR LAST. Keep the scissors handy to cut off what you know you won't need but DON'T CUT TOO MUCH. You can always trim, you can't add it back!

Once both sides are done back to the rear corners you can begin to work the corners and you may experiment a little with cutting a shallow notch here and there for better fit. These would be shallow enough not to be seen. The Headliner is pleated but there always seems to be more material than needed and it wants to bunch up in the corners. Fit it first, once you like how it lays, spray it and work it down. Go slow and trim only what you can afford to. The straight portion of the back will be just like the sides.

It's an art, go slow, think about it and try not to fight it and you should end up with something that looks like this.

Happy Headlining!
G.
head.jpg
IMG_2700.jpg
IMG_2699.jpg
 
Last edited:
Just fyi - those are 3M Roloc bristle disks , they work great for removing stuff like that and were designed to remove gaskets , ect . They come in 3 different levels - white/green/yellow . IIRC , white is the lightest grade....
You'll learn that using the lowest rpm's possible and light pressure on the tool will yield the most even results . Press on 'em hard and you'll wear them out quickly , not cheap to replace and they can gouge aluminum and soft surfaces if you get aggressive . Been using them for a lot of years now on a variety of materials , great product .
Sarge
 
Great job. I need to replace mine and plan to follow your lead. Can one person remove the hardtop without any problems? :confused:
 
Great job. I need to replace mine and plan to follow your lead. Can one person remove the hardtop without any problems? :confused:

I would not recommend it, unless you have some sort of support from above. I tried mine and had to call the neighbor over as I was starting to bend the drip pan in the middle, if you are careful you might be able to slide off the back after removing all the retaining bolts.
 
coonassjohn said:
Great job. I need to replace mine and plan to follow your lead. Can one person remove the hardtop without any problems? :confused:

You can certainly unbolt the and get it ready to take off on your own, but when it comes to lifting it off I would have one person on each side of the Cruiser. It's not heavy, it's just big and you don't want to drop it.
 
What kind of luck have you had with m.a.f., s.o.r and c.c.o.t.? I'm not sure which one to deal with. I have some dealings with s.o.r., good quality but high. :confused:
 
What kind of luck have you had with m.a.f., s.o.r and c.c.o.t.? I'm not sure which one to deal with. I have some dealings with s.o.r., good quality but high. :confused:

I used the headliner from www.cruisercorps.com and found it to be my preference. Color and thickness is very good and cost is less or comparable. Plus if you take their survey right now you can get 10% off.
 
Thanks for documenting the process. I used a similar process to install a stretchable fleece blanket for a finished, but not so stock look.:D
 
Nice work. I took the cheapo way and did auto carpet from checker auto
 
Very nice. I'd go with CruiserCorps too

I used a similar process to install a stretchable fleece blanket for a finished, but not so stock look.:D

I took the cheapo way and did auto carpet from checker auto

As nice as this one came out, I would stlil do white monstaliner. The results are awesome. Then I'd put led strips around the edges. As much as I like pure stock, I really like this mod.
 
Who did the work on your cap? Mine is really sun beaten and thin in some spots. It has no shine at all.
 
Fast Eddy said

Then I'd put led strips around the edges. As much as I like pure stock, I really like this mod.

i did exactly this. costco had led strips on sale. i bought 2 sets. the perfect amount to go from 6" back from the windshield on one side all the way around to 6" back from the other side. wired power in from the interior lamp, grounded it to windshield bolt, and wa la!! i can actually see the inside of my cruiser in the dark. its like a freakin sun in there. bonus is it strobes thru all the colors ion the rainbow with the handy dandy remote. since its led and virtually no draw on the battery, when i park it at night to go in someplace it gets left on strobe. people love it!! overall cost was $60. you could easily do it cheaper, but it was convenient to go this route.

hard to drive with strobes on though. if i could figure out how to wire it so it turned off when i get above 5 mph and back on when below it would be perfect!! mine is a 1978 pure stock, true survivor. but i can now see in it with out my headlamp.

andy
 
Great job on that headliner. I will need to be doing mine . I like the original look, but I also have Monstaliner. So is there a consensus on which may do a better job of dampening the sound inside the interior?
 

Users who are viewing this thread

Back
Top Bottom