1970s 40, 350/TH350 on Megasquirt 1 PCB3.0 (2 Viewers)

This site may earn a commission from merchant affiliate
links, including eBay, Amazon, Skimlinks, and others.

A little update.....

I still have to modify the throttle and kickdown linkage.....

The wiring isn't the prettiest girl at the ball, but it's getting the job done.

LC2 requires, so they claim, a minimum of 24" from the head to the o2 sensor. The narrowband is on the driver side and the shortest tube is about 22" from the o2.... For now, I pulled the exhaust off the passenger side, welded in the bung, and it's sitting around 28" or so (maybe even longer.... it's much further down, I didn't even measure). There isn't an H nor crossover pipe in the exhaust.... so once it's pretty well tuned, I'll throw the sensor on the (shorter) driver side to check/verify, but given this is just TBI (short of there being a mechanical problem with the engine) I am assuming the AF will be very similar side to side.

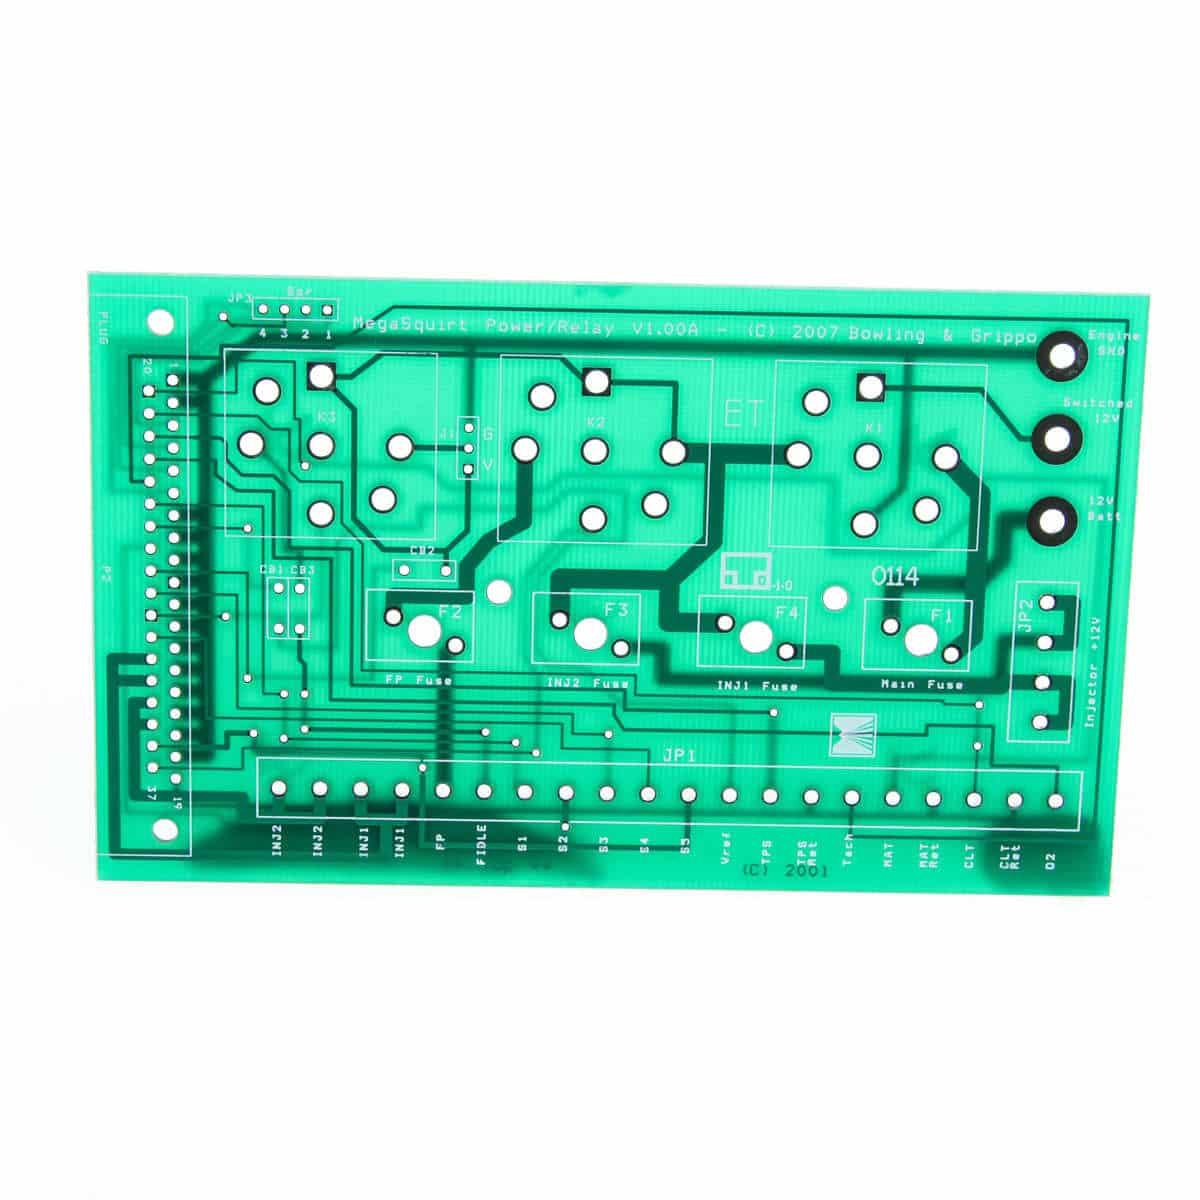
I wired the LC2 separate from the MS, as the LC2 suggests.... and since I'm not sold I want this to be a permanent install, it's just (well) zip tied to the MS itself and ran wiring separate from the MS/firewall location.

I also picked up a serial 9 (RS232) to USB adapter, tested Tunerstudio (which actually wasn't all that fun since it took quite a bit of time for the adapter to actually work)... then purchased the licenses for Tunerstudio Ultra and Megalog HD.

Since I mentioned it, and have since made a couple small changes (narrow to wideband) here is some info pertaining to my starting fuel map/lambda sensor/AFR target map.

I do plan to richen the low load (cruise) area a bit to force the engine to run a little cooler. I don't want/expect in any way for this to get even decent gas mileage, that isn't what I'm after.

TS_Start.jpg
 
And a snag, in a big way, and I'm not happy about it.


I got the throttle and trans cable adapted to the TBI unit - cleaned the truck off a bit to back it out. Hooked up a laptop, Tunerstudio said it saw some differences, allowed Tunerstudio to update MS, and upon a start attempt heard a loud 'bang' - low and behold, one injector (injector 1) was stuck open spraying fuel.

I assumed it was wiring - checked everything under the moon.... nope - it's MS.


The PCB 3.0 has both a flyback circuit and much more robust tracers when compared to a V2.2. However the flyback circuit wasn't affected (that I know of so far) - and I managed to blow a resistor and an amplifier (Q1). Also in testing, I completely messed up and blew an IC (integrated circuit, U4) - which is an 8 pin circuit. The worst part of this, is having to get the 8 pin circuit out. I've played this game before on an old MS1 V2.2..... and the solution is to socket it.

I ordered a kit of sockets (since a kit of 150 sockets is only 2x the price of 1 socket.... no, I'm not kidding). I also ordered 10x new amplifiers (Q1), 10 transistors as a just in case (Q14), 10x (2 pack) of the resistors for this circuit, and 10 new IC's. Luckily all of that was only about $50 - and I went way overboard ordering enough for both injector circuits (there are 2) to fail 5x.

Here's the kicker - I can't entirely pin down why this happened. I have pinned down that it has to do with the injectors, but I just can't seem to find the information I'm looking for....

Both injectors are 55lb units, low ohm. One registers at 0.4, the other 1.6. The injector that reads 1.6 was on injector circuit 1 that blew.

The fuse for the injectors had blown a couple times - but always when I had done some rewiring, so I was under the assumption it was based on power touching ground..... I had blown a 10 and 15a fuse... I threw a 20 in because that's what I found.

The 20A doesn't blow, but anything underneath will blow when both injectors fire at the same time. That 20a had put too much load on the circuit, and took one of them out (and the circuit got stuck 'open' - which means the injector has full 12v and ground). The 'bang' was either a bit of a backfire, or was it almost hydrolocking with fuel.

Luckily, with the MS disconnected and waiting 10 min - I was able to crank the engine over (and it even started/ran for a good 5 seconds) so all is well there.


I haven't replaced any of the transistors (as I don't think that's the culprit) but I have them just in case. I'm now waiting for the new integrated circuit to arrive - I've already completed the painstaking task of removing the old IC (literally used dykes and cut the chip into 4 pieces just to get it out) and soldering in a socket.


On a positive note - I have been doing some reading for, and preparing, for the Raspberry Pi3 kit.... even prepared a 64gb MicroSD with Raspbian on it.


Any thoughts from anyone why the fuse would blow only when both injectors fire at the same time? I have spares to test, but if rather just have it figured out.

20170328_075456.jpg
 
Way above my paygrade on MS systems..

Good luck amigo..
 
I should note - I did the injector/fuse testing independent of Megasquirt - literally just supplied power and tapped a ground.... no issues when injectors were separate - but connect the grounds together and tap them - instant blown fuse.

I could probably just turn it off, but there is a 'prime' fire when MS is turned on which has a single injector spray when power is supplied (both the pump primes and it sends a prime injector spray). That is when both fire at the same time and my guess is when the circuit failed from being overloaded.
 
Maybe you mentioned it and I didn't see it, but could it have to do with the injectors being a low or high impedance and the board being setup for the other type?
 
Possibly, and it's been indirectly mentioned.

The TBI 55lb injectors are low impedance.

Megasquirt and injector impedance (historically, especially pre PCB3 boards) for low resistance injectors didn't get along. The method to fix this was either run a resistor pack, or have a flyback daughterboard.

The PCB3 board has integrated flyback circuitry and upgraded tracers to allow use of any impedance injectors.

The impedence of an injector is actually more important than simple "high" vs "low".... there's meaning/reasoning behind it.... here's a pretty good explanation:

What is a peak and hold signal?

A peak and hold signal is a complex signal used to operate a low impedance injector. Peak and hold signals have two parts: a high initial current used to quickly open the injector and a low secondary current that is sufficient to hold the injector open until the end of the pulse. The low secondary current allows the injector to close more quickly since it takes less time for the weaker electrical field to collapse. Because of the two-step nature of the signal and the rudimentary construction of fuel injectors in the 1980’s, low impedance injectors of that time were more preferable than high impedance injectors for high-flow high performance applications; they could deliver more fuel more reliably than comparable high impedance injectors.


What is a saturated signal?

A saturated signal is a simple signal used to operate high impedance injectors. A single intensity signal is sent to a fuel injector which causes the valve to open and remain open until the signal has ended. The new technology used in the design and construction of today’s high impedance injectors allows much larger flow rates, much better response times, and much more predictable low pulse width operation than previous designs – all without overheating. This means that low impedance injectors are no longer the peak of performance when considering fuel injectors.


Here is some (older) information from the Megamanual regarding injector wiring and Megasquirt:
"Injectors are either high impedance or low impedance. High impedance injectors (usually about 12-16 ohms) can take a 12 supply directly, without a form of current control. Low impedance injectors (generally below 3 ohms) require some form of current limiting. With MegaSquirt® EFI Controller, you can use resistors to limit current, or you can use Pulse Width Modulation (PWM), which is a software solution built in to MegaSquirt®.

WM works by switching the 12 volt ground to the injector on and off very rapidly (in about 0.000059 seconds!). The ratio of the "on" time to the "off" time determines the current through the injectors. However, the easiest way to think of the PWM% is as a percentage of the supply voltage, so 50% PWM on a 14 volt supply becomes effectively 7 volts on average, 28% would be 4 volts, etc.

Remember that pulse width and PWM% are two different things. Pulse width is the total duration of the signal whereas PWM% is the ratio of 'on-time' to 'off-time' within the pulse. So in the above illustration, the pulse width for both is the same, but the PWM% for the first is 50%, while for the second it is 25%"


Now this makes me wonder what my PWM is set to.... learn as I go....
 
So....PWM is fine at 30%...... at running, that's in the mid 4v, maybe a tad low, but fine.

The concern I have is during startup/cranking.... I've read that these injectors like/prefer P&H, but I can't find why (and some of this is inference - but maybe it's due to the wattage needed.... I'm unsure).

One small thing that I can't imagine is the issue, but is I guess possible.....

I have 12V+ running from a relay to the injectors.... power is drawn from a fuse panel (which I am moving, but adding a 2nd small panel near the MS for the MS specifically)....one wire from the relay runs to the engine, where it splits 10" from the injectors.

This is the first time I've wired MS without using a MS relay board..... I know from factory Toyota has 1 power wire that feeds to the injectors.... when I look at a diagram of a relay board I see this:

msrelay-pcb2.jpg


There are 2 distinct fuses for the 2 injector banks (INJ1, INJ2) in the middle. Both draw power from the same relay, but they output separately (although it looks like the tracers meet - they are on opposite sides of the board).

Plan is to simply fuse the injectors separately and hope that 2 7.5A fuses will protect the individual circuits better, and not be enough to trip a fuse.

I hope that this overly simple fix is the needed resolution. For testing/simplicity I may add 2 fuse holders near the injectors and, if fixed, do something more permanent later (I have like 30 of those things floating around, capitalized on circuit city going out of business LONG ago.... never really use 'em)
 
The IC (U4) arrived yesterday, adding that (then undoing the wire jumper/adding jumper XG1/XG2 for stim board testing) and both injector banks seem to be working.

Can't test in the vehicle yet as I'm rewiring/moving the fuse box...

The RPi3 should arrive today, so I can do some out of car testing with that as well...
 
Still working on some rewiring - I'm at a point where what I wanted cleaned up is, and I could slap the rest back together - but it's something that will bug me to do in the not so distant future, so might as well handle it now.

In the meantime, the RPI3 showed up - loaded Raspbian with PIXEL on it - got it working with Tunerstudio.

Then ordered the 7" touchscreen - got that all going, but Tunerstudio wasn't usable, at all. Something in how the Tunerstudio SH file runs/loads messed with the resolution and nothing would fix it.

Since the microsd card only had Raspbian and Tunerstudio, I just rewrote theIS, to the card, using the 7" screen exclusively, then loaded Tunerstudio and it's all playing nice. Also, for s***s and giggles, loaded Banshee (mp3 player).

"Bench" testing, and connected to MS here (on the Stim).

20170404_135902.jpg
 
Looking at the reviews for the most basic kit, it's about even. Several people mention needing additional items. It doesn't include a fuel pump. In my application I would still need some additional things - like the taller coolant outlet since there wasn't room for the coolant temp sensor previously.

Looks like a very viable option for others though! I might have considered it had I known.


Edit to add-
I am kind of a geek when it comes to this kind of stuff - I do like the DIY nature of it. The RPi integration is in no way needed for MS, and shouldn't be considered a cost since it's more of a fun toy.


Now that I think about it - wideband o2 sensors are sensitive - they require calibration when new, then every 20k miles. I wonder how the o2 holds up I a system that is always tuning? (I assume it is always self tuning?). I will be tuning the MS, and once the tune is where I want it, I'll switch back to a narrow band and save seat on the wideband.
 
Last edited:
So today I got the other injectors I have cleaned up and swapped in.

This is part of what I like about this system - the injectors I have are for a 305, and 40lb. So, smaller. Not a problem - hook the MS up with a laptop, change the basic fuel required values, and then turn the key.

Didn't do much more than start, rev a little, shut down and restart - but runs essentially the same (if not better)....

I had rewired the injectors - power has a 15a fuse, but is then split before the injectors with 2x 7.5a fuses - no problems.
 
Rewired the wideband over the weekend then accidentally left the key 'on'.... battery recharging fun commenced.

Yesterday got it started up and connected the pi (house power as the Mausberry circuit I'm after still isn't available) with success (pic attached).

Today I got the 40 out of the garage and gas back in the tank.... connected the laptop, allowed some self tuning to take place - realized the target AFR's were way lower than I wanted - so reset, changed target AFR's and allowed some tuning to take place at idle....

So all seems to be going well!

20170417_153320.jpg
 
COOL!!
 
So been busy, but also waiting for weather to change to drive (it also needed tabs), work, and more.

Got the screen mounted where I thought would be far better - reachable with a 4 point strapped tight, visible, not in the way, and not hindering any "fj40ness" (despite that my dash completely ruins that aspect....).

Ordered a mini keyboard/mouse pad to keep in the glove box.... Still waiting on a proper power source, though I do have a 5v 3a step down USB adapter on hand for temp use......

After the pump primes it fires up nicely (not pictured.... I ordered a vacuum manifold and made my way to a hydraulic shop for brass fittings.... I also have both brakes and transfercase plumbed to the Edelbrock manifold vacuum port).

20170429_193705.jpg
 
There hasn't been an update for a reason....

Took it for an actual drive wither the laptop connected and 2 unrelated things happened...

1) noise from the coil causes it to be pretty undriveable. Misreading values (excessively high rpm) cause the injector to dump fuel.... which also means any auto tuning is out of the question

2) somehow between that drive and the next day, the power adapter for my laptop (used for the last 4 years almost daily) called it quits.

2 has been resolved after a bit of waiting.

1..... well..... I didn't want to post until I had a solution.

There are many references to this problem, almost to a disturbing level. There are also many possible fixes.....

Potential issues can include.... non resistor spark plugs (should check), interference from other sensors/spark plug wires - aside from the plugs everything was exhaustively tested with no change.

First option for MS1 is to swap up to a 36v zener on the 'backwards' zener diode for fuel only setups. Another is to put in 1 (or many) 5v zener diodes in series directly on the coil wire to MS. An order to digikey was placed.

Well... the 36v zener caused my 10k rpm spike to become an almost 40k rpm idle. No bueno.

The 5v zener diode did nothing, either direction. I upped it to 2... still nothing. Went for broke and tried 5 in series.... one way did nothing, the other caused the 40k idle. (FYI it doesn't mean the engine is at these values - it means the signal MS is getting has 'noise in it that is interpreted as an ignition event/signal).

I have a new distributor with an 8 pin GM module - did some reading on just going MS and Spark.... but then read noise is yet again an issue.

I broke down and ordered an MS2 daughterboard. This bumps functionality way up (Which I mostly don't need) but allows for a 'coded' way to ignore RPM noise.

I am just now getting the board updated (mostly just some jumpers), new firmware, and trying to understand some of the new settings.
 
^^^^ thanks, but I hope that doesn't deter anyone from trying/learning something like this. I'm by no means an expert... and it's a lot like a car, even a basic one - many things seem really difficult like changing brakes, alternators, starters.... and as you learn, you become more comfortable and get more in depth like building brake lines, rebuilding a starter, rewiring an alternator.


Last night I got some basic values entered, cleaned the battery contacts (ling story short, but I think the positive connection might be somones science project). Truck started up nicely, sounded better, idled better, and the nasty RPM spike is gone.

I'll post some screenshots after some tuning is done - I am starting back at scratch.
 
I really do enjoy reading about your problems. I'm looking at doing a boosted 3rz with a Megasquirt ECU and it's nice to see all this information!
 
The oddities that shouldn't happen continue on this vehicle.

Sunday we decided to take the 40 out for a first tune drive - start it up, back it out of the garage, let it warm up a little bit, shut it down so that we can load the pup in the back....

Strap in, and nothing..... do some tests and it seems the battery is toast - except the charger says 80%.... jumper the starter solenoid and nothing... test it and it gets 3v when the key turns over. Try to jump start off the running Suburban, nothing. I expect the starter is toast.

Push the truck into the garage, throw a different battery (known to charge and be able to start, but doesn't hold a charge nor enough to do much cranking), charge it up - an hour later I test the key....

There's enough power in the battery to move the starter, it quickly loses power, starter loses momentum, and a backfire blew out a header gasket.

Now the weather is crap again.

New battery fixed it all (minus the exhaust gasket).

Taking tomorrow/Friday off so I expect to get some work done on it... will post some photos very soon.
 

Users who are viewing this thread

Back
Top Bottom